
Introduction
This manual provides instructions for the installation and maintenance of the M93DVN Dryer Heating Element Replacement. This component is designed to restore heating functionality to compatible dryer models. Please read all instructions carefully before proceeding with installation.
Safety Information
WARNING: Appliance repair can be dangerous. Always prioritize safety to prevent personal injury or damage to property.
- Disconnect Power: Before beginning any repair, ensure the dryer is completely disconnected from its power source. Unplug the appliance or turn off the circuit breaker.
- Wear Protective Gear: Always wear work gloves to protect your hands from sharp edges and potential heat. Safety glasses are also recommended.
- Professional Assistance: If you are unsure about any step or uncomfortable performing the repair, consult a qualified appliance technician.
- Verify Compatibility: Double-check that this replacement part is compatible with your specific dryer model before installation.
Compatibility
This heating element replacement is compatible with various dryer models from brands such as Whirlpool, Kenmore, Maytag, Roper, KitchenAid, Estate, Sears, Magic Chef, Amana, Inglis, Crosley, and Admiral.
Specific Whirlpool models include: WED6400SB0, WED6400SW0, WED6400SW1, WED6400SB1, WED6400SG0, WED6400SG1.
Specific Crosley models include: CED137SDW0, CED147HXW0, CED147SBW0, CED147SDW0, CEDS1043VQ0, CEDS1043VQ1, CEDS563MQ0, CEDS563MQ1, CEDS563RB1.
This part also replaces numbers 4531017, 279838, W10724237, 4617547, PS1182051, 14210029, 3403585, and many others. Please refer to your dryer's service manual or the product listing for a comprehensive list of compatible models and part numbers.
Package Contents
The package typically includes the following components:
- Dryer Heating Element Assembly
- Thermal Cut-Off Fuse
- High-Limit Thermostat
- Mounting Screws and Connectors (as needed)

Image: Overview of the M93DVN dryer heating element replacement kit, including the heating coil assembly, thermal fuse, and thermostat.
Setup and Installation
Important: Always disconnect power to the dryer before starting any installation. Wear work gloves to protect your hands.
- Access the Heating Element: Depending on your dryer model, you may need to remove the back panel, front panel, or top panel to access the heating element housing. Refer to your dryer's specific service manual for detailed disassembly instructions.
- Locate the Old Element: Identify the existing heating element assembly. It is typically housed in a metal box or chamber.
- Disconnect Wiring: Carefully disconnect all electrical wires connected to the old heating element, thermal fuse, and thermostat. Note their positions or take a picture for reassembly.
- Remove Old Element: Unscrew or unclip the old heating element assembly from its housing. Gently pull it out.
- Install New Element: Position the new M93DVN heating element assembly into the housing. Ensure it sits securely and align any mounting holes. Secure it with screws or clips.
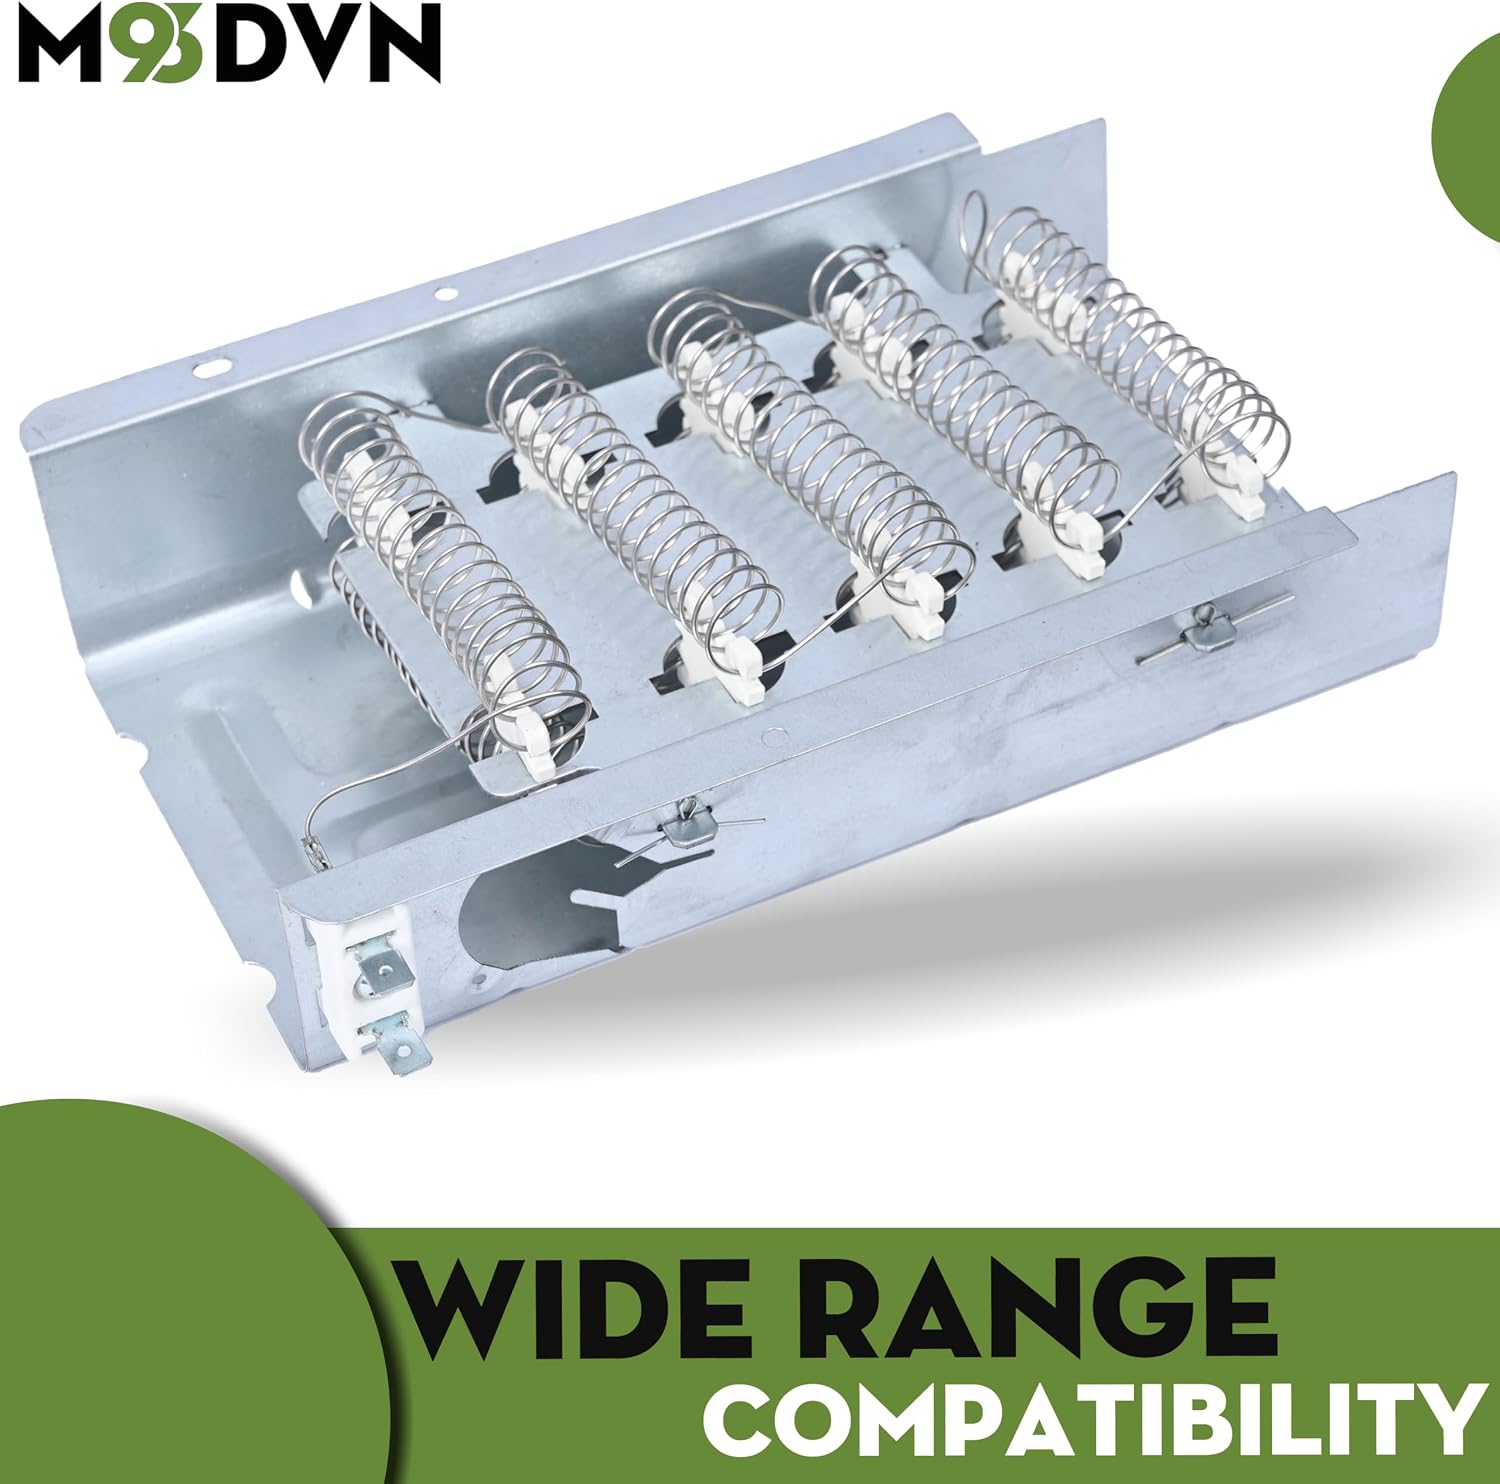
Image: The M93DVN heating element assembly, showing its structure and connection points, ready for installation.
- Connect Wiring: Reconnect all electrical wires to the new heating element, thermal fuse, and thermostat in their correct positions. Ensure all connections are secure.
- Reassemble Dryer: Carefully reassemble the dryer panels, ensuring all screws and fasteners are tightened.
- Test Functionality: Plug the dryer back into the power outlet or restore power at the circuit breaker. Run a short cycle with no load to verify that the dryer heats properly. Check for any unusual noises or smells.

Image: A detailed view of the heating coils within the M93DVN element, illustrating the component responsible for heat generation.
Operating
Once the M93DVN heating element is correctly installed, your dryer should operate as intended, providing heat for drying clothes. No special operating procedures are required for the heating element itself; simply use your dryer according to its manufacturer's instructions.
Maintenance
To ensure the longevity and efficient operation of your dryer and its new heating element, consider the following maintenance tips:
- Clean Lint Filter: Always clean the lint filter before or after every load to maintain proper airflow and prevent lint buildup, which can stress the heating element.
- Inspect Venting: Regularly check and clean the dryer's exhaust vent system. Blocked vents can cause the dryer to overheat and reduce the lifespan of the heating element and other components.
- Avoid Overloading: Do not overload the dryer, as this can restrict airflow and cause the heating element to work harder than necessary.
Troubleshooting
If your dryer is not heating after installing the new element, consider these troubleshooting steps:
- Check Power Supply: Ensure the dryer is receiving adequate power. Check the circuit breaker for any tripped breakers.
- Verify Connections: Re-check all electrical connections to the heating element, thermal fuse, and thermostat for looseness or incorrect placement.
- Inspect Thermal Fuse/Thermostat: Although new, these components can sometimes be faulty or trip if there's an underlying issue like a blocked vent. A multimeter can be used to test for continuity.
- Examine Heating Coils: Visually inspect the heating coils for any breaks or damage.
- Check Other Components: Other dryer components, such as the cycling thermostat or timer, can also affect heating. Consult your dryer's service manual for further diagnostic steps.
Specifications
| Feature | Detail |
|---|---|
| Manufacturer | M93DVN |
| Part Number | 4531017 |
| Item Model Number | WED6400SB0 |
| Product Dimensions | 1 x 1 x 1 inches (Approximate) |
Warranty and Support
We are confident in the quality of our products. If you are not satisfied with this product, please contact us for a replacement or a refund. For further assistance or inquiries, refer to the seller's contact information on the purchase platform.