1. Introduction
This manual provides detailed instructions for the Vtopek 4K 10-inch Dashcam Rearview Mirror, Model T79N. Please read this manual thoroughly before using the product to ensure proper operation and to prevent damage. Keep this manual for future reference.
2. Safety Information
- Do not operate the device while driving. Adjustments should only be made when the vehicle is safely parked.
- Ensure all cables are securely connected and do not obstruct the driver's view or vehicle controls.
- Use only the provided power adapter and cables. Using incompatible accessories may cause damage or fire.
- Do not expose the device to extreme temperatures, direct sunlight for prolonged periods, or excessive moisture.
- Keep the device away from strong magnetic fields.
- If the device malfunctions, do not attempt to repair it yourself. Contact customer support.
3. Package Contents
Verify that all items are present in the package:
- Vtopek 4K 10-inch Dashcam Rearview Mirror
- Rear Camera
- Car Charger
- 6m Rear Camera Cable
- 64GB SD Card
- User Manual
- Mounting Straps/Brackets
4. Product Overview
The Vtopek 4K 10-inch Dashcam Rearview Mirror integrates a front-facing 4K camera and a rear-facing 1080P camera into a single device, replacing your existing rearview mirror. It features a 10-inch IPS touchscreen for intuitive control and real-time display.
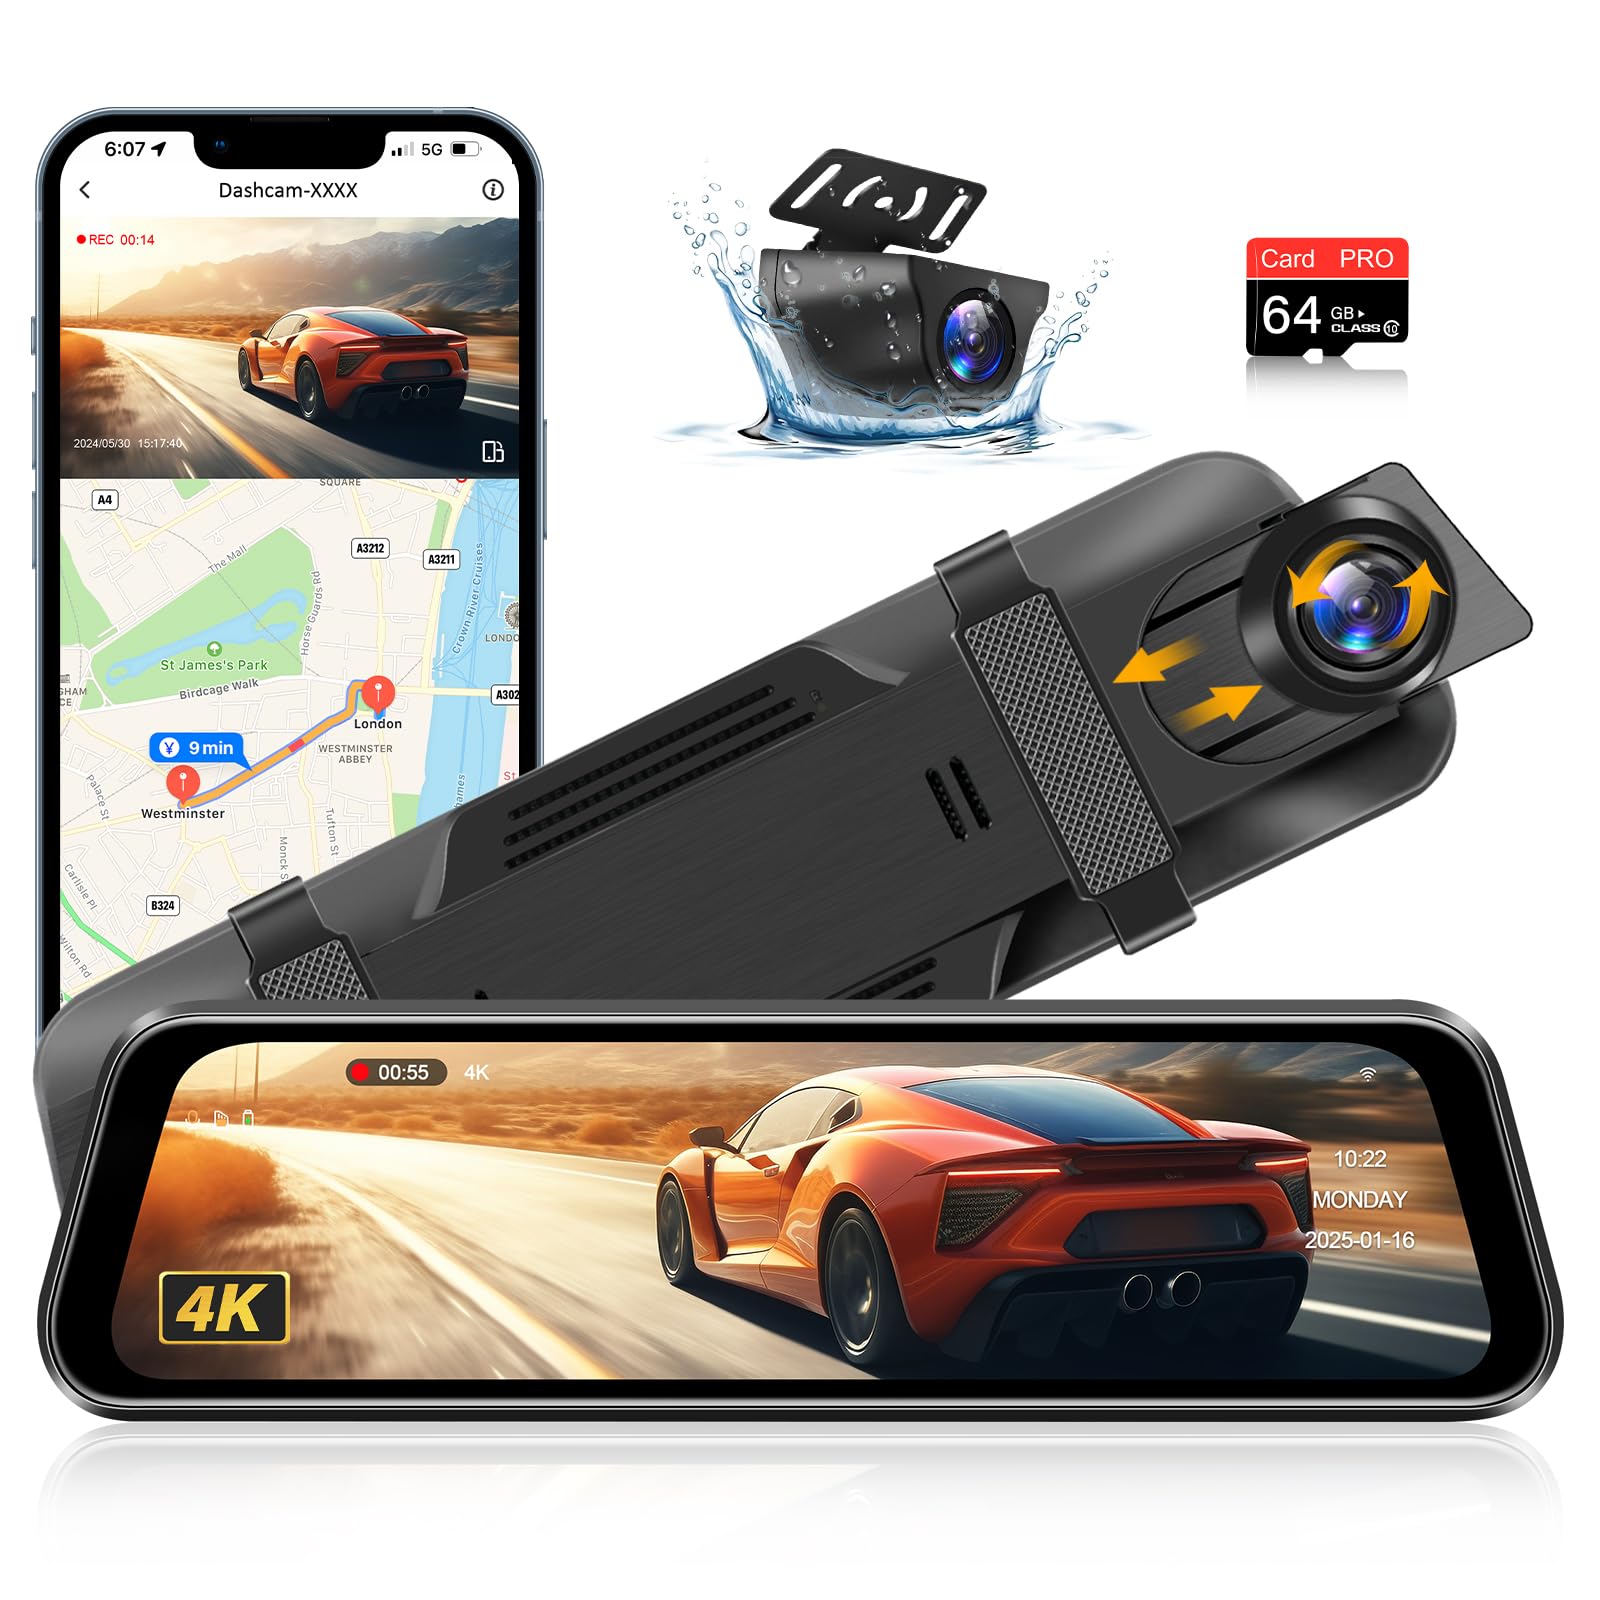
Image: Front view of the Vtopek 4K 10-inch Dashcam Rearview Mirror, showing the integrated front camera and the touchscreen display. The rear camera is also depicted separately, highlighting its waterproof design.
Key Features:
- 4K Ultra HD Front Camera: Records clear video footage with a 170° wide-angle lens.
- 1080P Rear Camera: Records rear view with a 140° wide-angle lens, supporting reversing aid.
- 10-inch IPS Touchscreen: Provides a large, clear display and easy navigation.
- HDR/WDR Technology: Enhances video quality in various lighting conditions, including low light and bright glare.
- Super Night Vision: Utilizes an F1.5 aperture and 6-layer glass lens for improved low-light performance.
- G-Sensor: Automatically locks and saves video footage upon sudden impact.
- Loop Recording: Overwrites the oldest files when the SD card is full to ensure continuous recording.
- 24-Hour Parking Monitor: Requires an additional hardwire kit (not included) to provide continuous surveillance when parked.
- Voice Control: Supports specific English voice commands for hands-free operation.
- GPS Functionality: (Requires additional GPS module) Records driving route and speed.
- Wi-Fi Connectivity: Allows viewing and downloading footage via a mobile application.
- IP69 Waterproof Rear Camera: Durable and resistant to rain, fog, and dust.
5. Setup and Installation
5.1 Installing the Dashcam Rearview Mirror
- Attach to Original Mirror: Secure the dashcam rearview mirror over your vehicle's existing rearview mirror using the provided rubber straps or mounting brackets. Ensure it is firmly attached and does not obstruct your view.
- Connect Power: Plug the car charger into your vehicle's cigarette lighter socket. Connect the Type-C end of the power cable to the dashcam. Route the cable neatly along the windshield trim and dashboard to avoid interference with driving.
- Insert SD Card: Insert the provided 64GB Class 10 high-speed SD card into the designated slot on the dashcam. Ensure it is inserted correctly until it clicks into place.
5.2 Installing the Rear Camera
The rear camera can be installed either inside or outside the vehicle.

Image: Diagram illustrating options for mounting the rear camera either inside the vehicle (e.g., on the rear window) or outside (e.g., above the license plate), emphasizing its waterproof construction.
- Choose Mounting Location:
- Inside: Mount on the rear windshield using adhesive or screws.
- Outside: Mount above the license plate or other suitable location. The camera is IP69 waterproof.
- Route Rear Camera Cable: Connect the rear camera to the main dashcam unit using the 6m extension cable. Route the cable carefully along the vehicle's interior trim, ensuring it does not interfere with airbags or other safety features.
- Connect Reversing Signal (Optional): If you wish to use the reversing aid function (displaying parking lines when reversing), connect the red wire from the rear camera cable to your vehicle's reverse light power wire. This will automatically trigger the rear view display when the vehicle is in reverse gear.
6. Operating Instructions
6.1 Basic Operation
- Power On/Off: The dashcam will automatically power on and begin recording when the vehicle's ignition is turned on. It will power off automatically when the ignition is turned off. You can also manually power it on/off using the power button.
- Touchscreen Interface: Use the 10-inch IPS touchscreen to navigate menus, view live footage, and adjust settings. Swipe left/right to switch between front, rear, or dual-camera views. Swipe up/down to adjust the camera's vertical viewing angle.
- Recording: The dashcam records continuously in a loop. Video files are saved in segments (e.g., 1, 2, or 5 minutes).

Image: The 10-inch touchscreen display of the dashcam rearview mirror, showing a live 4K UHD recording from the front camera. Icons for various functions are visible on the screen.
6.2 Advanced Features
- Loop Recording: When the SD card is full, the oldest unlocked video files will be overwritten to make space for new recordings. Locked files (triggered by G-sensor or manual lock) are protected from being overwritten.
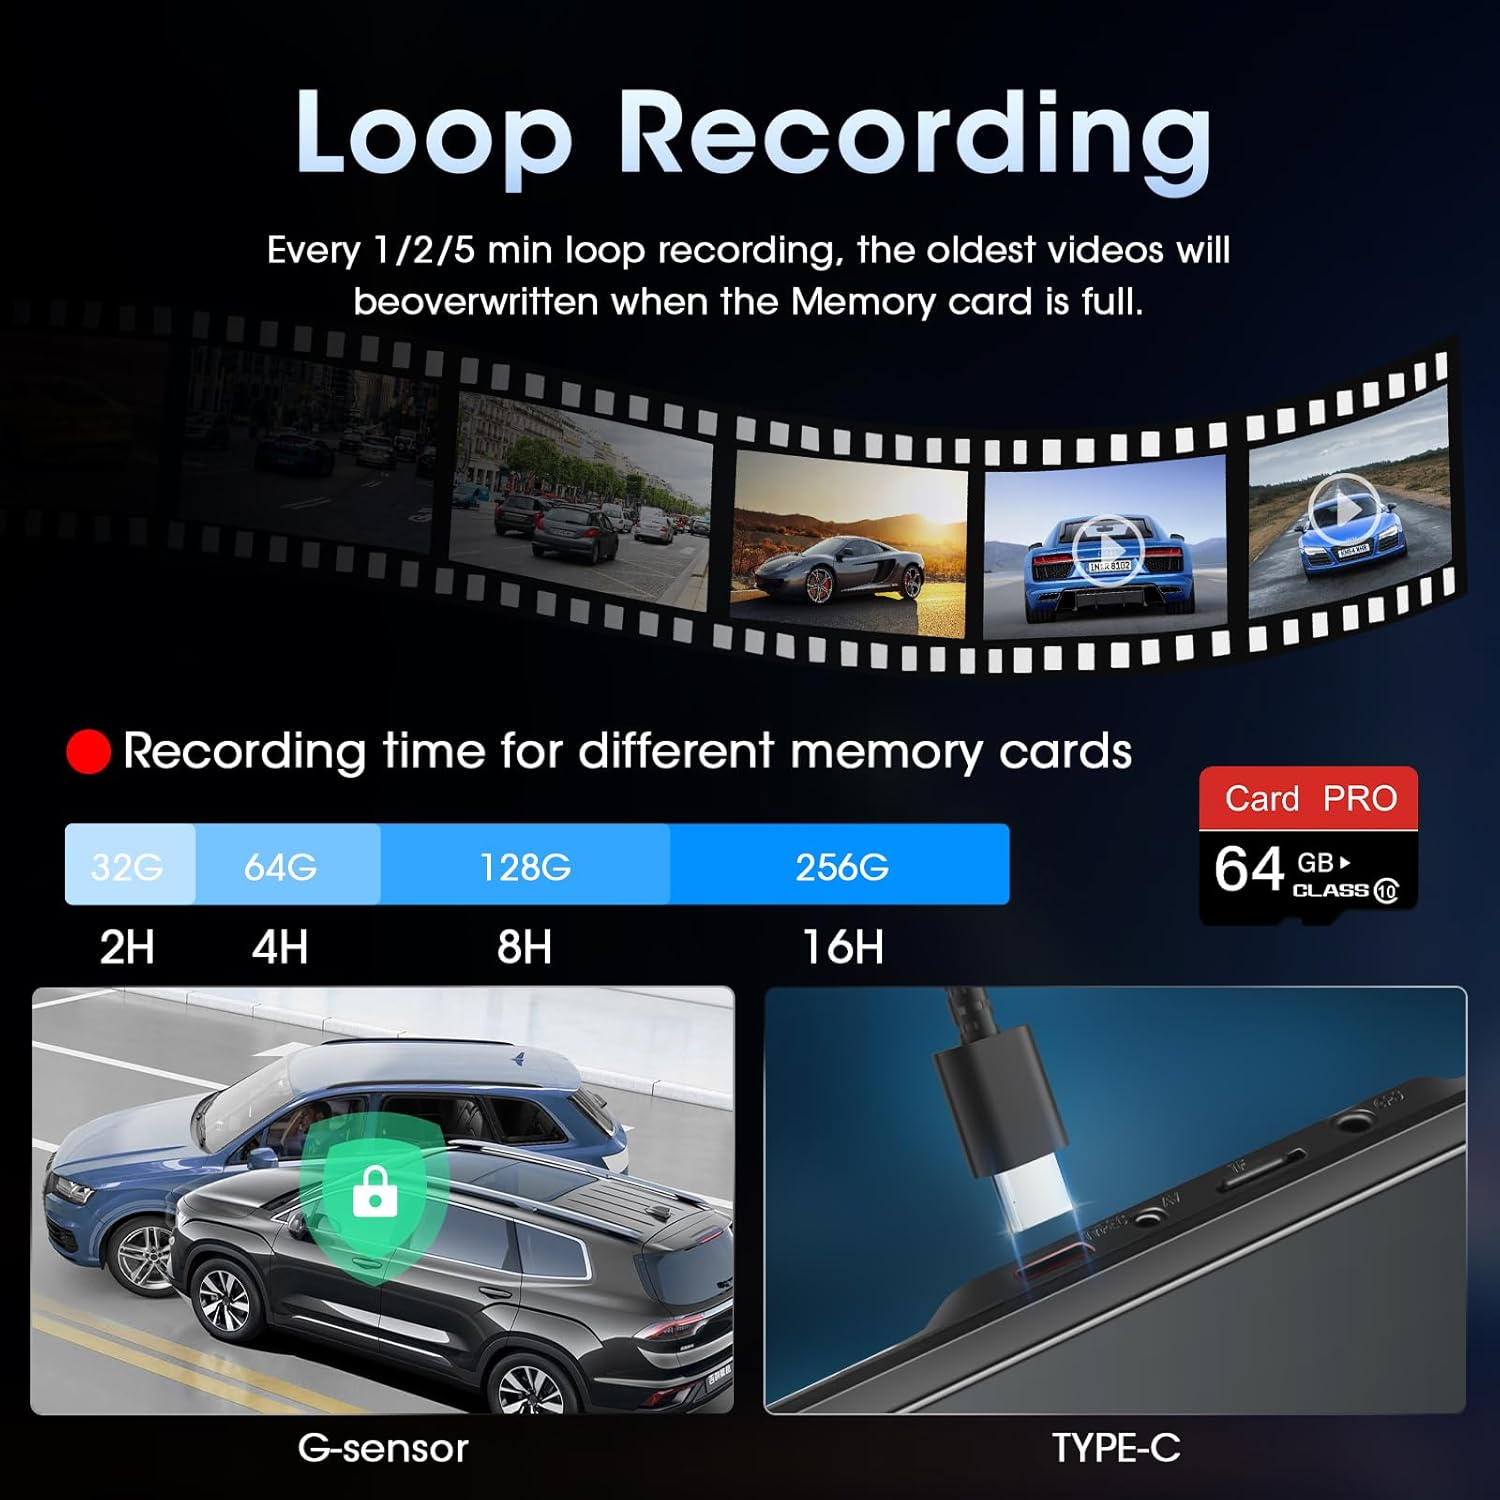
Image: Illustration of loop recording, showing how older files are overwritten. Also depicts the G-sensor locking footage during an impact and the Type-C power port.
- G-Sensor: The built-in G-sensor detects sudden impacts or collisions. When triggered, it automatically locks the current video segment, preventing it from being overwritten by loop recording.
- 24-Hour Parking Monitor: To enable this feature, an optional hardwire kit (sold separately) is required. Once installed, the dashcam will monitor your vehicle for impacts or motion even when parked and the ignition is off.

Image: Graphic illustrating the 24-hour parking mode, showing a car under surveillance with a clock icon indicating continuous monitoring.
- Reversing Aid Line: When the rear camera's red wire is connected to the reverse light, the display will automatically show the rear view with adjustable parking guidelines when the vehicle is in reverse. You can adjust the height of these lines by swiping on the screen.

Image: The dashcam display showing the rear view with colored reversing aid lines superimposed, assisting with parking maneuvers.
- Super Night Vision: The dashcam is equipped with advanced night vision capabilities to capture clear footage in low-light conditions.

Image: An illustration highlighting the Super Night Vision feature, demonstrating its ability to capture clear details like license plates in dark environments.
- Voice Control: The device supports specific English voice commands for hands-free operation. Examples include: "Take a picture", "Turn on/off screen", "Turn on/off audio", "Show front camera", "Show rear camera", "Show two cameras", "Lock video".
- Wi-Fi & GPS (Optional GPS Module): Connect the dashcam to your smartphone via the Viidure App (available on App Store and Google Play) to view and download footage. If an optional GPS module is purchased and connected, the app can also display driving routes and speed.
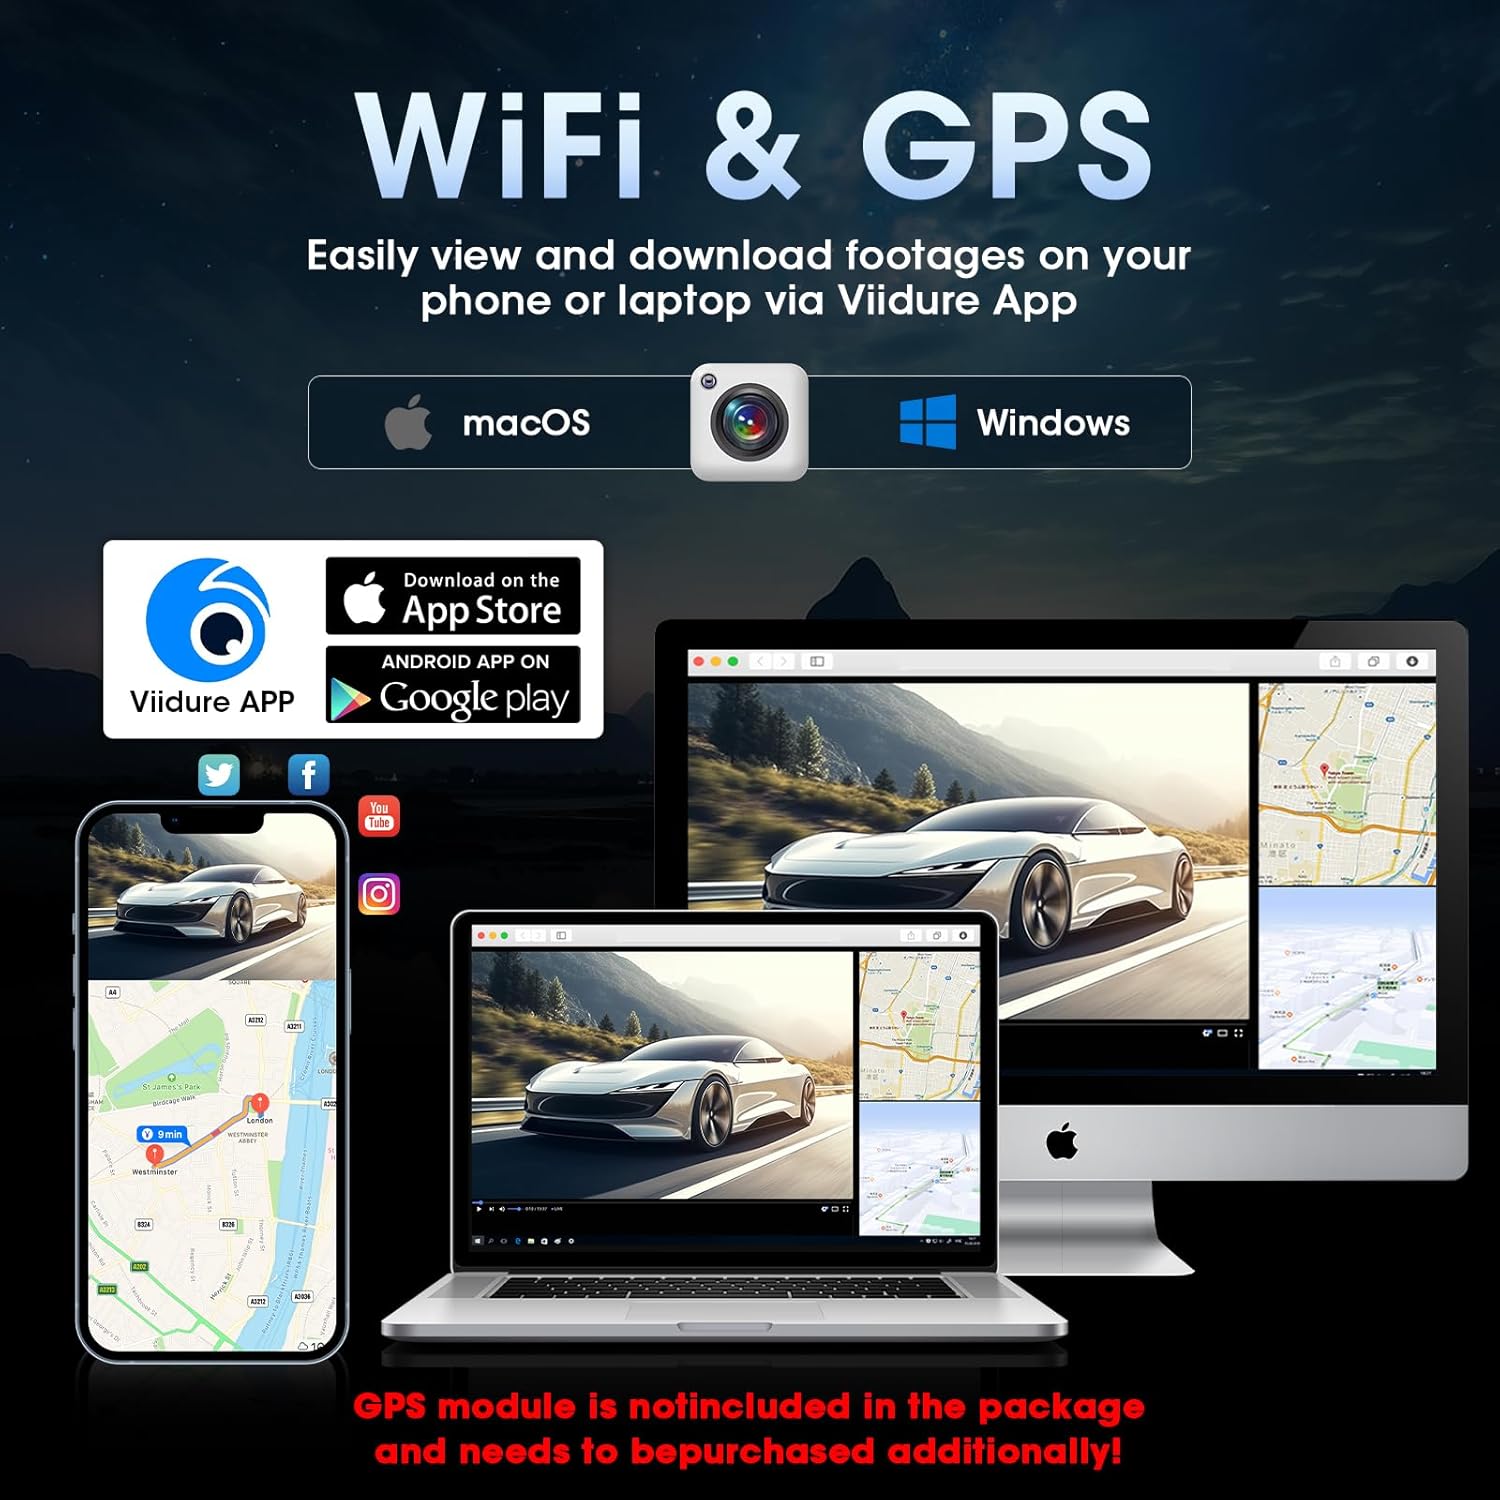
Image: Graphic showing Wi-Fi and GPS functionality, with a smartphone and laptop displaying footage via the Viidure App. A note indicates that the GPS module is sold separately.
7. Maintenance
- Cleaning the Lenses: Use a soft, lint-free cloth to gently wipe the camera lenses. Avoid using abrasive cleaners or solvents.
- Cleaning the Screen: Use a microfiber cloth to clean the touchscreen. If necessary, slightly dampen the cloth with water.
- SD Card Maintenance: Format the SD card regularly (e.g., once a month) within the dashcam's settings to ensure optimal performance and prevent data corruption. Back up important footage before formatting.
- Firmware Updates: Check the manufacturer's website periodically for firmware updates. Follow the instructions provided with the update carefully.
8. Troubleshooting
| Problem | Possible Solution |
|---|---|
| Dashcam does not power on. |
|
| Recording stops or freezes. |
|
| Rear camera not displaying. |
|
| Voice control not responding. |
|
| GPS not working (if module installed). |
|
9. Specifications
| Feature | Detail |
|---|---|
| Model Number | T79N |
| Screen Size | 10 inches IPS Touchscreen |
| Front Camera Resolution | 4K (2160p) |
| Rear Camera Resolution | 1080p |
| Front Camera Field of View | 170° |
| Rear Camera Field of View | 140° |
| Special Features | G-Sensor, Parking Monitor, Night Vision, Wi-Fi, Voice Control, HDR/WDR |
| Connectivity | USB, Wi-Fi |
| Storage | Supports up to 128GB SD card (64GB included) |
| Power Source | Car Charger (Type-C) |
| Battery Type | Lithium-polymer (Super Capacitor for power stability, not for standalone operation) |
| Rear Camera Waterproof Rating | IP69 |
10. Warranty and Support
The Vtopek 4K 10-inch Dashcam Rearview Mirror comes with a 1-year warranty from the date of purchase. Vtopek also provides lifetime technical support.
For any questions, technical assistance, or warranty claims, please contact Vtopek customer service:
- Email: jenny@jansite.cn
- Please provide your product model number (T79N) and purchase details when contacting support.

Image: Graphic detailing lifetime technical support, a 1-year warranty, and an email address for customer service.
