1. Introduction
This manual provides detailed instructions for the installation, setup, and operation of your TAXNELE WiFi Smart Earth Leakage Over/Under Voltage Protector. This device is designed to monitor and protect electrical circuits from various anomalies, including over-voltage, under-voltage, over-current, and earth leakage, while also offering energy metering and smart control functionalities.
The protector is capable of simultaneously disconnecting both Live (L) and Neutral (N) wires, enhancing safety compared to devices that only disconnect the Live wire.
2. Safety Information
WARNING: Electrical shock hazard. Installation and maintenance should only be performed by qualified electricians or personnel with appropriate electrical knowledge. Always disconnect power before installation or servicing.
- Ensure the main power supply is turned off before installing or performing any wiring.
- Verify that the voltage and current ratings of the device match your electrical system requirements.
- Do not operate the device if it appears damaged.
- This device is designed for indoor use in dry environments.
- Follow all local electrical codes and regulations during installation.
3. Product Features
The TAXNELE WiFi Smart Protector offers a range of advanced features for comprehensive electrical circuit management:
- Multi-function Protection: Provides protection against over-voltage, under-voltage, over-current, and earth leakage.
- Dual-Pole Disconnection: Cuts off both Live (L) and Neutral (N) wires simultaneously for enhanced safety.
- Adjustable Parameters: User-configurable settings for protection thresholds (voltage, current, leakage) and reconnect time.
- Energy Metering: Displays real-time voltage, current, active power, and accumulated energy consumption (kWh).
- WiFi Connectivity: Remote control and monitoring via the Smart Life mobile application.
- Voice Control: Compatible with Amazon Alexa and Google Home for hands-free operation.
- Timer Functions: Schedule device on/off times with various timing modes (timing, countdown, cycle timing).
- Automatic Reconnection: Configurable delay for automatic power restoration after a fault condition clears.

Image: Overview of the WiFi Multi-Function Protector highlighting compatibility with Tuya Smart, Google Assistant, Amazon Alexa, and Smart Life app.

Image: Diagram illustrating the eight core multi-protection functions of the device, including automatic reconnection, over/under voltage, over current, earth leakage, and kWh power metering.
4. Package Contents
- TAXNELE WiFi Smart Earth Leakage Over/Under Voltage Protector (63A)
- CT (Current Transformer, if applicable and included)
- User Manual (this document)
5. Product Overview
Familiarize yourself with the components and indicators of the protector:
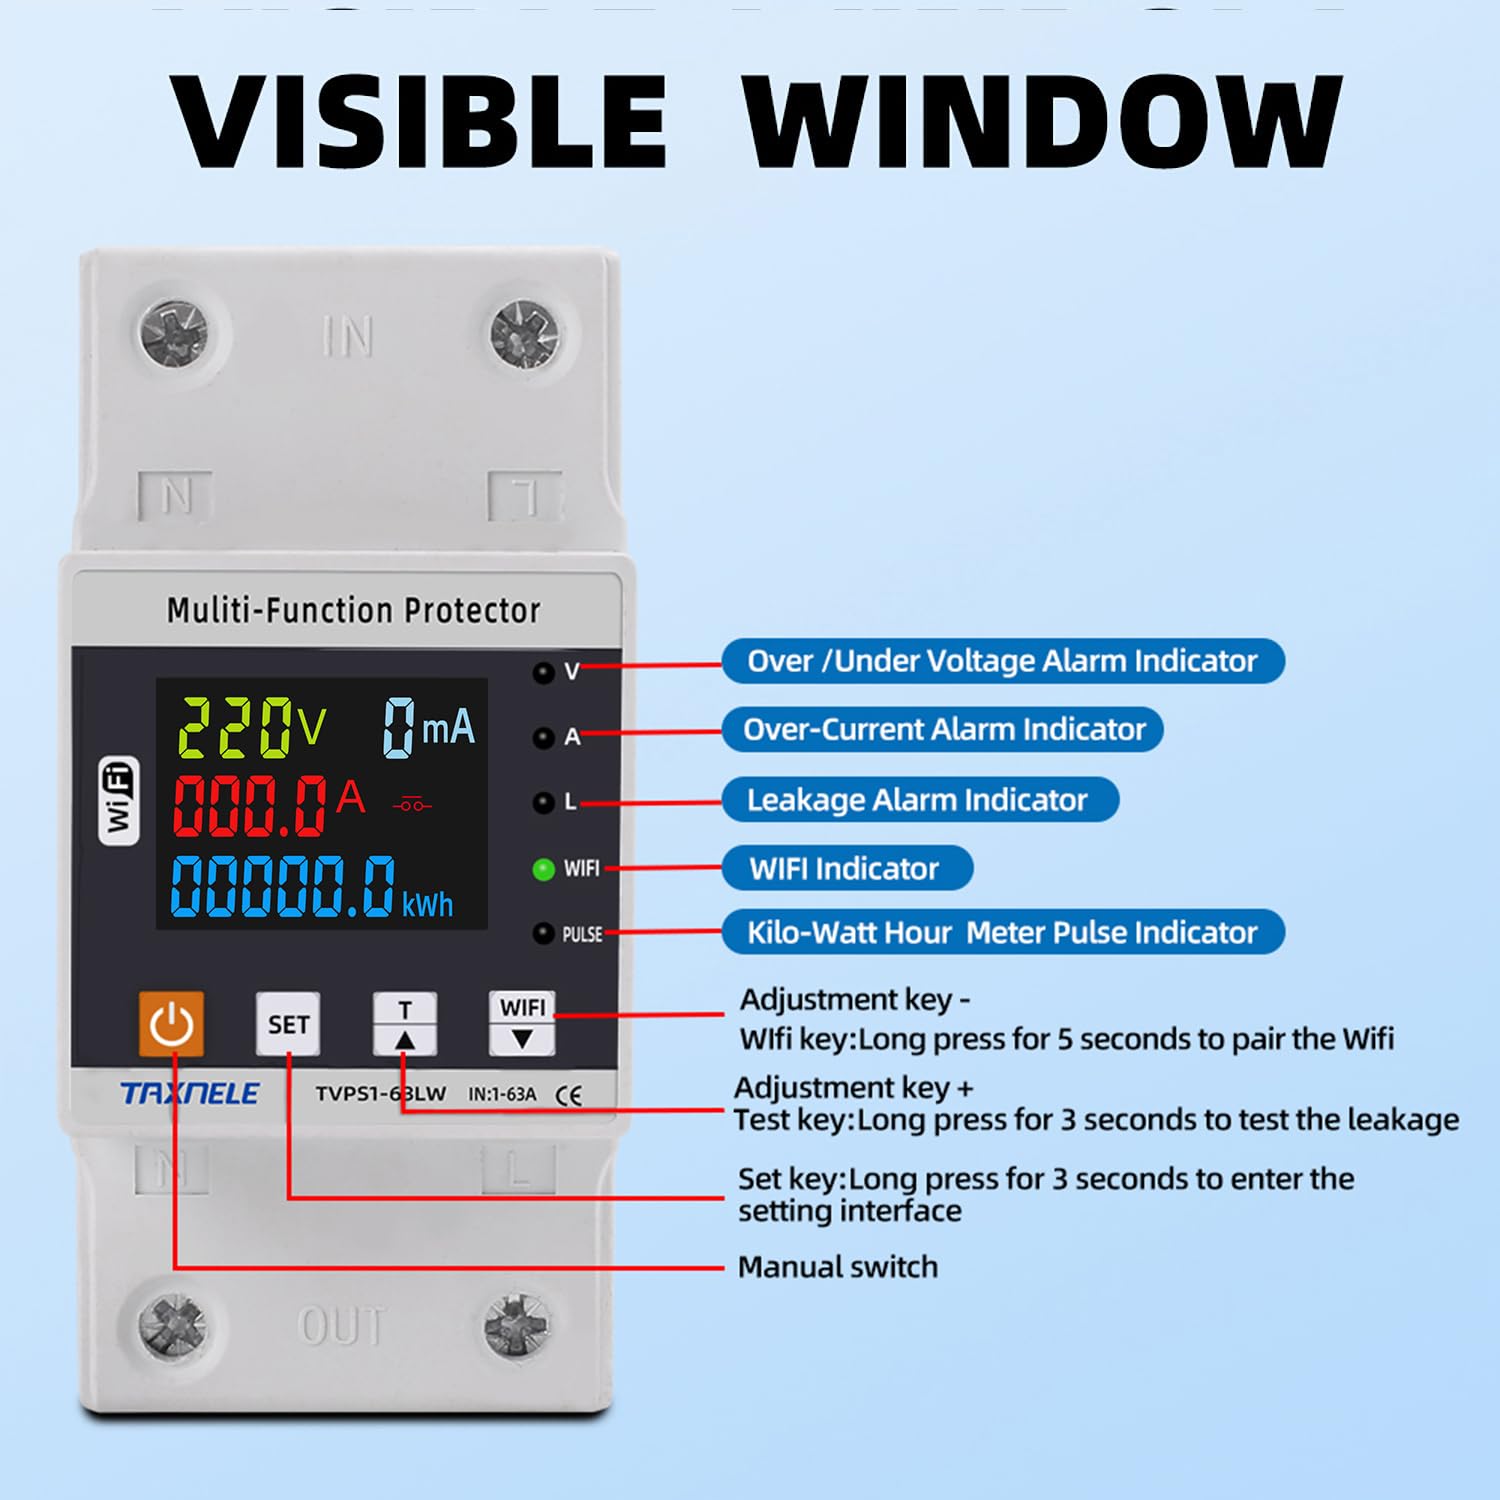
Image: Detailed diagram of the protector's front panel, labeling the display, indicators, and control buttons. Key labels include: Over/Under Voltage Alarm Indicator, Over-Current Alarm Indicator, Leakage Alarm Indicator, WiFi Indicator, Kilo-Watt Hour Meter Pulse Indicator, Adjustment keys (+/-), WiFi pairing button (long press for 5 seconds), Test key (long press for 3 seconds to test leakage), Set key (long press for 3 seconds to enter setting interface), and Manual switch.
- Display Screen: Shows real-time voltage, current, power, and energy consumption.
- Indicators (V, A, L, WiFi, PULSE): Provide visual status for voltage, current, leakage, WiFi connection, and energy pulse.
- Power Button: Manual switch for turning the device on/off.
- SET Button: Used to enter the setting interface (long press for 3 seconds).
- Adjustment Keys (Up/Down): Used to navigate menus and adjust parameter values.
- WiFi Button: Long press for 5 seconds to initiate WiFi pairing mode.
- Test Key: Long press for 3 seconds to test the earth leakage protection function.
6. Installation
The TAXNELE WiFi Smart Protector is designed for DIN rail mounting. Ensure proper wiring and secure connections.
- Power Disconnection: Before starting, ensure the main power supply to the circuit is completely disconnected.
- Mounting: Mount the protector securely onto a standard DIN rail within your electrical panel.
- Wiring:
- Connect the incoming Live (L) and Neutral (N) wires to the "IN" terminals at the top of the device.
- Connect the outgoing Live (L) and Neutral (N) wires to the "OUT" terminals at the bottom of the device.
- Ensure all connections are tight and secure to prevent loose contacts and overheating.
- Verification: Double-check all wiring connections for correctness and security.
- Power Restoration: Once installation is complete and verified, restore power to the circuit.
Note: For optimal performance and safety, it is recommended to have this device installed by a certified electrician.
7. Initial Setup & WiFi Pairing
To utilize the smart features, connect the device to your WiFi network via the Smart Life app.
- Download App: Download the "Smart Life" app from your smartphone's app store (available for Android and iOS).
- Register/Login: Open the app and register a new account or log in with an existing one.
- Enter Pairing Mode: On the protector, long press the WiFi button (labeled with a WiFi icon) for 5 seconds until the WiFi indicator starts blinking rapidly. This indicates the device is in pairing mode.
- Add Device in App: In the Smart Life app, tap the "+" icon to add a new device. Select the appropriate device type (e.g., "Circuit Breaker" or "Energy Meter").
- Connect to WiFi: Follow the on-screen instructions in the app to connect the device to your 2.4GHz WiFi network. Enter your WiFi password when prompted.
- Confirmation: Once successfully paired, the WiFi indicator on the protector will stop blinking and remain steadily lit. The device will appear in your Smart Life app.

Image: The TAXNELE protector displayed alongside a smartphone showing the Smart Life app interface, illustrating real-time energy monitoring data.
8. Operating Instructions
8.1. Basic Display Information
The device's LCD screen cycles through various parameters. Use the adjustment keys to manually cycle or observe the automatic rotation.

Image: Examples of the device's display showing different energy parameters: kWh (kilowatt-hour), kW (kilowatt), Power Factor, and Prepaid Energy.
- Voltage (V): Real-time voltage of the circuit.
- Current (A): Real-time current flowing through the circuit.
- Power (kW): Real-time active power consumption.
- Energy (kWh): Accumulated energy consumption.
- Power Factor (cosφ): Indicates the efficiency of power usage.
8.2. Setting Protection Parameters
You can configure protection thresholds directly on the device or via the Smart Life app.
- Enter Setting Interface: Long press the SET button for 3 seconds. The display will show the first configurable parameter.
- Navigate Parameters: Use the SET button to cycle through different parameters (e.g., Under Voltage, Over Voltage, Over Current, Leakage Protection, Reconnect Time, Calibration).
- Adjust Values: Use the Up/Down adjustment keys to change the value of the selected parameter.
- Save Settings: After adjusting a parameter, wait a few seconds for the device to automatically save the setting and exit the configuration mode, or long press SET again to save and exit.
Default and Adjustable Ranges:
- Under Voltage Protection: 140V-210V (Default: 170V)
- Over Voltage Protection: 230V-300V (Default: 270V)
- Over Current Protection: 1A-63A (Adjustable)
- Reconnect Time (Delay On Time): 1s-500s (Default: 30s)
- Electric Leakage Protection: 10-99mA (Adjustable)
- Voltage/Current/kW Calibration: -9.9% to 9.9%

Image: Close-up view detailing the internal dual relays for earth leakage protection and showing the adjustable leakage value range (10-99mA) which can be set on the device or via the phone app.
8.3. Timer Functions
The Smart Life app allows you to set various timing schedules for the protector.

Image: Screenshot of the Smart Life app demonstrating three timing modes: Timing mode, Countdown mode, and Cycle Timing, with examples of scheduled events.
- Timing Mode: Set specific times for the device to turn on or off daily or on selected days.
- Countdown Mode: Set a countdown timer after which the device will change its state (on to off, or off to on).
- Cycle Timing: Configure repetitive on/off cycles within a specified period.
8.4. Remote Control via App
Once connected to the Smart Life app, you can remotely control the device from anywhere with an internet connection.
- Turn the protector on/off.
- View real-time electrical parameters (voltage, current, power, energy).
- Adjust protection settings.
- Set and manage timing schedules.
- Receive notifications for fault conditions.
8.5. Voice Control
Integrate the Smart Life app with Amazon Alexa or Google Home for voice-activated control.
- Enable the "Smart Life" skill/service in your Alexa or Google Home app.
- Link your Smart Life account.
- Discover devices.
- Use voice commands such as "Alexa, turn on [Device Name]" or "Hey Google, turn off [Device Name]".
9. Energy Monitoring
The protector provides detailed energy consumption data, accessible on the device display and through the Smart Life app.

Image: A visual representation of electricity statistics, including daily, monthly, and yearly energy consumption, alongside a table showing real-time voltage, current, and power readings.
- Real-time Data: View live voltage, current, and power readings.
- Historical Data: The Smart Life app records and displays historical energy consumption data (daily, monthly, yearly), allowing you to track usage patterns.
- kWh Meter: Accurate measurement of total energy consumed.
10. Maintenance
- Cleaning: Gently wipe the device with a dry, soft cloth. Do not use abrasive cleaners or solvents.
- Firmware Updates: Periodically check the Smart Life app for available firmware updates to ensure optimal performance and security.
- Leakage Test: Regularly test the earth leakage protection function by long-pressing the dedicated Test key for 3 seconds. The device should trip, indicating the function is operational.
11. Troubleshooting
| Problem | Possible Cause | Solution |
|---|---|---|
| Device does not power on. | No power supply; incorrect wiring; internal fault. | Check main power supply. Verify wiring connections. If problem persists, contact support. |
| WiFi indicator not blinking/pairing fails. | Not in pairing mode; incorrect WiFi password; 5GHz WiFi network. | Long press WiFi button for 5s. Ensure correct 2.4GHz WiFi network and password. Move device closer to router. |
| Device trips frequently. | Over-voltage, under-voltage, over-current, or earth leakage detected; protection thresholds set too low. | Check connected appliances for faults. Review and adjust protection parameters in settings. |
| Remote control not working. | No internet connection; app not linked; device offline. | Check home internet and phone's data connection. Ensure device is online in Smart Life app. Re-pair if necessary. |
12. Specifications
| Parameter | Value |
|---|---|
| Model | TVPS1-63LW (63A) |
| Rated Voltage | 230V AC |
| Frequency | 50Hz/60Hz |
| Current Rating | 63 Amps |
| Under Voltage Protection Range | 140V-210V (Adjustable, Default: 170V) |
| Over Voltage Protection Range | 230V-300V (Adjustable, Default: 270V) |
| Over Current Protection Range | 1A-63A (Adjustable) |
| Electric Leakage Protection Range | 10-99mA (Adjustable) |
| Reconnect Time (Delay On) | 1s-500s (Adjustable, Default: 30s) |
| Power Display Range | 0-99999.9 kWh |
| Mounting Type | DIN Rail Mount |
| Number of Poles | 1 (for L and N disconnection) |
| WiFi Standard | 2.4GHz 802.11 b/g/n |
13. Warranty and Support
For warranty information and technical support, please refer to the manufacturer's official channels. The manufacturer details found on the product packaging are:
- Manufacturer: YUEQING TAIXIN ELECTRIC CO., LIMITED
- Address: No. 57 Sulv Road, Liushi Town, Wenzhou City, Zhejiang Province 325604 CN
- EC REP: eVatmaster Consulting GmbH, Bettinastr. 30, 60325 Frankfurt am Main 60325, Tel: +496995179070, E-mail: contact@evatmaster.com
- UK REP: GOAL REACH CONSULTING LTD, OFFICE 1029 3 HARDMAN STREET 10TH FLOORSP INNINGFIELDS MANCHESTER, UK M3 3HF, E-mail: goal@hotmail.com
Please retain your purchase receipt for warranty claims.
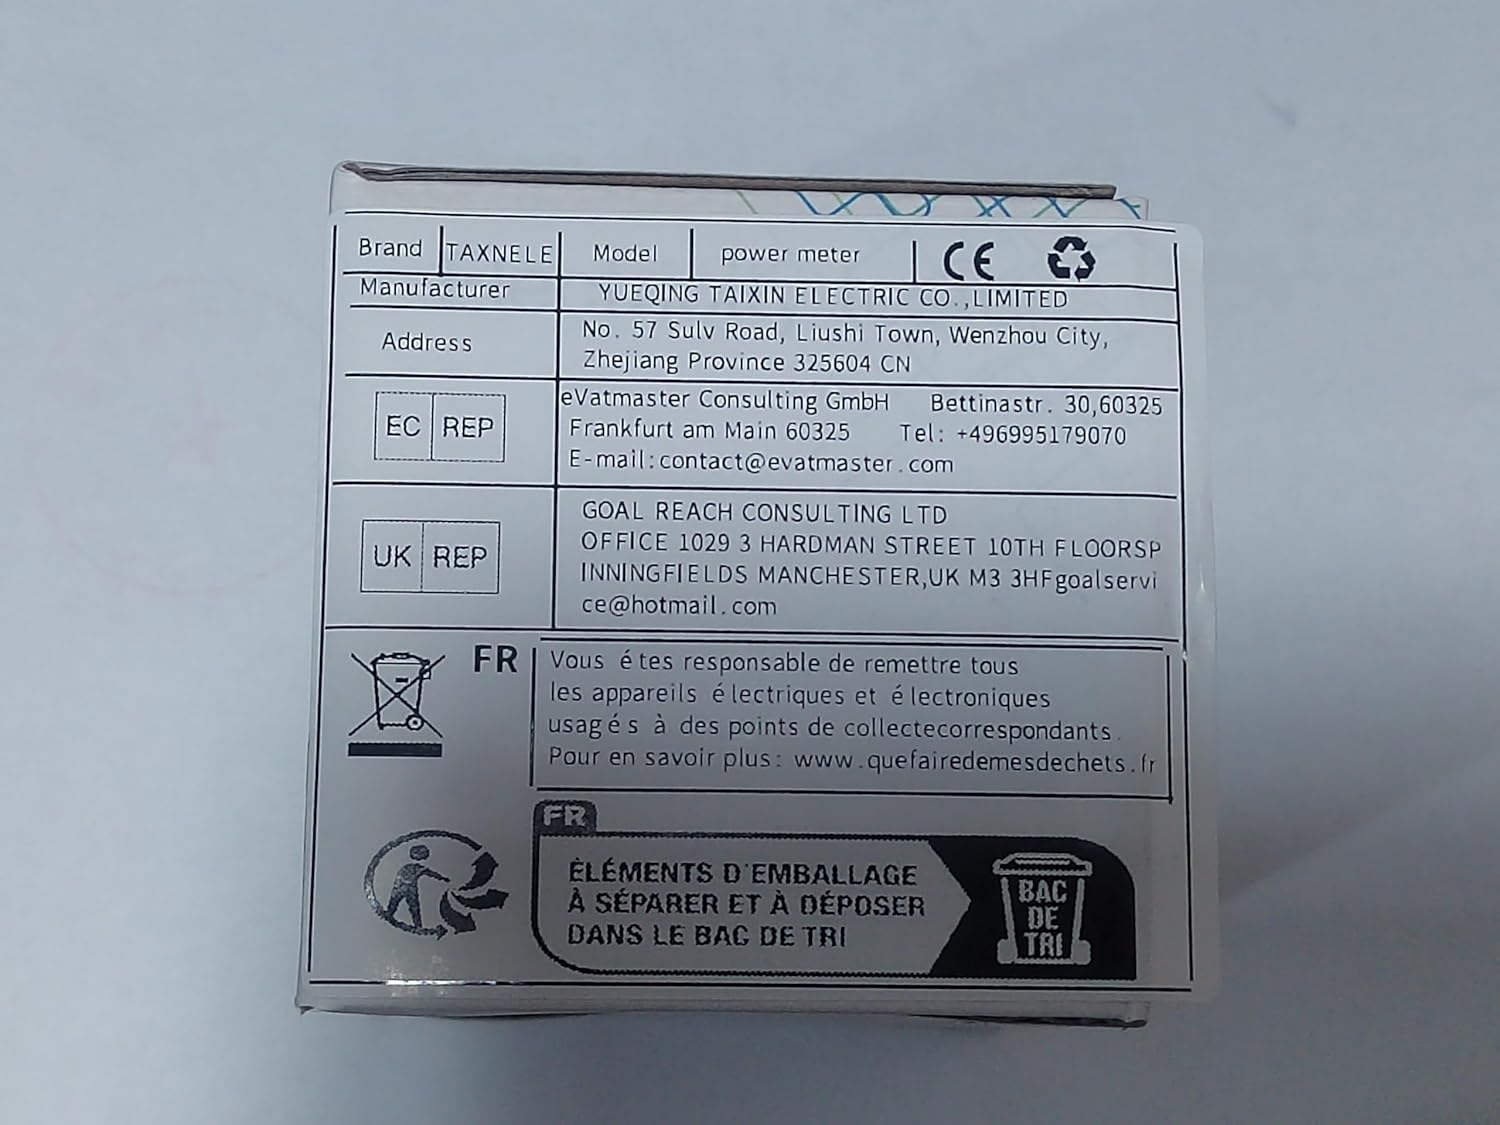
Image: Product packaging displaying manufacturer details, European and UK authorized representatives, and WEEE disposal symbol.
Waste Electrical and Electronic Equipment (WEEE) Directive: This symbol on the product or its packaging indicates that this product shall not be treated as household waste. Instead, it shall be handed over to the applicable collection point for the recycling of electrical and electronic equipment. By ensuring this product is disposed of correctly, you will help prevent potential negative consequences for the environment and human health.