1. Introduction
The ETA Gratus Evo Max is a powerful and versatile all-metal food processor designed to assist with a wide range of kitchen tasks. Featuring a 1500W motor and a planetary mixing system, it is equipped for kneading, beating, mixing, grating, meat grinding, and blending. This manual provides essential information for safe and efficient operation, maintenance, and troubleshooting of your appliance.
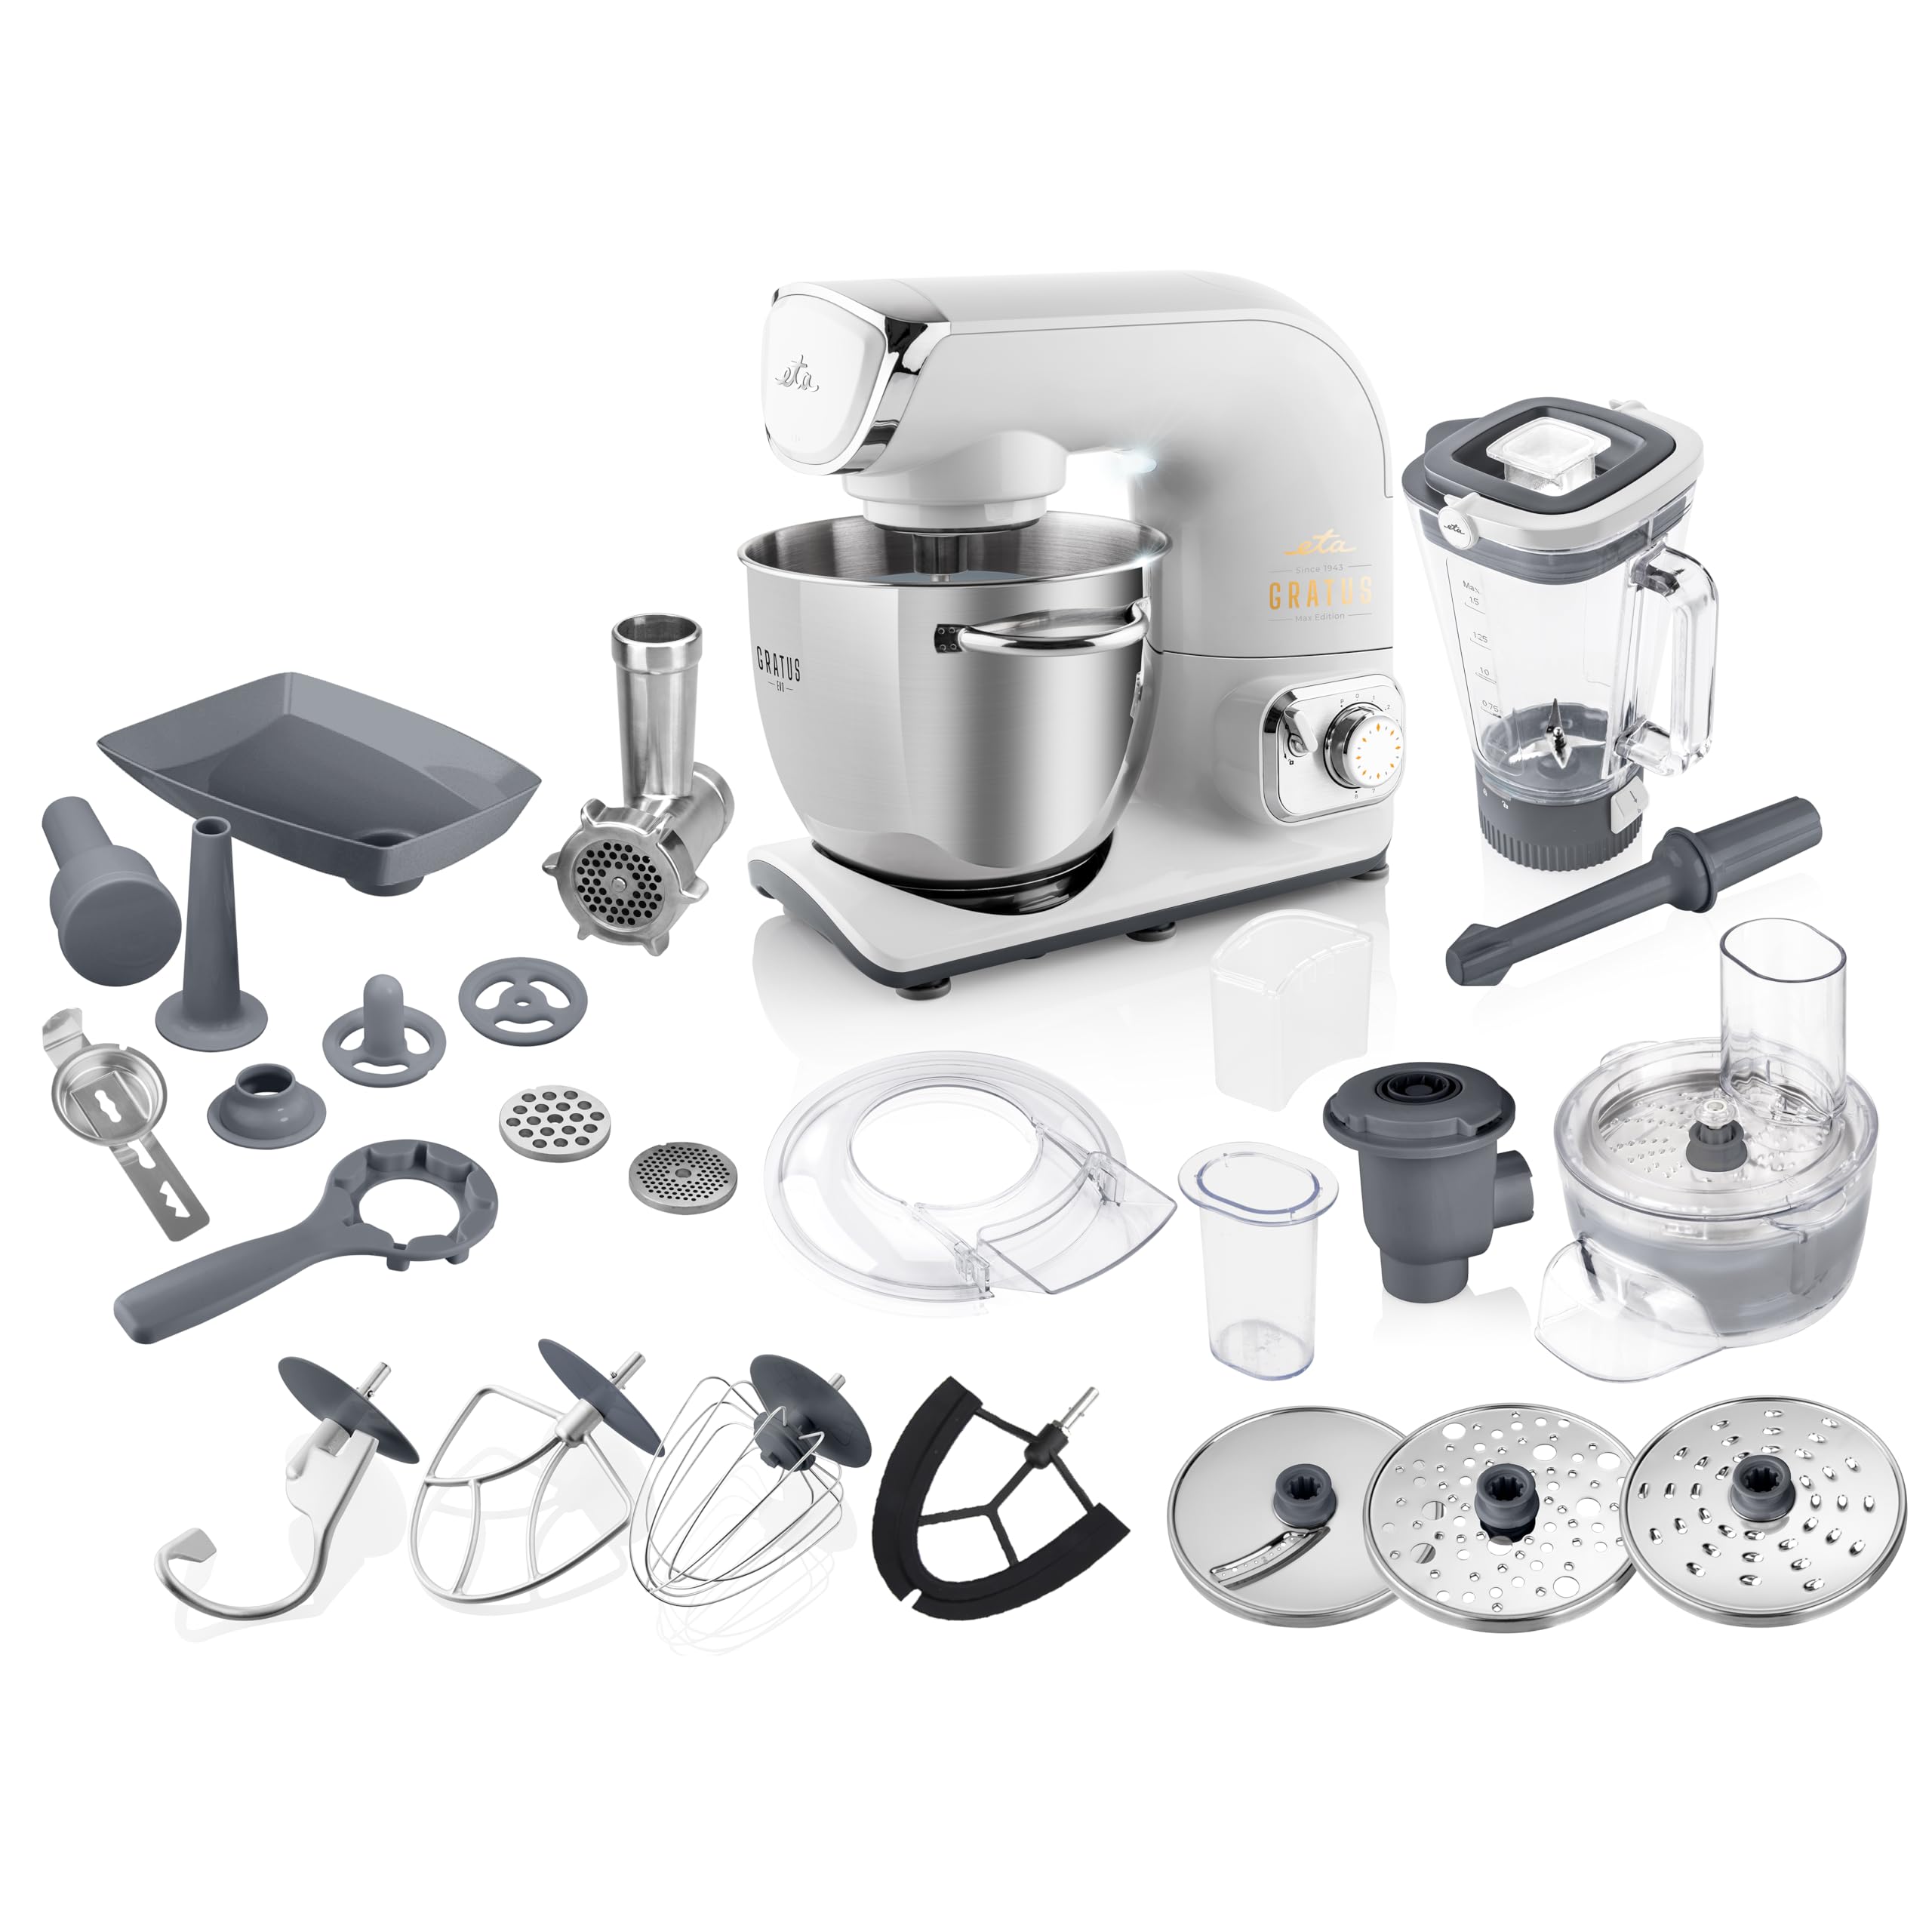
Image 1.1: The ETA Gratus Evo Max Food Processor with its stainless steel bowl.
2. Important Safety Instructions
- Read all instructions carefully before using the appliance.
- Always ensure the appliance is unplugged before assembly, disassembly, or cleaning.
- Do not immerse the motor unit in water or any other liquid.
- Keep hands and utensils away from moving parts during operation to prevent injury.
- Never operate the appliance with a damaged cord or plug. Contact customer support for repairs.
- This appliance is not intended for use by children or persons with reduced physical, sensory, or mental capabilities unless supervised.
- Ensure the pivoting arm safety system is engaged before starting the appliance to prevent unintentional starts.
- Use only original ETA accessories and attachments.
3. Package Contents
Carefully unpack all components and check against the list below. If any parts are missing or damaged, contact customer support.
- ETA Gratus Evo Max Food Processor main unit
- 5.5L stainless steel bowl with transparent lid
- Kneading hook
- Whisk
- Flexible beater (for creams and light batters)
- 1.5L glass blender
- Meat grinder (62mm diameter)
- 3 grinding plates for meat grinder
- Sausage stuffer attachment
- Kebbe attachment
- Candy dough mold
- Puree press
- Release key
- Grater attachment with 3 stainless steel graters
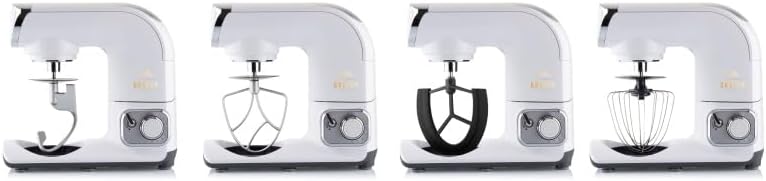
Image 3.1: The kneading hook, beater, flexible beater, and whisk attachments.
4. Getting Started (Setup)
4.1 Unpacking and Initial Cleaning
- Remove all packaging materials and promotional labels.
- Clean all parts that will come into contact with food before first use. Refer to the 'Maintenance and Cleaning' section.
4.2 Assembling the Main Unit
- Place the main unit on a stable, flat, and dry surface.
- Lift the mixing arm by pressing the release button and raising it until it locks into position.
- Place the stainless steel bowl onto the base and turn it clockwise until it locks securely.
- Select the desired attachment (kneading hook, whisk, or beater) and insert it into the attachment shaft. Push upwards and turn slightly until it clicks into place.
- Lower the mixing arm by pressing the release button and gently pushing it down until it locks.
- Attach the transparent splash guard to the mixing arm if desired.
5. Operating Instructions
5.1 General Operation
- Ensure the appliance is correctly assembled and plugged into a suitable power outlet.
- Turn the speed control dial to the desired setting. The appliance features continuous speed adjustment.
- For short bursts of maximum power, use the Pulse function.
- Always start at a low speed and gradually increase to prevent splashing.
- The planetary mixing system ensures thorough mixing by rotating the attachment in one direction while the drive head rotates in the opposite direction.
5.2 Using the Kneading Hook
The kneading hook is ideal for heavy doughs such as bread, pizza, or pasta dough.
- Attach the kneading hook as described in Section 4.2.
- Add ingredients to the stainless steel bowl.
- Select a low to medium speed for kneading.

Image 5.1: The kneading hook positioned in the mixing bowl.
5.3 Using the Whisk
The whisk is suitable for whipping cream, egg whites, light batters, and sauces.
- Attach the whisk.
- Add ingredients to the bowl.
- Start at a low speed and gradually increase to a higher speed for best results.

Image 5.2: The whisk attachment in operation.
5.4 Using the Flexible Beater
The flexible beater is designed for creams and light batters, ensuring ingredients are scraped from the sides of the bowl for even mixing.
- Attach the flexible beater.
- Add ingredients.
- Use medium speeds for thorough mixing.
5.5 Using the Glass Blender
The 1.5L glass blender is perfect for smoothies, soups, sauces, and purees.
- Ensure the main mixing arm is raised and locked.
- Place the blender onto the high-speed drive outlet on top of the main unit and twist to lock.
- Add ingredients to the blender jug, ensuring not to exceed the MAX fill line.
- Select desired speed or use the Pulse function.
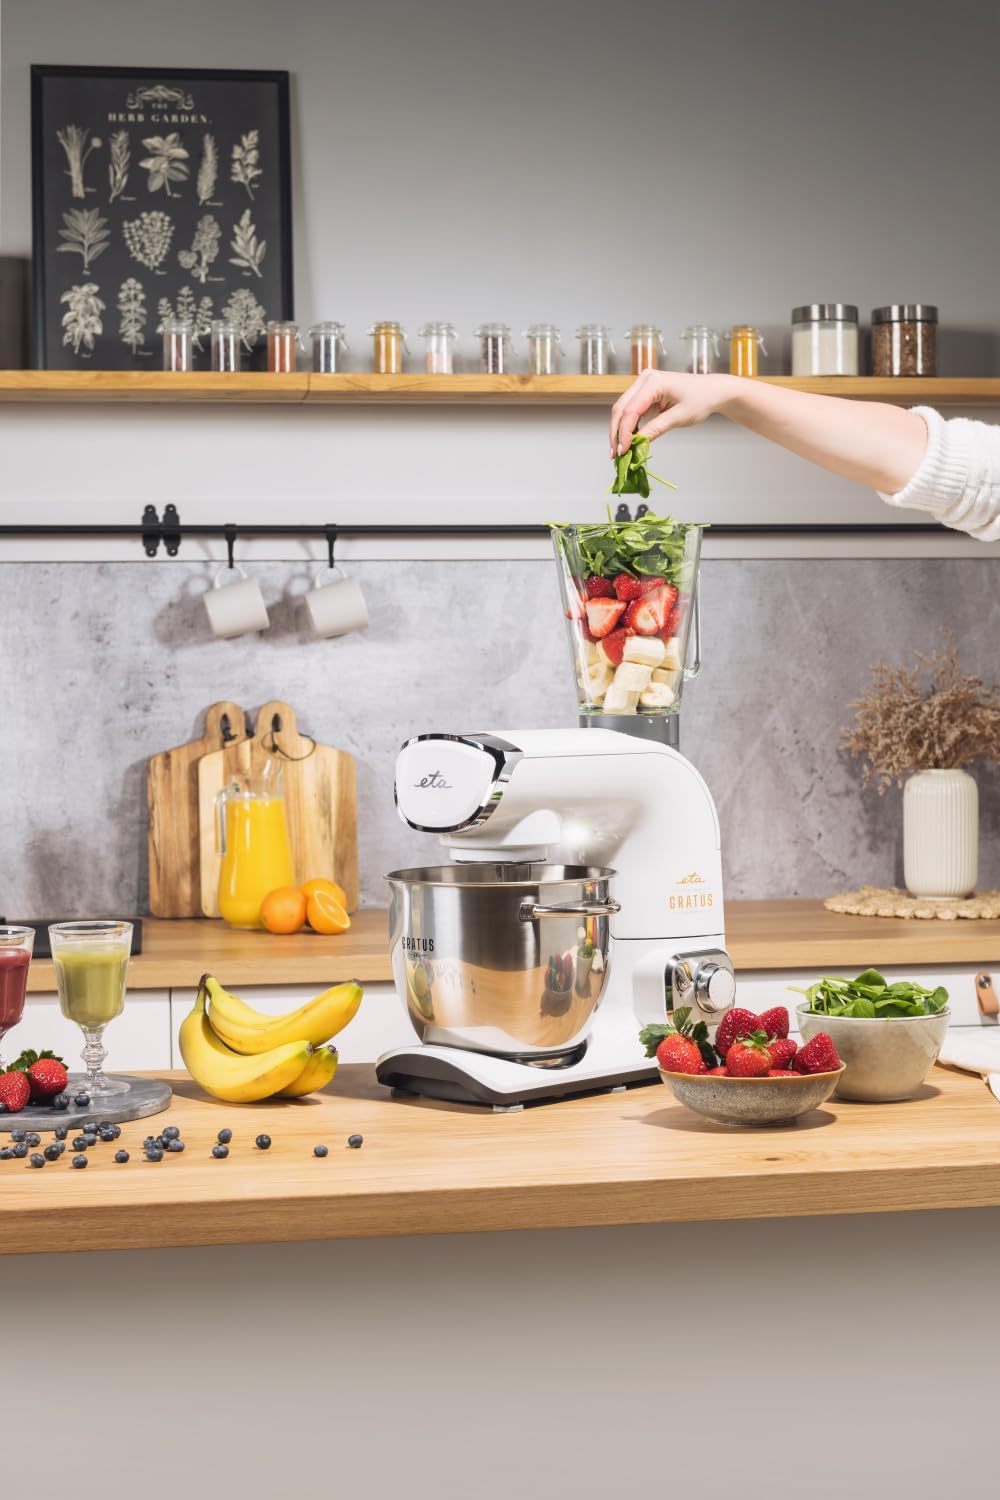
Image 5.3: The glass blender attachment in use.
5.6 Using the Meat Grinder
The 62mm meat grinder attachment is used for grinding meat, making sausages, and kebbe.
- Ensure the main mixing arm is raised and locked.
- Attach the meat grinder to the front drive outlet and secure it.
- Assemble the desired grinding plate, blade, and screw into the grinder housing.
- Place a bowl under the outlet.
- Feed pre-cut meat into the hopper using the food pusher.
- Use a medium speed setting.

Image 5.4: The meat grinder attachment in operation.
5.7 Using the Grater Attachment
The grater attachment with its three stainless steel graters allows for fine, coarse, and slicing functions for vegetables, cheese, and more.
- Ensure the main mixing arm is raised and locked.
- Attach the grater housing to the front drive outlet and secure it.
- Insert the desired grater disc.
- Place a bowl under the outlet.
- Feed ingredients into the chute using the food pusher.
- Use a medium to high speed setting.

Image 5.5: The three stainless steel grating discs: fine, coarse, and slicing.
6. Maintenance and Cleaning
Proper cleaning and maintenance ensure the longevity and optimal performance of your food processor.
6.1 General Cleaning
- Always unplug the appliance before cleaning.
- Wipe the main motor unit with a damp cloth. Never immerse it in water.
- The stainless steel bowl, kneading hook, whisk, and flexible beater are generally dishwasher safe, but hand washing is recommended for best care.
- The glass blender jug, meat grinder components, and grater attachment parts should be hand washed with warm soapy water.
- Dry all parts thoroughly before reassembling or storing.
6.2 Care Instructions
- Hand wash only for specific components as indicated above to preserve their finish and functionality.
- Avoid abrasive cleaners or scouring pads that could damage surfaces.
- Store the appliance and its accessories in a dry place.
7. Troubleshooting
If you encounter issues with your ETA Gratus Evo Max, refer to the following common problems and solutions:
| Problem | Possible Cause | Solution |
|---|---|---|
| Appliance does not start | Not plugged in; Mixing arm not locked down; Safety switch not engaged. | Check power connection; Ensure mixing arm is fully lowered and locked; Verify all attachments are correctly installed. |
| Motor stops during operation | Overload protection activated; Appliance overheated. | Reduce load; Turn off and unplug, allow to cool for 30 minutes before restarting. |
| Attachments not mixing properly | Attachment not correctly installed; Too much or too little ingredient. | Re-install attachment; Adjust ingredient quantities according to recipes. |
| Loud noise or vibration | Appliance not on a stable surface; Attachment loose or damaged. | Place on a flat, stable surface; Check attachment installation; Inspect for damage. |
8. Technical Specifications
Detailed specifications for the ETA Gratus Evo Max Food Processor.
| Specification | Value |
|---|---|
| Brand | ETA |
| Model Name | Gratus Evo Max |
| Model Number | 08590393376797 |
| Power | 1500 Watts |
| Material | Metal |
| Color | White |
| Bowl Capacity | 5.5 Liters (stainless steel) |
| Blender Capacity | 1.5 Liters (glass) |
| Meat Grinder Diameter | 62 mm |
| Item Weight | 15.5 Kilograms |
| Special Feature | Adjustable Speed Control, Planetary Mixing System |
| Care Instructions | Hand wash (for specific components) |

Image 8.1: Key features including 1500W motor, all-metal design, and speed stabilization.
9. Warranty and Customer Support
For warranty information, please refer to the warranty card included with your product or visit the official ETA website. If you require technical assistance, spare parts, or have any questions not covered in this manual, please contact ETA customer support through their official channels.
- Online Support: Visit the official ETA website for FAQs and contact options.
- Service Centers: Information on authorized service centers can be found on the ETA website.


