1. Introduction
This manual provides comprehensive instructions for the installation, operation, and maintenance of your REKONG BE200 WiFi 7 Desktop Kit. This kit is designed to upgrade your desktop computer with advanced Wi-Fi 7 (802.11be) and Bluetooth 5.4 capabilities, offering tri-band connectivity (2.4GHz, 5GHz, 6GHz) for enhanced wireless performance.
2. Package Contents
Verify that all items listed below are present in your package:
- REKONG BE200 WiFi 7 M.2 NGFF Key E Wireless Card
- PCIe Adapter Card with full-height bracket
- Low-profile bracket
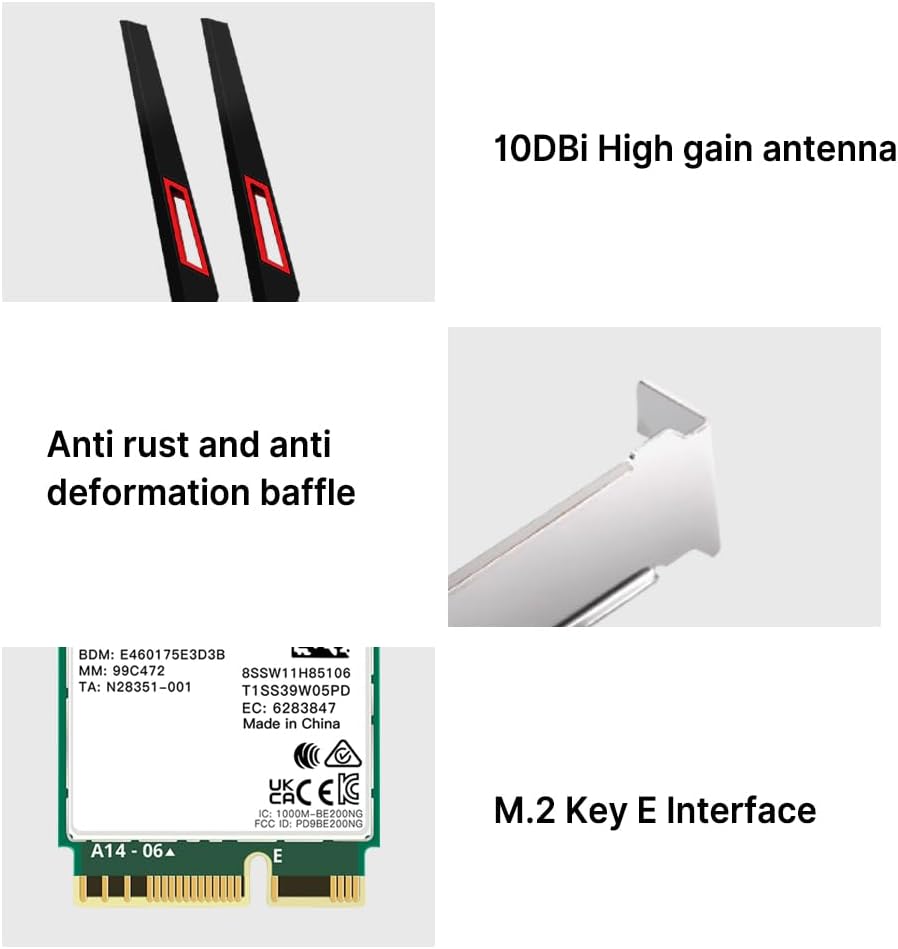
- Two High-Gain Antennas (10dBi)
- Two IPEX4 Antenna Cables
- Mounting Screws
- Small Phillips Screwdriver


3. Specifications
| Feature | Description |
|---|---|
| Model Number | BE200kit |
| Wireless Standard | Wi-Fi 7 (802.11be) |
| Frequency Bands | Tri-Band: 2.4GHz, 5GHz, 6GHz |
| Max Data Transfer Rate | Up to 8774 Mbps (574Mbps on 2.4GHz, 2400Mbps on 5GHz, 5800Mbps on 6GHz) |
| Bluetooth Version | Bluetooth 5.4 |
| Interface | M.2 NGFF Key E |
| Antennas | Two 10dBi High-Gain Antennas |
| Operating System Support | Windows 10/11 (64-bit) |
| Compatibility | Intel-based motherboards with M.2 2230 (E Key) slots. Not compatible with AMD systems. |
| Security | WPA4 (backward compatible with WPA3) |

4. Setup and Installation
Follow these steps carefully to install your REKONG BE200 WiFi 7 Desktop Kit.
4.1. Pre-Installation Checks
- Compatibility: Ensure your motherboard has an M.2 2230 (E Key) slot and is Intel-based. This kit is not compatible with AMD systems.
- Operating System: Verify your system runs Windows 10 (64-bit) or Windows 11.
- Drivers: It is recommended to download the latest Wi-Fi and Bluetooth drivers for the Intel BE200 chipset from the official Intel website before installation.
- Safety: Power off your computer and unplug it from the power outlet. Discharge any static electricity by touching a grounded metal object.

4.2. Physical Installation
- Open your computer case.
- Locate an available PCIe slot on your motherboard.
- Insert the BE200 M.2 card into the M.2 slot on the provided PCIe adapter card. Secure it with the small screw.
- Connect the IPEX4 antenna cables to the corresponding connectors on the BE200 M.2 card. Ensure they are securely attached.
- If necessary, replace the full-height bracket on the PCIe adapter with the low-profile bracket to match your computer case.
- Carefully insert the PCIe adapter card into an available PCIe slot on your motherboard. Press down firmly until it is seated correctly.
- Secure the PCIe adapter card to the computer case with a screw.
- Close your computer case.
- Attach the two high-gain antennas to the connectors on the back of the PCIe adapter card.
4.3. Driver Installation
- Power on your computer.
- Once Windows has loaded, navigate to the Intel website to download the latest drivers for the Intel BE200 Wi-Fi and Bluetooth module.
- Install the downloaded drivers by following the on-screen instructions.
- Restart your computer after the driver installation is complete.
- After restarting, your system should recognize the new Wi-Fi and Bluetooth hardware. You can now connect to Wi-Fi networks and pair Bluetooth devices.
5. Operating Instructions
5.1. Wi-Fi Connectivity
After successful driver installation, your computer will detect available Wi-Fi networks. Click on the Wi-Fi icon in your system tray, select your desired network, and enter the password to connect. The BE200 supports tri-band operation, automatically selecting the optimal frequency (2.4GHz, 5GHz, or 6GHz) for your connection based on your router's capabilities and network conditions.

5.2. Bluetooth 5.4 Functionality
The integrated Bluetooth 5.4 module allows you to connect various Bluetooth-enabled devices to your computer. To pair a device:
- Go to Windows Settings > Devices > Bluetooth & other devices.
- Ensure Bluetooth is turned ON.
- Put your Bluetooth device into pairing mode.
- Click "Add Bluetooth or other device" and select "Bluetooth".
- Select your device from the list and follow any on-screen prompts to complete pairing.

6. Maintenance
The REKONG BE200 WiFi 7 Desktop Kit requires minimal maintenance. Keep the following in mind:
- Antennas: Ensure antennas are securely attached and positioned for optimal signal reception. Avoid bending or forcing them.
- Drivers: Periodically check the Intel website for updated Wi-Fi and Bluetooth drivers to ensure optimal performance and security.
- Environment: Ensure your computer case has adequate ventilation to prevent overheating of internal components, including the Wi-Fi card.
7. Troubleshooting
7.1. No Wi-Fi or Bluetooth Connection
- Check Physical Connection: Ensure the PCIe adapter card is fully seated in its slot and secured. Verify that the antenna cables are properly connected to the M.2 card and the antennas are attached.
- Driver Installation: Confirm that the correct Intel BE200 drivers for Wi-Fi and Bluetooth are installed. Reinstall them if necessary.
- Device Manager: Open Device Manager in Windows. Check for any yellow exclamation marks next to network adapters or Bluetooth devices. If present, update or reinstall drivers.
- BIOS/UEFI Settings: Some motherboards may require enabling the M.2 slot or PCIe slot in the BIOS/UEFI settings. Consult your motherboard manual.
- Compatibility: Double-check that your system is Intel-based and running Windows 10/11 (64-bit). AMD systems are not supported.
7.2. Slow Wi-Fi Speeds
- Antenna Position: Adjust the position of the external antennas for better signal reception.
- Router Proximity: Move your computer closer to your Wi-Fi router or access point.
- Interference: Reduce interference from other electronic devices (e.g., microwaves, cordless phones) operating on similar frequencies.
- Router Compatibility: Ensure your router supports Wi-Fi 7 (802.11be) to achieve maximum speeds. If not, the card will operate at the highest supported standard of your router (e.g., Wi-Fi 6E, Wi-Fi 6).
- Driver Update: Ensure you have the latest drivers installed.
7.3. Bluetooth Device Disconnections
- Distance: Ensure the Bluetooth device is within range of your computer.
- Battery: Check the battery level of your Bluetooth device.
- Interference: Minimize interference from other 2.4GHz devices.
- Re-pair Device: Try unpairing and re-pairing the Bluetooth device.
8. Support
For further assistance or technical support, please refer to the manufacturer's official website or contact their customer service. Ensure you have your product model number (BE200kit) available when seeking support.