1. Introduction
This manual provides detailed instructions for the installation, operation, and maintenance of your Airpuxem TPMS Tire Pressure Monitoring System. Please read this manual thoroughly before using the product to ensure proper function and safety.
The Airpuxem TPMS is designed to provide real-time tire pressure and temperature monitoring, enhancing driving safety by alerting you to potential tire issues. It features high-precision measurements, support for 2-wheel and 4-wheel modes, and various alarm functions.
2. Package Contents
Verify that all items are present in your package:
- TPMS Monitor Display (3.5-inch)
- 4 External Tire Pressure Sensors
- Removable Mounting Bracket
- USB Type-C Charging Cable
- User Manual
- Wrench and Anti-theft Nuts (for sensors)

Image 1: Airpuxem TPMS Monitor and four external sensors. The monitor displays tire pressure and temperature for all four wheels, along with battery status and signal strength.
3. Specifications
| Feature | Description |
|---|---|
| Model | TYH11-EU6-ZQ |
| Display Size | 3.5 inches |
| Pressure Accuracy | ±0.01 bar |
| Pressure Range | 0.2 - 6.0 bar / 3 - 87 psi |
| Temperature Units | ℃ / ℉ |
| Waterproof Rating (Sensors) | IP67 |
| Charging Options | Solar, USB Type-C |
| Monitor Dimensions | 9.5 x 4 x 5.5 cm |
| Item Weight | 220 g |
4. Setup and Installation
4.1 Initial Charging
Before first use, charge the TPMS monitor for at least 2 hours using the provided USB Type-C cable. This ensures the internal battery is sufficiently charged for operation.

Image 2: The TPMS monitor supports both solar charging via its integrated panel and USB Type-C charging for initial setup or when solar power is insufficient.
4.2 Sensor Installation
- Identify each sensor: They are marked for specific wheel positions (e.g., FL for Front Left, FR for Front Right, RL for Rear Left, RR for Rear Right).
- Unscrew the original valve cap from the tire valve.
- Screw on the anti-theft nut (if using) onto the tire valve stem.
- Screw the corresponding sensor onto the tire valve stem until it is hand-tight.
- Tighten the anti-theft nut against the sensor using the provided wrench.
- Repeat for all four tires.
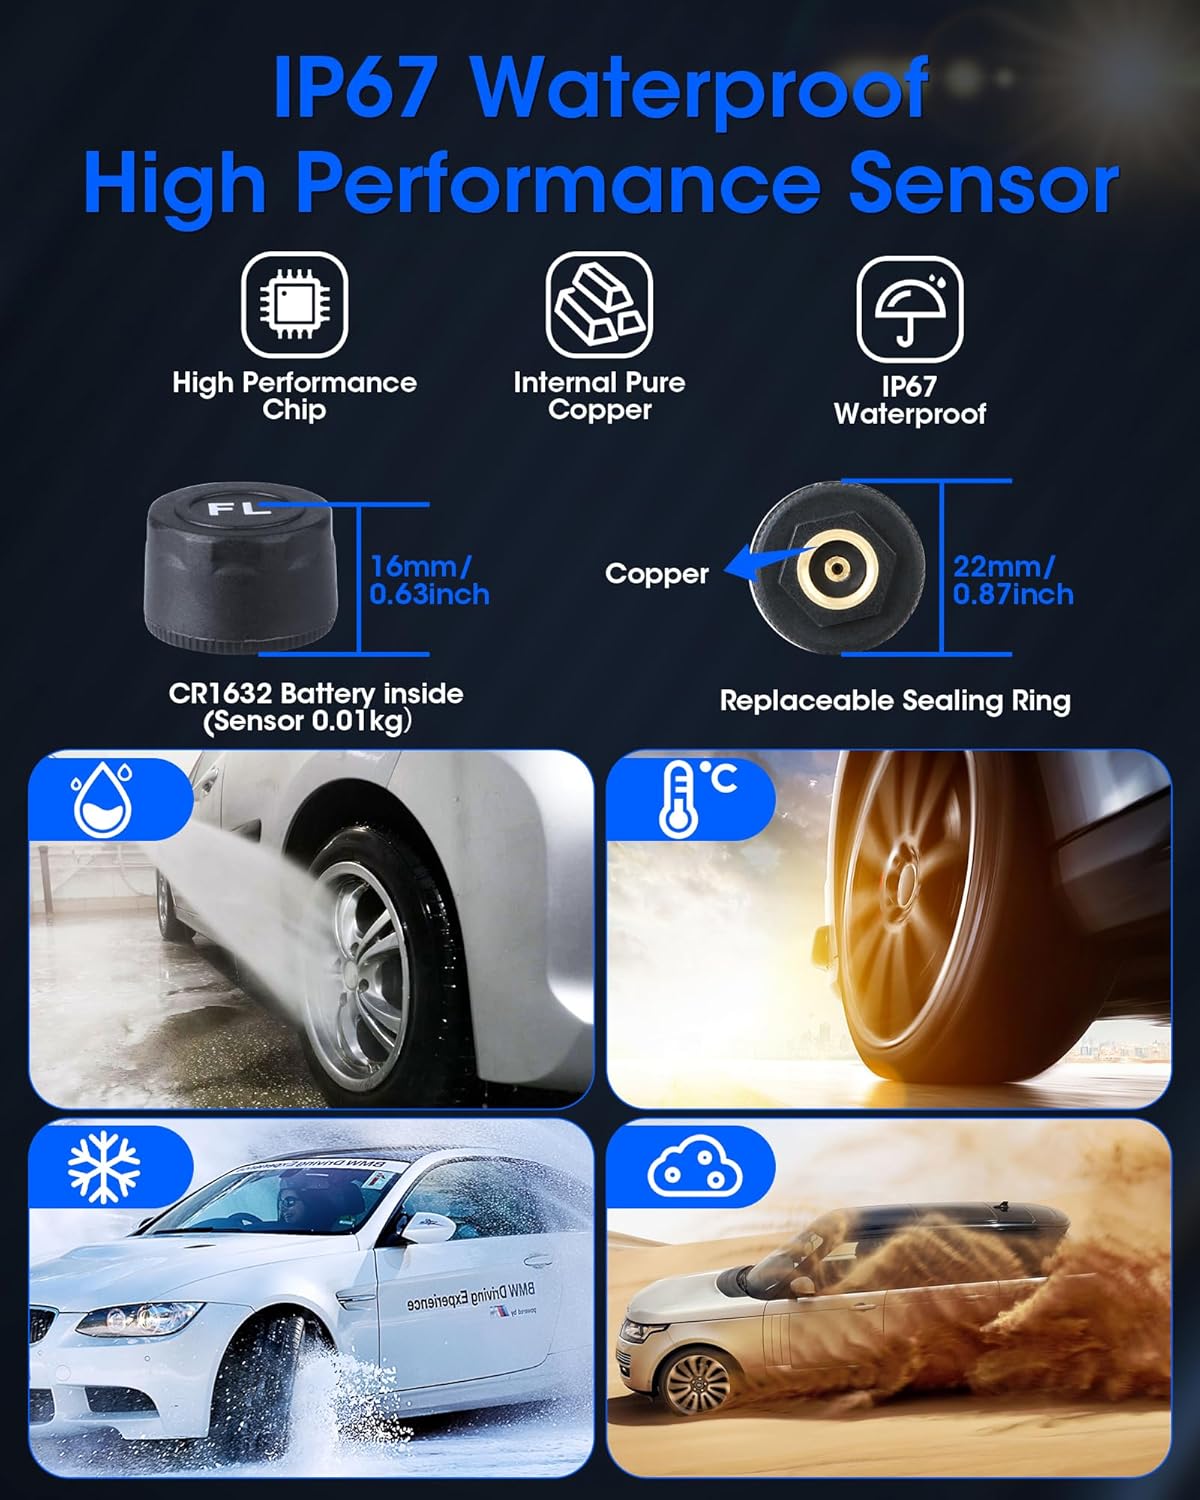
Image 3: Detail of an IP67 waterproof sensor, highlighting its robust design with internal pure copper components for reliable performance in various weather conditions.
4.3 Monitor Placement
The monitor comes with a removable bracket, offering two primary placement options:
- Windshield Mounting: Attach the bracket to the windshield using the suction cup.
- Dashboard Mounting: Place the bracket on the dashboard.
Adjust the angle of the monitor (up to 45° tilt) for optimal visibility. The monitor can be easily removed from the bracket for USB charging or parameter adjustments.

Image 4: The TPMS monitor can be mounted on the windshield or dashboard using its removable bracket, allowing for flexible positioning and easy removal.
5. Operating Instructions
5.1 Power On/Off and Automatic Operation
The monitor features an automatic vibration detection function. It will automatically power on when vibration is detected (e.g., when the vehicle starts moving) and enter sleep mode after 5 minutes of no vibration. Do not manually turn off the display when this feature is active to ensure continuous monitoring.

Image 5: The monitor automatically activates upon detecting vibration and enters sleep mode after 5 minutes of inactivity, conserving power.
5.2 Display and Brightness Adjustment
The 3.5-inch LCD color screen displays real-time tire pressure and temperature. You can adjust the screen brightness to one of three levels (High, Medium, Low) to suit different driving environments and lighting conditions.

Image 6: The 3.5-inch LCD screen offers three brightness settings (High, Medium, Eye Protection) for optimal visibility in various driving conditions.
5.3 2-Wheel / 4-Wheel Mode Switching
The system supports both 2-wheel and 4-wheel modes, making it suitable for small 2-wheel trailers and 4-wheel vehicles. If only two sensors are installed (e.g., for a 2-wheel trailer), switch the monitor to 2-wheel mode to prevent unnecessary alarms. The maximum effective distance between a sensor and the monitor for a trailer is less than 19.7 meters (approximately 64.6 feet).

Image 7: The system supports both 2-wheel (trailer) and 4-wheel (car) modes, allowing for flexible use across different vehicle types.
5.4 Setting Alarm Values
The TPMS allows for individual adjustment of high and low pressure alarm values for front and rear wheels. This feature accommodates vehicles that require different pressure settings for different axles. You can also select between Celsius (℃) and Fahrenheit (℉) for temperature display. The pressure range for settings is 0.2-6.0 bar or 3-87 psi.
The system features six distinct alarm modes:
- Fast Leak Alarm
- High Pressure Alarm
- High Temperature Alarm
- Loss of Sensor Alarm
- Sensor Low Battery Alarm
- Sensor Failure Alarm
Refer to the on-screen menu for detailed instructions on how to navigate and adjust these settings.
6. Maintenance
6.1 Sensor Care
The sensors are IP67 waterproof, meaning they are protected against dust and temporary immersion in water. You do not need to remove them when washing your car. Periodically check the sensors for any physical damage or loose connections.
Sensor batteries (CR1632) are replaceable. Refer to the troubleshooting section or contact support for instructions on battery replacement.
6.2 Monitor Cleaning
Clean the monitor display with a soft, dry cloth. Avoid using abrasive cleaners or solvents that could damage the screen or casing.
6.3 Charging
While the monitor supports solar charging, it is recommended to periodically charge it via the USB Type-C port, especially during periods of low sunlight or frequent use, to ensure optimal battery life.
7. Troubleshooting
| Problem | Possible Cause | Solution |
|---|---|---|
| Monitor not turning on automatically. | Vibration detection off, low battery. | Ensure vibration detection is enabled. Charge the monitor via USB-C. |
| No tire pressure reading. | Sensor not installed correctly, sensor battery low/dead, sensor failure, out of range. | Re-install sensor. Check sensor battery. Replace sensor if faulty. Ensure monitor is within range of sensors. |
| Inaccurate pressure readings. | Sensor not fully tightened, incorrect unit setting. | Ensure sensors are securely tightened. Verify pressure unit (bar/psi) setting. |
| Frequent alarms. | Alarm thresholds set too narrow, actual tire issue. | Adjust high/low pressure alarm values. Check actual tire pressure and condition. |
| Monitor battery drains quickly. | Insufficient solar charging, high brightness setting. | Charge via USB-C. Reduce screen brightness. Ensure solar panel is clean and exposed to sunlight. |
8. Warranty and Support
This Airpuxem TPMS system comes with a 12-month warranty from the date of purchase.
If you encounter any issues with the system or require assistance, please contact customer support via the email address provided in the product packaging or original instructions. When contacting support, please provide your model number (TYH11-EU6-ZQ) and a detailed description of the issue.