1. Introduction
This manual provides essential instructions for the installation, operation, and maintenance of your ToiCottage JR-RX-12V or JR1630RX-12V Bluetooth Remote Control Receiver. This receiver is designed for use in kids' electric ride-on vehicles, enabling remote control functionality. The JR-RX-12V and JR1630RX-12V models are functionally identical and interchangeable.
2. Safety Information
- Always disconnect the vehicle's battery before installing or replacing the receiver.
- Ensure all connections are secure and correctly polarized to prevent damage to the receiver or vehicle.
- Do not expose the receiver to moisture, extreme temperatures, or direct sunlight.
- This product is an electrical component. Installation should be performed by an adult or under adult supervision.
- Verify the voltage and current ratings of your vehicle's system match the receiver's specifications.
3. Product Overview
The JR-RX-12V / JR1630RX-12V is a compact control box that acts as the mainboard for receiving signals from a Bluetooth remote control, translating them into commands for the ride-on car's motors. It features clearly labeled ports for power input, motor connections, and other accessories.

Figure 3.1: Top view of the JR-RX-12V receiver, displaying its model number, supply voltage (DC 12V), load current (Max 20A), and frequency range (2.405GHz-2.485GHz). Various connection ports are visible on the sides.
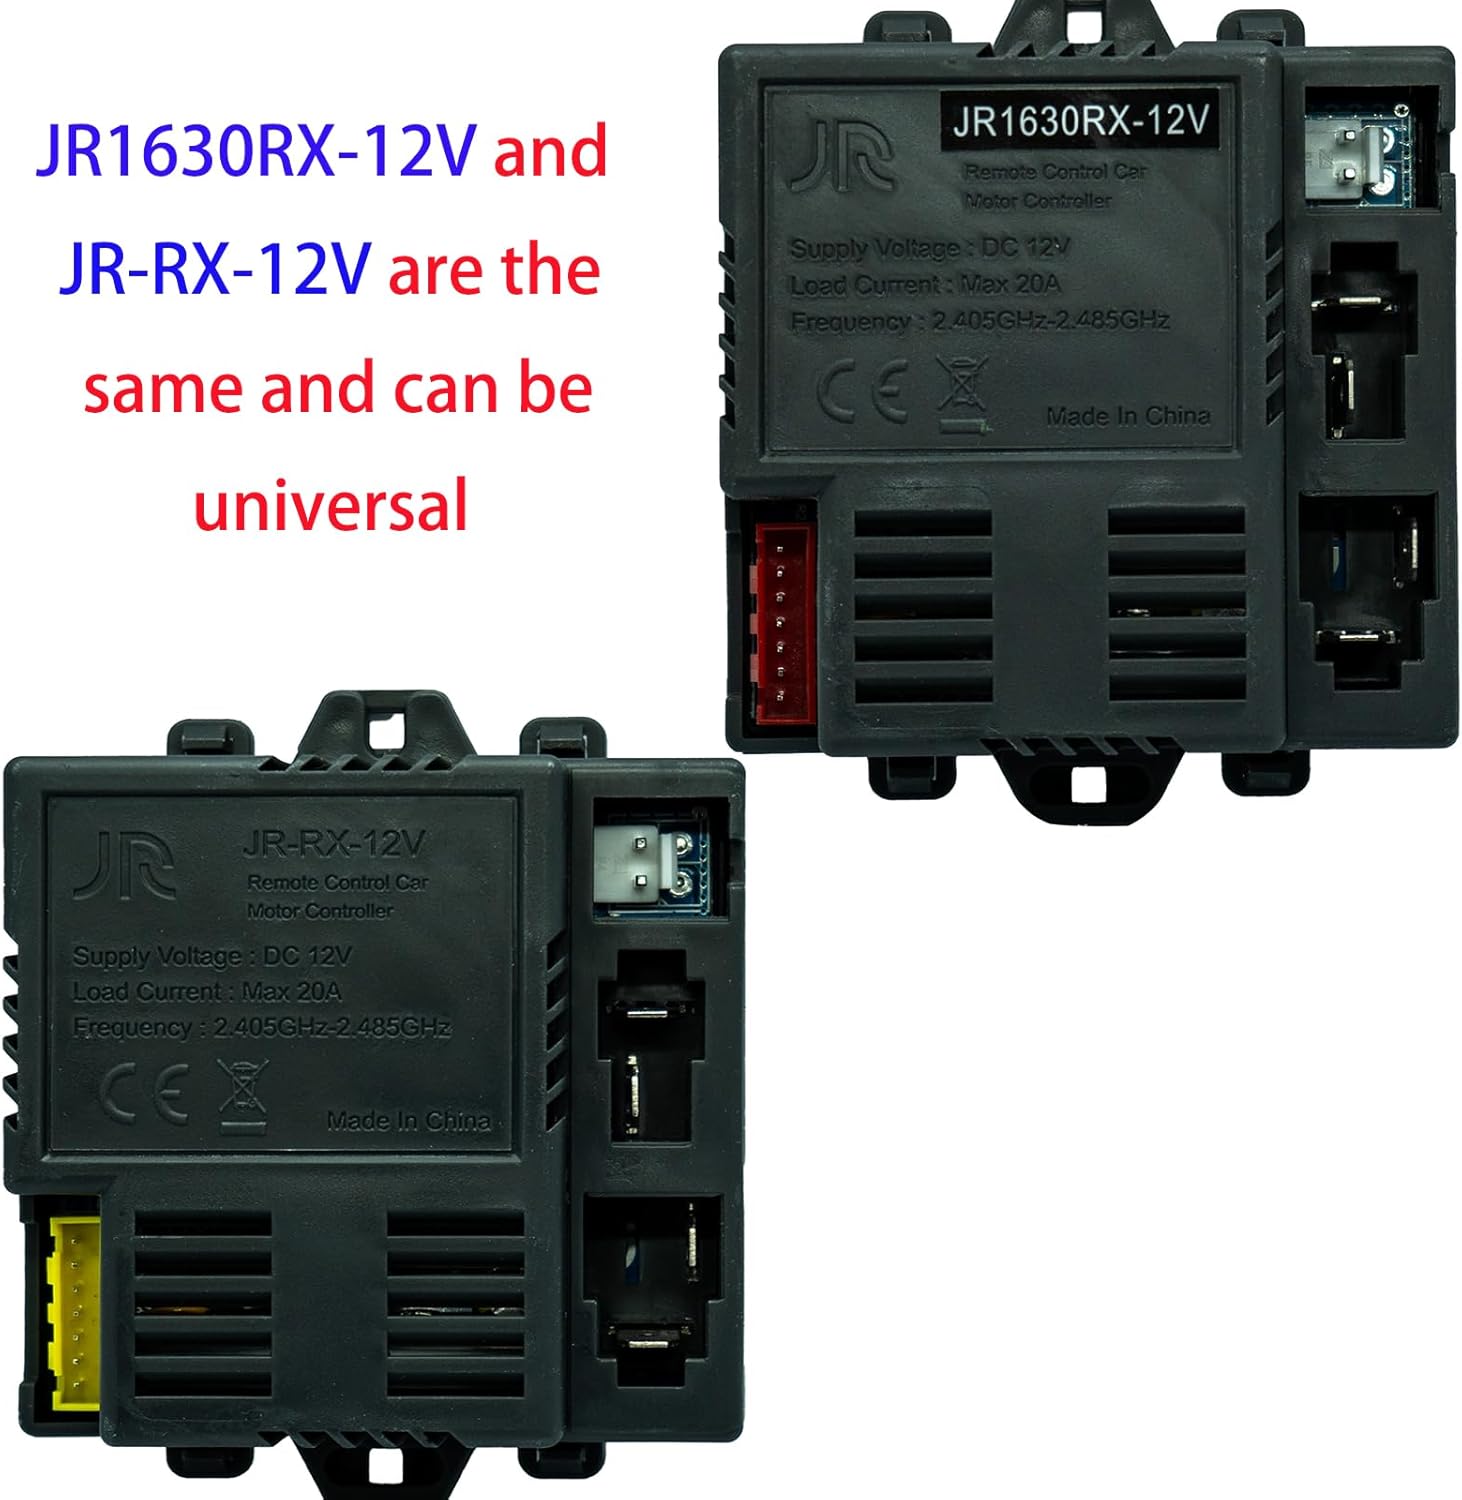
Figure 3.2: This image illustrates that the JR1630RX-12V and JR-RX-12V models are identical in function and can be used interchangeably as universal replacement parts.

Figure 3.3: Side view of the JR-RX-12V receiver, showing the yellow multi-pin connector on the left, typically used for connecting to the vehicle's main harness, and other smaller connectors on the right for various functions.
4. Setup and Installation
- Preparation: Ensure the ride-on vehicle's power is off and the battery is disconnected. Locate the existing receiver or the designated mounting area for the new receiver.
- Mounting: Secure the JR-RX-12V receiver in a dry, protected area within the vehicle, away from moving parts and excessive heat.
- Wiring Connections:
- Power Input: Connect the vehicle's 12V power supply to the designated power input port on the receiver. Observe correct polarity (positive to positive, negative to negative).
- Motor Connections: Connect the motor wires to the corresponding output ports on the receiver. Refer to your vehicle's wiring diagram for specific motor connections (e.g., left motor, right motor).
- Steering/Other Functions: Connect any additional wires for steering, lights, or other accessories to their respective ports as indicated by the vehicle's wiring. The yellow multi-pin connector is typically for the main harness.
- Final Check: Double-check all connections for security and correct polarity. Ensure no loose wires are present.
- Reconnect Battery: Once all connections are verified, reconnect the vehicle's battery.
5. Operating Instructions
After successful installation, the receiver needs to be paired with its compatible Bluetooth remote control.
- Power On: Turn on the ride-on vehicle's main power switch.
- Initiate Pairing: On the remote control, press and hold the pairing button (often labeled 'Code', 'Pair', or a specific symbol) for a few seconds. The indicator light on the remote should start flashing.
- Confirm Pairing: The vehicle's lights or a specific indicator on the receiver may flash or change state to confirm successful pairing. Once paired, the remote control's indicator light should become solid.
- Test Functionality: Test all functions of the remote control (forward, reverse, left, right, speed settings) to ensure proper operation before allowing use by a child.
Note: Pairing procedures may vary slightly depending on the specific remote control model. Refer to your remote control's manual for detailed pairing instructions if needed.
6. Maintenance
- Keep the receiver clean and free from dust and debris. Use a soft, dry cloth for cleaning.
- Regularly inspect wiring connections for any signs of wear, corrosion, or looseness.
- Ensure the receiver is not exposed to water or other liquids, as this can cause electrical damage.
- Store the vehicle and its components in a dry environment when not in use.
7. Troubleshooting
- Vehicle Not Responding to Remote:
- Check if the vehicle's power is on.
- Ensure the remote control has fresh batteries.
- Attempt to re-pair the remote control with the receiver (refer to Section 5).
- Verify all wiring connections to the receiver are secure.
- No Power to Vehicle:
- Check the vehicle's main battery charge level.
- Inspect the main power fuse (if applicable) in the vehicle.
- Ensure the power input wires to the receiver are correctly connected and receiving 12V.
- Intermittent Operation:
- Check for loose or corroded wiring connections.
- Ensure there are no strong radio interference sources nearby.
8. Specifications
| Feature | Specification |
|---|---|
| Model Numbers | JR-RX-12V, JR1630RX-12V |
| Supply Voltage | DC 12V |
| Load Current | Max 20A |
| Frequency | 2.405GHz - 2.485GHz |
| Product Dimensions | 0.5 x 0.9 x 1.8 inches |
| Item Weight | 0.48 ounces |
| Manufacturer | Toi Cottage |
9. Warranty and Support
For warranty information or technical support, please contact the retailer or manufacturer directly. Keep your purchase receipt as proof of purchase. Do not attempt to open or modify the receiver, as this may void the warranty and could cause damage to the unit or vehicle.