1. Introduction
This manual provides detailed instructions for the operation, maintenance, and safety of your VEVOR 20-Amp Smart Battery Charger, Model GS280C. This charger is designed for various battery types, including Lithium, LiFePO4, and Lead-Acid (AGM/Gel/SLA) batteries, offering multiple charging modes and safety features.

Image: The VEVOR 20-Amp Smart Battery Charger, showing its main unit with an LCD display and the included red and black battery clamps.
2. Safety Information
Always observe the following safety precautions to prevent injury or damage to the charger or battery:
- Read all instructions before using the charger.
- Use the charger in a well-ventilated area.
- Do not expose the charger to rain or excessive moisture.
- Ensure the charger is disconnected from the power outlet before making or breaking connections to the battery.
- Connect the positive (red) clamp to the positive (+) battery terminal and the negative (black) clamp to the negative (-) battery terminal. For vehicle batteries, connect the negative clamp to the vehicle chassis away from the battery and fuel line if the battery is not removed from the vehicle.
- Avoid sparks when connecting or disconnecting the clamps.
- Do not charge frozen batteries.
- This charger is not a jump starter. Do not attempt to use it for jump-starting vehicles.
- Keep out of reach of children.

Image: Diagram illustrating the safety features of the VEVOR Smart Battery Charger, including overheat, over-current, short-circuit, reverse polarity, and over-voltage protection, along with intelligent cooling.
3. Product Overview
The VEVOR Smart Battery Charger GS280C features a user-friendly interface and robust design for versatile battery charging and maintenance.
3.1 Compatible Battery Types
- Lead-Acid Batteries (6V/12V/24V): AGM, Gel, SLA, Flooded
- Lithium Batteries (12V/24V)
- LiFePO4 Batteries (12V/24V)
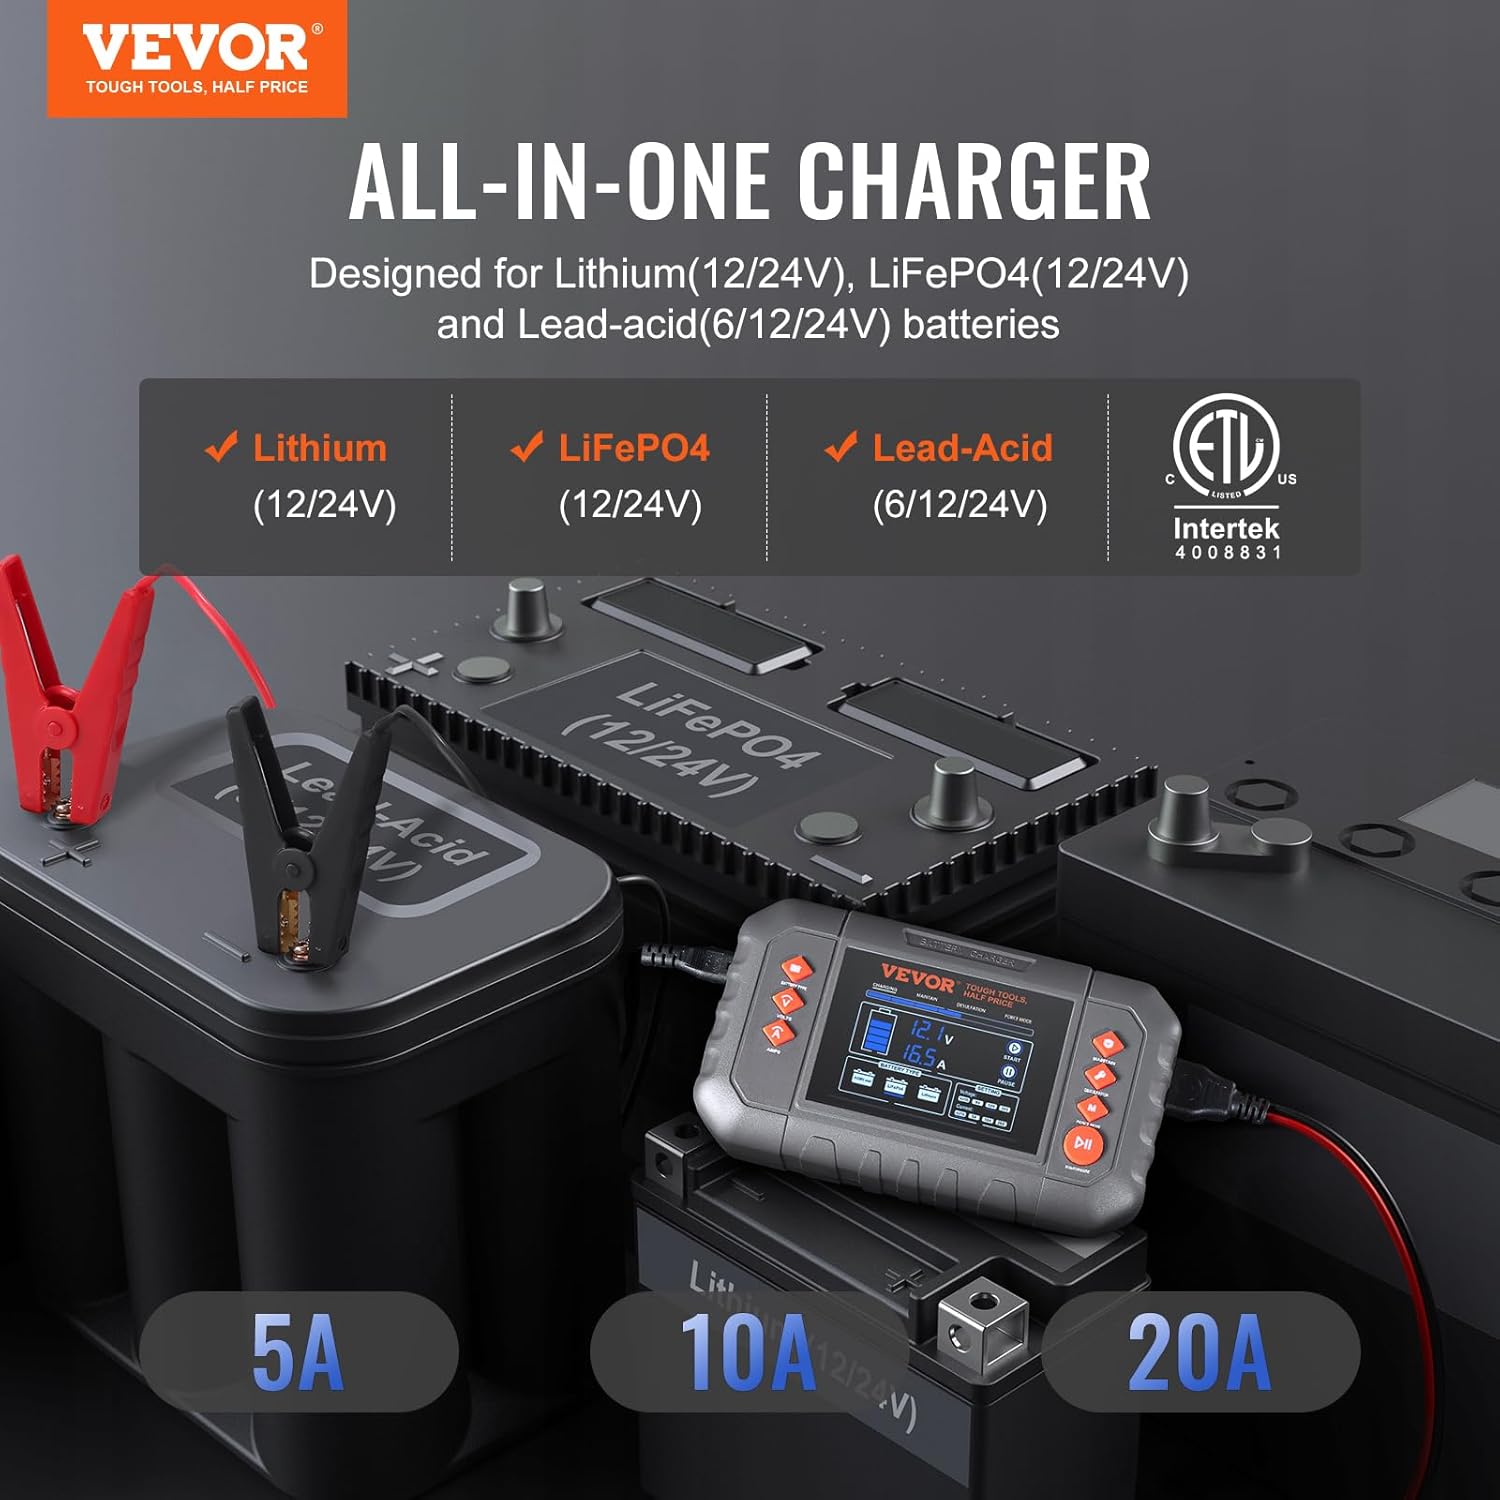
Image: The VEVOR charger connected to various battery types, highlighting its compatibility with Lithium, LiFePO4, and Lead-Acid (6V/12V/24V) batteries.
3.2 LCD Display and Controls
The charger is equipped with a 3.6-inch LCD screen that provides real-time information on charging status, battery voltage, current, and power percentage. Independent buttons allow for easy mode selection and setting adjustments.
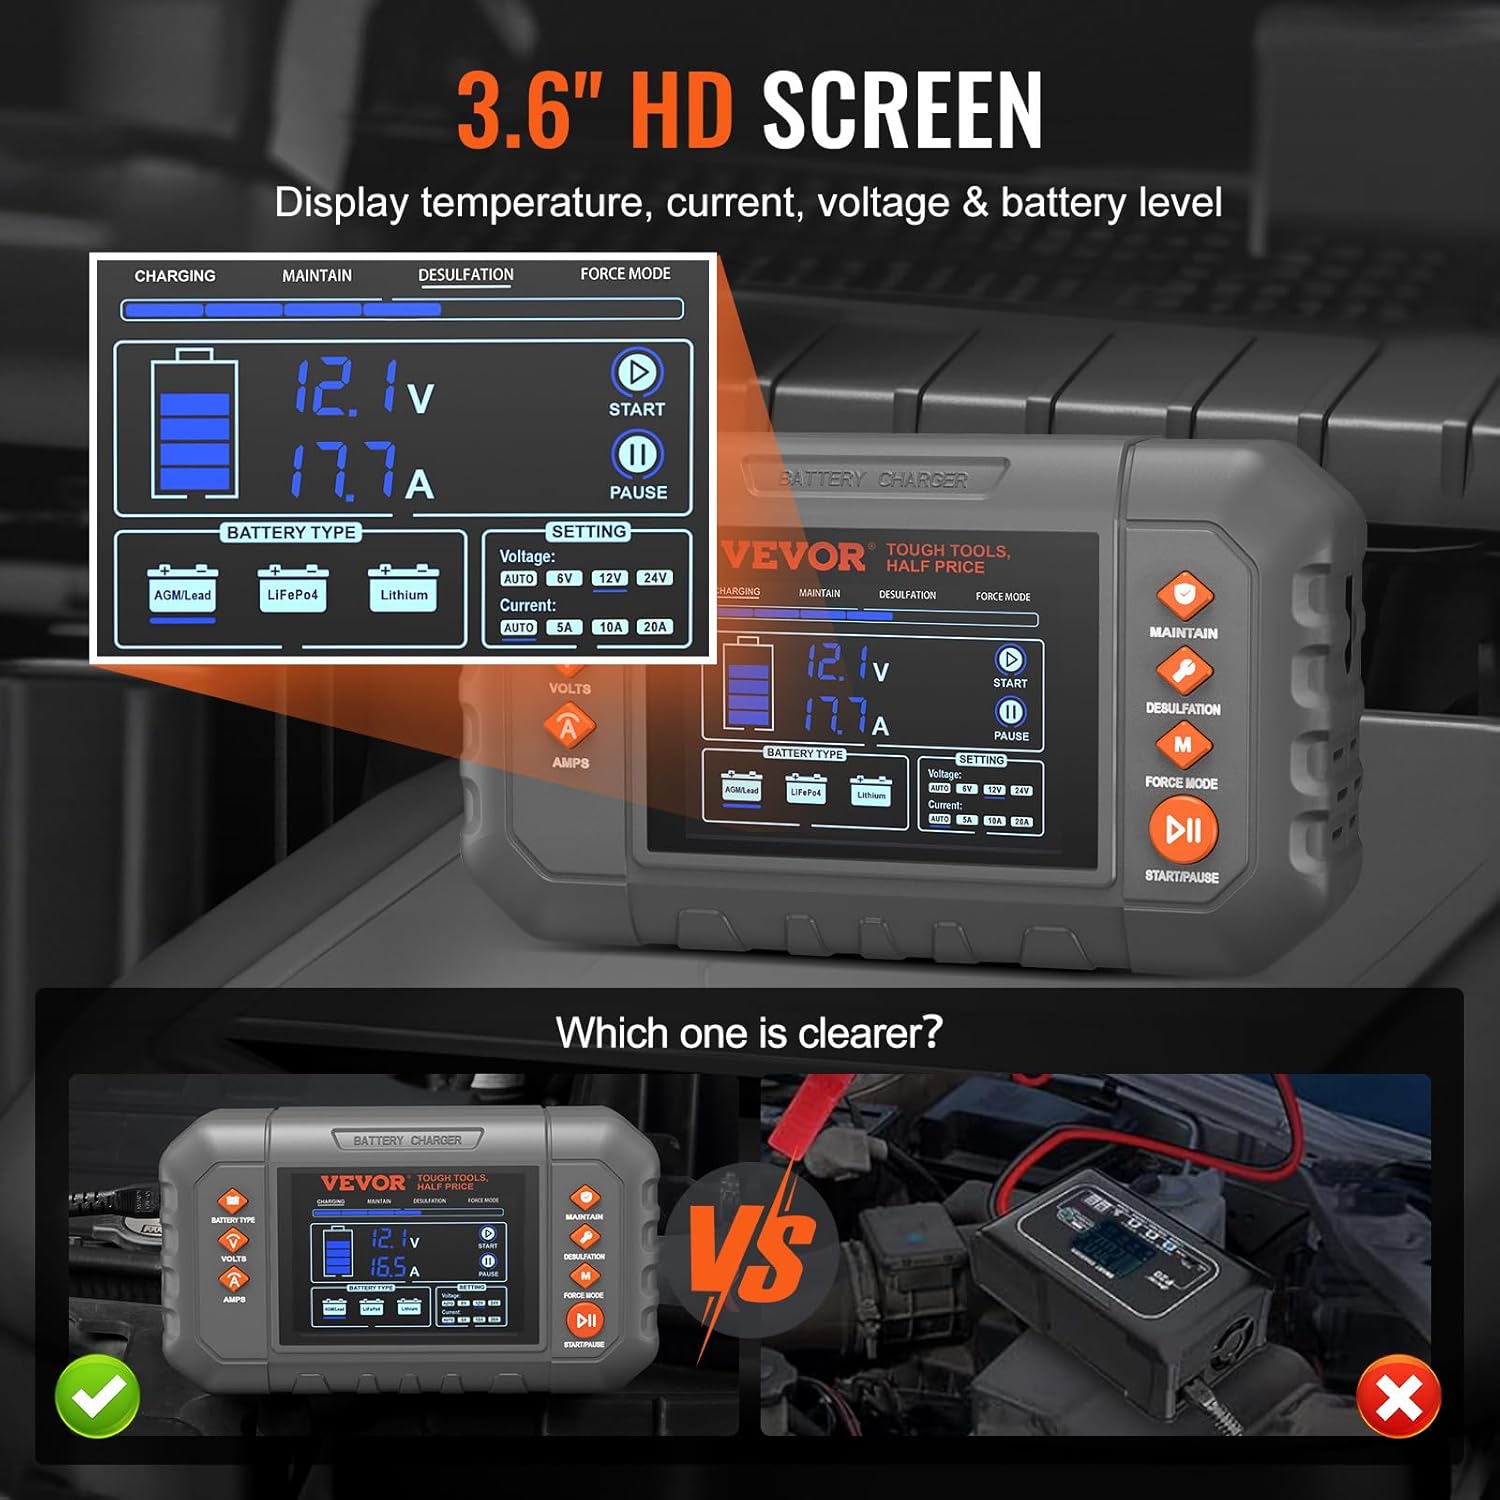
Image: A detailed view of the charger's 3.6-inch HD LCD screen, displaying battery voltage, current, and battery level, along with settings for voltage and current.
4. Setup and Connection
Follow these steps to safely connect the charger to your battery:
- Prepare the Battery: Ensure the battery terminals are clean and free of corrosion.
- Connect Battery Clamps:
- Connect the red positive (+) clamp to the positive (+) terminal of the battery.
- Connect the black negative (-) clamp to the negative (-) terminal of the battery. If charging a battery installed in a vehicle, connect the black clamp to a metal part of the vehicle chassis away from the battery and fuel line.
- Connect to Power: Plug the charger's power cord into a standard AC (100-240V) power outlet. The charger will power on and display the current battery status.

Image: A visual guide demonstrating the four simple steps to use the charger: plug into power, select battery type and program, adjust voltage and current, and connect alligator clips to the battery.
4.1 Accessory Options
The charger comes with both alligator clips and copper wire terminals for flexible connection options.
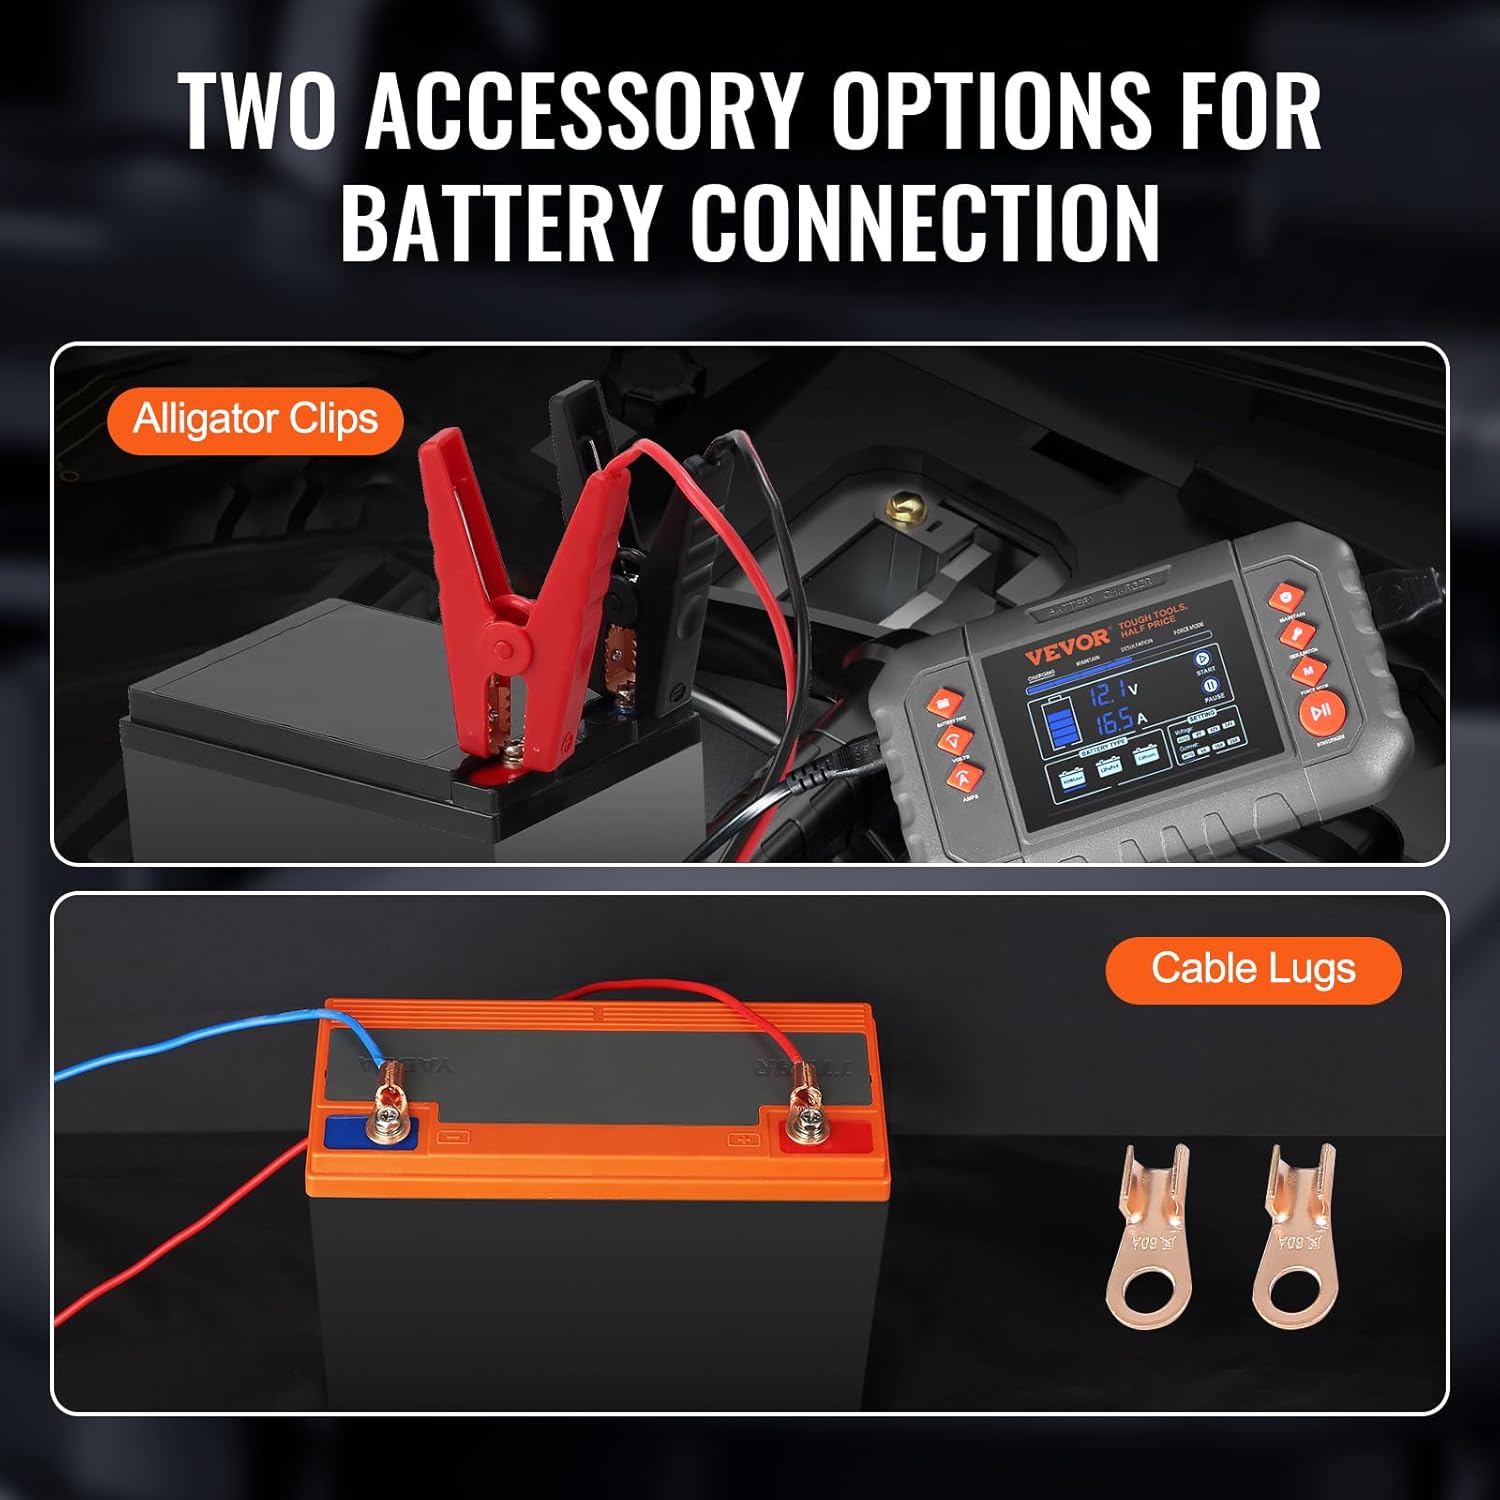
Image: The two accessory options for battery connection: standard alligator clips and copper cable lugs for more permanent installations.
5. Operating Modes
The VEVOR Smart Battery Charger offers four distinct operating modes to suit various battery needs:

Image: A visual representation of the four selectable modes: Charging, Maintain, Desulfation (Restoring Aging Batteries), and Force Mode (Manually begin charging batteries below 1V).
5.1 Charging Mode
This is the primary mode for charging depleted batteries. The charger automatically detects 6V, 12V, or 24V batteries and employs a 7-level intelligent charging process. Once the battery is fully charged, it automatically switches to trickle charging.
- Automatic Detection: Automatically identifies 6V, 12V, or 24V battery systems.
- Manual Selection: Allows manual selection of battery type (AGM/Lead, LiFePO4, Lithium) and charging current (AUTO, 5A, 10A, 20A).
- 7-Level Intelligent Charging: Optimizes the charging process for efficiency and battery longevity.
5.2 Maintain Mode
Designed for long-term battery maintenance, this mode sustains the charge with a lower current, preventing self-discharge and keeping the battery at optimal capacity without overcharging.
5.3 Desulfation Mode (Repair)
This mode uses pulse repair functionality to help restore sulfated or deeply discharged lead-acid batteries, potentially extending their lifespan and improving performance.
5.4 Supply Mode (Force Mode)
This mode allows manual initiation of charging for batteries with very low voltages (as low as 1V) that might not be detected by the automatic charging mode. Use with caution and monitor the battery.

Image: A graph illustrating the intelligent charging current adjustment process, showing stages like battery test, desulfation, soft start, bulk charging, absorption, maintenance, and complete.
6. Charging Process
After connecting the charger as described in Section 4:
- Select Battery Type: Use the "BATTERY TYPE" button to cycle through AGM/Lead, LiFePO4, and Lithium options until the correct type for your battery is selected.
- Select Voltage: Use the "VOLTS" button to select the appropriate voltage (AUTO, 6V, 12V, 24V). For most applications, "AUTO" is sufficient.
- Select Current: Use the "AMPS" button to select the desired charging current (AUTO, 5A, 10A, 20A). Refer to your battery's specifications for recommended charging rates.
- Start Charging: Press the "START/PAUSE" button to begin the charging process. The LCD display will show real-time charging status.
- Monitor Progress: The charger will automatically stop charging when the battery is full and switch to a maintenance charge if applicable.
- Disconnect: Once charging is complete, first unplug the charger from the AC power outlet, then disconnect the negative (black) clamp, followed by the positive (red) clamp.
6.1 Reference for Charging Time
The following table provides theoretical charging times for various battery capacities. Actual times may vary based on battery condition and ambient temperature.

Image: A table providing estimated charging times in hours for various battery capacities (Ah) at different voltages and charging currents (e.g., 6V5A, 12V10A, 24V10A).
7. Maintenance
To ensure the longevity and optimal performance of your VEVOR Smart Battery Charger:
- Cleaning: Wipe the charger casing with a dry, soft cloth. Do not use abrasive cleaners or solvents.
- Storage: Store the charger in a cool, dry place when not in use. Keep cables neatly coiled.
- Inspection: Periodically inspect the cables and clamps for any signs of damage, wear, or corrosion. Replace if necessary.
- Ventilation: Ensure the charger's ventilation openings are clear of obstructions during operation to prevent overheating.
8. Troubleshooting
If you encounter issues with your charger, refer to the following common problems and solutions:
| Problem | Possible Cause | Solution |
|---|---|---|
| Charger does not power on. | No AC power; faulty power cord. | Check power outlet and connections. Ensure power cord is not damaged. |
| Charger displays an error code or does not start charging. | Incorrect battery connection (reverse polarity); battery voltage too low; incorrect mode selected. | Verify correct polarity of clamps. Use "Supply Mode" for very low voltage batteries. Ensure correct battery type and voltage are selected. |
| Charger gets hot during operation. | Normal operation; obstructed ventilation. | Some heat is normal. Ensure ventilation openings are clear. If excessively hot, disconnect and allow to cool. |
| Charging takes too long. | Battery capacity is large; low charging current selected; battery is deeply discharged. | Increase charging current if battery allows. Refer to charging time table. |
9. Specifications
| Feature | Detail |
|---|---|
| Model Number | GS280C |
| Input Voltage | AC 100-240V, 50/60 Hz |
| Max. Charging Current | 20A |
| Charging Current Options | 5A (6V), 10A (6V), 5A (12V), 10A (12V), 20A (12V), 5A (24V), 10A (24V), Auto (6V, 12V, 24V) |
| Output Voltage (DC) | 14.4 Volts (typical) |
| Low Voltage Detection | 1V (6V), 8V (12V), 16V (24V) |
| Product Dimensions | 6.5"D x 3.8"W x 2.2"H (165 x 96 x 55 mm) |
| Item Weight | 1.8 lbs / 0.8 kg |
| Ambient Temperature | -4°F to 104°F (-20°C to 40°C) |
| Ventilation | Fan Cooled |
| Power Cord Length | 9.8 ft / 3 m |

Image: A visual representation of the charger's dimensions and a summary of its technical specifications, including model number, input voltage, charging currents, and environmental conditions.
10. Package Contents
Upon unpacking, ensure all the following items are present:
- 1 x VEVOR Smart Battery Charger (Model GS280C)
- 1 x Power Cord (9.8 ft / 3 m)
- 1 x Set of Battery Clamps (Alligator Clips)
- 2 x Copper Wire Terminals (Cable Lugs)
- 1 x User Manual (this document)

Image: The VEVOR Smart Battery Charger displayed with its complete set of accessories, including the power cord, battery clamps, and copper wire terminals.
11. Warranty and Support
For warranty information and technical support, please refer to the official VEVOR website or contact VEVOR customer service directly. Keep your purchase receipt for warranty claims.
Note: The manufacturer's warranty typically covers defects in materials and workmanship under normal use. Damage resulting from misuse, neglect, or unauthorized modifications may not be covered.