
navfalcon Camera Detectors
navfalcon Hidden Camera Detector User Manual
Model: Camera Detectors
Brand: navfalcon
Introduction
The navfalcon Hidden Camera Detector is a professional device designed to protect your privacy by detecting various hidden devices. It features three primary detection functions: Camera Detection, GPS Tracking Detection, and Infrared Detection. With its upgraded smart chip, it offers faster and more accurate detection, ensuring your privacy in various environments such as hotels, meeting rooms, bathrooms, and offices.

Figure 1: navfalcon Hidden Camera Detector (Model: Camera Detectors)
Setup
Before first use, ensure the device is fully charged. The detector comes with a built-in Lithium Polymer battery. Connect the device to a power source using the provided charging cable. The charging indicator will show the charging status.
Components Overview:
- Main Detector Unit: Houses the controls, display, and primary sensors.
- RF Antenna: Used for detecting wireless signals.
- Magnetic Probe: Connects to the unit for detecting magnetic fields from GPS trackers.
- Infrared Viewfinder: Integrated into the unit for visual detection of hidden camera lenses.
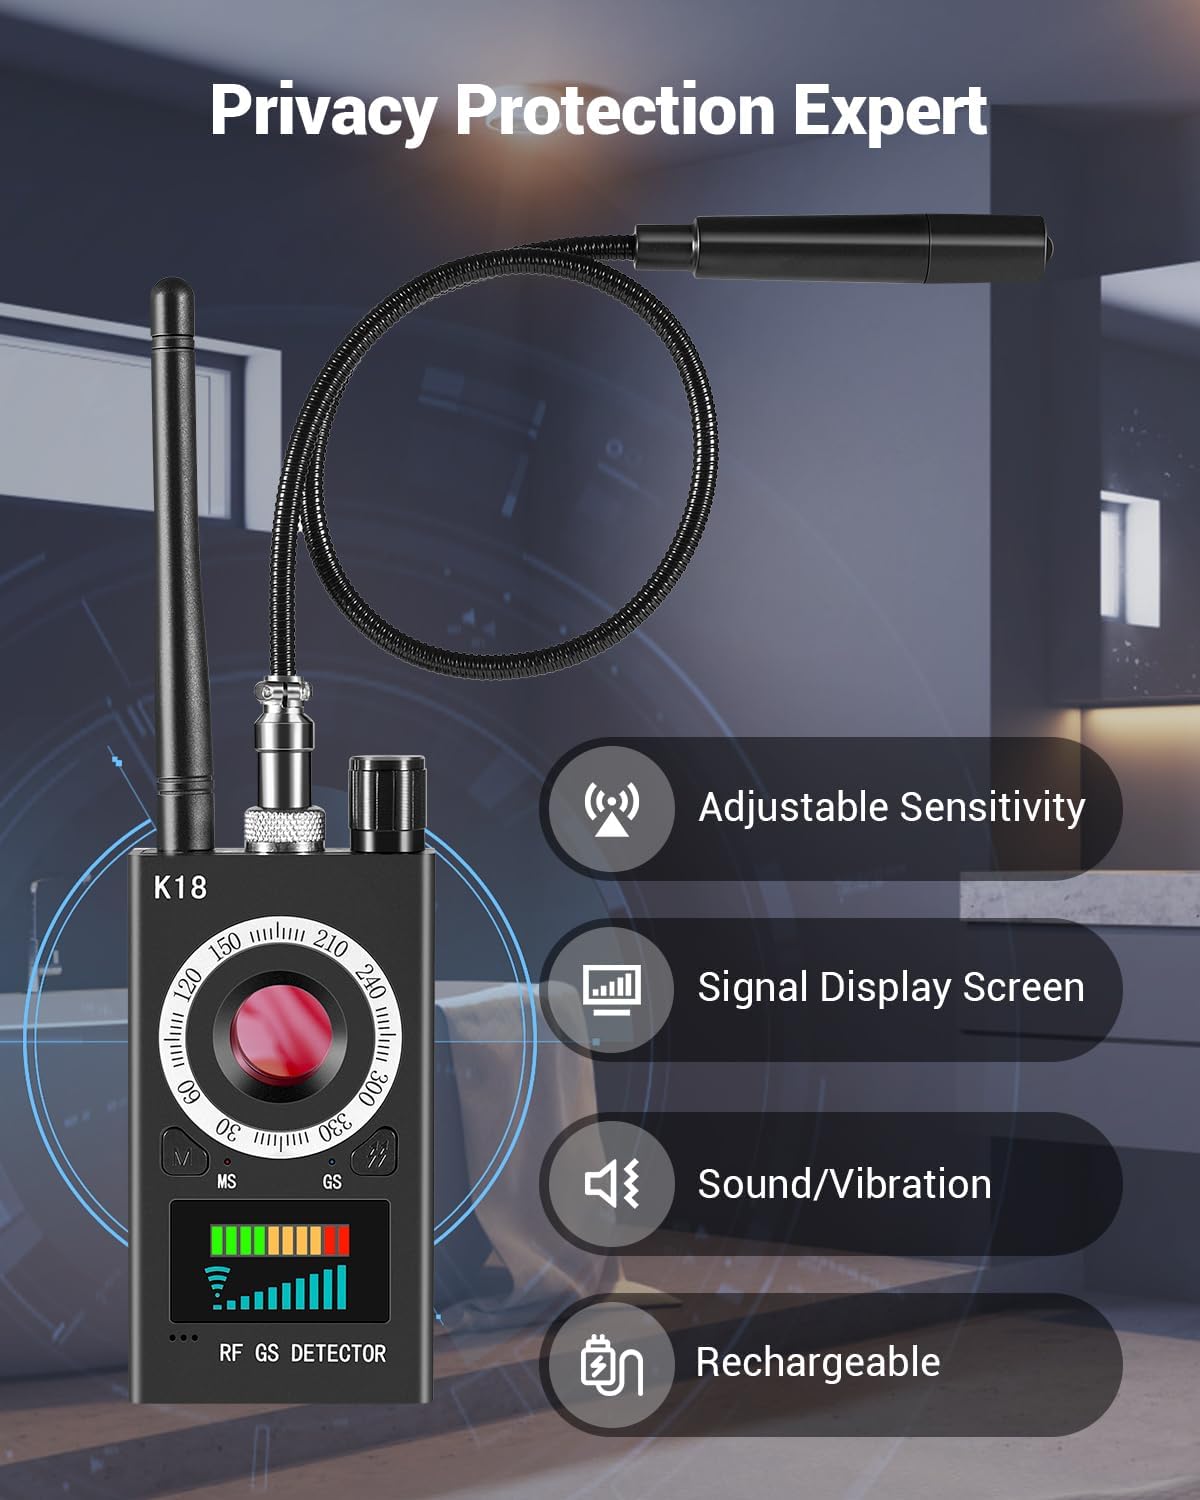
Figure 2: Key features of the navfalcon detector including adjustable sensitivity and signal display.
Operating Instructions
1. RF Detection Mode (Wireless Camera & Eavesdropping Device Detection)
This mode is used to detect wireless cameras, eavesdropping devices, and other RF signal-emitting hidden devices. The device will indicate the presence and strength of RF signals.
- Turn on the device.
- Press the "Mode Button" to select RF detection mode.
- Adjust the sensitivity using the "Sensitivity Adjustment Button" or rotary knob. Start with higher sensitivity and decrease it as you get closer to a signal source to pinpoint its location.
- Slowly scan the area. The signal display screen will show the strength of detected signals. An audible alert or vibration will also indicate detection.
- Move closer to areas where the signal strength increases to locate the hidden device.

Figure 3: Using the RF Detection Mode in a typical environment.
Video 1: Demonstration of the Hidden Camera Detector's RF detection capabilities.
2. Magnetic Field Detection Mode (GPS Tracker Detection)
This mode is specifically designed to detect magnetic GPS trackers, which are often covertly attached to vehicles or other metal surfaces.
- Attach the magnetic probe to the main unit.
- Select the Magnetic Field Detection Mode.
- Slowly move the magnetic probe along surfaces where a GPS tracker might be hidden, such as under a car, inside wheel wells, or in the trunk.
- The device will alert you with an audible sound or vibration when a magnetic field is detected, indicating the presence of a tracker.

Figure 4: Detecting a GPS tracker using the magnetic probe.

Figure 5: Visual representation of magnetic field detection in a vehicle.
3. Infrared Detection Mode (Hidden Camera Lens Detection)
This mode helps locate hidden cameras by identifying their lenses, even if they are not actively transmitting signals, especially those with night vision capabilities.
- Select the Infrared Detection Mode.
- Look through the integrated viewfinder on the device.
- Slowly scan the area, paying close attention to objects, walls, and furniture. Hidden camera lenses will appear as bright red dots when viewed through the viewfinder.
- The device emits infrared light that reflects off camera lenses, making them visible.

Figure 6: Using the Camera Detection Mode to identify hidden camera lenses.
Maintenance
- Keep the device clean by wiping it with a soft, dry cloth. Avoid using abrasive cleaners or solvents.
- Store the detector in a cool, dry place away from direct sunlight and extreme temperatures.
- Ensure the battery is charged periodically, even if not in use, to maintain battery health. The device offers a standby time of up to 30 days on a full charge.
- Handle the antenna and magnetic probe with care to prevent damage.
Troubleshooting
| Problem | Possible Cause | Solution |
|---|---|---|
| No detection in RF mode. | Low sensitivity setting; no active RF signals; device malfunction. | Increase sensitivity. Ensure there are active wireless devices nearby for testing. Recharge device. Contact support if issue persists. |
| False positives in RF mode. | High sensitivity setting; interference from common household electronics (Wi-Fi routers, cell phones). | Decrease sensitivity. Move away from known signal sources. |
| Magnetic probe not detecting. | Probe not properly connected; no magnetic GPS tracker present. | Ensure probe is securely connected. Test on a known magnetic object. |
| Infrared detection not working. | Insufficient darkness; no hidden camera lens present. | Perform detection in a dimly lit or dark room for best results. Ensure you are scanning thoroughly. |
Specifications
| Feature | Detail |
|---|---|
| Product Dimensions | 5 x 2 x 2 inches |
| Item Weight | 10.5 ounces |
| Item Model Number | Camera Detectors |
| Batteries | 1 Lithium Polymer batteries required (included) |
| Power Source | Battery Powered |
| Display Type | LED |
| Manufacturer | navfalcon |
| Date First Available | December 19, 2023 |
Warranty and Support
navfalcon provides a one-year warranty for defective products. If you encounter any issues with your Hidden Camera Detector, please do not hesitate to contact our customer support team. We are committed to providing excellent after-sales service and will respond to your inquiries within 24 hours.
For further assistance, please visit the official navfalcon store: navfalcon Store on Amazon.
Related documentsCamera Detectors


Ask a question about this manual
Ask about setup, troubleshooting, compatibility, parts, safety, or missing instructions. Manuals+ will review the question and use this page’s manual context to help answer it.