Introduction
This manual provides detailed instructions for the installation, operation, and maintenance of your GRIFEMA GB2001A-2 Dual Monitor Mount. This product is designed to enhance your workspace by providing an ergonomic and space-saving solution for mounting two monitors. Please read this manual thoroughly before installation and use to ensure proper setup and safe operation.

Image: The GRIFEMA GB2001A-2 Dual Monitor Mount, showcasing its two adjustable arms and desk clamp base.
Important Safety Information
- Ensure all components are present and undamaged before installation. Do not use if any parts are missing or faulty.
- Verify that the mounting surface (desk) is strong enough to support the combined weight of the mount and your monitors.
- Do not exceed the maximum weight capacity of 10 kg (22 lbs) per arm.
- Follow all installation steps carefully. Improper installation may result in equipment damage or personal injury.
- Keep children and pets away during installation. Small parts may be a choking hazard.
- Periodically check all screws and connections to ensure they remain secure.
Package Contents
Please check to ensure all parts are included in your package:
- Main Pole and Base
- Monitor Arms (2 units)
- VESA Plates (2 units)
- Desk Clamp Assembly
- Grommet Mount Assembly (alternative)
- Cable Management Clips
- Hardware Kit (screws, washers, Allen keys)
- Instruction Manual
Specifications
| Feature | Detail |
|---|---|
| Model Number | GB2001A-2 |
| Screen Size Compatibility | 13 - 27 inches |
| Weight Capacity | Up to 10 kg (22 lbs) per arm |
| VESA Compatibility | 75x75 mm, 100x100 mm |
| Tilt Range | +90° to -90° |
| Swivel Range | 180° |
| Rotation | 360° (Portrait to Landscape) |
| Mounting Options | C-Clamp, Grommet |
| Desk Thickness (C-Clamp) | 10 - 80 mm |
| Material | Alloy Steel |
| Color | Black |

Image: Detailed measurements, weight capacity (10kg/22lbs), VESA patterns (75/100mm), and adjustment ranges (360° rotation, +/-90° tilt, +/-90° swivel) for the monitor mount.
Setup and Installation
Follow these steps to install your GRIFEMA GB2001A-2 monitor mount.
Step 1: Choose Your Mounting Option
The mount supports two installation methods: C-Clamp or Grommet Mount. Select the option best suited for your desk.
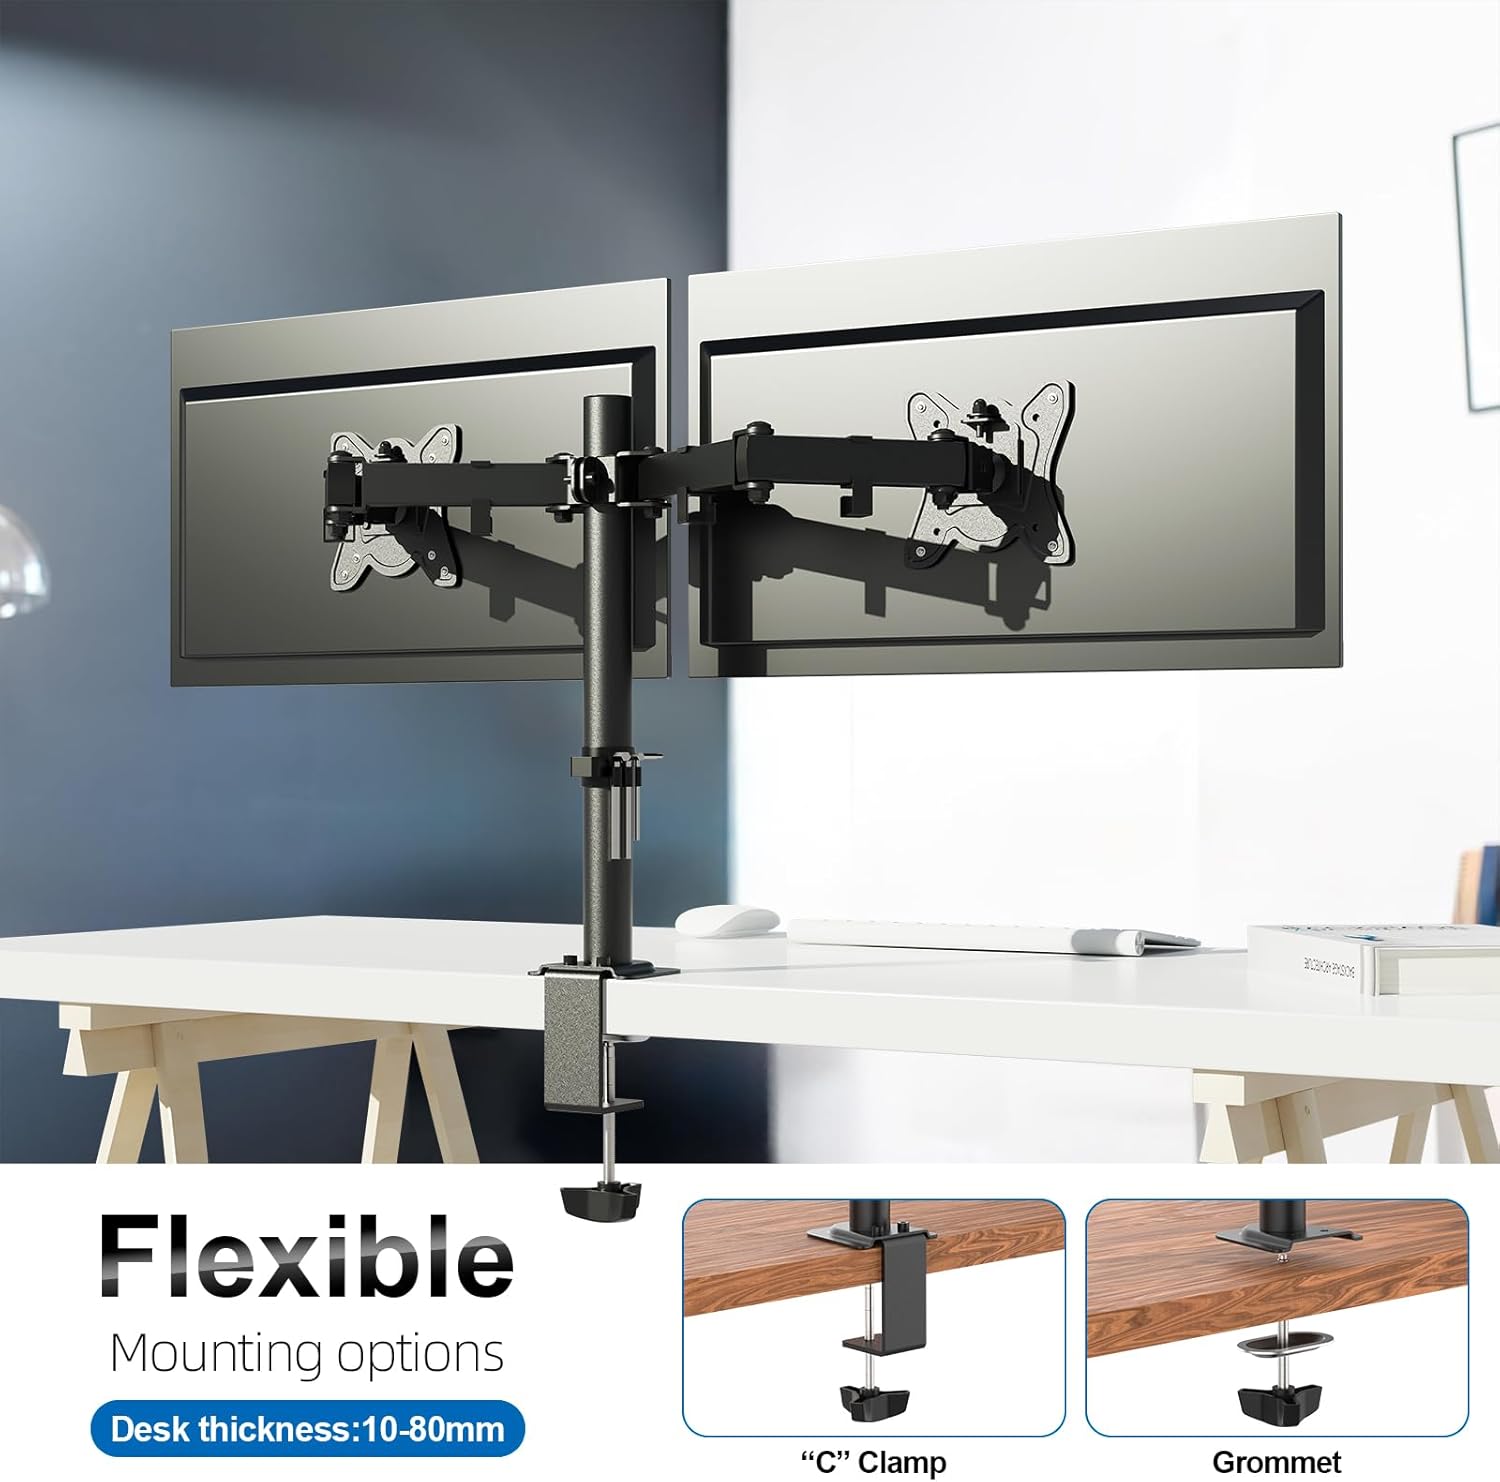
Image: Illustration of the two available mounting options: C-Clamp for desk edges and Grommet for desks with a pre-drilled hole.
C-Clamp Installation:
- Attach the C-clamp base to the bottom of the main pole.
- Position the C-clamp on the edge of your desk. Ensure the desk thickness is between 10mm and 80mm.
- Tighten the C-clamp screw firmly until the mount is stable and secure.
Grommet Mount Installation:
- If your desk has a grommet hole, insert the main pole through it.
- Secure the grommet plate and nut from underneath the desk, tightening until stable.
Step 2: Attach Monitor Arms to the Pole
Slide the monitor arm assemblies onto the main pole. Adjust their height to your preference and secure them using the provided screws or clamps.
Step 3: Attach VESA Plates to Monitors
Attach the VESA plates to the back of your monitors using the appropriate screws from the hardware kit. Ensure your monitor has VESA 75x75mm or 100x100mm mounting holes.

Image: Demonstrates the universal compatibility of the mount with 13-27 inch monitors and VESA 75x75mm or 100x100mm patterns.
Step 4: Mount Monitors to Arms
Carefully slide the monitors (with VESA plates attached) onto the monitor arms. Secure them with the locking mechanism or screws as indicated in the detailed instructions provided with the hardware kit.
Step 5: Cable Management
Utilize the integrated cable management clips along the arms and pole to route your monitor cables neatly. This helps maintain a clutter-free workspace.

Image: Close-up view of the cable management clips on the monitor mount pole, designed to organize and conceal cables.
Operating and Adjustments
The GRIFEMA GB2001A-2 mount offers extensive adjustability for optimal viewing comfort.
- Height Adjustment: Loosen the clamp on the main pole to slide the arms up or down. Re-tighten to secure at the desired height.
- Tilt Adjustment: The monitor can be tilted +90° to -90° to reduce glare and find the perfect viewing angle. Adjust the tilt mechanism on the VESA plate.
- Swivel Adjustment: Swivel the monitor arms up to 180° left or right from the pole, and the VESA plate can swivel +/-90° for flexible screen positioning.
- Rotation: Rotate your monitor 360° to switch between landscape and portrait orientations without removing the monitor.

Image: Demonstrates the easy articulation of the monitor mount, showing monitors in various tilt, swivel, and rotation positions for flexible screen placement.

Image: A dual monitor setup showcasing the adjustable VESA plate with +/-18mm adjustment, allowing for fine-tuning of monitor alignment.
Maintenance
To ensure the longevity and safe operation of your monitor mount, follow these maintenance guidelines:
- Regular Cleaning: Wipe the mount with a soft, damp cloth. Avoid abrasive cleaners or solvents that could damage the finish.
- Check Connections: Periodically (e.g., every 3-6 months) inspect all screws and bolts to ensure they are tight and secure. Re-tighten if necessary.
- Weight Limits: Do not place monitors exceeding the specified weight capacity on the arms.
- Avoid Over-tightening: While ensuring security, avoid over-tightening screws, which can strip threads or damage components.
Troubleshooting
If you encounter issues with your monitor mount, refer to the following common problems and solutions:
- Monitor sags or tilts downwards:
Solution: The tilt mechanism might not be tight enough. Use the provided Allen key to tighten the bolt on the VESA plate that controls the tilt. Ensure it is tightened firmly. - Mount feels unstable on the desk:
Solution: Re-check the C-clamp or grommet mount. Ensure it is fully tightened to the desk. Verify that your desk surface is flat and sturdy enough to support the mount and monitors. - Monitors are not level:
Solution: The VESA plates often have a small amount of rotational adjustment. Loosen the VESA plate screws slightly, adjust the monitor to be level, and then re-tighten. Some VESA plates also offer +/-18mm height adjustment for fine-tuning. - Difficulty adjusting height:
Solution: Ensure the height adjustment clamp on the main pole is sufficiently loosened before attempting to move the arms. If it's still stiff, check for any obstructions.
Warranty and Support
For warranty information or technical support, please refer to the contact details provided on the product packaging or the official GRIFEMA website. Keep your purchase receipt as proof of purchase.