Introduction
This manual provides detailed instructions for the Diivoo Sprinkler Timer 3 Zone, a programmable automatic irrigation timer designed for garden, lawn, yard, and pool watering. It features three independent outlets, rain delay, and manual/auto modes, with an IP54 waterproof rating. Please read this manual thoroughly before use to ensure proper installation and operation.
1. Setup
1.1 Package Contents
- Diivoo Sprinkler Timer 3 Zone
- User Manual
- 1/2" Inlet Adapter (for 1/2" faucets)
- Thread Seal Tape
1.2 Battery Installation
- Remove the battery compartment cover on the back of the timer.
- Insert four (4) AA 1.5V alkaline batteries (not included), ensuring correct polarity.
- Securely replace the battery compartment cover.

Image: The Diivoo Sprinkler Timer with its battery compartment open, illustrating the correct placement of AA batteries. Ensure the compartment is sealed properly after installation.
1.3 Connecting to Faucet
- Wrap the faucet threads with the provided thread seal tape clockwise to prevent leaks.
- If using a 1/2" faucet, install the 1/2" washer into the 1/2" inlet adapter, then connect the adapter to the timer and faucet. For a 3/4" faucet, simply connect the timer directly.
- Install the 3/4" washer and filter into the water timer inlet.
- Securely screw the timer onto your outdoor faucet.

Image: The Diivoo Sprinkler Timer securely attached to an outdoor faucet, ready for hose connections.
1.4 Connecting Hoses
- Attach your garden hoses to the three independent outlets at the bottom of the timer.
- Ensure all connections are tight to prevent leaks.
1.5 Leak Check
- Open the faucet fully to check for any leaks.
- If leaks occur, ensure the thread seal tape is properly applied, washers are in place, and all connections are securely tightened.
Video: This video demonstrates the step-by-step installation process of the Diivoo Sprinkler Timer, including battery insertion, faucet connection with thread tape and washers, and hose attachment. It also shows how to check for leaks after installation.
2. Operating Instructions
The Diivoo Sprinkler Timer allows for flexible programming across its three independent zones. Each zone can be customized with its own start time, watering duration, and frequency.
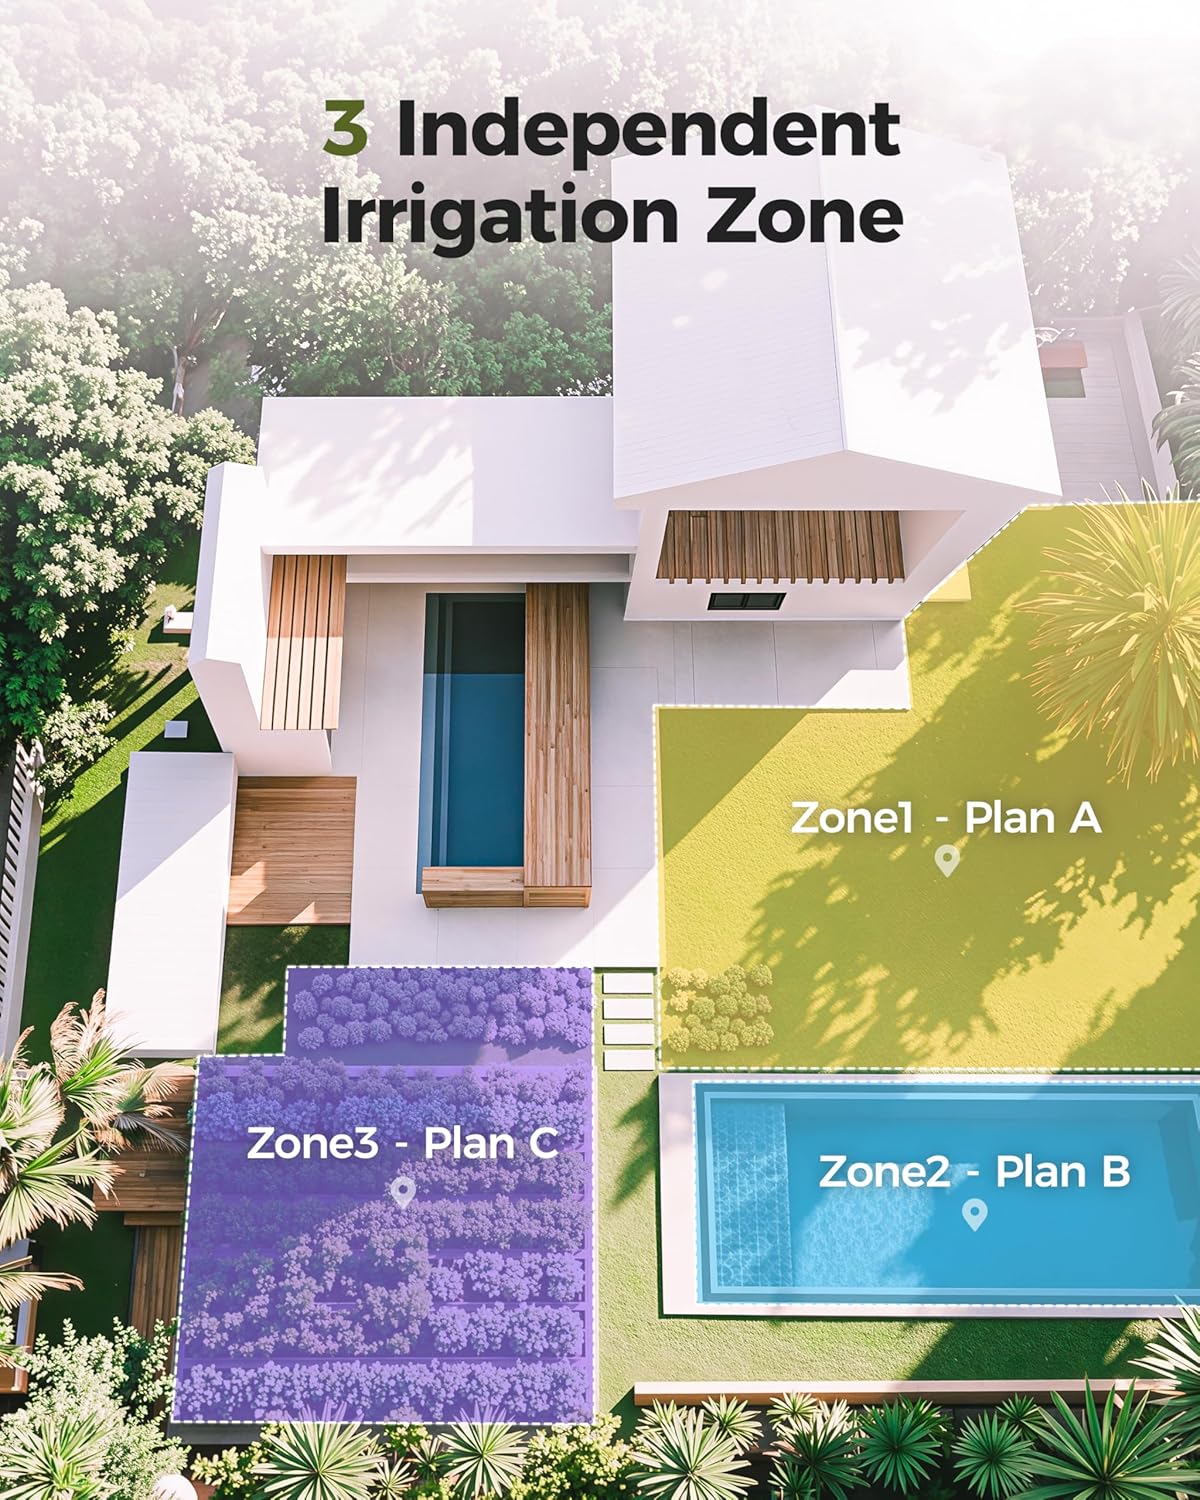
Image: An aerial view illustrating how the three independent irrigation zones can be used to water different areas of a garden or property, such as a lawn, pool area, and planted beds.
2.1 Setting the Clock (Local Time)
- Turn the dial to SET CLOCK.
- Press the + or - buttons to adjust the current time. Hold the button for quick advance/reverse.
- To change between 12-hour and 24-hour format, hold the ZONE button.
2.2 Setting Start Time
- Turn the dial to START TIME.
- Press the ZONE button to select the desired outlet (Zone 1, Zone 2, or Zone 3) for programming.
- Use the + or - buttons to set the desired start time for watering.
2.3 Setting Watering Duration (How Long)
- Turn the dial to HOW LONG.
- Press the ZONE button to select the desired outlet (Zone 1, Zone 2, or Zone 3).
- Set the watering duration from 0 to 240 minutes using the + or - buttons.
- Note: The maximum watering duration depends on the set frequency. If frequency is 1 hour, max duration is 59 minutes. If frequency is 3 hours, max duration is 179 minutes.
2.4 Setting Watering Frequency (How Often)
- Turn the dial to HOW OFTEN.
- Press the ZONE button to select the desired outlet (Zone 1, Zone 2, or Zone 3).
- Set the watering frequency using the + or - buttons. Options include every 6 hours, 12 hours, or from every day to every 7 days. (1 = every day, 2 = every other day, etc.)

Image: The timer's display showing a comprehensive watering plan, including the next start time, duration, and frequency for a selected zone.
2.5 Activating Auto Watering
- Turn the dial to AUTO.
- Ensure your garden faucet is turned on.
- The timer will now water according to your programmed time, zone, duration, and frequency.
2.6 Manual Watering
This feature allows you to water manually without interrupting your preset schedule.
- Turn the dial to AUTO, then press the MANUAL button.
- Press the ZONE button to select the desired outlet (Zone 1, Zone 2, or Zone 3).
- Use the + or - buttons to select the manual watering time, from 0 to 240 minutes. (There may be a slight delay between pressing the + button and when watering begins.)
- To stop manual watering:
a) Press the MANUAL button again.
b) Or, turn the dial to OFF and then back to AUTO.
2.7 Rain Delay
This feature allows you to postpone watering for a set period of time, useful during rainy weather.
- Turn the dial to AUTO.
- Press and hold the + button for 2 seconds to select a delay of 1-7 days. The screen will show the days remaining before the programmed cycle resumes.
- To remove rain delay:
a) Press and hold the + button for 2 seconds again.
b) Or, turn the dial to OFF and then back to AUTO.

Image: The timer's display indicating a 2-day rain delay, allowing users to pause watering during periods of natural rainfall.
2.8 Off Mode
Turning the dial to OFF at any time will stop all watering plans for an extended period. Unless you turn the dial back to AUTO, your programmed watering schedule will not resume.
2.9 Turning Off Only One Zone
- Turn the dial to START TIME.
- Press the ZONE button to select the specific outlet (Zone 1, Zone 2, or Zone 3) you want to turn off.
- Use the + or - buttons to set the start time to OFF. If using 12-hour format, OFF is between 11:59 and 12:00. If using 24-hour format, OFF is between 23:59 and 00:00.
- Turn the dial back to AUTO.
Video: This video provides a comprehensive guide on how to use the Diivoo Sprinkler Timer, covering setting the clock, programming start times, watering durations, and frequencies for each zone, as well as activating auto mode, manual watering, rain delay, and off mode.
3. Maintenance
- Filter Cleaning: Regularly check and clean the aluminum alloy filters at the inlet to prevent debris from clogging the timer and affecting water flow.
- Winter Storage: During freezing temperatures, remove the timer from the faucet and store it indoors to prevent damage from ice expansion.
- Battery Replacement: Replace batteries when the low battery indicator appears on the display to ensure continuous operation.
- Leak Prevention: Periodically check all connections for tightness and ensure sealing washers are in good condition to maintain the IP54 waterproof rating.

Image: The Diivoo Sprinkler Timer partially submerged in water, demonstrating its IP54 waterproof and reliable construction, which contributes to its durability.
4. Troubleshooting
4.1 Water Leaks
- Check Thread Seal Tape: Ensure the thread seal tape is properly applied to the faucet threads.
- Verify Washers: Confirm that all necessary washers (1/2" or 3/4") and the filter are correctly installed at the inlet.
- Tighten Connections: Make sure the timer is securely tightened to the faucet and hoses are firmly attached to the outlets.
4.2 Timer Not Watering
- Check Battery Level: Ensure batteries are not depleted and are installed with correct polarity.
- Verify Mode: Confirm the dial is set to AUTO for programmed watering. If set to OFF, no watering will occur.
- Rain Delay Active: Check if Rain Delay is active. If so, watering will be postponed.
- Zone Off: If only one zone is not watering, check if that specific zone has been set to OFF in the START TIME setting.
- Faucet On: Ensure the outdoor faucet is fully open.
5. Specifications
| Brand | Diivoo |
| Model Number | DI-WT10M1 |
| Color | Green |
| Material | Aluminum |
| Product Dimensions (D x W x H) | 8.46" x 3.66" x 7.2" |
| Item Weight | 0.89 Kilograms |
| Water Pressure Range | 7.25 psi to 116.03 psi |
| Waterproof Rating | IP54 |
| Power Source | 4* AA 1.5V Alkaline Batteries (excluded) |
| Battery Life | 6~8 months (approx.) |
6. Warranty and Support
For warranty information, technical support, or any questions regarding your Diivoo Sprinkler Timer, please contact Diivoo customer service. Refer to the product packaging or the official Diivoo website for the most up-to-date contact details.
We are committed to providing high-quality products and excellent customer service.