
Introduction
Thank you for choosing the GMR Sprinkler Timer. This device is designed to automate your garden watering, ensuring your plants receive optimal hydration with minimal effort. It features three independent watering programs, flexible frequency modes, and a rain delay function to conserve water. This manual provides detailed instructions for installation, programming, and maintenance to help you get the most out of your timer.
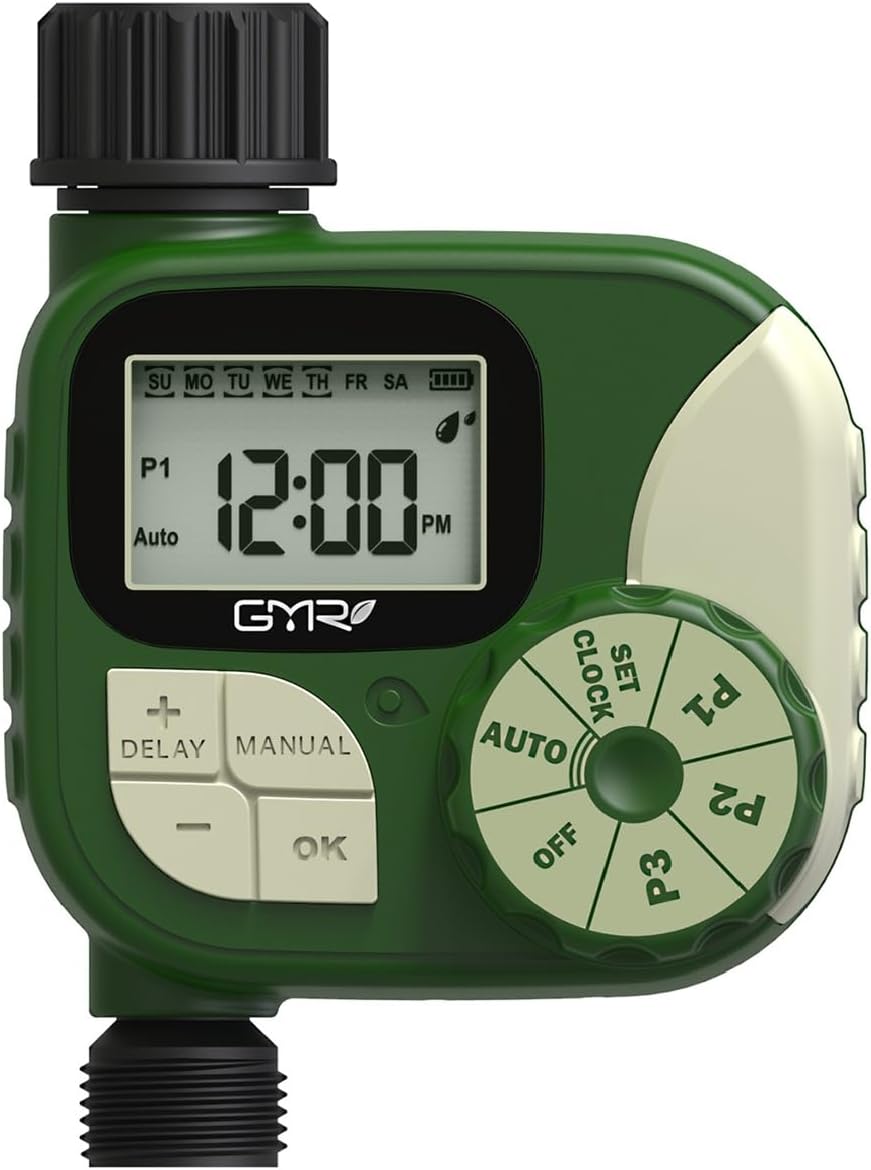
The GMR Sprinkler Timer, Model GWT102S-NH, featuring a large LCD display and intuitive dial for programming.
Key Features
- 3 Separate Watering Programs: Set distinct start times and durations for up to three watering cycles per day.
- 3 Watering Frequency Modes: Choose between weekly, specific days of the week, or interval-based watering (e.g., every 1-12 hours or 1-7 days).
- Auto/Manual/Rain Delay Modes: Operate automatically, initiate instant watering, or pause schedules for 24/48/72 hours to prevent overwatering.
- Durable and Waterproof: Constructed with high-quality materials, anti-UV coating, and IP54 waterproof rating to withstand outdoor conditions.
- Easy to Read & Operate: Features a large dial and LCD screen for straightforward setup and program review.
- Low Battery Warning: Alerts you when batteries are low and automatically closes the valve to prevent leakage.

An overview of the GMR Sprinkler Timer's main features, including timed watering, manual watering, rain delay, IP54 waterproof rating, large LCD display, and water-saving capabilities.
Setup Instructions
- Install Batteries: Open the battery compartment on the back of the timer. Insert two new AA (1.5V) alkaline batteries (not included), ensuring correct polarity. Close the compartment securely to maintain the leak-proof seal.
- Connect to Faucet: Screw the timer's inlet connector onto your outdoor faucet. The 360° rotatable inlet allows for easy installation, even with faucets close to a wall. Ensure the connection is hand-tight to prevent leaks. The timer is suitable for standard US 3/4'' faucets.
- Connect Water Pipe: Attach your garden hose or irrigation system to the outlet at the bottom of the timer.

Visual guide for installing batteries, setting the timer, and connecting it to the faucet and water pipe.
Video demonstrating the setup process for the GMR Sprinkler Timer, including battery installation and connection to a water source.
Operating Instructions
1. Setting the Current Time
- Turn the dial to SET CLOCK.
- Use the + and - buttons to adjust the current hour. Press OK to confirm.
- Use the + and - buttons to adjust the current minute. Press OK to confirm.
- Use the + and - buttons to set the current day of the week. Press OK to confirm.
2. Programming Watering Schedules (P1, P2, P3)
The timer allows for three independent watering programs. Follow these steps for each program (P1, P2, P3):
- Turn the dial to P1 (or P2, P3).
- Set Start Time: Use the + and - buttons to set the desired start time. Press OK.
- Set Watering Duration: Use the + and - buttons to set the watering duration (1 to 240 minutes). Press OK.
- Set Watering Frequency:
- Week Mode: Select specific days (Monday to Sunday) using + and - buttons. Press OK for each day.
- Interval Mode: Choose to water every 1-12 hours or every 1-7 days. Use + and - to set the interval. Press OK.
- Turn the dial to AUTO to save the settings and activate the program.
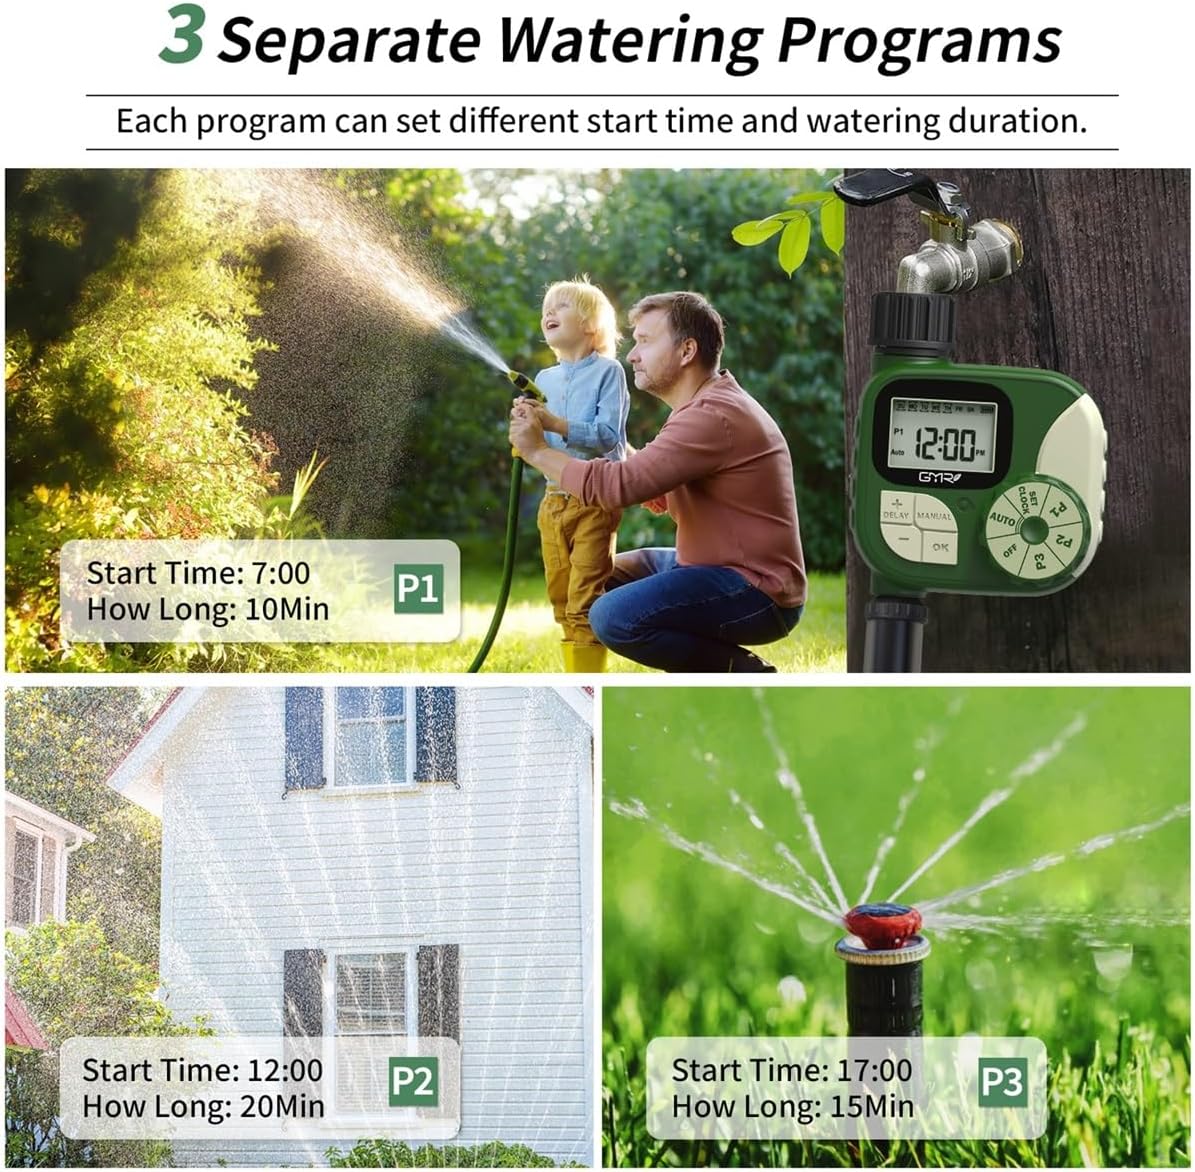
Illustration of three separate watering programs (P1, P2, P3) with customizable start times and durations.
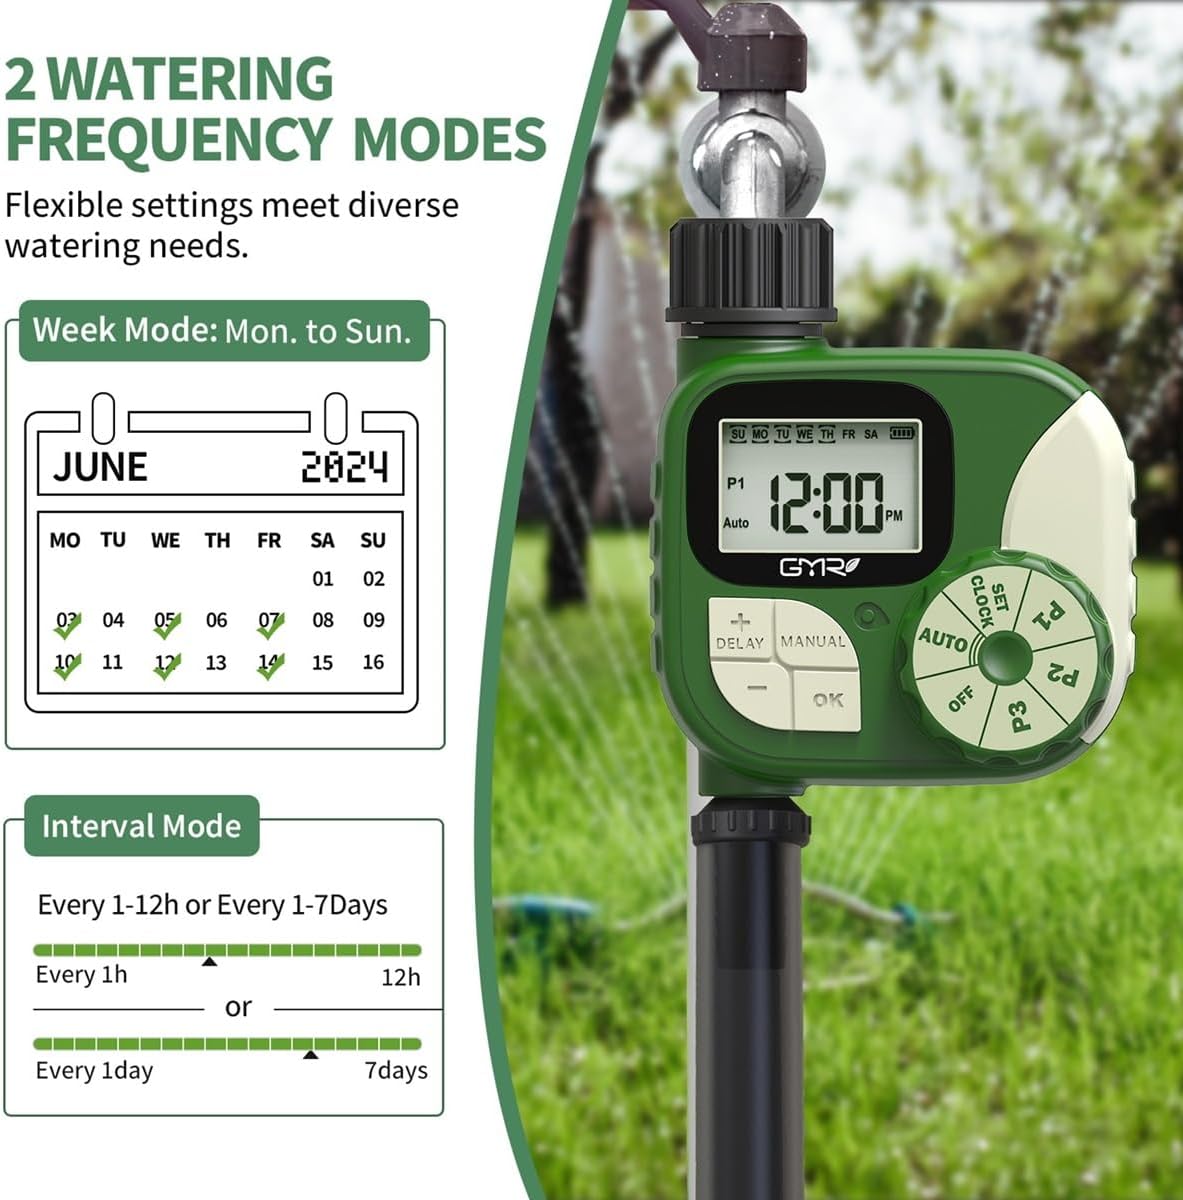
Detailed view of the two watering frequency modes: Week Mode (Monday to Sunday) and Interval Mode (Every 1-12 hours or 1-7 days).
3. Manual Watering Mode
To water instantly without affecting your programmed schedules:
- Ensure the dial is set to AUTO.
- Press the MANUAL button.
- Use the + and - buttons to set the desired manual watering duration (1 to 240 minutes). Press OK to start watering.
- To stop manual watering, press MANUAL again or turn the dial to OFF.
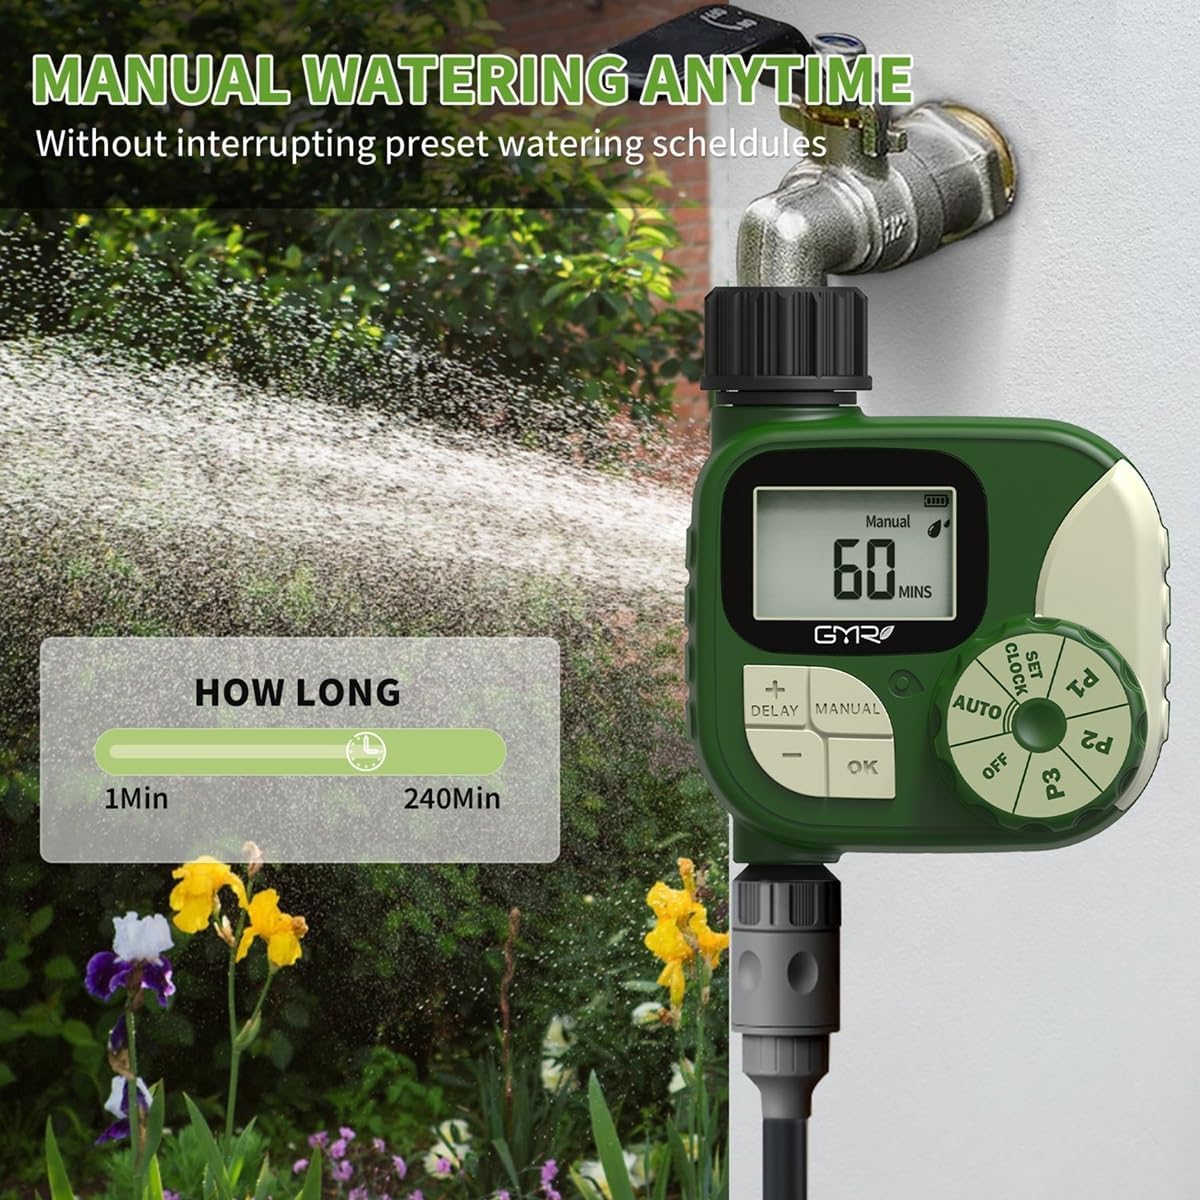
Demonstration of the manual watering mode, allowing users to set a watering duration from 1 to 240 minutes for immediate use.
4. Rain Delay Function
To temporarily pause your watering schedule due to rain:
- Ensure the dial is set to AUTO.
- Press the DELAY button.
- Use the + and - buttons to select a delay period of 24, 48, or 72 hours. Press OK to activate the rain delay.
- The timer will resume its programmed schedule after the delay period ends. To cancel the rain delay, press DELAY again.

Visual explanation of the 24/48/72 hour rain delay feature and the low battery warning indicator on the LCD screen.
Video demonstrating the various operating modes and programming steps of the GMR Water Timer.
Video showcasing the functionality and programming of the GMR Sprinkler Timer.
Official GMR video demonstrating the features and operation of the garden hose timer.
Maintenance
- Battery Replacement: When the low battery symbol flashes on the LCD screen, replace the two AA alkaline batteries promptly. The valve will automatically close when the battery is critically low to prevent continuous watering.
- Filter Cleaning: The timer has a built-in metal filter at the inlet to strain impurities from tap water. Periodically check and clean this filter to ensure optimal water flow and prevent blockages. Unscrew the timer from the faucet, remove the filter, rinse it under running water, and reinsert it before reattaching the timer.
- Winter Storage: In freezing conditions, disconnect the timer from the faucet and store it indoors to prevent damage from ice expansion.

Details on the timer's durable construction, including the 360° rotatable inlet with a built-in metal filter and the leak-proof sealed battery compartment.
Troubleshooting
| Problem | Possible Cause | Solution |
|---|---|---|
| Timer does not turn on/LCD is blank. | No batteries or batteries are dead/incorrectly installed. | Install two new AA alkaline batteries, ensuring correct polarity. |
| Water does not flow at scheduled time. | Timer is in OFF mode, rain delay is active, low battery, or faucet is off. | Ensure dial is set to AUTO. Check if rain delay is active and cancel if necessary. Replace batteries if low. Ensure outdoor faucet is fully open. |
| Water is leaking from the connection to the faucet. | Connection is not tight enough or washer is missing/damaged. | Ensure the timer is securely tightened to the faucet. Check if the rubber washer is properly seated inside the inlet connector. Replace if damaged. |
| Water flow is weak or inconsistent. | Built-in metal filter is clogged. | Disconnect the timer and clean the metal filter at the inlet. |
| Timer stops working after a short period. | Batteries are depleted. | Replace with fresh AA alkaline batteries. |
Specifications
- Model Number: GWT102S-NH
- Brand: GMR
- Material: Plastic
- Product Dimensions (D x W x H): 2.46" x 3" x 5.89"
- Item Weight: 9.44 ounces
- Battery Type: 2 x AA Alkaline (not included)
- Number of Watering Programs: 3
- Watering Duration: 1 to 240 minutes
- Watering Frequency: Week Mode (Mon-Sun), Interval Mode (Every 1-12 hours or 1-7 days)
- Rain Delay: 24, 48, or 72 hours
- Water Pressure Range: 7.25-116 psi
- Waterproof Rating: IP54
- Inlet Connector: US 3/4'' (360° rotation)
Warranty and Support
For any questions, technical assistance, or warranty inquiries regarding your GMR Sprinkler Timer, please contact GMR customer support. Refer to the product packaging or the official GMR website for the most current contact information.