Introduction
Thank you for choosing the THE PERFECT PART Vacuum Sealer Machine. This manual provides essential information for the safe and efficient operation of your new appliance. Please read these instructions carefully before use and retain them for future reference.
Important Safety Instructions
- Read all instructions before using the appliance.
- Do not immerse the appliance, power cord, or plug in water or other liquids.
- Keep out of reach of children. Close supervision is necessary when used near children.
- Unplug from outlet when not in use and before cleaning.
- Do not operate any appliance with a damaged cord or plug, or after the appliance malfunctions or has been damaged in any manner.
- Use only manufacturer-recommended attachments.
- Do not use outdoors.
- Do not place on or near a hot gas or electric burner, or in a heated oven.
- Always ensure the lid is properly closed and latched before operating.
- This appliance is for household use only.
Product Overview
Familiarize yourself with the components of your vacuum sealer machine.
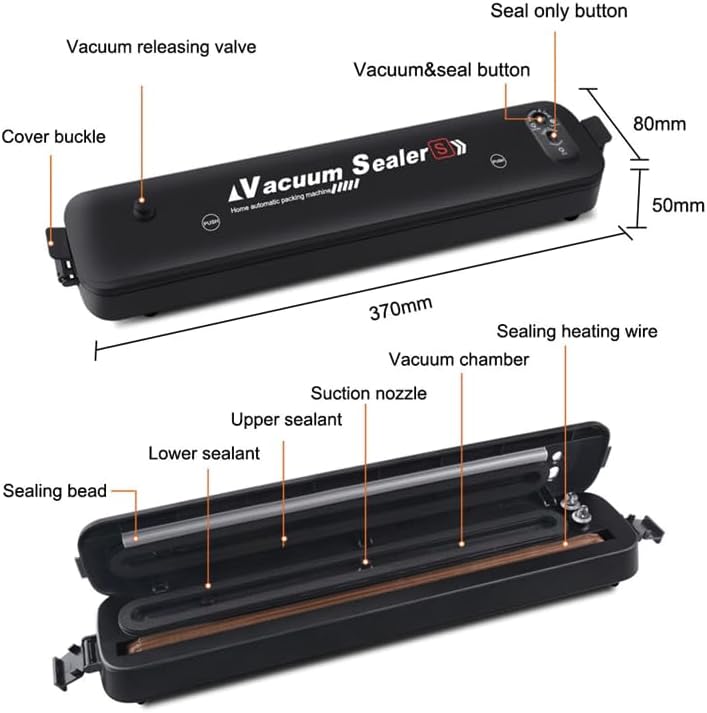
Figure 1: Labeled components of the vacuum sealer machine.
- 1. Vacuum Releasing Valve: Releases vacuum pressure.
- 2. Cover Buckle: Secures the lid.
- 3. Vacuum & Seal Button: Initiates vacuuming and sealing process.
- 4. Seal Only Button: Initiates sealing process without vacuuming.
- 5. Sealing Heating Wire: Heats to create a seal.
- 6. Vacuum Chamber: Area where air is removed.
- 7. Suction Nozzle: Draws air from the bag.
- 8. Upper Sealant: Top sealing strip.
- 9. Lower Sealant: Bottom sealing strip.
- 10. Sealing Bead: Helps create a tight seal.
Setup
- Unpack: Carefully remove the vacuum sealer from its packaging.
- Inspect: Check the appliance for any signs of damage. Do not use if damaged.
- Clean: Wipe down the exterior of the machine with a damp cloth. Ensure the sealing area is clean and dry.
- Placement: Place the vacuum sealer on a flat, stable, and dry surface.
- Power Connection: Plug the power cord into a standard electrical outlet.
Operating Instructions

The vacuum sealer machine in operation, preserving food.
General Vacuum Sealing
Follow these steps for vacuum sealing food items:
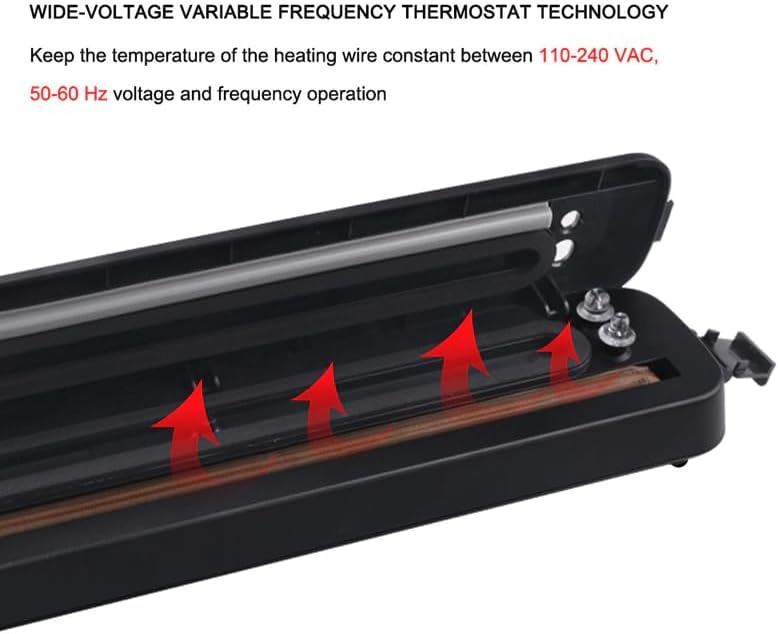
Figure 2: Operational steps for vacuum sealing.
- Prepare the Bag: Place the open end of the vacuum sealer bag into the packing area, ensuring it is flat and smooth.
- Close the Lid: Press down firmly on the lid until both cover buckles click into place, locking the bag.
- Start Operation: Press the "Vacuum & Seal" button. The machine will begin to vacuum air from the bag. A green light indicates vacuuming is in progress.
- Sealing: Once the vacuum process is complete, the machine will automatically switch to sealing. A red light indicates sealing is in progress.
- Release: When the sealing process is finished, the red light will turn off. Pull the black button (vacuum releasing valve) to easily open the lid. Remove the sealed bag.
Seal Only Function
Use this function to seal bags without vacuuming, ideal for delicate items or creating custom-sized bags.
- Position Bag: Place the open end of the bag onto the sealing heating wire.
- Close Lid: Close the lid and ensure it is latched.
- Activate Seal: Press the "Seal Only" button. The red light will illuminate, indicating the sealing process.
- Release: Once the light turns off, the seal is complete. Open the lid and remove the bag.
Bag Compatibility
For optimal performance, use bags designed for vacuum sealing. The machine is compatible with various patterned and angled bags. Flat bags without lines are generally not suitable for vacuum sealing with this machine.
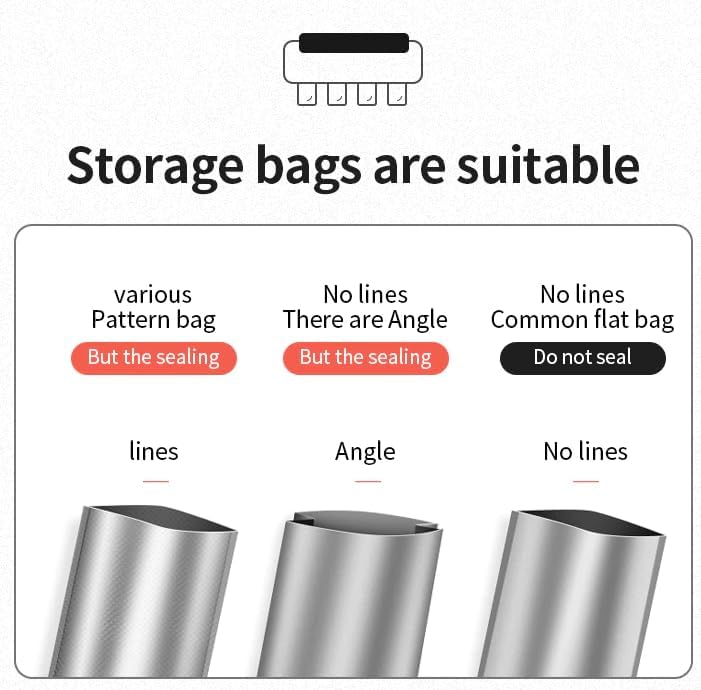
Figure 3: Recommended bag types for vacuum sealing.
Maintenance
Cleaning
- Always unplug the appliance before cleaning.
- Wipe the exterior of the machine with a soft, damp cloth. Do not use abrasive cleaners or solvents.
- Clean the vacuum chamber and sealing area with a damp cloth and mild soap if necessary. Ensure these areas are completely dry before next use.
- Do not immerse the machine in water or any other liquid.
Storage
- Store the vacuum sealer in a cool, dry place.
- For prolonged storage, it is recommended to leave the lid unlatched to prevent compression of the sealing gaskets, which can affect performance over time.
Troubleshooting
| Problem | Possible Cause | Solution |
|---|---|---|
| Machine does not turn on. | Not plugged in; power outlet issue. | Ensure power cord is securely plugged into a working outlet. |
| Machine vacuums but does not seal. | Sealing wire or gasket dirty/damaged; bag not positioned correctly. | Clean sealing wire and gaskets. Ensure bag is flat and extends fully across the sealing area. Check for damage to sealing components. |
| Machine seals but does not vacuum. | Lid not properly latched; bag opening not fully inside vacuum chamber; bag type incompatible. | Ensure lid is securely latched. Verify bag opening is completely within the vacuum chamber. Use appropriate vacuum sealer bags (patterned or angled). |
| Incomplete vacuum or air leaks. | Wrinkles in bag; food debris in sealing area; bag too full; moisture in bag. | Smooth out bag wrinkles. Clean sealing area. Do not overfill bags. Pre-freeze moist foods or use a paper towel to absorb excess liquid. |
Specifications
| Feature | Detail |
|---|---|
| Brand | THE PERFECT PART |
| Model | B0CQHCJVG3 |
| Material | ABS |
| Color | Black |
| Item Weight | 2.6 Pounds |
| Power Source | AC |
| Operation Mode | Automatic |
| UPC | 647168705936 |
| Voltage/Frequency | 110-240 VAC, 50-60 Hz |
Warranty and Support
For warranty information, technical support, or service inquiries, please refer to the manufacturer's official website or contact customer support using the details provided with your purchase documentation. Please have your model number (B0CQHCJVG3) available when contacting support.