1. Introduction
This manual provides essential information for the safe and efficient operation, maintenance, and troubleshooting of your Beko Robot Vacuum Cleaner VRR 94314 VB. Please read this manual thoroughly before using the product and retain it for future reference.
The Beko VRR 94314 VB is an advanced robotic vacuum cleaner designed for both dry vacuuming and wet mopping. It features Laser (LDS) navigation for precise mapping, Wi-Fi connectivity for app control, and an auto dirt disposal system for convenience.
2. Safety Information
Always observe the following safety precautions to reduce the risk of fire, electric shock, or injury:
- Read all instructions before operating the appliance.
- This appliance is not intended for use by persons (including children) with reduced physical, sensory or mental capabilities, or lack of experience and knowledge, unless they have been given supervision or instruction concerning use of the appliance by a person responsible for their safety.
- Children should be supervised to ensure that they do not play with the appliance.
- Do not use the appliance in wet conditions or on wet surfaces.
- Do not pick up flammable or combustible materials, or anything that is burning or smoking.
- Ensure the charging station is placed against a wall in an open area, free from obstacles.
- Keep hair, loose clothing, fingers, and all parts of the body away from openings and moving parts.
- Use only manufacturer-recommended attachments and accessories.
- Unplug the appliance from the power outlet before cleaning or performing maintenance.
3. Product Overview
Familiarize yourself with the components of your Beko Robot Vacuum Cleaner and its charging station.

Figure 3.1: The Beko Robot Vacuum Cleaner alongside its auto-empty charging station. The robot is a circular black unit, and the station is a taller, rectangular black unit.

Figure 3.2: Top view of the Beko Robot Vacuum Cleaner, showing the central control button and the LDS laser navigation dome.

Figure 3.3: Bottom view of the Beko Robot Vacuum Cleaner, illustrating the main brush, side brushes, wheels, and the attached blue mopping pad.
Robot Components:
- LDS Laser Navigation System: Located on top, enables 360° scanning for precise mapping.
- Main Control Button: For starting/pausing cleaning or returning to the charging station.
- Dustbin: 0.4 L capacity, accessible from the top or side.
- Side Brushes: Two brushes to sweep debris into the main brush path.
- Main Rolling Brush: Central brush for deep cleaning.
- Driving Wheels: For movement across various surfaces, including climbing thresholds up to 2 cm.
- Sensors: Cliff sensors, wall sensors, and collision sensors for navigation and safety.
- Mopping Attachment: For wet cleaning of hard floors.
Auto-Empty Station Components:
- Dust Bag Compartment: Holds the disposable dust bag for automatic dirt disposal.
- Charging Contacts: For recharging the robot's battery.
- Power Cord Port: Connects the station to an electrical outlet.
4. Setup
4.1 Unpacking and Placement
- Carefully remove all components from the packaging.
- Remove all protective films and stickers from the robot and charging station.
- Place the auto-empty station against a wall in an area with good Wi-Fi signal, ensuring at least 0.5 meters of clear space on both sides and 1.5 meters in front.
- Connect the power cord to the charging station and plug it into a power outlet.
4.2 Initial Charging
Place the robot onto the charging station. Ensure the charging contacts on the robot align with those on the station. The robot will begin charging automatically. For first-time use, fully charge the robot before operation (approximately 4-6 hours).
4.3 App Installation and Pairing
The Beko Robot Vacuum Cleaner is controlled via a Wi-Fi connected mobile application.
- Download the official Beko robot vacuum app from your smartphone's app store (iOS or Android).
- Open the app and create an account or log in.
- Follow the in-app instructions to add your Beko VRR 94314 VB robot vacuum cleaner. This typically involves connecting your phone to the robot's temporary Wi-Fi network and then connecting the robot to your home Wi-Fi network.
- Once paired, the app will allow you to control the robot, view maps, set schedules, and customize cleaning preferences.

Figure 4.1: A user interacting with the mobile application to control the Beko Robot Vacuum Cleaner, which is visible in the background.
5. Operating Instructions
5.1 Initial Map Creation
For its first cleaning cycle, allow the robot to complete a full cleaning run without interruption. This enables the LDS navigation system to create an accurate map of your home. The robot can store up to 5 different maps, useful for multi-floor homes.
5.2 Starting a Cleaning Cycle
- Via App: Open the mobile app, select your desired cleaning mode (e.g., Auto, Spot, Zone), and tap 'Start'. You can also customize specific rooms or cleaning zones.
- Via Robot Button: Press the main control button on the robot once to start an automatic cleaning cycle.
5.3 Cleaning Modes and Features
- Auto Cleaning: The robot intelligently cleans the entire mapped area.
- Spot Cleaning: Directs the robot to clean a specific small area intensively.
- Zone Cleaning: Define specific areas on the map for the robot to clean.
- Virtual Walls: Use the app to set virtual boundaries or no-go zones to prevent the robot from entering certain areas.
- Mopping Function: Attach the mopping module and fill the water tank. The robot can sweep and mop hard floors simultaneously. Adjust water drop levels via the app.
- Carpet Boost: The robot automatically detects carpets and increases suction power for deeper cleaning.
- Suction Modes: Choose from 4 different suction modes via the app to suit various cleaning needs and floor types.
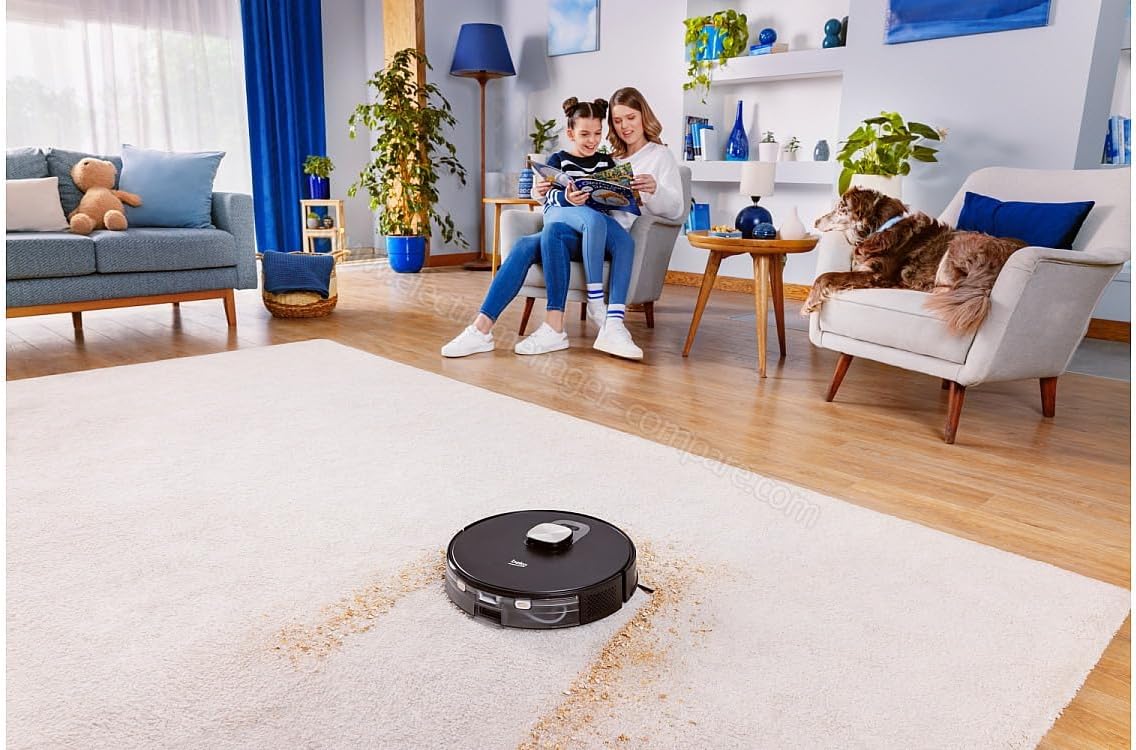
Figure 5.1: The Beko Robot Vacuum Cleaner actively cleaning a carpeted floor, demonstrating its ability to navigate and clean soft surfaces.

Figure 5.2: The Beko Robot Vacuum Cleaner operating on a hard floor, showcasing its versatility across different floor types.
5.4 Automatic Charging and Resume
When the robot's battery is low, it will automatically return to the charging station. After recharging, it will resume cleaning from where it left off to complete the cleaning cycle.
6. Maintenance
Regular maintenance ensures optimal performance and extends the lifespan of your robot vacuum cleaner.
6.1 Emptying the Dustbin
The robot features a 0.4 L dust container. It is recommended to empty the dustbin after each cleaning cycle, especially if the auto-empty station is not used or if the robot is used for heavy cleaning. The auto-empty station will automatically transfer debris from the robot's dustbin to a larger dust bag within the station.
6.2 Cleaning the HEPA Filter
The HEPA filter should be cleaned regularly (e.g., weekly) by tapping it gently to remove dust. Replace the HEPA filter every 3-6 months, depending on usage.
6.3 Cleaning Brushes
- Main Rolling Brush: Remove hair and debris tangled around the main brush using the cleaning tool provided. Check weekly.
- Side Brushes: Remove any tangled hair or debris. If brushes are worn or damaged, replace them. Check monthly.
6.4 Cleaning Sensors and Charging Contacts
Wipe all sensors (cliff sensors, wall sensors, LDS sensor window) and the charging contacts on both the robot and the charging station with a clean, dry cloth. This should be done monthly to ensure proper navigation and charging.
6.5 Mopping Pad Maintenance
After each mopping session, remove the mopping pad, rinse it thoroughly with water, and allow it to air dry completely before reattaching or storing.
7. Troubleshooting
If you encounter issues with your Beko Robot Vacuum Cleaner, refer to the following common problems and solutions:
| Problem | Possible Cause | Solution |
|---|---|---|
| Robot does not turn on or charge. | Low battery; charging contacts dirty; power cord not connected. | Ensure robot is properly docked; clean charging contacts; check power connection to station. |
| Robot gets stuck frequently. | Obstacles in path; sensors dirty; wheels tangled. | Clear obstacles; clean all sensors; remove hair/debris from wheels and brushes. |
| Poor cleaning performance. | Dustbin full; filter clogged; brushes tangled/worn. | Empty dustbin; clean/replace filter; clean/replace brushes. |
| Robot cannot connect to Wi-Fi/App. | Incorrect Wi-Fi password; weak signal; robot too far from router. | Verify Wi-Fi password; move charging station closer to router; restart robot and router. |
| Auto-empty station not working. | Dust bag full; suction port blocked. | Replace dust bag; check for blockages in the station's suction path. |
If the problem persists after attempting these solutions, please contact Beko customer support.
8. Specifications
| Feature | Specification |
|---|---|
| Brand Name | Beko |
| Model | VRR 94314 VB |
| Navigation Type | Laser (LDS) |
| Cleaning Type | Dry and Wet |
| Dust Container Capacity | 0.4 L |
| Cleaning Area | Up to 180 m² |
| Surface Recommendation | Multi-Surface |
| Special Features | Cordless, Auto Dirt Disposal, Carpet Boost, Virtual Walls, Multi-Floor Mapping |
| Color | Black |
| Item Dimensions (L x W x H) | 9L x 9W x 9H centimeters (Robot dimensions) |
| Controller Type | App Control |
| Filter Type | HEPA |
| Battery Life | Up to 120 minutes |
| Battery Cell Composition | Lithium |
| Item Weight | 249 Grams (Robot weight) |
| Climbing Threshold | 2 cm |
9. Warranty and Support
For warranty information, please refer to the warranty card included with your product or visit the official Beko website. For technical support, troubleshooting assistance beyond this manual, or to order replacement parts, please contact Beko customer service through their official channels.