Introduction
This manual provides instructions for the proper setup, operation, and maintenance of your Lewisia 5W Solar Fountain Pump with Battery Backup and LED Lighting. This product is designed to create a decorative water feature in bird baths, ponds, and garden decorations, utilizing solar energy for power and featuring a battery for extended operation and LED lights for nighttime ambiance.
Included Components
- 1 x Solar Panel
- 1 x Pump with LED Light
- 1 x Nozzle Adapter
- 5 x Fountain Heads (for various spray patterns)
- 1 x Ground Stake Mount
- 1 x Inserted Bar
- 1 x Funnel Shaped Tube
- 1 x User Manual
Setup Instructions
Follow these steps to assemble and install your solar fountain pump:
- Assemble the Pump: Attach the desired fountain head to the pump's nozzle adapter. The kit includes 5 different fountain heads to achieve various water spray patterns.
- Position the Pump: Place the pump in your bird bath, pond, or water feature, ensuring it is fully submerged in water. The pump features a water inlet strainer to prevent debris from entering.
- Solar Panel Installation: The solar panel can be installed in two ways:
- Ground Stake Mount: Attach the ground stake to the solar panel and insert it firmly into the ground in a location that receives maximum direct sunlight.
- Wall Mount: Use the included screws to mount the solar panel on a wall. The metal bracket allows for adjustable angles to optimize sun exposure.
Ensure the solar panel is positioned to receive direct sunlight for optimal performance and battery charging. The separate solar panel design allows for flexible placement, even if the fountain is in a shaded area.
- Connect the Pump to the Solar Panel: Connect the cable from the pump to the solar panel. Ensure the connection is secure.
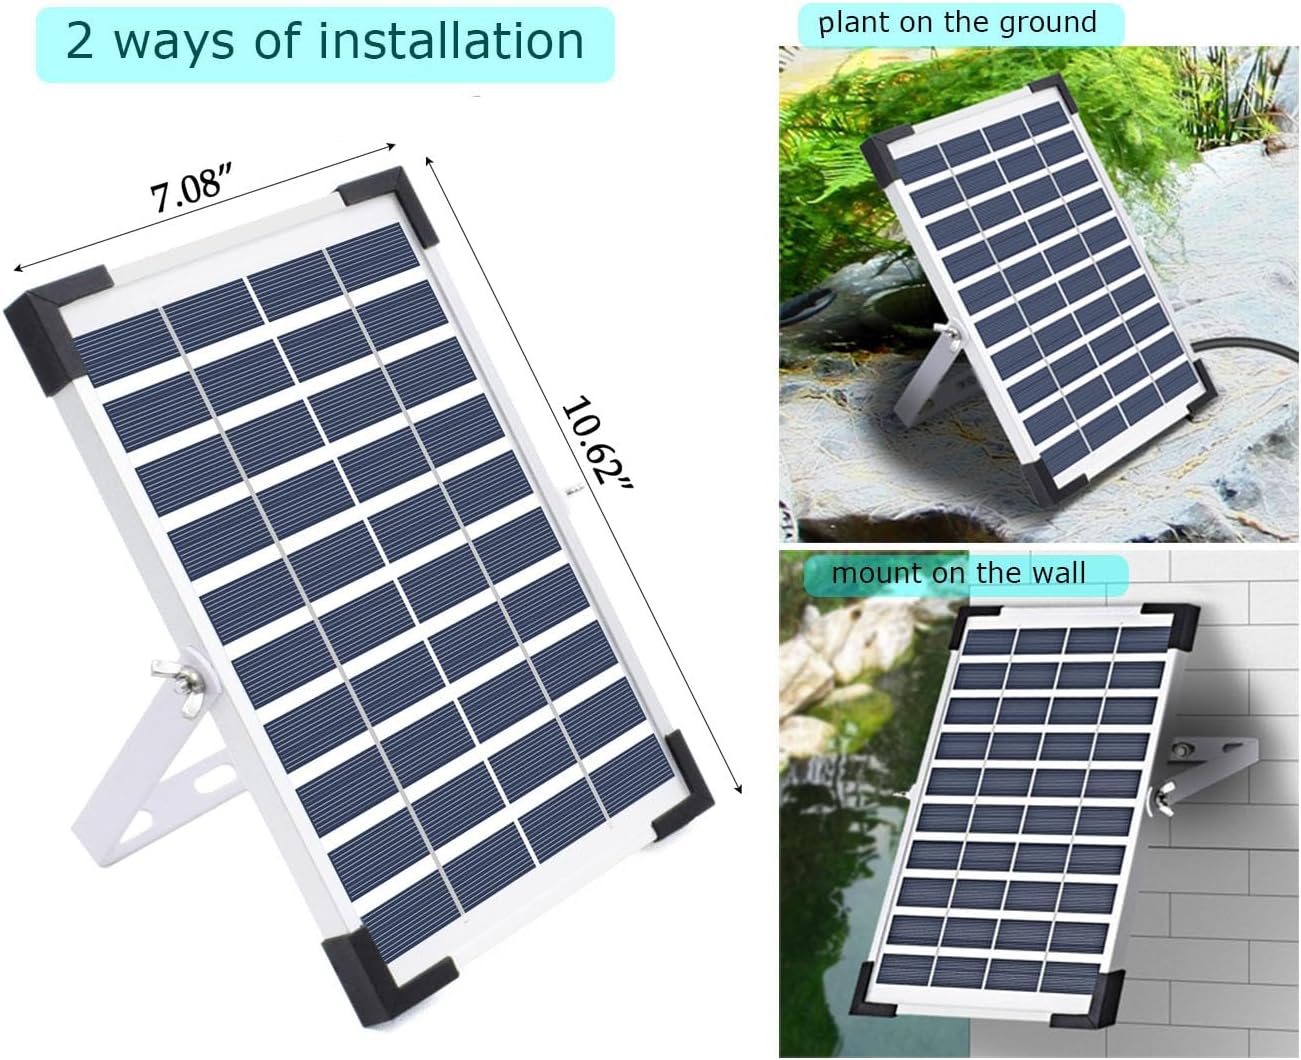
Image: Solar panel showing two installation methods: ground stake and wall mount. The panel is designed for optimal sun exposure.

Image: A separate solar panel with an adjustable stand, allowing for optimal placement away from the water feature.
Video: This video demonstrates the assembly and initial setup of the Lewisia Solar Fountain Pump, including connecting the pump to the solar panel and placing it in a bird bath.
Operation
The Lewisia Solar Fountain Pump operates automatically once properly installed and exposed to sunlight.
- Solar Power & Battery Backup: The 5W solar panel converts sunlight into electricity to power the pump directly. The built-in 1800mAh battery stores excess energy, allowing the fountain to continue running for several hours during cloudy conditions or at night.
- LED Lighting: The pump includes 5 LED lights that automatically illuminate at night, adding a colorful glow to your water feature.
- Working Modes: The pump offers two adjustable water height settings: High and Low. Refer to the specific controls on your unit for switching between these modes.
- Fountain Heads: Experiment with the 5 included fountain heads to achieve different spray patterns and heights. Simply attach the desired head to the pump's nozzle.

Image: The solar fountain pump operating during the day with a water spray and at night with colorful LED illumination.

Image: Examples of various water spray patterns achievable with the different fountain heads.
Maintenance
Regular maintenance ensures the longevity and optimal performance of your solar fountain pump.
- Clean the Pump: Periodically clean the pump and its water inlet strainer to prevent clogging from debris, leaves, or algae. The pump is designed to be removable and easy to clean.
- Clean the Solar Panel: Wipe the solar panel surface regularly with a soft, damp cloth to remove dust and dirt, ensuring maximum sunlight absorption.
- Water Level: Ensure the water level in your fountain is always sufficient to keep the pump fully submerged. Running the pump dry can cause damage.
- Winter Storage: During freezing temperatures, remove the pump and solar panel from the water and store them indoors to prevent damage.

Image: The pump disassembled, highlighting the water inlet strainer which should be regularly cleaned to prevent blockages.

Image: A close-up of the filter cotton, a component that helps keep the pump clean and should be checked periodically.
Troubleshooting
| Problem | Possible Cause | Solution |
|---|---|---|
| Pump not working or weak spray | Insufficient sunlight; clogged pump/filter; low water level; loose connection. | Ensure solar panel receives direct sunlight. Clean the pump and filter. Add water to submerge the pump. Check all cable connections. |
| LED lights not working at night | Battery not sufficiently charged; faulty LED connection. | Ensure solar panel receives full sun during the day to charge the battery. Check the LED light connection to the pump. |
| Fountain stops working after dark/cloudy day | Battery depleted or not fully charged. | Allow the solar panel to charge the battery for a full day in direct sunlight. Ensure no obstructions are blocking the panel. |
Specifications
| Feature | Detail |
|---|---|
| Model Number | PQ03C (SP050C) |
| Brand | Lewisia |
| Power Source | Solar Powered |
| Solar Collector Wattage | 5W |
| Battery Capacity | 1800mAh (built-in) |
| LED Lights | 5 LED lights |
| Material | Polycrystalline Silicon and ABS |
| Product Dimensions (L x W x H) | 6" x 6" x 6" |
| Item Weight | 1.85 Pounds |
Warranty and Support
For warranty information or technical support, please refer to the contact details provided with your purchase documentation or visit the official Lewisia website. Keep your purchase receipt for warranty claims.
Replacement parts such as a spare water pump (ASIN: B07NVDC39G) and extension cords (ASIN: B073JF6HYG) are available for purchase separately.