1. Introduction
This manual provides essential instructions for the safe and efficient operation of your EagleNav Level 1 & 2 Portable EV Charger. This device is designed to charge electric vehicles and plug-in hybrid vehicles compatible with the SAE J1772 standard. Please read this manual thoroughly before use and retain it for future reference.
2. Safety Information
Adherence to safety guidelines is crucial for preventing injury and damage. This charger incorporates multiple safety features, including:
- Leakage Protection
- Short Circuit Protection
- Over Temperature Protection
- Over Voltage Protection
- Automatic power-off upon full charge
The cable features an IP56 waterproof rating and is constructed with high-quality TPU thermoplastic for the outer layer and PC94V-0 thermoplastic for the display housing, ensuring durability in various weather conditions from -25°C to +55°C.
Important Safety Notes:
- Ensure the charging plug is kept away from water sources during use.
- Do not attempt to modify or disassemble the charger.
- Always connect the charger to a properly grounded outlet.
- If the charger displays an "E04" error, it indicates a grounding issue. Refer to the troubleshooting section.

Figure 2.1: Overview of the charger's integrated safety features.
3. Package Contents
Verify that all items are present in the package:
- 1 x 26ft EV Charger Cable
- 1 x NEMA 5-15P Adapter
- 1 x Storage Bag
- 1 x User Manual (this document)

Figure 3.1: Contents included in the product package.
4. Product Overview
The EagleNav portable EV charger features a control box with a multi-function display, a 26ft charging cable, and a J1772 connector. It supports both NEMA 14-50 (Level 2) and NEMA 5-15 (Level 1) power inputs via the included adapter.

Figure 4.1: EagleNav Portable EV Charger components.
4.1 Display Description
The charger's display provides real-time information about the charging process. Key indicators include:
- Temperature: Current operating temperature.
- CP Voltage: Control Pilot voltage.
- Connection Status: Indicates if the charger is connected to the vehicle.
- Ground Wire: Status of the grounding connection.
- Setting Current: Displays the selected charging current (e.g., 32A).
- Charging Time: Elapsed charging duration.
- Charge Quantity: Amount of energy delivered (kWh).

Figure 4.2: Detailed view of the charger's display functions.
5. Setup and Installation
Follow these steps to set up your EV charger:
- Choose Power Source: Identify the appropriate electrical outlet. The charger supports NEMA 14-50 (240V, up to 32A) for Level 2 charging and NEMA 5-15 (120V, up to 16A) for Level 1 charging using the provided adapter.
- Connect to Power: Plug the charger's NEMA 14-50 plug directly into a compatible 240V outlet. If using a standard 120V outlet, attach the NEMA 5-15P adapter to the NEMA 14-50 plug, then plug it into the 120V outlet.
- Secure Placement: Ensure the control box is placed in a stable location, away from direct water exposure, even though it is waterproof.
- Vehicle Connection: Open your vehicle's charging port and firmly insert the J1772 connector into the port. Ensure a secure connection.
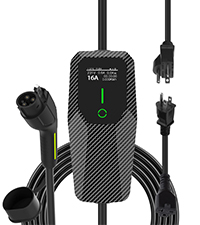
Figure 5.1: Charger compatibility with different plug types and their specifications.
6. Operating Instructions
6.1 Adjusting Charging Current
The charger allows you to adjust the charging current to suit your needs. Available current settings are 6A, 8A, 10A, 13A, 16A, 20A, 24A, and 32A.
- With the charger connected to power but not yet to the vehicle, press the 'Power' button on the control box.
- The display will show the current setting. Press the 'Power' button repeatedly to cycle through the available current options.
- Select your desired current. Once the J1772 connector is plugged into the vehicle, charging will begin at the selected current.
Note:
- When using the NEMA 5-15P adapter (120V), the current must be set below 16A.
- The maximum current for the NEMA 14-50 plug (240V) is 32A.

Figure 6.1: Adjusting charging current and setting timed charging.
6.2 Scheduled Charging
The charger supports scheduled charging for up to 5 hours. This feature allows you to set a delay before charging begins.
- After setting the desired current, press and hold the 'Power' button to enter the scheduled charging mode.
- Press the 'Power' button repeatedly to cycle through the delay options (1h, 2h, 3h, 4h, 5h).
- Once the desired delay is selected, connect the J1772 connector to your vehicle. Charging will commence after the set delay.
7. Compatibility
This charger is compatible with most electric vehicles and plug-in hybrid vehicles that adhere to the SAE J1772 charging standard.
Note for Tesla Vehicles:
If your vehicle is a Tesla, you will need to purchase a separate J1772 to Tesla charging adapter to use this charger.

Figure 7.1: Charger compatibility with various electric vehicle brands.
8. Maintenance
To ensure the longevity and optimal performance of your charger, follow these maintenance guidelines:
- Cleaning: Wipe the charger and cable with a dry or slightly damp cloth. Do not use harsh chemicals or abrasive cleaners.
- Storage: When not in use, store the charger in the provided storage bag in a dry, cool place. Avoid coiling the cable too tightly.
- Inspection: Periodically inspect the cable, plugs, and J1772 connector for any signs of damage, wear, or corrosion. Do not use if any damage is observed.
- Environmental Conditions: While the charger is IP56 waterproof and dustproof, avoid prolonged exposure to extreme weather conditions or submerging the unit in water.
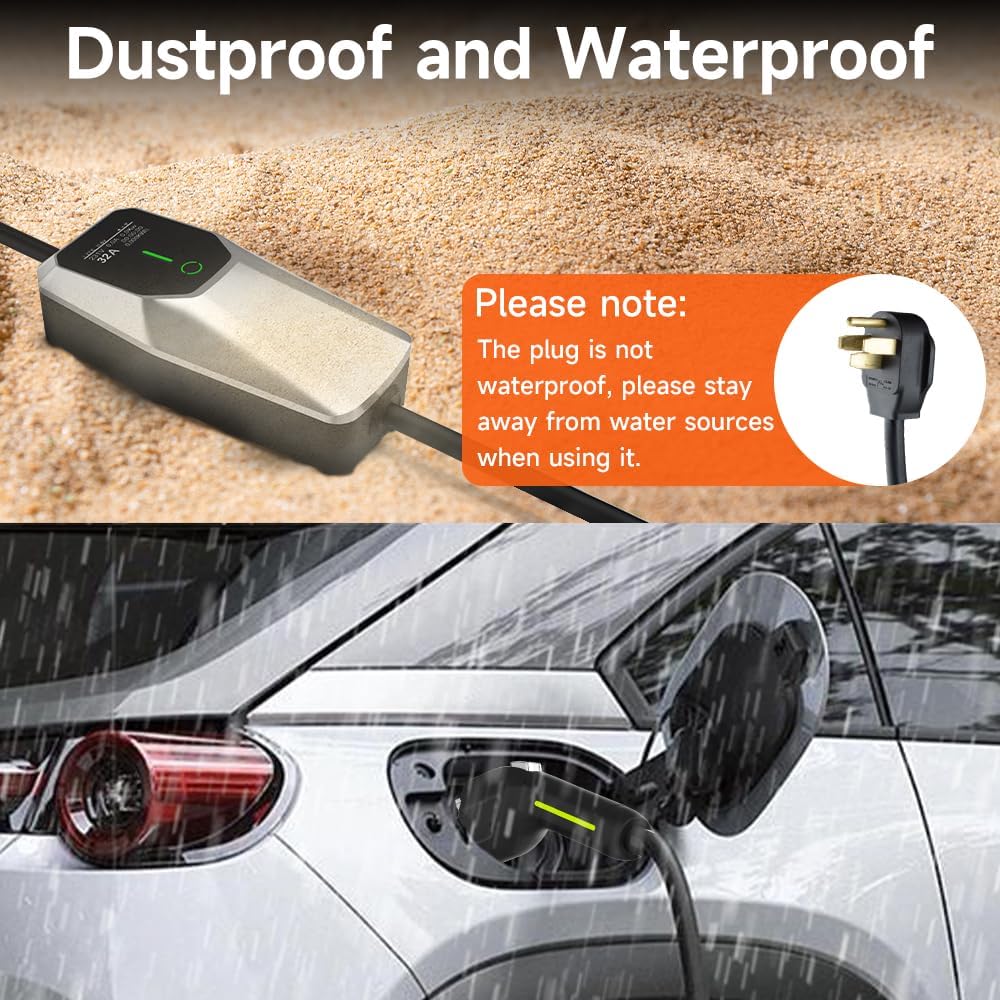
Figure 8.1: Charger's dustproof and waterproof capabilities.
9. Troubleshooting
9.1 "E04" Error Displayed
If the charger displays an "E04" error, it indicates that the product does not detect a proper grounding wire, which prevents normal charging. To resolve this:
- Ensure the power outlet you are using is correctly grounded. If unsure, consult a qualified electrician.
- If the outlet is grounded and the error persists, or if you are in a situation where grounding cannot be verified, you can attempt to bypass the grounding check.
- To bypass grounding check: Long press the 'Power' button on the control box. The display will show options like "GND". Select "No grounding" to proceed.
Warning: Bypassing the grounding check should only be done if absolutely necessary and with caution, as it may reduce certain safety protections.

Figure 9.1: Steps to address the "E04" grounding error.
9.2 Charger Not Initiating Charge
- Verify that the charger is securely plugged into the power outlet and the J1772 connector is fully inserted into the vehicle's charging port.
- Check the display for any error messages.
- Ensure the selected current setting is appropriate for the connected power source (e.g., below 16A for 120V outlets).
- If scheduled charging is enabled, wait for the set delay to expire.
9.3 Overheat Protection
The charger is equipped with overheat protection. If the internal temperature exceeds safe limits:
- At >85°C, the current will automatically reduce.
- At >95°C, charging will automatically pause.
- Charging will automatically recover when the temperature drops below 70°C.
If overheating occurs, ensure the charger is in a well-ventilated area and not exposed to direct sunlight or other heat sources.
10. Specifications
| Feature | Specification |
|---|---|
| Model Number | SY-NS-AC1.0-32AS+SY-SP2-AC3.0-32AS |
| Power Output | 7.68 KW |
| Amperage | 32 Amps (Max) |
| Input Voltage | AC110V-240V |
| Connector Type | SAE J1772 |
| Plug Types | NEMA 14-50P, NEMA 5-15P (with adapter) |
| Cable Length | 26 feet |
| Waterproof Rating | IP56 |
| Operating Temperature | -25°C to +55°C |
| Frequency | 50-60Hz |
| Item Weight | 8.8 pounds |
| Package Dimensions | 16.81 x 13.66 x 5.04 inches |
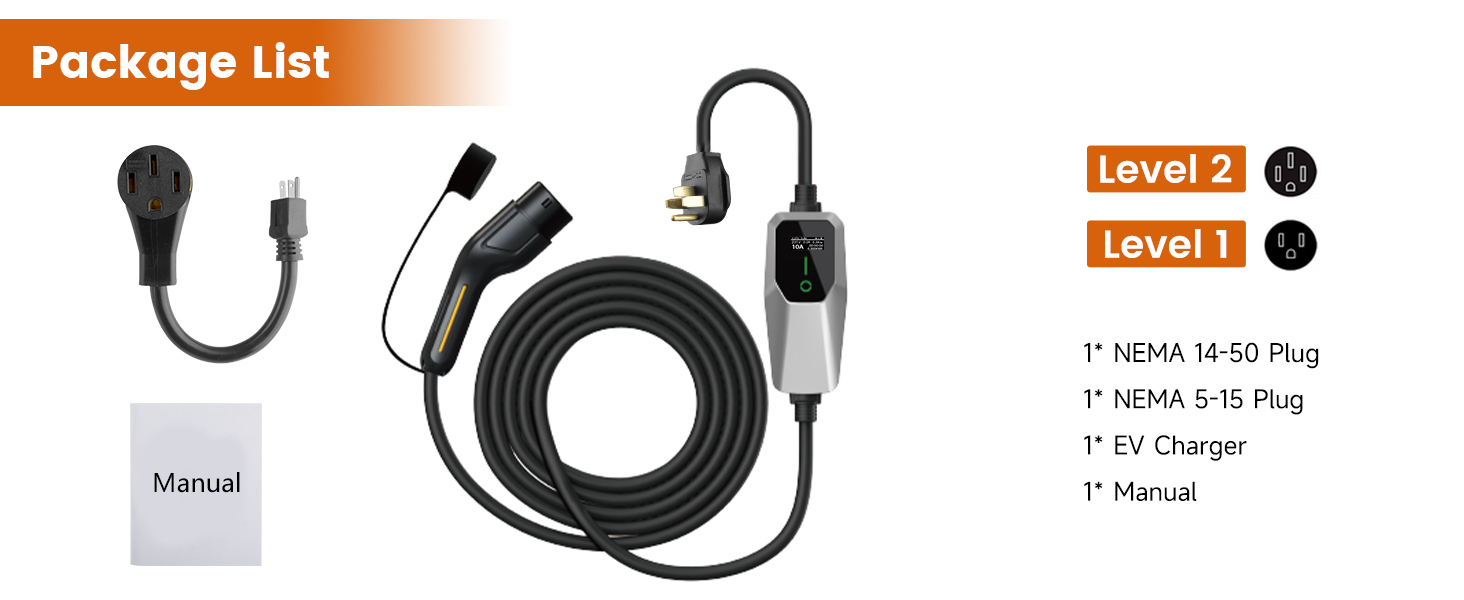
Figure 10.1: Product specifications and component diagram.
11. Warranty and Support
The EagleNav Level 1 & 2 Portable EV Charger comes with a 2-year warranty from the date of purchase. This warranty covers defects in materials and workmanship under normal use.
For warranty claims, technical support, or any inquiries, please contact EagleNav customer service through the retailer where the product was purchased or visit the official EagleNav store page on Amazon.
Online Support: EagleNav Amazon Store