
HONE FC140
HONE FC140 3-in-1 Flux Core Welder Instruction Manual
Model: FC140 | Brand: HONE
Introduction
The HONE FC140 is a powerful and versatile 3-in-1 multi-process welding machine designed for both DIY enthusiasts and industry professionals. It offers Flux-Cored MIG, Stick (MMA), and Lift TIG welding capabilities, all powered by a standard 110V AC input. Its compact and lightweight design makes it highly portable for various applications, from home repairs to farm maintenance.
This manual provides essential information for the safe and effective operation of your HONE FC140 welder. Please read it thoroughly before use to ensure proper setup, operation, and maintenance.
Safety Information
WARNING: Welding can be dangerous. Always follow safety precautions to prevent injury or death. Read and understand all safety warnings and instructions before operating this machine.
- Always wear appropriate personal protective equipment (PPE), including a welding helmet with proper shade, flame-resistant clothing, welding gloves, and safety shoes.
- Ensure adequate ventilation to avoid inhaling welding fumes.
- Protect yourself and others from arc rays and hot metal.
- Ensure proper grounding of the workpiece and the welding machine.
- Do not weld near flammable materials.
- Disconnect power before performing any maintenance or changing accessories.
- Keep children and unauthorized persons away from the welding area.
Package Contents
Verify that all items are present in your package:
- HONE FC140 3-in-1 Flux Core MIG Welder (1 pc)
- Welding Gun 9.85 ft (3.0 m) (1 pc)
- Electrode holder with welding cable and cable joint 8.2 ft (2.5 m) (1 pc)
- Earth clamp with welding cable and cable joint 8.2 ft (2.5 m) (1 pc)
- Brush hammer (1 pc)
- Adjustable shoulder strap (1 pc)
- Contact Tip .03-inch (2 pcs)
- Contact Tip .035-inch (2 pcs)
- Flux core wire 2LB (1 pc)

Figure 1: HONE FC140 Welder and its complete set of accessories.
Product Overview
The HONE FC140 features a user-friendly digital smart control system, making it easy to operate even for beginners. The front panel includes a large LED display and two control knobs for precise adjustments.

Figure 2: Front panel controls and connections.
Key Features:
- 3-in-1 Multi-Process: Supports Flux-Cored MIG, Stick (MMA), and Lift TIG welding.
- Synergic Control: Simplifies settings for Flux-Cored welding, allowing even beginners to achieve good results.
- Smart Stick Welding: Built-in Hot-start for easier arc striking, Arc-force for smoother welding and deeper penetration, and Anti-stick for easy electrode removal.
- Wide Application: Capable of welding various ferrous metals including mild steel, medium carbon steel, stainless steel, and cast iron.
- Portable Design: Weighs only 10.1 lbs, with a handle and included shoulder strap for easy transport.
- Advanced IGBT Inverter Technology: Provides smooth arc, low spatter, and deep bath for quality welds.
- Fast Air Cooling: Ensures stable operation and extends machine lifespan.
Setup
1. Wire Installation (Flux Core MIG)
- Open the side panel of the welder to access the wire spool compartment.
- Remove the retaining nut and spring from the spool spindle.
- Place the 2lb flux core wire spool onto the spindle, ensuring it rotates freely.
- Replace the spring and retaining nut, tightening just enough to prevent free spinning but allowing smooth wire feed.
- Adjust the drive roller to match the wire size (.030" or .035"). Ensure the correct groove is facing outwards.
- Straighten the end of the wire and feed it through the wire guide into the drive roller mechanism.
- Close the drive roller tension arm.
Video 1: FC140 Flux core weld operate guide. This video demonstrates the process of installing the flux core wire into the welder and preparing it for use.
2. Connecting Accessories
- MIG Gun: Insert the MIG gun connector into the designated port on the front panel (usually the leftmost port with a small pin connector for the trigger). Twist to secure.
- Ground Clamp: Connect the ground clamp cable to the appropriate output terminal (usually the negative (-) terminal for flux core).
- Electrode Holder (for Stick): Connect the electrode holder cable to the positive (+) terminal for most stick welding applications.
- TIG Torch (for Lift TIG): Connect the TIG torch to the appropriate terminal (usually the negative (-) terminal for DC Lift TIG). Ensure gas connection if using shielded TIG.
Video 2: HONE MIG Welder 110V, Actual140Amp 3 in 1 Flux Core Welder. This video provides an overview of the welder and how to connect its various components for different welding processes.
3. Power Connection
Connect the welder's power cord to a standard 110V AC power outlet. Ensure the outlet can provide sufficient amperage (a 20 amp circuit is recommended for full output).
Operating Modes
The FC140 offers three primary welding modes, selectable via the function select button on the front panel.
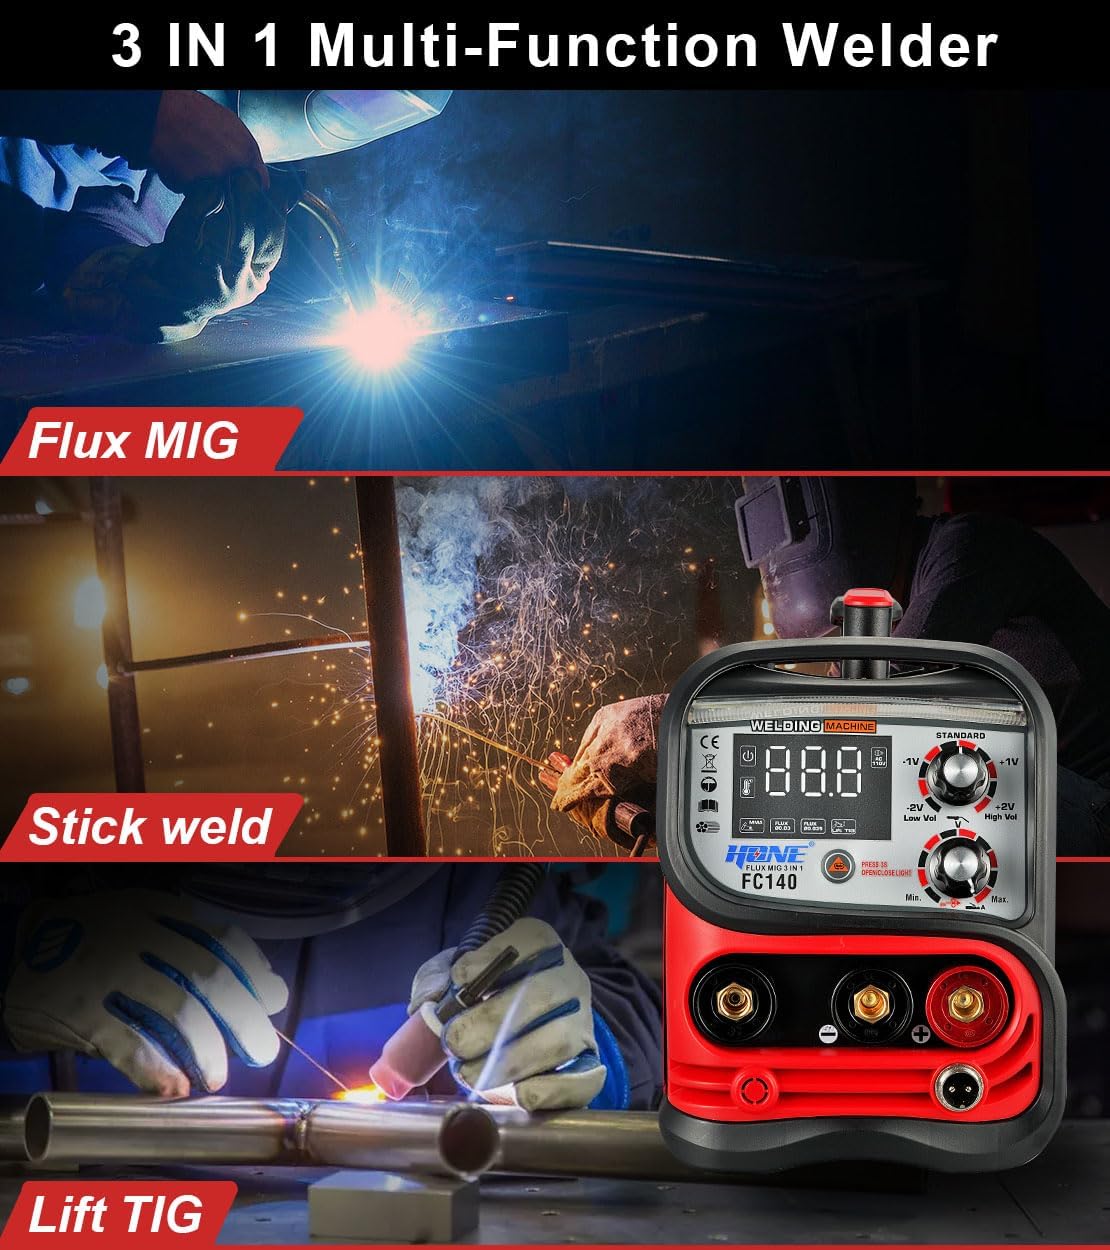
Figure 3: The FC140 supports Flux MIG, Stick weld, and Lift TIG functions.
1. Flux Core MIG Welding
This mode is ideal for welding mild steel without the need for shielding gas. The machine features synergic adjustment, simplifying the setup process.
- Select "FLUX .030" or "FLUX .035" based on your wire size.
- The bottom knob controls wire speed (and indirectly amperage).
- The top knob allows for fine-tuning the voltage (±2V) from the standard synergic setting.
- For optimal results, keep the fine-tune voltage knob generally in the middle position and adjust as needed.
Video 3: HONE Flux-cored wire MIG Welder 110V- FC140 Operation Guide. This video demonstrates the operation of the FC140 for flux-cored MIG welding.
2. Stick Welding (MMA)
The FC140's smart stick functions provide easy arc striking and stable welding current.
- Select "MMA" mode.
- The bottom knob directly controls the welding current (Amperage).
- The machine is suitable for various electrode types, including E6013, E7018, E6011, E6010, and E308L.
- Built-in Hot-start, Arc-force, and Anti-stick features enhance performance.
3. Lift TIG Welding
For precise welding of thinner materials, the Lift TIG function offers excellent control.
- Select "LIFT TIG" mode.
- The bottom knob controls the welding current (Amperage).
- A separate TIG torch and shielding gas (e.g., Argon) are required for this process (not included).
- Initiate the arc by lightly touching the tungsten electrode to the workpiece and then lifting it slightly.
Welding Guidelines & Applications
The FC140 is designed for a wide range of applications, from small home projects to more demanding tasks.

Figure 4: Examples of welding applications and compatible materials.
| Workpiece Thickness | Wire Diameter | Current (Approx.) |
|---|---|---|
| 1/32 inch (0.8mm) | .030 inch (0.8mm) | 20A |
| 13/64 inch (5.2mm) | .030 inch (0.8mm) | 120A |
| 1/4 inch (6.35mm) | .035 inch (0.9mm) | 140A |
The wire feed welder is capable of welding all kinds of ferrous metals such as medium carbon steel, mild steel, fence, automotive exhaust pipe, stainless steel and cast iron.
Maintenance
Regular maintenance ensures the longevity and optimal performance of your HONE FC140 welder.
- Cleaning: Regularly clean the machine's exterior and ventilation grilles to prevent dust and debris buildup. Use a dry, clean cloth.
- Contact Tips & Nozzles: Inspect and clean the MIG gun contact tip and nozzle frequently. Replace worn or clogged tips to ensure consistent wire feeding and arc stability.
- Wire Feed Roller: Check the wire feed roller for wear and ensure it is free of debris. Clean the grooves as needed.
- Cables & Connections: Inspect all welding cables, connectors, and the ground clamp for damage, fraying, or loose connections. Repair or replace as necessary.
- Storage: Store the welder in a dry, clean environment away from direct sunlight and extreme temperatures.
Troubleshooting
This section addresses common issues you might encounter with your HONE FC140 welder. For problems not listed here, please contact customer support.
| Problem | Possible Cause | Solution |
|---|---|---|
| No Power | Power switch off, loose connection, tripped breaker | Turn on switch, check connections, reset breaker |
| No Arc / Weak Arc | Poor ground connection, incorrect settings, worn contact tip, wire feeding issue | Ensure good ground, adjust settings, replace tip, check wire feed path |
| Wire Not Feeding | Tangled wire, incorrect drive roller tension, clogged liner, worn contact tip | Untangle wire, adjust tension, clean liner, replace tip |
| Excessive Spatter | Incorrect voltage/wire speed, improper stick-out, dirty workpiece | Adjust settings, reduce stick-out, clean workpiece thoroughly |
| Overheat Protection | Exceeded duty cycle, poor ventilation | Allow machine to cool down, ensure clear airflow to vents |
Specifications
| Specification | Value |
|---|---|
| Manufacturer | HONE |
| Model Number | FC140 |
| Item Weight | 18.43 pounds |
| Product Dimensions | 5.8 x 7.69 x 14 inches |
| Power Source | AC 110V (90 ~ 140V) |
| Rated Input Current (MIG/MMA/TIG) | 39A(MIG) / 43A(MMA) / 29A(TIG) |
| Welding Current (MIG/MMA/TIG) | 20 ~ 140A(MIG & MMA) / 10 ~ 140A(TIG) |
| Duty Cycle (MIG/MMA/TIG) | 35%MIG / 30%MMA / 40%TIG |
| Flux Core MIG Wire | Mild Steel E71TGS .030 / .035 inch, 2-Pound Spool |
| Electrode Diameter (MMA) | 1/16 inch ~ 1/8 inch (1.6mm ~ 3.2mm) |
| Electrode Type (MMA) | AWS E6013, E7018, E6011, E6010, E308L etc |
| Protection Grade | IP21S |
| Insulation Grade | H |
Warranty and Support
For warranty information, technical support, or service inquiries, please refer to the contact details provided in your product packaging or visit the official HONE website. Keep your purchase receipt for warranty claims.
Visit the HONE Store: HONE Official Store
Ask a question about this manual
Ask about setup, troubleshooting, compatibility, parts, safety, or missing instructions. Manuals+ will review the question and use this page’s manual context to help answer it.