dearnow HR698-52DK
dearnow 52-inch Ceiling Fan with Lights and Remote Control User Manual
Model: HR698-52DK
1. Introduction
Thank you for choosing the dearnow 52-inch Ceiling Fan with Lights and Remote Control. This manual provides essential information for the safe installation, operation, maintenance, and troubleshooting of your new ceiling fan. Please read all instructions carefully before beginning installation and retain this manual for future reference.
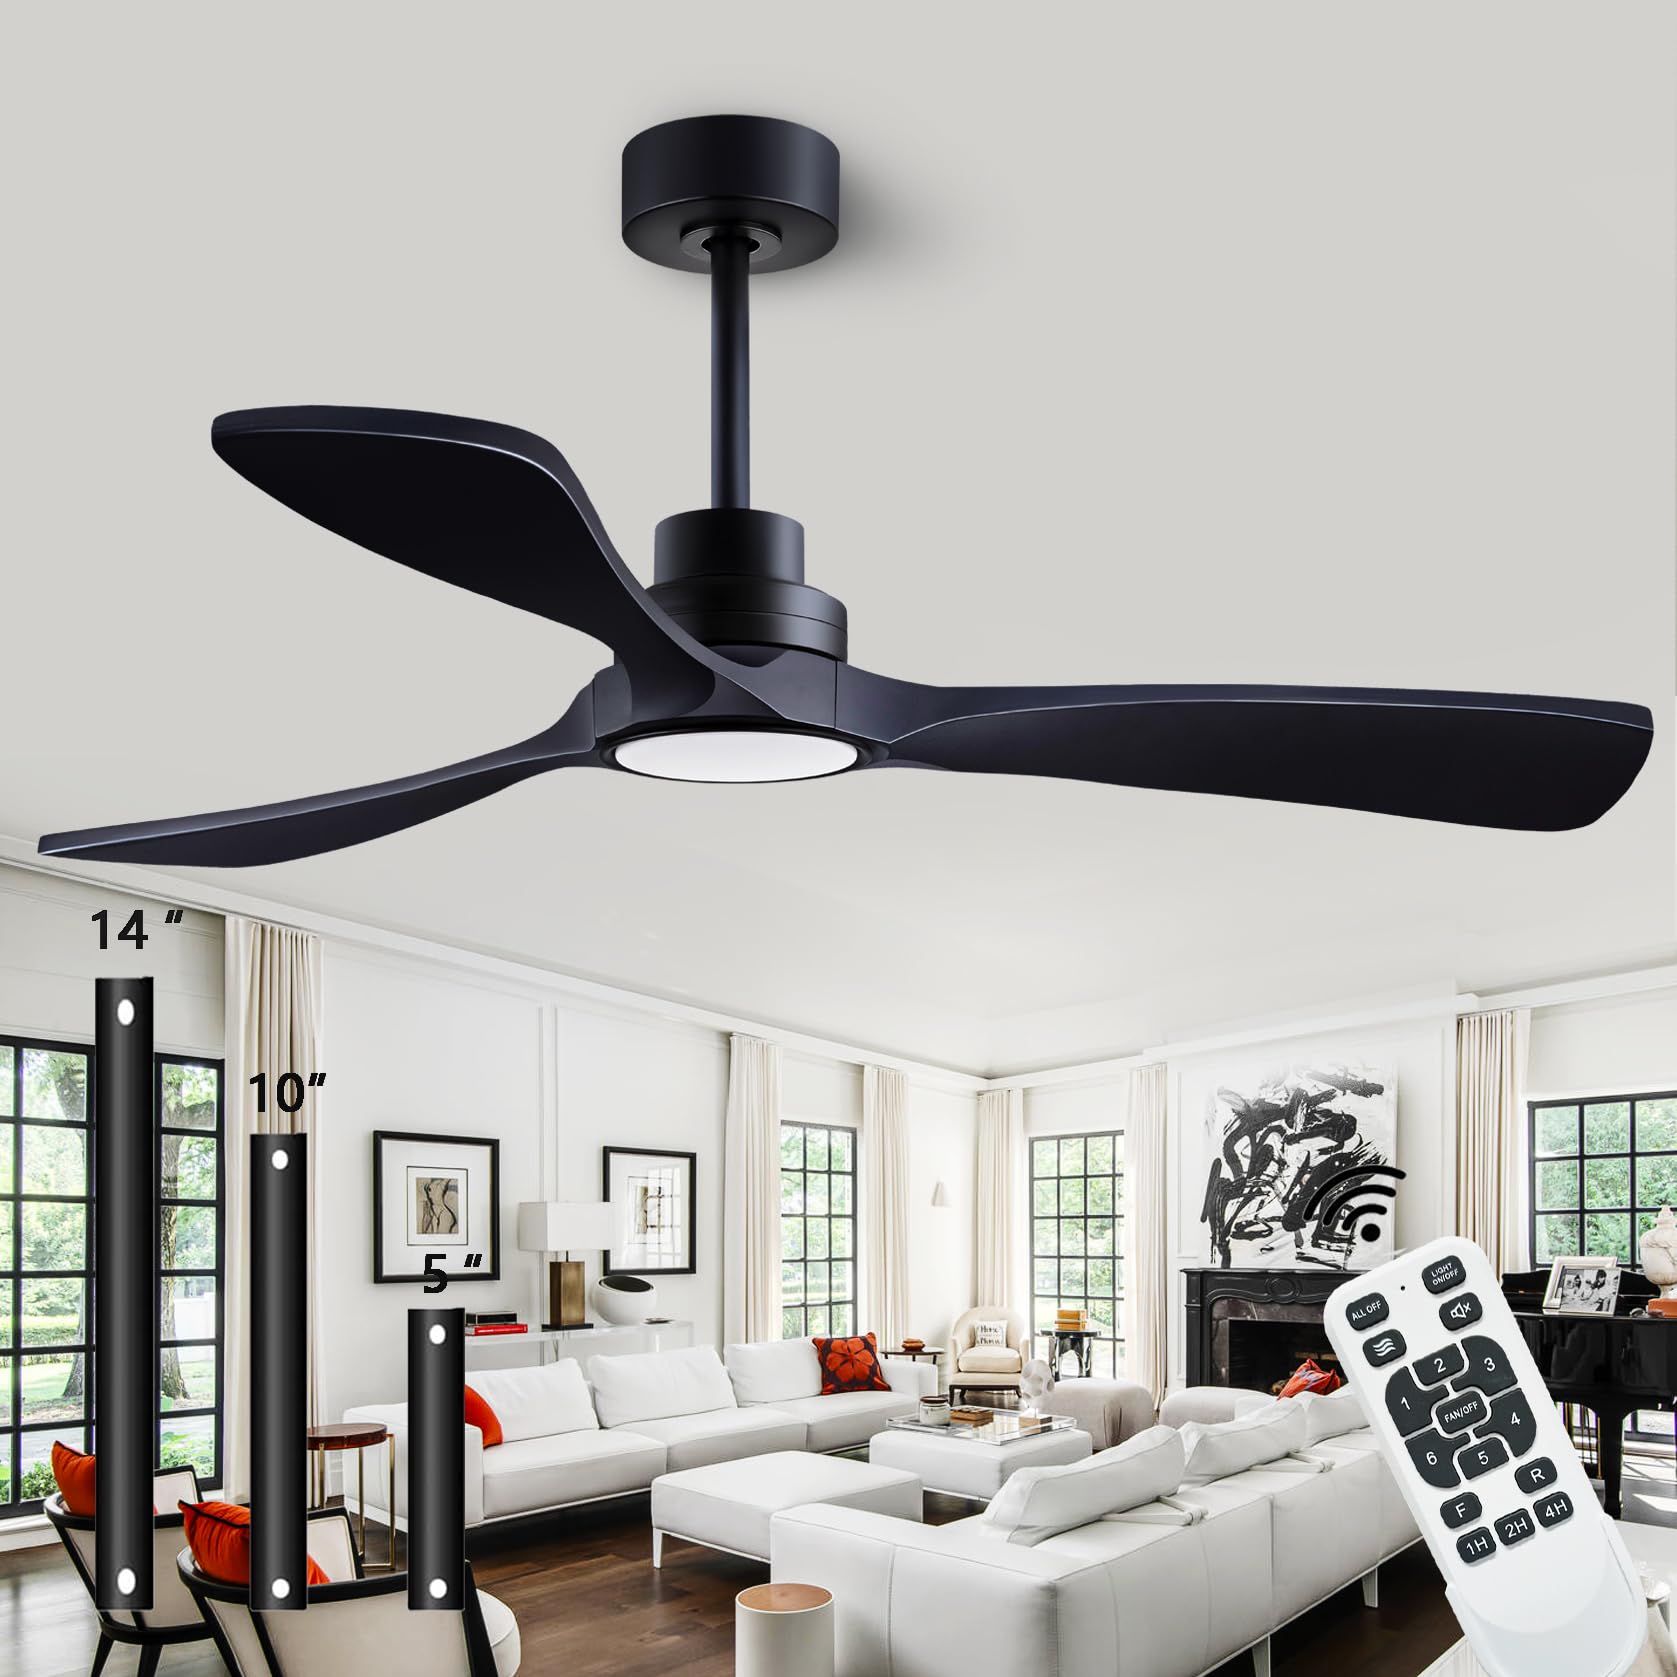
Image: The dearnow 52-inch Black Ceiling Fan with Lights and Remote Control, featuring three sleek blades and an integrated LED light, installed in a modern living space.
2. Important Safety Information
WARNING: To reduce the risk of fire, electric shock, or personal injury, always turn off the main power supply at the circuit breaker before installation or servicing.
- All wiring must be in accordance with national and local electrical codes. Consult a qualified electrician if you are unsure about wiring.
- The mounting box and support structure must be securely fastened and capable of reliably supporting a minimum of 35 lbs (15.9 kg).
- Ensure the installation site allows for blade clearance of at least 7 feet (2.1 meters) from the floor and 18 inches (45 cm) from any wall or obstruction.
- Do not operate the fan with damaged blades. Replace all blades if any are damaged.
- Do not insert objects into the path of the fan blades while the fan is operating.
3. Package Contents
Verify that all components are present before beginning installation:
- Motor Housing
- 3 Solid Wood Blades
- Downrods (5-inch, 10-inch, 14-inch)
- Mounting Bracket
- Canopy
- LED Light Kit
- Remote Control with Receiver
- Hardware Pack (screws, washers, wire nuts)
- Instruction Manual

Image: The remote control unit and three different length downrods (5-inch, 10-inch, 14-inch) included with the dearnow ceiling fan.
4. Setup and Installation
Follow these steps for proper installation. It is recommended to have a second person assist during installation.
4.1. Mounting the Fan
- Turn off Power: Ensure power is disconnected at the circuit breaker.
- Install Mounting Bracket: Secure the mounting bracket to the ceiling junction box using the provided screws. Ensure the junction box is rated for ceiling fan support.
- Assemble Downrod: Feed the motor wires through the chosen downrod. Insert the downrod into the motor housing and secure it with the pin and clip.
- Hang Fan Assembly: Carefully lift the fan assembly and hang it from the mounting bracket hook.
4.2. Wiring Connections
- Connect Receiver: Connect the remote control receiver to the fan and house wiring according to the wiring diagram in the separate wiring guide. Use wire nuts to secure connections.
- Grounding: Connect all green (ground) wires together.
- Secure Wiring: Tuck all wires neatly into the junction box.
4.3. Attaching Blades and Light Kit
- Attach Blades: Secure each solid wood blade to the motor housing using the provided screws. Ensure all screws are tightened.
- Install LED Light Kit: Connect the LED light kit wires to the fan motor wires. Secure the light kit to the bottom of the fan motor housing.
- Attach Light Cover: Twist or snap the light cover into place over the LED light kit.

Image: A close-up view of one of the dearnow ceiling fan's solid wood blades, showcasing the natural grain and quality craftsmanship.
4.4. Installation Videos
For visual guidance, please refer to the following installation videos:
Video: A detailed guide demonstrating the step-by-step process of installing the ceiling fan light component.
Video: A visual demonstration of the ceiling fan light installation in a typical room setting.
5. Operating Instructions
Your dearnow ceiling fan comes with a convenient remote control for easy operation of all functions.
5.1. Remote Control Functions
- Fan ON/OFF: Press the 'FAN/OFF' button to turn the fan on or off.
- Fan Speed: Select from 6 adjustable speeds using buttons '1' through '6'.
- Light ON/OFF: Press the 'LIGHT ON/OFF' button to control the integrated LED light.
- Light Color Temperature: Cycle through 3 color temperatures (3000K Warm White, 4500K Neutral White, 6000K Cold White) by pressing the light bulb icon button. The fan remembers your last setting.
- Forward/Reverse (F/R): Press the 'F/R' button to change the blade rotation direction. This allows for summer (downward airflow) and winter (upward airflow) modes.
- Timer: Set the fan to turn off automatically after 1, 4, or 8 hours using the '1H', '4H', '8H' buttons.
- Quiet Operation: The DC inverter motor ensures quiet operation, typically below 30dB.
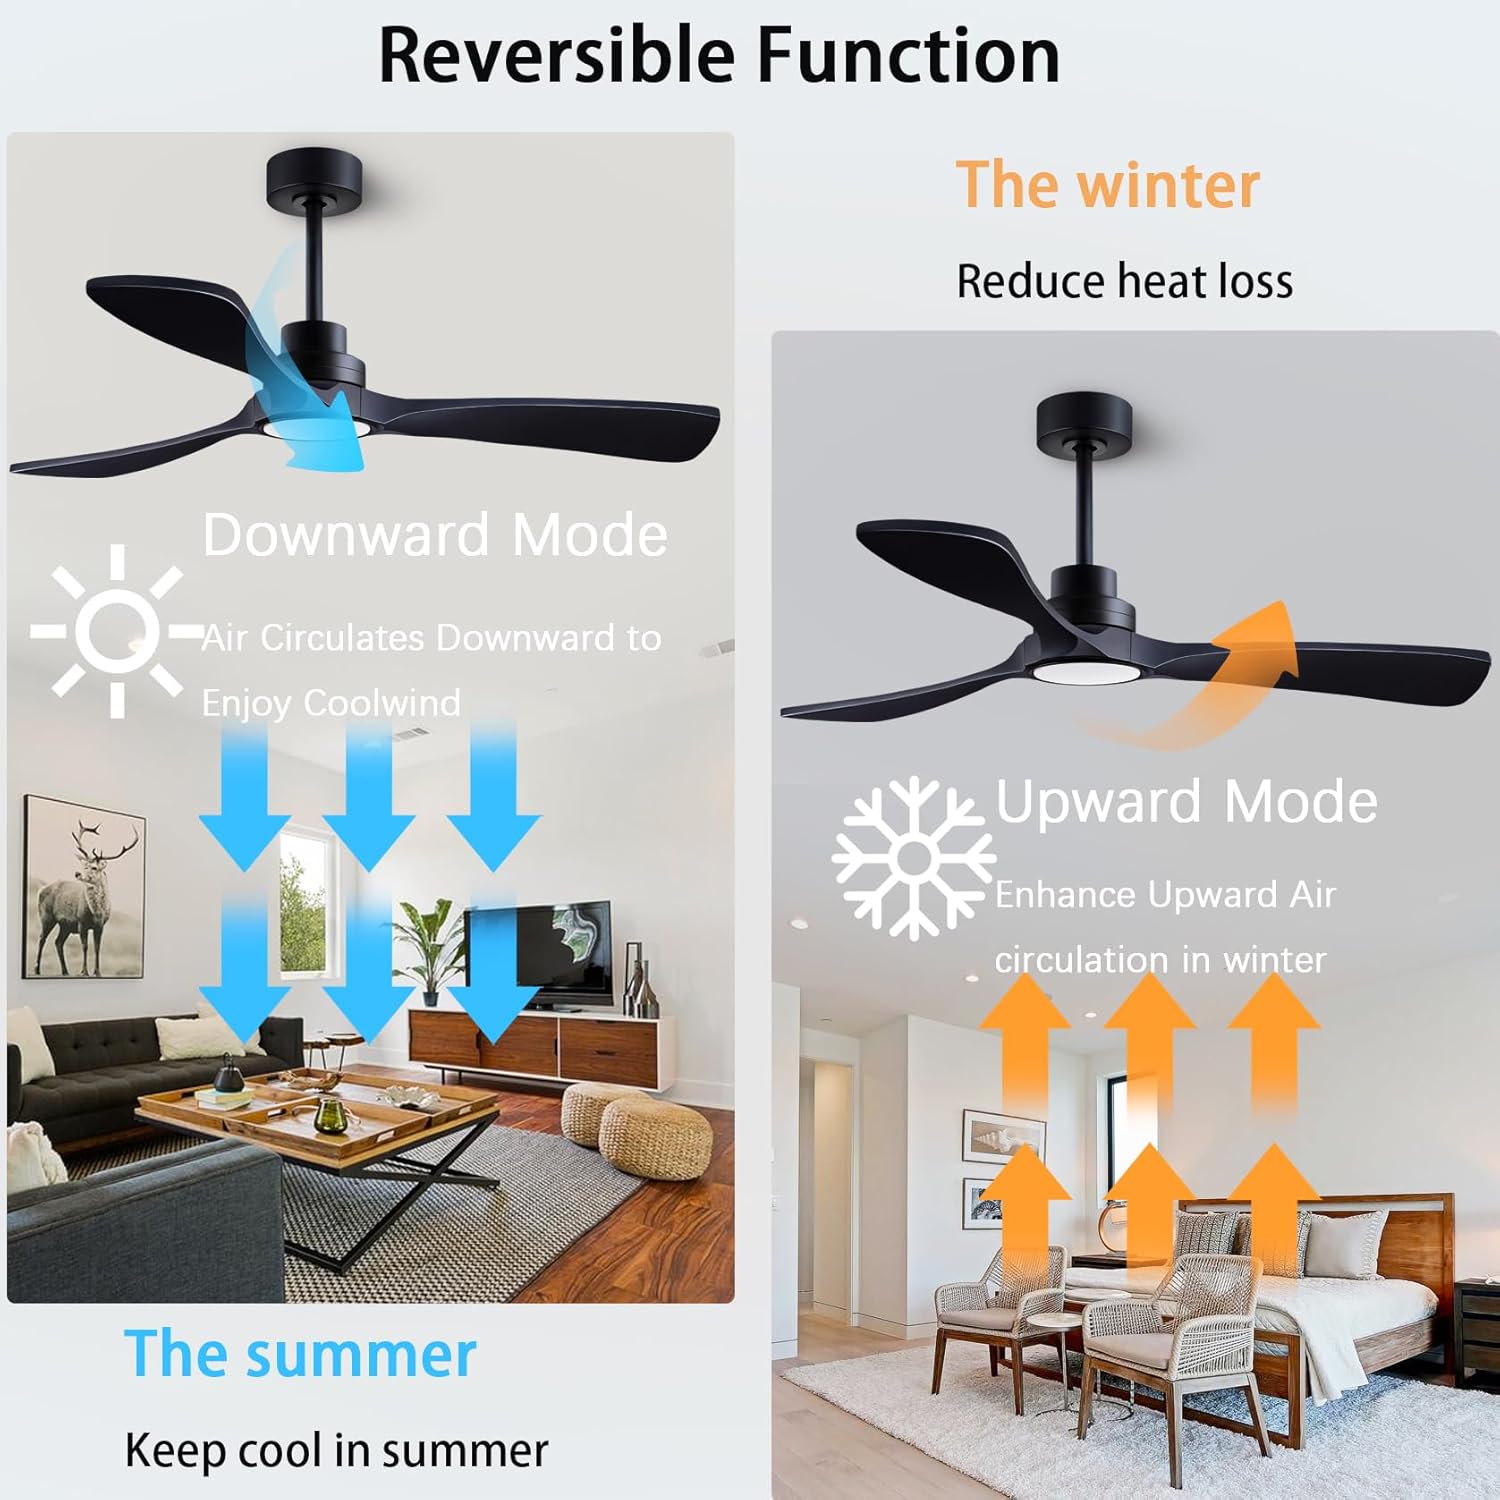
Image: A visual representation of the fan's reversible function, showing downward airflow for cooling in summer and upward airflow for circulating warm air in winter.

Image: Examples of the three adjustable LED light color temperatures: 3000K Warm White, 4500K Natural White, and 6000K Cool White.
6. Maintenance
Regular maintenance ensures optimal performance and longevity of your ceiling fan.
- Cleaning: Clean the fan housing and blades with a soft, damp cloth. Do not use abrasive cleaners or solvents.
- Blade Inspection: Periodically check the blade attachments for tightness. Loose blades can cause wobbling and noise.
- Light Cover: Ensure the light cover is securely attached.
- No Lubrication Needed: The motor is permanently lubricated and does not require oiling.
7. Troubleshooting
Before attempting any repairs, ensure the power supply is disconnected.
| Problem | Possible Cause | Solution |
|---|---|---|
| Fan does not start | No power to the fan; Loose wire connections; Remote control not paired. | Check circuit breaker; Verify all wire connections are secure; Pair the remote control (refer to remote instructions). |
| Fan wobbles | Loose blade screws; Improperly balanced blades; Loose mounting bracket. | Tighten all blade screws; Use a blade balancing kit (not included) to balance blades; Ensure mounting bracket is securely fastened. |
| Light does not work | Loose wire connections; Faulty LED light kit. | Check light kit wiring connections; Contact customer support for a replacement LED light kit if necessary. |
| Remote control not working | Dead batteries; Remote not paired with receiver. | Replace batteries; Pair the remote control with the fan receiver. |
8. Specifications
| Feature | Detail |
|---|---|
| Brand | dearnow |
| Model Name | HR698-52DK |
| Size | 52-inch |
| Color | Black |
| Material | Alloy Steel, Copper, Metal, Plastic, Wood |
| Motor Type | DC Inverter Motor |
| Control Method | Remote Control |
| Fan Speeds | 6 |
| Light Type | Integrated LED (15W, 1500 lumens) |
| Light Color Temperatures | 3 (Warm White, Neutral White, Cold White) |
| Special Features | Adjustable Height, Adjustable Tilt, Reversible Function, Timer (1H, 4H, 8H) |
| Noise Level | Below 30dB |
| Power Source | DC, 120 Volts |
| Product Dimensions | 52 x 52 x 16 inches |
| Item Weight | 12.03 pounds |
| Assembly Required | Yes |
9. Warranty and Support
dearnow is committed to providing high-quality products and excellent customer service.
- Motor Warranty: The dearnow motor is covered by a 10-year warranty.
- Full Machine Warranty: The entire fan unit is covered by a 2-year worry-free guarantee.
- Remote Replacement: If the remote control is lost or damaged, a free replacement remote will be provided.
For any questions, technical assistance, or warranty claims, please contact dearnow customer support through your purchase platform or visit the official dearnow store.
Visit the dearnow Store on AmazonAsk a question about this manual
Ask about setup, troubleshooting, compatibility, parts, safety, or missing instructions. Manuals+ will review the question and use this page’s manual context to help answer it.