1. Introduction and Overview
This manual provides essential instructions for the safe and efficient use of your Maxcom MM135L Basic Mobile Phone. The MM135L is designed for straightforward communication, featuring a user-friendly interface, large keys, and a 1.77-inch screen. It supports 2G networks and includes dual SIM capability, an SOS button for emergencies, and convenient USB-C charging. Please read this manual thoroughly before operating the device.
2. Package Contents
Verify that all items are present in the package:
- Maxcom MM135L Mobile Phone
- Battery (Lithium-Ion, 600 mAh)
- USB Cable
- SIM Tray Ejector
- User Manual (this document)
3. Device Layout
Familiarize yourself with the physical components of your Maxcom MM135L phone.
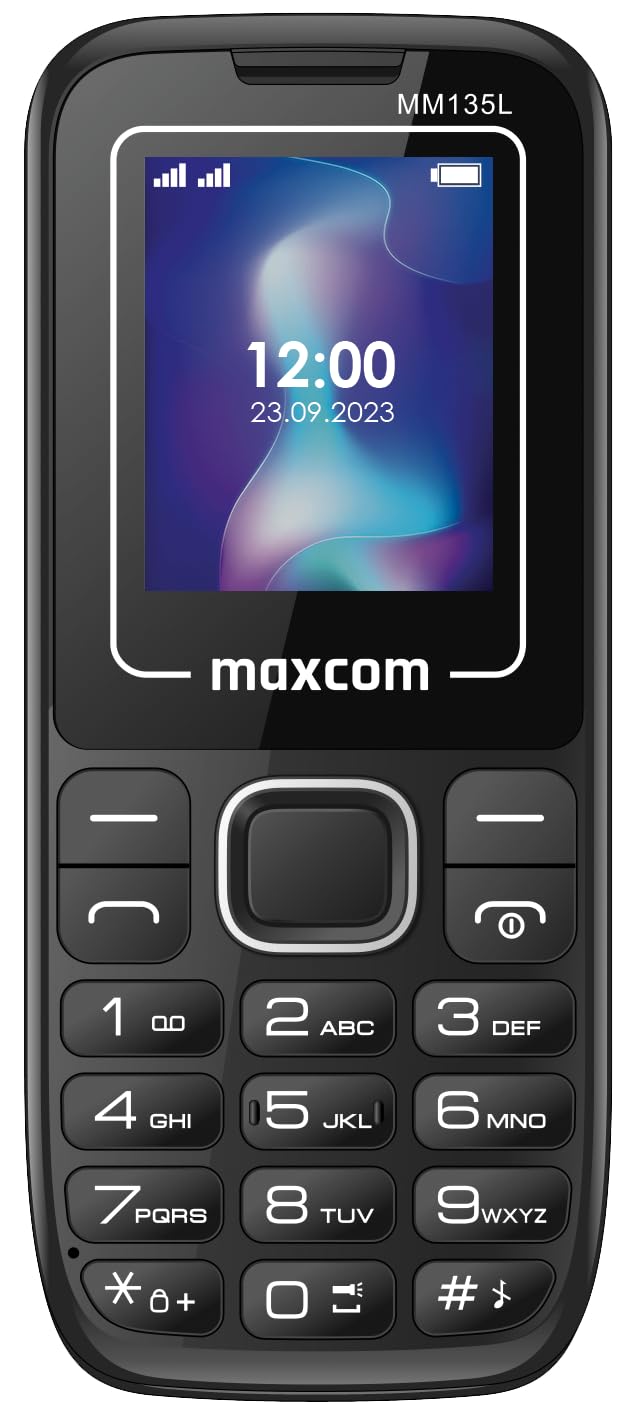
Figure 3.1: Rear view of the Maxcom MM135L phone, showing the blue textured back cover, Maxcom logo, and speaker grille at the top.

Figure 3.2: Front view of the Maxcom MM135L phone, displaying the screen, large numeric keypad, and call/end buttons.

Figure 3.3: Bottom edge of the phone, featuring the USB-C charging port and a 3.5mm headphone jack.

Figure 3.4: Top edge of the phone, highlighting the integrated flashlight.
Key Components:
- Display Screen: 1.77-inch LCD for clear text and call information.
- Numeric Keypad: Large, tactile buttons for easy dialing and texting.
- Call/End Buttons: Dedicated buttons for managing calls.
- Navigation Keys: For menu navigation.
- SOS Button: Located on the rear for emergency calls (refer to Figure 3.1).
- Flashlight: Integrated at the top of the device (refer to Figure 3.4).
- USB-C Port: For charging the device (refer to Figure 3.3).
- Headphone Jack: 3.5mm port for audio accessories (refer to Figure 3.3).
4. Setup
4.1 Battery Installation
- Carefully remove the back cover of the phone.
- Align the battery contacts with the terminals inside the battery compartment.
- Gently press the battery into place.
- Replace the back cover, ensuring it clicks securely.
4.2 SIM Card Installation
The Maxcom MM135L supports dual SIM cards.
- With the phone powered off and the back cover removed, locate the SIM card slots.
- Insert your SIM card(s) into the designated slot(s) with the gold contacts facing down, following the orientation indicated on the phone.
- Ensure the SIM card(s) are fully seated.
- Replace the back cover and battery.
4.3 Charging the Phone
The phone uses a USB-C port for charging.
- Connect the USB-C cable to the charging port at the bottom of the phone (refer to Figure 3.3).
- Connect the other end of the USB cable to a compatible USB power adapter or a computer's USB port.
- The battery indicator on the screen will show the charging status.
- Disconnect the charger once the battery is fully charged.
Note: For optimal battery life, fully charge the phone before first use.
5. Operating Instructions
5.1 Power On/Off
- To Power On: Press and hold the Call/Power button until the screen lights up.
- To Power Off: Press and hold the End/Power button until the power off options appear, then confirm.
5.2 Making and Receiving Calls
- To Make a Call: Enter the phone number using the keypad and press the Call button.
- To Answer a Call: Press the Call button when the phone rings.
- To End a Call: Press the End button.
5.3 Sending and Receiving Messages
- Navigate to the "Messages" menu using the navigation keys.
- Select "Create New Message" to compose an SMS.
- Enter the recipient's number and your message, then send.
- Received messages will appear in the "Inbox".
5.4 Using the SOS Button
The SOS button is located on the rear of the phone. It is designed for emergency situations.
- To Activate: Press and hold the SOS button for several seconds.
- The phone will automatically sound an alarm and send emergency SMS messages to pre-set contacts.
- It will then automatically call the saved emergency contacts in a loop until a call is answered.
- Ensure emergency contacts are properly configured in the phone settings.
5.5 Flashlight Function
The built-in flashlight can be activated for convenience.
- Refer to the phone's specific settings or a dedicated side button for flashlight activation. Typically, a long press on a designated key or a side switch controls it.
6. Maintenance
- Cleaning: Use a soft, dry cloth to clean the phone's surface. Avoid liquid cleaners.
- Battery Care: Do not expose the battery to extreme temperatures. Avoid fully discharging the battery frequently.
- Storage: Store the phone in a cool, dry place when not in use for extended periods.
- Water Resistance: This phone is not water-resistant. Avoid exposure to liquids.
7. Troubleshooting
| Problem | Possible Solution |
|---|---|
| Phone does not power on. | Ensure the battery is correctly installed and charged. Connect the charger and try again. |
| Cannot make or receive calls. | Check if the SIM card is properly inserted and activated. Verify network signal strength. Contact your service provider if issues persist. |
| Battery not charging. | Ensure the USB-C cable and charger are securely connected and functional. Try a different charging cable or adapter. |
| SOS button not working. | Verify that emergency contacts are saved in the phone's settings. Ensure the phone has network coverage. |
| Poor call quality. | Move to an area with better network reception. Check the speaker and microphone for obstructions. |
8. Specifications
| Feature | Detail |
|---|---|
| Model Name | MM135L |
| Screen Size | 1.77 Inches |
| Display Type | LCD |
| Resolution | 128 x 160 |
| Cellular Technology | 2G |
| SIM Support | Dual SIM |
| Battery Type | Lithium-Ion |
| Battery Capacity | 600 mAh |
| Charging Port | USB-C |
| Dimensions (L x W x H) | 7 x 14 x 3.5 cm |
| Weight | 60 g |
| Special Features | SOS Button, Flashlight, Expandable Memory, Fast Charging Support |
9. Warranty and Support
For warranty information, technical support, or service inquiries, please refer to the warranty card included with your product or contact Maxcom customer service directly. Keep your proof of purchase for warranty claims.


