
1. Introduction
Thank you for choosing the j Junsun Portable Level 1 and Level 2 EV Charger. This manual provides essential information for the safe and efficient operation of your new EV charger. Please read this manual thoroughly before use and retain it for future reference.
This versatile charger offers both Level 1 (110V, 16A Max) and Level 2 (240V, 32A Max) charging capabilities, providing up to 7 KW of power. It is designed for SAE-J1772 compliant electric vehicles and plug-in hybrids, offering a charging speed up to 6 times faster than standard Level 1 chargers.
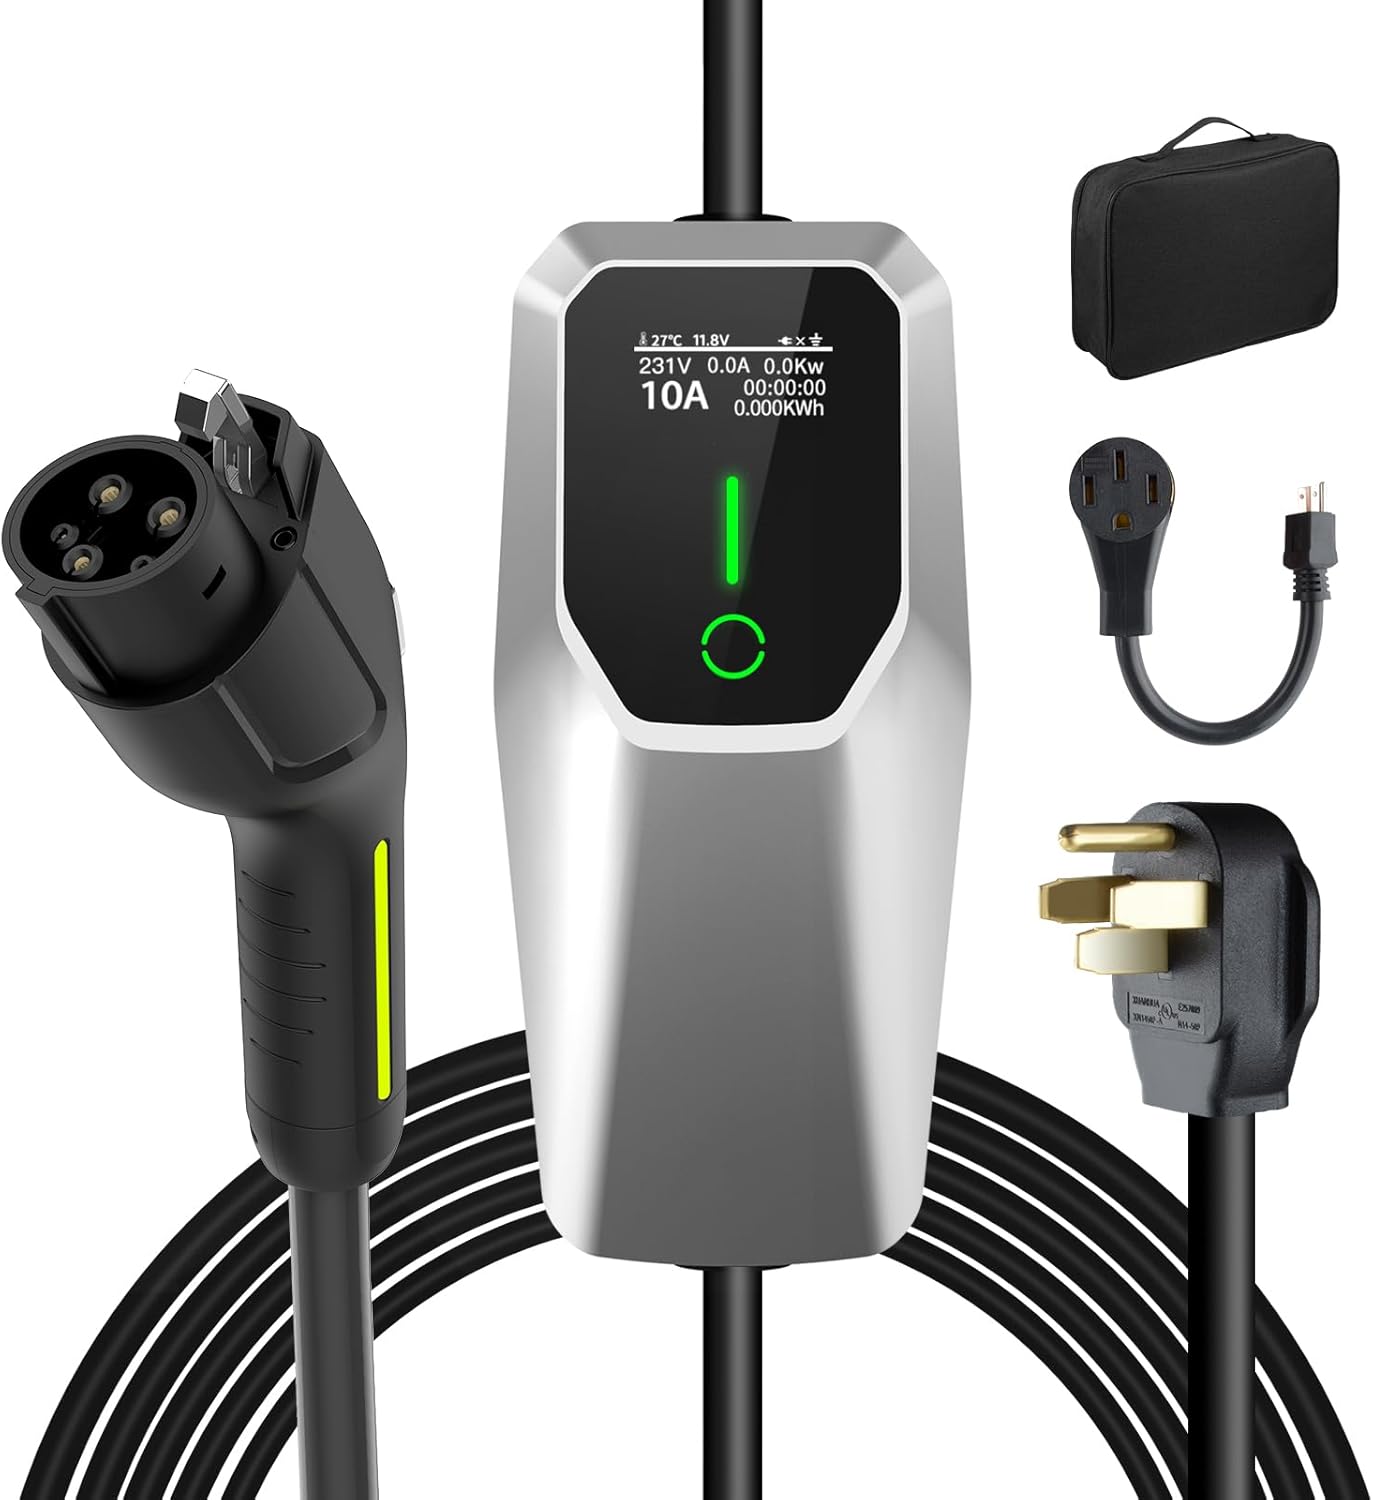
Image: The j Junsun Portable EV Charger, showcasing the main unit, charging cable, SAE-J1772 connector, NEMA 14-50 plug, and NEMA 5-15 adapter, along with a carrying case.
2. Package Contents
Please verify that all items are included in your package:
- Portable EV Charger Unit with integrated cable and SAE-J1772 connector
- NEMA 14-50 Plug (pre-attached)
- NEMA 5-15 Adapter
- User Manual (this document)
- Carrying Case

Image: A visual representation of the package contents, including the main charger unit, NEMA 14-50 plug, NEMA 5-15 adapter, user manual, and a black carrying bag.
3. Safety Information
Always adhere to the following safety precautions to prevent injury or damage:
- Do not use the charger if the cable or plug is damaged.
- Ensure the charging environment is dry and well-ventilated.
- Avoid submerging the charger in water.
- Do not attempt to disassemble or repair the charger yourself. Contact customer support for assistance.
- Keep out of reach of children.
- Ensure proper grounding for safe operation.

Image: An illustration highlighting the multi-protection features of the charger, including IP66 waterproof rating, lightning protection, overcurrent protection, ground protection, overvoltage protection, low-voltage protection, overcharge protection, and overheating protection.
4. Setup and Installation
The j Junsun Portable EV Charger is designed for ease of use. Follow these steps for initial setup:
- Unpack the Charger: Carefully remove all components from the packaging.
- Select Appropriate Plug:
- For Level 2 charging (up to 32A, 240V), use the pre-attached NEMA 14-50 plug.
- For Level 1 charging (up to 16A, 110V), attach the NEMA 5-15 adapter to the NEMA 14-50 plug.
- Connect to Power Outlet: Plug the charger into a compatible NEMA 14-50 or 5-15 outlet. The LCD screen will illuminate.
- Prepare Vehicle: Ensure your electric vehicle is ready for charging and the charging port is accessible. The charger is compatible with all SAE-J1772 EVs. (Note: Tesla vehicles require a J1772 to Tesla Charging Adapter, sold separately).

Image: A close-up of the charger's LCD screen, showing temperature, voltage, current, charging time, and charge quantity. Labels indicate the meaning of each displayed value.

Image: The portable EV charger mounted on a wall, connected to a white electric vehicle in a garage setting, demonstrating typical indoor use.
5. Operating Instructions
Using your j Junsun EV Charger is straightforward:
- Plug into Vehicle: Insert the SAE-J1772 connector into your vehicle's charging port. Ensure it clicks securely into place.
- Monitor Charging: The LCD screen will display real-time charging information, including current, voltage, charging amount, and time.
- Adjust Current (Optional): To adjust the charging current (16A/32A for NEMA 14-50, or up to 16A for NEMA 5-15), press the function button on the charger's control box. Repeated presses will cycle through available amperage settings.
- Schedule Charging (Optional): The charger supports scheduling charging times. Consult the detailed manual for specific steps on setting delayed charging. This feature is ideal for utilizing off-peak electricity rates.
- Charging Completion: The charger will automatically stop when your vehicle's battery is full. Disconnect the connector from your vehicle first, then unplug the charger from the wall outlet.

Image: A graphic illustrating the adjustable current feature, showing estimated miles gained per hour at 16A (12 miles), 20A (15 miles), 24A (18 miles), and 32A (24 miles).

Image: The EV charger connected to a white electric vehicle, highlighting the 26-foot cable length, which provides flexibility for charging in various locations.
6. Maintenance and Care
To ensure the longevity and optimal performance of your j Junsun EV Charger, follow these maintenance guidelines:
- Cleaning: Wipe the charger unit and cables with a soft, dry cloth. Do not use abrasive cleaners or solvents.
- Storage: When not in use, store the charger in its carrying case in a cool, dry place, away from direct sunlight and extreme temperatures.
- Cable Management: Avoid kinking or sharply bending the charging cable. Coil it loosely for storage.
- Environmental Protection: The charger has an IP67 waterproof and dustproof rating, making it suitable for outdoor use. However, prolonged exposure to harsh weather conditions should be minimized.

Image: A white electric vehicle being charged outdoors in the rain, illustrating the charger's IP67 waterproof and dustproof capabilities.
7. Troubleshooting
If you encounter issues with your charger, refer to the following common problems and solutions:
Issue: Charger displays "E04" or a Ground Fault Error.
This error typically indicates a grounding issue with the electrical outlet. The charger has a built-in safety feature that detects improper grounding.
Solution: In some cases, this error can be bypassed if your electrical system does not provide a ground wire (e.g., older NEMA 10-30 outlets). Follow these steps to bypass the ground fault detection:
- Ensure the charger is unplugged from the vehicle.
- Long press the "function" button on the charger's control box.
- Navigate through the menu options until you see "GND" or "Grounding".
- Select "No grounding" or the equivalent option to bypass the ground fault detection.
- Reconnect the charger to your vehicle and attempt charging again.
Note: Bypassing ground fault detection should only be done if you are certain about your electrical system and understand the potential risks. Consult a qualified electrician if unsure.

Image: A three-step visual guide demonstrating how to bypass the "E04" ground fault error on the charger's screen by long-pressing the function button, selecting "GND", and then choosing "No grounding".
Other Issues:
- Charger not powering on: Ensure it is securely plugged into a live electrical outlet. Check the circuit breaker.
- Slow charging: Verify the selected amperage setting on the charger. Ensure your vehicle and electrical system can support higher charging rates.
- Charging interrupted: Check for loose connections at both the outlet and the vehicle. Ensure no external factors (e.g., power fluctuations) are affecting the charge.
8. Specifications
| Feature | Specification |
|---|---|
| Brand | j Junsun |
| Model Number | SYCDQ328M1S |
| Input Voltage | 240 Volts (compatible with 110V via adapter) |
| Amperage | Adjustable 16A/32A (Max 32 Amps) |
| Max Power Output | 7.68 kW (at 32A, 240V) |
| Cable Length | 26 feet (approx. 7.9 meters) |
| Connector Type | SAE-J1772 |
| Plug Types | NEMA 14-50, NEMA 5-15 (with adapter) |
| Waterproof Rating | IP67 |
| Item Weight | 11.14 pounds (approx. 5.05 kg) |
| Package Dimensions | 16.65 x 12.95 x 4.96 inches |
9. Warranty and Support
j Junsun products are built with quality and reliability in mind. For warranty information and customer support, please refer to the contact details below.
For any questions, technical assistance, or warranty claims, please contact j Junsun customer support:
- Email: Junsun-US@outlook.com
- Service: 24 Hours Online Service

Image: A customer service representative wearing a headset and smiling while working on a laptop, symbolizing available support.