1. Introduction
The Thermalright Aqua Elite 240 ARGB V2 is an advanced all-in-one (AIO) CPU liquid cooler designed to provide superior thermal performance for your desktop computer. Featuring a 240mm radiator, two 120mm PWM ARGB fans, and a high-efficiency pump with S-FDB bearings, this cooler ensures effective heat dissipation, low noise operation, and vibrant customizable lighting. This manual provides essential information for proper installation, operation, and maintenance to ensure optimal performance and longevity of your cooler.
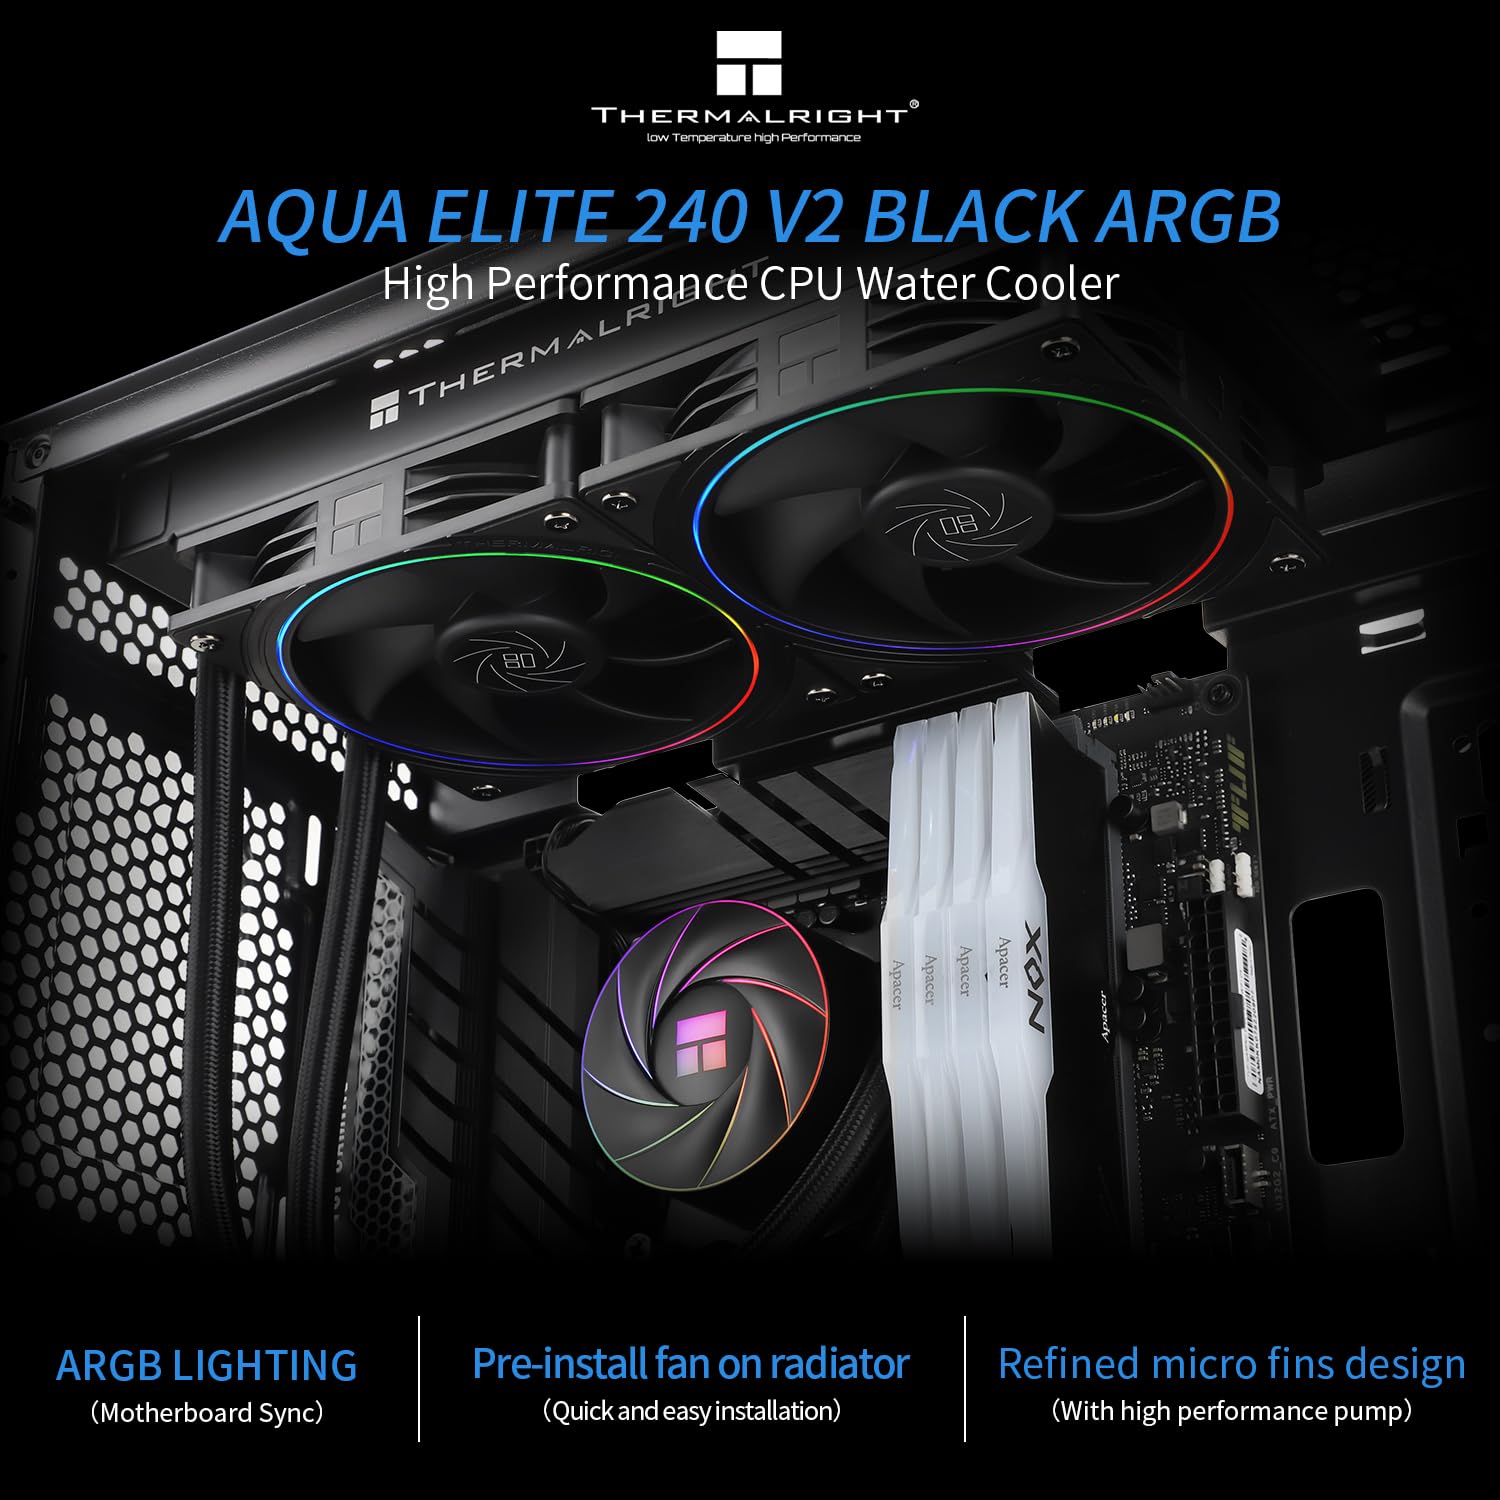
Figure 1: Thermalright Aqua Elite 240 ARGB V2 installed in a PC case.
2. Package Contents
Please verify that all components are present in the package:
- Thermalright Aqua Elite 240 ARGB V2 CPU Liquid Cooling System (Radiator, Pump/Water Block, 2x 120mm ARGB Fans, Tubing)
- Mounting Hardware for Intel (LGA 1150/1151/1155/1156/1200/1700/2011/2066)
- Mounting Hardware for AMD (AM4/AM5/AM2/AM2+/AM3/AM3+/FM1/FM2/FM2+)
- Thermal Paste (pre-applied or included)
- User Manual (this document)
3. Specifications
| Feature | Specification |
|---|---|
| Product Dimensions | 58.4L x 17.8W x 82H cm (Overall) |
| Radiator Dimensions | 277 x 120 x 27 mm (approx.) |
| Fan Dimensions | 120 x 120 x 25 mm (TL-S12 x 2) |
| Fan Speed | Up to 2000 RPM ±10% |
| Fan Airflow | 68.9 CFM (MAX) |
| Fan Air Pressure | 2.21 mmH2O (MAX) |
| Fan Noise Level | ≤28.2 dBA |
| Fan Bearing Type | S-FDB (Stably FDB) |
| Pump Speed | 2600 RPM ±10% |
| Pump Life Expectancy | 40,000 hours |
| Pump Noise Level | ≤30 dBA |
| Power Connector | 4-pin PWM (Fan), 3-pin/4-pin (Pump) |
| Voltage | 12 Volt (DC) |
| Wattage | 3.2 watts |
| Material | Aluminum (Radiator), Copper (Cold Plate) |
| Compatibility | Intel: LGA 1150/1151/1155/1156/1200/1700/2011/2066 AMD: AM4/AM5/AM2/AM2+/AM3/AM3+/FM1/FM2/FM2+ |

Figure 2: Overview of product specifications.
4. Setup and Installation
Before beginning installation, ensure your system is powered off and unplugged. Refer to your motherboard manual for specific CPU socket information. The fans are pre-installed on the radiator for simplified setup.
4.1. Prepare the Motherboard
- Identify your CPU socket type (Intel or AMD).
- For Intel LGA1700/1851 sockets, install the appropriate standoffs through the backplate screws from the front side of the motherboard.
- Attach the Intel mounting brackets to the standoffs.
Video 1: This video demonstrates the installation process for the Thermalright Aqua Elite series liquid cooler on an Intel LGA1700/1851 motherboard, including mounting the backplate, standoffs, and securing the pump head.
4.2. Mount the Radiator and Fans
- Determine the optimal mounting location for the 240mm radiator in your PC case (typically top or front). Ensure your case width is greater than 250mm for proper fit.
- Secure the radiator with the pre-installed fans to your chosen mounting location using the provided screws.

Figure 3: Radiator and fans mounted at the top of a PC case.
4.3. Install the Pump/Water Block
- Apply thermal paste to the CPU if not pre-applied on the cold plate.
- Carefully place the pump/water block onto the CPU, aligning it with the mounting brackets.
- Secure the pump/water block by tightening the four nuts evenly until firm pressure is applied. Do not overtighten.

Figure 4: Close-up of the pump head with ARGB lighting.
4.4. Connect Cables
- Connect the 4-pin PWM fan cables to the CPU_FAN or AIO_PUMP headers on your motherboard. The Y-type cable allows connecting both fans to a single header.
- Connect the pump power cable (3-pin or 4-pin) to an appropriate pump header (e.g., AIO_PUMP or PUMP_FAN) on your motherboard.
- Connect the 5V Addressable RGB (ARGB) cable from the fans and pump to a compatible 5V ARGB header on your motherboard. Ensure correct pin alignment to avoid damage.

Figure 5: Detail of the TL-S12 PWM fan with shock-absorbing pads.
5. Operating Instructions
5.1. PWM Intelligent Control
The Thermalright Aqua Elite 240 ARGB V2 fans and pump utilize PWM (Pulse Width Modulation) technology. This allows your motherboard to automatically adjust the fan and pump speeds based on the CPU temperature, ensuring optimal cooling performance while minimizing noise levels. You can configure fan curves through your motherboard's BIOS/UEFI settings or dedicated software.
5.2. ARGB Lighting Control
The cooler features Addressable RGB (ARGB) lighting on both the fans and the pump head. This lighting can be controlled and synchronized using compatible motherboard software (e.g., ASUS Aura Sync, MSI Mystic Light Sync, Gigabyte RGB Fusion, ASRock Polychrome Sync) or a dedicated ARGB controller (if included or purchased separately). Ensure the 5V ARGB cable is correctly connected to your motherboard's ARGB header.

Figure 6: Pump head showcasing Halo Addressable RGB Lighting.
6. Maintenance
Regular maintenance helps ensure the longevity and optimal performance of your liquid cooler.
- Dust Cleaning: Periodically clean the radiator fins and fan blades with compressed air to remove dust buildup. Dust can impede airflow and reduce cooling efficiency.
- Inspect Tubing: Occasionally check the liquid tubes for any signs of kinks, damage, or leaks. The tubes are protected by polymer sleeves for low liquid evaporation, extending the cooler's lifespan.
- Fan Bearings: The S-FDB bearings are designed for long-term stability and quiet operation. No specific maintenance is required for the bearings themselves.

Figure 7: Radiator with special design water channels.
7. Troubleshooting
If you encounter issues with your Thermalright Aqua Elite 240 ARGB V2, try the following troubleshooting steps:
- No Power/Fans Not Spinning/Pump Not Working:
• Ensure all power cables (4-pin PWM for fans, 3/4-pin for pump) are securely connected to the correct headers on your motherboard.
• Check your motherboard's BIOS/UEFI settings to ensure fan and pump headers are enabled and configured correctly. - High CPU Temperatures:
• Verify that the pump/water block is securely mounted to the CPU with adequate pressure.
• Ensure thermal paste was applied correctly and evenly.
• Check for any obstructions to airflow through the radiator. Clean any dust buildup.
• Confirm that the fans are spinning and oriented correctly to push air through the radiator. - ARGB Lighting Not Working/Incorrect Colors:
• Ensure the 5V ARGB cable is correctly connected to a compatible 5V ARGB header on your motherboard. Do NOT connect to a 12V RGB header.
• Check your motherboard's ARGB software or external controller settings to ensure lighting is enabled and configured as desired.
• Verify that the ARGB cable is not damaged. - Unusual Noise:
• If you hear a gurgling sound, it may indicate air bubbles in the loop. Gently tilt your PC case to help move air bubbles to the radiator.
• If fans are noisy, check for obstructions or loose mounting. The S-FDB bearings are designed for quiet operation, but excessive dust can cause noise.
8. Warranty and Support
Thermalright products are manufactured to the highest quality standards. For warranty information, please refer to the documentation included with your purchase or visit the official Thermalright website. If you encounter any issues that cannot be resolved using the troubleshooting steps provided, please contact Thermalright customer support for assistance.
For the latest drivers, software, and product information, please visit the official Thermalright website: www.thermalright.com