1. Important Safety Information
Please read all instructions carefully before using this product and retain them for future reference. Failure to follow these instructions may result in electric shock, fire, or other hazards.
- Do not expose the projector to rain or moisture to prevent fire or electric shock.
- Do not open the projector casing. Refer all servicing to qualified personnel.
- Ensure the projector is placed on a stable, level surface to prevent falls.
- Do not block ventilation openings. Proper ventilation is essential to prevent overheating.
- Avoid direct eye exposure to the projector lens when the lamp is on.
- Use only the power adapter supplied with the projector.
- Unplug the projector from the power outlet during lightning storms or when unused for long periods.
2. Product Overview
The Generic Mini Portable Projector 240P is designed for home entertainment, offering a compact solution for projecting movies, photos, and presentations. It supports various input sources and features a user-friendly interface.
2.1 Package Contents
- Mini Portable Projector
- Power Cord
- Remote Control
- AV Signal Cable
- User Manual (this document)
2.2 Projector Components
Familiarize yourself with the main components of your projector:

Image: Rear and top view of the projector with labels for operation buttons, USB port, power input, headset jack, TF card slot, HDMI port, switch, and infrared receiver.
- Operation Buttons: Controls for menu navigation and selection.
- USB Port: Connect USB storage devices.
- Power Input: Connect the power adapter.
- Headset Jack: Connect external headphones or speakers.
- TF Card Slot: Insert a TF (Micro SD) card for media playback.
- HDMI Port: Connect devices via HDMI cable.
- Switch: Power on/off switch.
- Infrared Receiver: For remote control signals.
- Projection Lens: Focuses the image onto the screen.
- Focus Adjustment Wheel: Manual adjustment for image clarity.
3. Setup
3.1 Placement
Place the projector on a stable, flat surface. Ensure there is adequate space around the projector for ventilation. The distance from the projector to the screen will determine the projection size.

Image: Illustration of projection distance and corresponding screen sizes, ranging from 32 inches to 120 inches. A recommended home viewing size is around 80 inches.
- Projection Distance: 1.2 - 3.2 meters (approximately 4 - 10.5 feet).
- Projection Size: 32 - 120 inches.
- For optimal home viewing, a projection size of approximately 80 inches is recommended.
3.2 Power Connection
- Connect the power cord to the "Power Input" port on the projector.
- Plug the other end of the power cord into a wall outlet.
- Flip the "Switch" to the ON position. The power indicator light will illuminate.
3.3 Focus Adjustment
After powering on, if the image appears blurry, adjust the focus:
- Turn on the projector and display an image or menu.
- Rotate the focus adjustment wheel (usually located near the lens) until the image becomes clear and sharp.
3.4 Keystone Correction
If the projected image appears trapezoidal (wider at the top or bottom), use the keystone correction feature to adjust it. This projector supports vertical keystone correction of plus or minus 15 degrees.
- Access the projector's menu using the remote control or operation buttons.
- Navigate to the "Keystone" or "Image Adjustment" settings.
- Adjust the vertical keystone until the image is rectangular.
4. Operating Instructions
4.1 Connecting Input Devices
The projector supports multiple input sources. Ensure the projector is powered on before connecting devices.
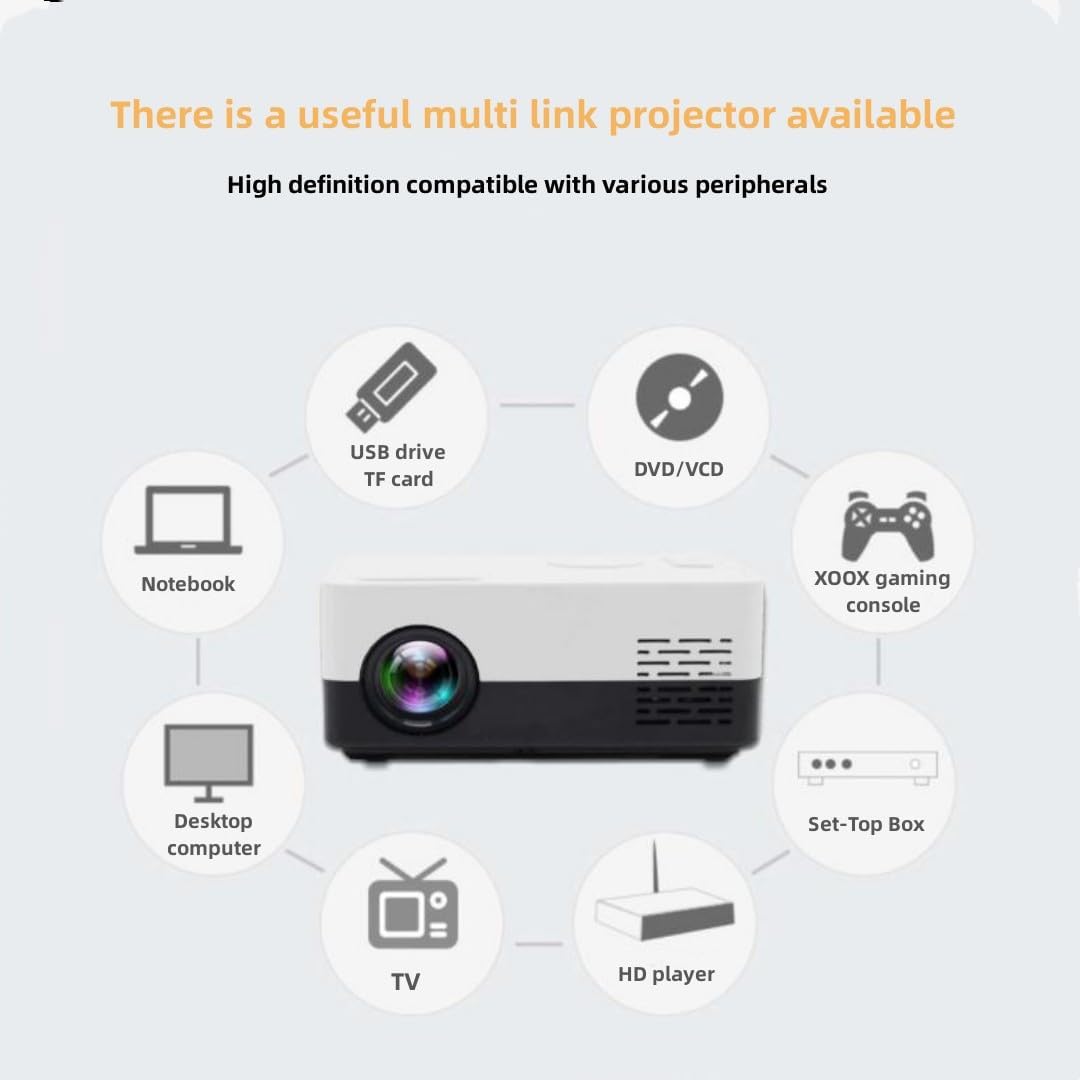
Image: A circular diagram illustrating the projector's compatibility with various peripherals, including USB drives, TF cards, DVD/VCD players, gaming consoles, set-top boxes, HD players, TVs, desktop computers, and notebooks.
4.1.1 HDMI Connection
- Connect an HDMI cable from your device (e.g., laptop, game console, set-top box) to the HDMI port on the projector.
- Select "HDMI" as the input source using the remote control or projector buttons.
4.1.2 USB/TF Card Connection
- Insert a USB drive into the USB port or a TF card into the TF card slot.
- Select "USB" or "TF Card" as the input source.
- Navigate through the files using the remote control or projector buttons to select your media.
4.1.3 AV Connection
- Connect the supplied AV cable to the AV port on the projector and to the corresponding audio/video output ports on your device (e.g., DVD player).
- Select "AV" as the input source.
4.1.4 Headset/External Speaker Connection
- Connect headphones or external speakers to the "Headset" jack for private listening or enhanced audio.
4.2 Menu Navigation
Use the remote control or the operation buttons on the projector to navigate the on-screen menu. The "OK" button typically confirms selections, and arrow keys navigate.
4.3 Audio Settings
Adjust the volume using the remote control. Further audio settings may be available in the projector's menu.
4.4 3D Support
This projector supports red and blue 3D content. To view 3D content, you will need compatible red/blue 3D glasses (not included) and 3D source material.
5. Maintenance
5.1 Cleaning the Lens
- Use a soft, lint-free cloth specifically designed for optical lenses.
- Gently wipe the lens in a circular motion. Do not use abrasive cleaners or excessive force.
5.2 Cleaning the Projector Body
- Wipe the projector's exterior with a soft, dry cloth.
- Do not use liquid or aerosol cleaners directly on the projector.
5.3 Ventilation
- Ensure ventilation openings are clear of dust and obstructions to prevent overheating.
- Do not place the projector on soft surfaces that may block airflow.
5.4 Storage
- When not in use for extended periods, store the projector in a cool, dry place, away from direct sunlight and extreme temperatures.
- Cover the lens with its cap (if provided) to protect it from dust.
6. Troubleshooting
| Problem | Possible Cause | Solution |
|---|---|---|
| No power | Power cord not connected; Power outlet faulty; Projector switch off. | Ensure power cord is securely connected. Try a different outlet. Check if the projector's power switch is ON. |
| No image | Incorrect input source selected; Device not connected properly; Lens cap on. | Select the correct input source (HDMI, USB, AV). Check cable connections. Remove lens cap. |
| Image blurry | Focus not adjusted; Projector too close/far from screen. | Adjust the focus wheel. Adjust projection distance. |
| Image trapezoidal | Projector not perpendicular to screen. | Adjust keystone correction in the menu. Reposition the projector. |
| No sound | Volume too low; External speakers not connected; Source device volume low. | Increase projector volume. Check external speaker connection. Increase volume on the source device. |
| Remote control not working | Batteries dead; Obstruction between remote and projector; Remote not pointed at IR receiver. | Replace batteries. Remove obstructions. Point remote directly at the projector's IR receiver. |
7. Specifications
| Feature | Detail |
|---|---|
| Model | 240P |
| Resolution | 800 x 480 (Supports 1080P input) |
| Brightness | 2800 Lumens |
| Contrast Ratio | 4500:1 |
| Bulb Type | 58W LED light source |
| Bulb Lifespan | Over 30,000 hours |
| Keystone Correction | Vertical ±15 degrees |
| Power Consumption | 63W |
| Projection Size | 32 - 120 inches |
| Projection Distance | 1.2 - 3.2 meters |
| Aspect Ratio | 4:3 / 16:9 (4-level scaling) |
| Input Ports | AV, VGA, HDMI, USB, SD (TF card) |
| Audio Format Support | MP3/WMA/WAV/APE/FLAC/AAC/OGG |
| Image Format Support | JPG/BMP/GIF/PNG |
| Document Format Support | PDF/WORD/EXCEL/PPT/TXT |
| Video Format Support | MPEG4/AV/RM/RMVB/FLV/WMV, etc. |
| Body Size | 17 x 11 x 6 cm (6.7 x 4.3 x 2.4 inches) |
| Net Weight | 0.49 kg (1.08 lbs) |
| Color | Pink |
8. Warranty and Support
For warranty information and technical support, please refer to the documentation provided at the time of purchase or contact your retailer. Keep your proof of purchase for warranty claims.
For further assistance, please visit the manufacturer's website or contact their customer service department.