1. Introduction
Thank you for choosing the LEDLUX 72-inch Ceiling Fan with Light. This manual provides essential information for the safe installation, operation, and maintenance of your new ceiling fan. Please read these instructions thoroughly before beginning installation and retain them for future reference.
Important Safety Information
- Always disconnect power at the main circuit breaker before installation or servicing.
- All electrical wiring must be in accordance with national and local electrical codes. If you are unfamiliar with wiring, consult a qualified electrician.
- Ensure the installation site can support the fan's weight (approximately 15-20 kg).
- Do not bend the blade holders during installation or cleaning.
- Keep children away from the fan during operation.
2. Package Contents
Verify that all components are present before beginning installation:
- Motor Housing Assembly
- Fan Blades (9 pieces)
- Downrods (4.5", 12", 24" options)
- Canopy
- Mounting Bracket
- LED Light Kit
- Remote Control with Receiver
- Hardware Pack (screws, washers, wire nuts)
- Instruction Manual

Image: All components of the LEDLUX 72-inch ceiling fan laid out on a white surface.
3. Specifications
| Brand | LEDLUX |
| Model | 72-inch Ceiling Fan with Light |
| Color | Black |
| Size | 72 inches |
| Number of Blades | 9 |
| Blade Material | Plastic |
| Motor Type | DC Motor (Reversible) |
| Number of Speeds | 6 |
| Controller Type | Remote Control |
| Wattage | 65 watts |
| Noise Level | 45 Decibels |
| Indoor/Outdoor Usage | Indoor |
| Downrod Options | 4.5", 12", 24" |

Image: Diagram showing the dimensions of the 72-inch ceiling fan and available downrod lengths.
4. Installation Guide
Follow these steps for proper installation. It is recommended to have a qualified electrician perform the installation.
4.1 Assemble the Fan Blades
- Attach each fan blade to the motor housing using the provided screws. Ensure they are securely fastened.

Image: Close-up of a hand using a drill to attach a fan blade to the motor housing.
4.2 Prepare the Downrod
- Select the appropriate downrod length for your ceiling height.
- Feed the fan wires through the downrod.
- Secure the downrod to the motor housing using the provided pin and screws.
4.3 Wiring the Receiver
- Connect the receiver wires to the corresponding fan wires and household wiring using wire nuts. Ensure all connections are secure.
- Carefully tuck the wired receiver into the mounting bracket.
Video: This video demonstrates the step-by-step installation process for the LEDLUX ceiling fan with light, including blade assembly, downrod attachment, and electrical wiring connections.
4.4 Mount the Fan
- Attach the mounting bracket to the ceiling junction box.
- Hang the fan assembly onto the mounting bracket.
- Secure the canopy to the mounting bracket with screws.

Image: Diagrams illustrating installation on flat, sloped, and high ceilings.
4.5 Install the Light Kit
- Connect the light kit wires to the fan's light wires.
- Attach the LED light panel to the fan motor housing.
- Secure the light cover.
5. Operating Instructions
Your LEDLUX ceiling fan is controlled by the included remote control. Ensure the remote has fresh batteries installed.
5.1 Remote Control Functions
- Fan On/Off: Press the fan icon button to turn the fan on or off.
- Fan Speed: Use the '1' through '6' buttons to adjust the fan speed. '1' is the lowest speed, '6' is the highest.
- Light On/Off: Press the light bulb icon button to turn the light on or off.
- Color Temperature: Press the 'CCT' button to cycle through 3 color temperatures: 3000K (Warm White), 4500K (Natural White), and 6000K (Cool White).
- Timer Function: Set the fan to turn off automatically after 1H, 2H, 4H, or 8H using the respective timer buttons.
- Reversible Motor: Press the 'F/R' button to change the direction of the fan blades.

Image: Remote control with labeled functions for fan speed, light, timer, and reverse.
5.2 Reversible DC Motor
The DC motor allows for reversible blade rotation, providing comfort in different seasons:
- Summer Mode (Counter-clockwise): Creates a downward airflow, producing a cooling effect.
- Winter Mode (Clockwise): Creates an upward airflow, circulating warm air trapped near the ceiling.
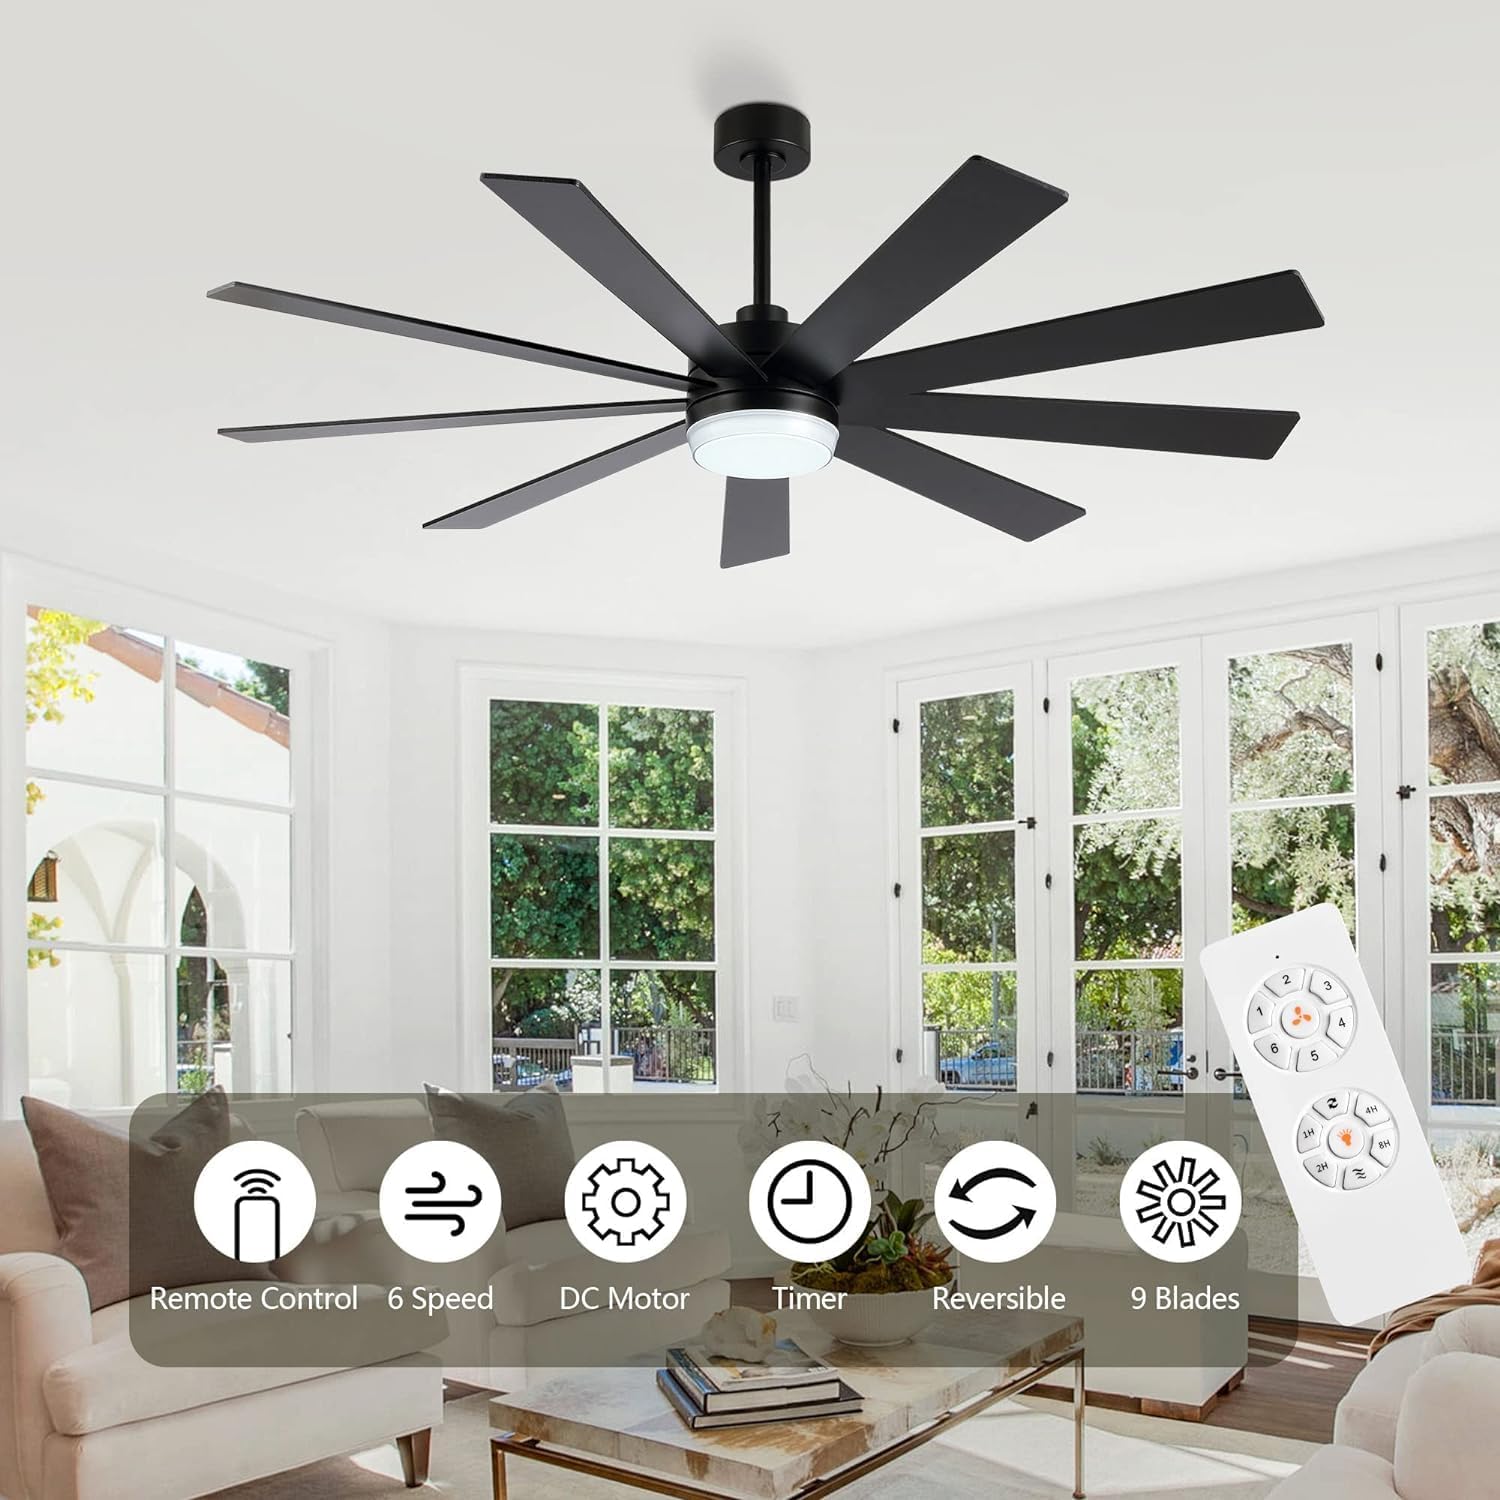
Image: Fan blade direction for summer (cooling) and winter (air circulation) modes.
5.3 Light Color Temperature
The integrated LED light offers three color temperature options to suit your preference:
- 3000K: Warm White, ideal for a cozy atmosphere.
- 4500K: Natural White, suitable for general illumination.
- 6000K: Cool White, bright and invigorating.
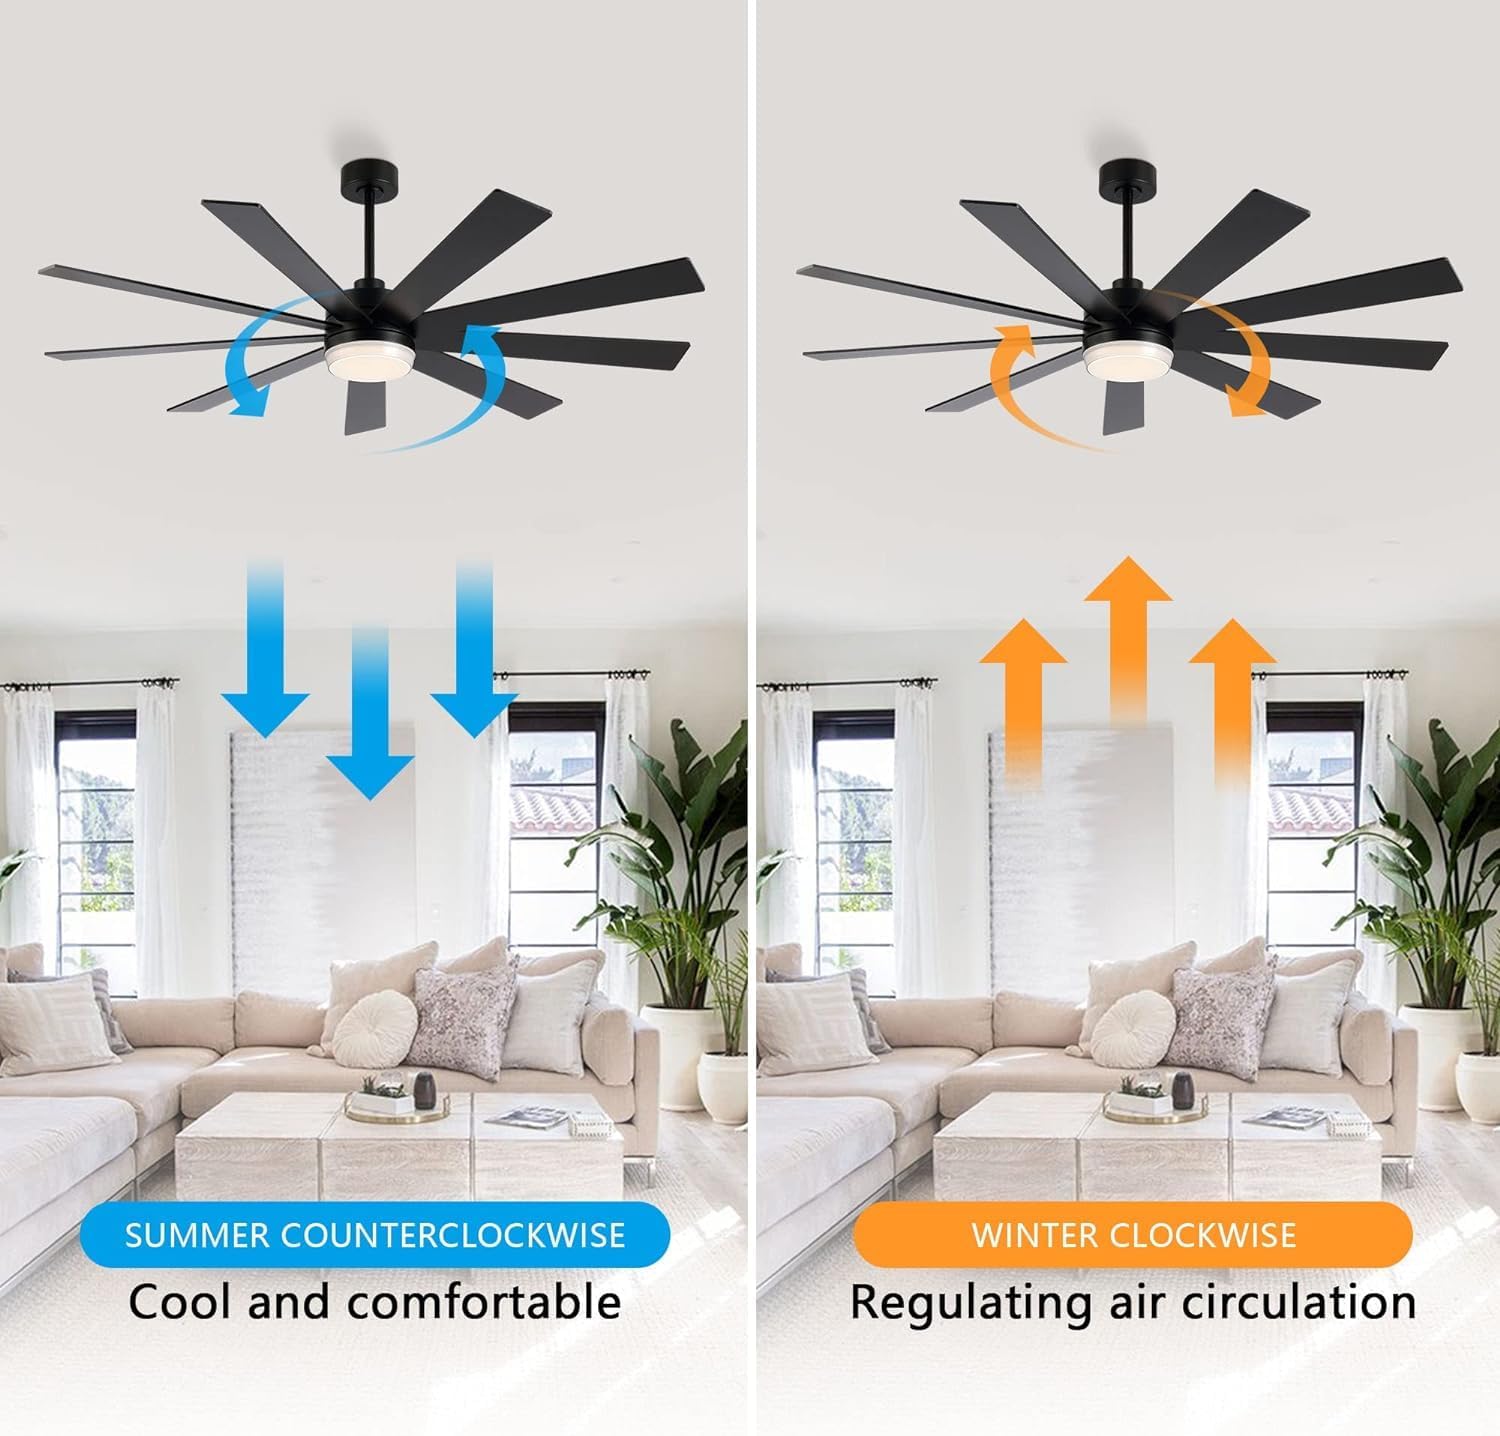
Image: Ceiling fan light demonstrating 3000K, 4500K, and 6000K color temperatures.
6. Maintenance
Regular maintenance ensures optimal performance and longevity of your ceiling fan.
6.1 Cleaning
- Always turn off the power to the fan at the main circuit breaker before cleaning.
- Use a soft, damp cloth to clean the fan blades and motor housing. Do not use abrasive cleaners or solvents.
- Periodically check all screws for tightness. Re-tighten as necessary.
6.2 Blade Balancing
If the fan wobbles, ensure all blade screws are tight. If wobbling persists, a blade balancing kit (not included) may be used to correct the issue.
7. Troubleshooting
Before attempting any repairs, ensure the power is disconnected at the circuit breaker.
| Problem | Possible Cause | Solution |
|---|---|---|
| Fan does not start | No power to the fan; Loose wire connections; Remote control battery low. | Check circuit breaker; Verify all wire connections are secure; Replace remote control battery. |
| Light does not work | Loose wire connection to light kit; Faulty LED light kit. | Check light kit wiring; Contact customer support for replacement if faulty. |
| Fan wobbles | Loose blade screws; Improperly balanced blades; Loose mounting bracket. | Tighten all blade screws; Use a blade balancing kit; Ensure mounting bracket is securely fastened to the ceiling. |
| Noisy operation | Loose screws; Motor housing rubbing against canopy; Incorrect installation. | Check and tighten all screws; Ensure proper clearance between motor housing and canopy; Re-check installation steps. |
8. Warranty and Support
LEDLUX stands behind the quality of its products.
8.1 Warranty Information
- 10-Year Motor Warranty: The DC motor is covered by a 10-year free replacement warranty.
- 3-Year Full Warranty: All other parts of the ceiling fan are covered by a 3-year warranty.
Image: LEDLUX Warranty details: 3-Year Full Warranty and 10-Year Motor Warranty.
8.2 Customer Support
For any installation, pre-sales, or after-sales questions, please contact our professional service team via Amazon mail. We are committed to resolving your issues within 24 hours.