
1. Introduction
This manual provides essential information for the installation, operation, and maintenance of your new Generic replacement carburetor. This carburetor is designed as a compatible replacement for specific John Deere JS45 MowMentum Walk-Behind Mowers, corresponding to original part number AM134697 and manufacturer part number Carb-US-1224792. Please read these instructions thoroughly before proceeding with installation to ensure proper function and safety.
2. Package Contents
Verify that all components are present and undamaged upon opening the package. The package should contain:
- 1 x Replacement Carburetor Unit
- Associated Gaskets (as pictured)

Image 2.1: Contents of the replacement carburetor package, including the main carburetor unit and gaskets.
3. Compatibility
This replacement carburetor is specifically designed for use with:
- Mower Model: John Deere JS45 MowMentum Walk-Behind Mower
- Original Part Number: AM134697
- Manufacturer Part Number: Carb-US-1224792
It is crucial to compare your existing carburetor with the provided images and specifications to ensure compatibility before installation. Discrepancies in appearance or dimensions may indicate an incompatible part.

Image 3.1: Detailed view of the carburetor with critical dimensions (0.75 in and 1.80 in) for compatibility verification.
4. Safety Information
Always prioritize safety when working with engine components and fuel. Failure to follow safety precautions can result in serious injury or damage.
- Disconnect Spark Plug: Before beginning any work, disconnect the spark plug wire to prevent accidental engine starting.
- Fuel Handling: Gasoline is highly flammable. Work in a well-ventilated area, away from open flames or sparks. Use an approved container for draining fuel.
- Eye Protection: Always wear safety glasses to protect your eyes from fuel, debris, or tools.
- Gloves: Wear appropriate gloves to protect your hands from fuel and sharp edges.
- Engine Cool Down: Allow the engine to cool completely before working on it to avoid burns.
5. Setup and Installation
This section outlines the general steps for replacing a carburetor. Specific procedures may vary slightly depending on your mower model. Refer to your mower's service manual for detailed instructions if available.
5.1. Preparation
- Ensure the mower is on a flat, stable surface.
- Disconnect the spark plug wire.
- Turn off the fuel supply valve (if equipped) or clamp the fuel line.
- Place a suitable container under the carburetor to catch any spilled fuel.
5.2. Removing the Old Carburetor
- Remove the air filter housing and air filter.
- Carefully disconnect the fuel line from the carburetor. Be prepared for some fuel spillage.
- Disconnect any throttle linkage, choke linkage, or governor springs attached to the carburetor. Note their positions for reassembly. Taking photos can be helpful.
- Unbolt the carburetor from the engine manifold. There are typically two nuts holding it in place.
- Remove the old carburetor and any old gaskets. Inspect the mounting surfaces for cleanliness.

Image 5.1: Side view of the replacement carburetor, showing fuel inlet and mounting points.
5.3. Installing the New Carburetor
- Ensure the engine mounting surface is clean and free of old gasket material.
- Place new gaskets in their correct positions.
- Mount the new carburetor onto the engine manifold, aligning it with the bolt holes.
- Secure the carburetor with the bolts, tightening them evenly to prevent warping. Do not overtighten.
- Reconnect the throttle linkage, choke linkage, and governor springs to their original positions.
- Reconnect the fuel line to the carburetor. Ensure a secure, leak-free connection.
- Reinstall the air filter and air filter housing.
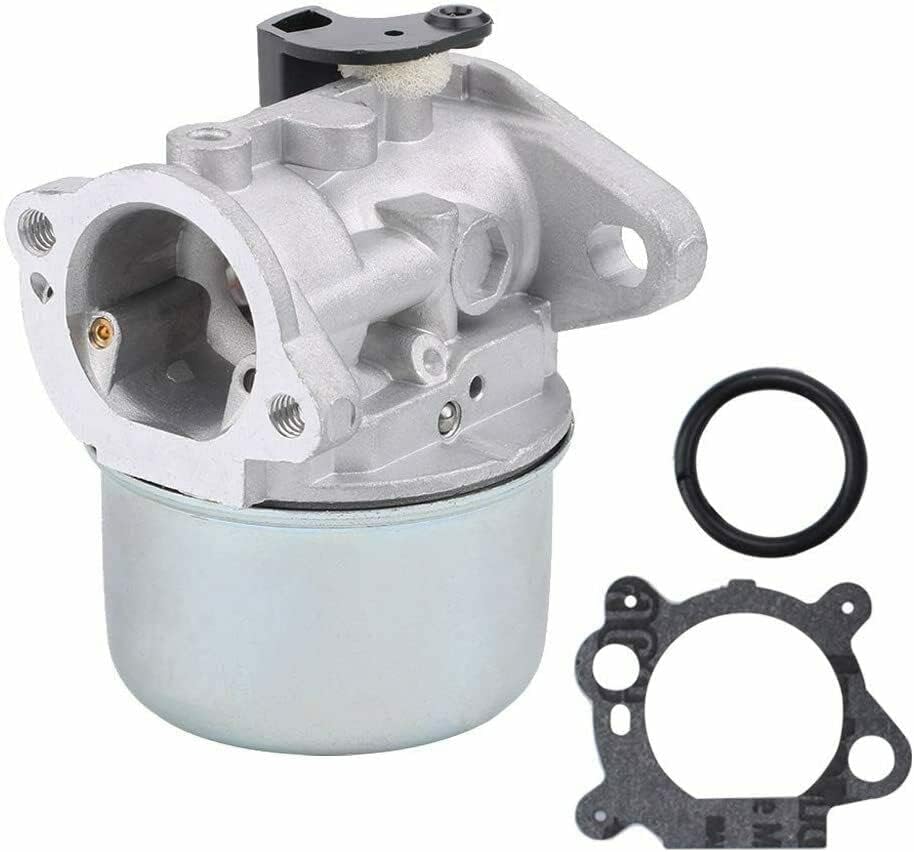
Image 5.2: Rear view of the replacement carburetor, showing the air intake and linkage points.
6. Operating Instructions
After installation, perform the following steps before operating the mower:
- Turn on the fuel supply valve (if applicable).
- Check all fuel line connections for leaks. Address any leaks immediately.
- Reconnect the spark plug wire.
- Start the engine according to your mower's operating instructions.
- Allow the engine to warm up and observe for smooth operation, proper idle, and responsiveness to throttle changes.
7. Maintenance
Regular maintenance helps ensure the longevity and performance of your carburetor and mower.
- Fuel Quality: Always use fresh, clean gasoline. Stale or contaminated fuel can clog the carburetor. Consider using a fuel stabilizer if the mower will be stored for extended periods.
- Air Filter: Regularly inspect and clean or replace the air filter to prevent dirt and debris from entering the carburetor.
- Cleaning: If performance issues arise, the carburetor may require cleaning. This typically involves disassembling, cleaning with carburetor cleaner, and reassembling with new gaskets. This procedure should only be performed by individuals with mechanical experience.
8. Troubleshooting
If you encounter issues after installing the new carburetor, consider the following common problems and solutions:
| Problem | Possible Cause | Solution |
|---|---|---|
| Engine will not start | No fuel reaching carburetor, clogged fuel filter, incorrect choke setting, spark plug issue | Check fuel level, fuel line connections, fuel filter. Ensure choke is set correctly. Check spark plug. |
| Engine runs rough or stalls | Improper carburetor adjustment, dirty carburetor, air leak, old fuel | Ensure all linkages are correctly connected. Clean carburetor if necessary. Check for air leaks around gaskets. Use fresh fuel. |
| Fuel leaks from carburetor | Improperly seated gaskets, loose connections, damaged float needle | Check all connections and ensure gaskets are properly installed and not damaged. If leaks persist, internal inspection may be required. |
9. Specifications
| Feature | Detail |
|---|---|
| Brand | Generic |
| Recommended Uses | Lawn Mower |
| Manufacturer Part Number | Carb-US-1224792 |
| Number of Items | 1 (Set includes carburetor and gaskets) |
| Compatible OEM Part | AM134697 |
10. Warranty and Support
For any questions regarding this replacement carburetor, including compatibility concerns or installation assistance, please contact the seller directly through the platform where the purchase was made. Information regarding specific warranty terms, if any, will be provided by the seller at the time of purchase or upon request.