Introduction
This manual provides detailed instructions for the installation, operation, and maintenance of the CONTIA STC-8080A+ LED Digital Thermostat Temperature Controller. This device is designed for precise temperature regulation in various applications, including incubators, offering both heating and cooling control capabilities. Please read this manual thoroughly before use to ensure proper function and safety.
Safety Information
- Ensure the power supply voltage matches the controller's requirements (e.g., DC12V, DC24V, AC110-220V). Incorrect voltage can damage the device.
- All wiring should be performed by qualified personnel to prevent electrical hazards.
- Do not expose the controller to excessive moisture or extreme temperatures outside its operating range.
- Keep the device away from flammable materials.
- Disconnect power before performing any wiring, maintenance, or troubleshooting.
- The sensor lead and power cord must not be in contact with each other to avoid interference or damage.
Product Overview
Dimensions and Physical Layout

Image: Front and side view of the STC-8080A+ controller, illustrating its compact design and key dimensions for installation. The unit measures approximately 75mm x 34.5mm (front panel) with a depth of 85.5mm.
Display and Control Panel

Image: Close-up of the STC-8080A+ display and control buttons. The large LED display shows the current temperature. Buttons include 'Set', 'Up', 'Down', and 'Rst' (Reset).
Indicator Light Functions
| Indicator Light | State | Features |
|---|---|---|
| Defr | Normally on | Defrost output active |
| Cool | Normally on | Compressor output active |
| Cool | Flashing | Compressor output delay active |
| Set | Normally on | Parameter modification mode |
Technical Specifications
- Power Supply: 12VDC (for this model), also available in 24VDC or 110-220VAC +10%/-15%, 50/60Hz
- Machine Power Consumption: 3W
- Measuring Range: -50°C to 99°C
- Temperature Control Range: -40°C to 50°C
- Temperature Resolution: 1°C
- Sensor Type: NTC sensor
- Measurement Accuracy: ±1°C for -40°C to 50°C, otherwise unspecified
- Front Panel Protection Level: IP64
- Refrigeration Output Contact Capacity: 7A/220VAC
- Defrost Output Contact Capacity: 7A/220VAC
- Working Environment Temperature: 0°C to 60°C
- Storage Temperature: -30°C to 75°C
- Working Environment Humidity: 20% to 85% (non-condensing)
- Item Weight: 50 Grams
Setup and Wiring
Wiring Diagram
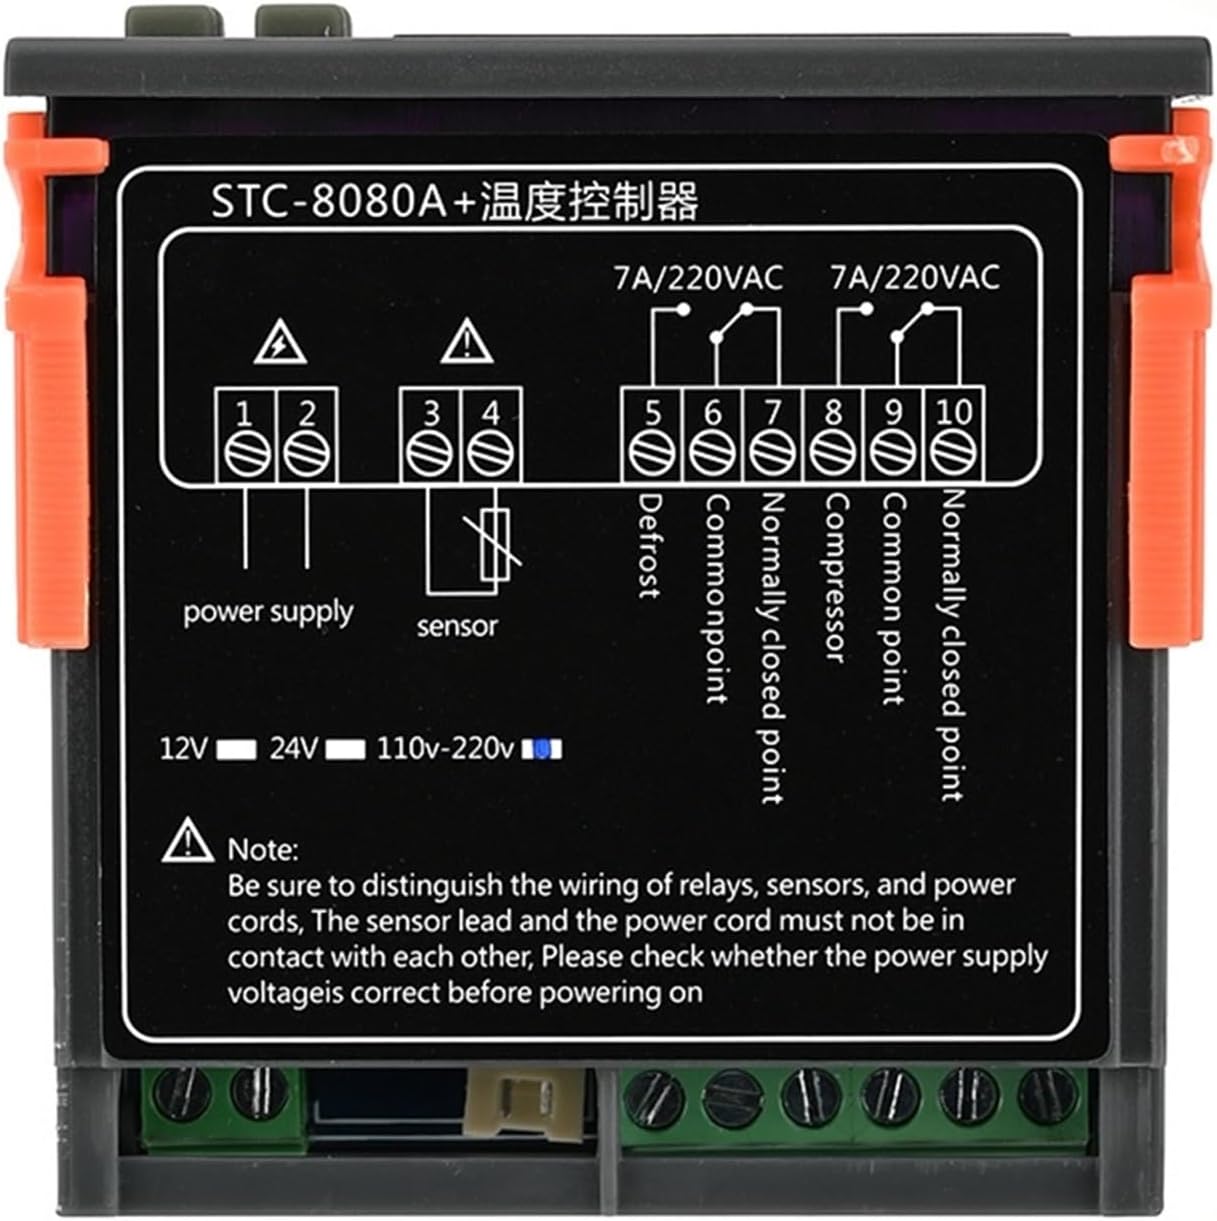
Image: Comprehensive wiring diagram showing connections for power supply, NTC sensor, defrost output, and compressor output. Note the different power supply options (12V, 24V, 110-220V).
Wiring Terminal Overview
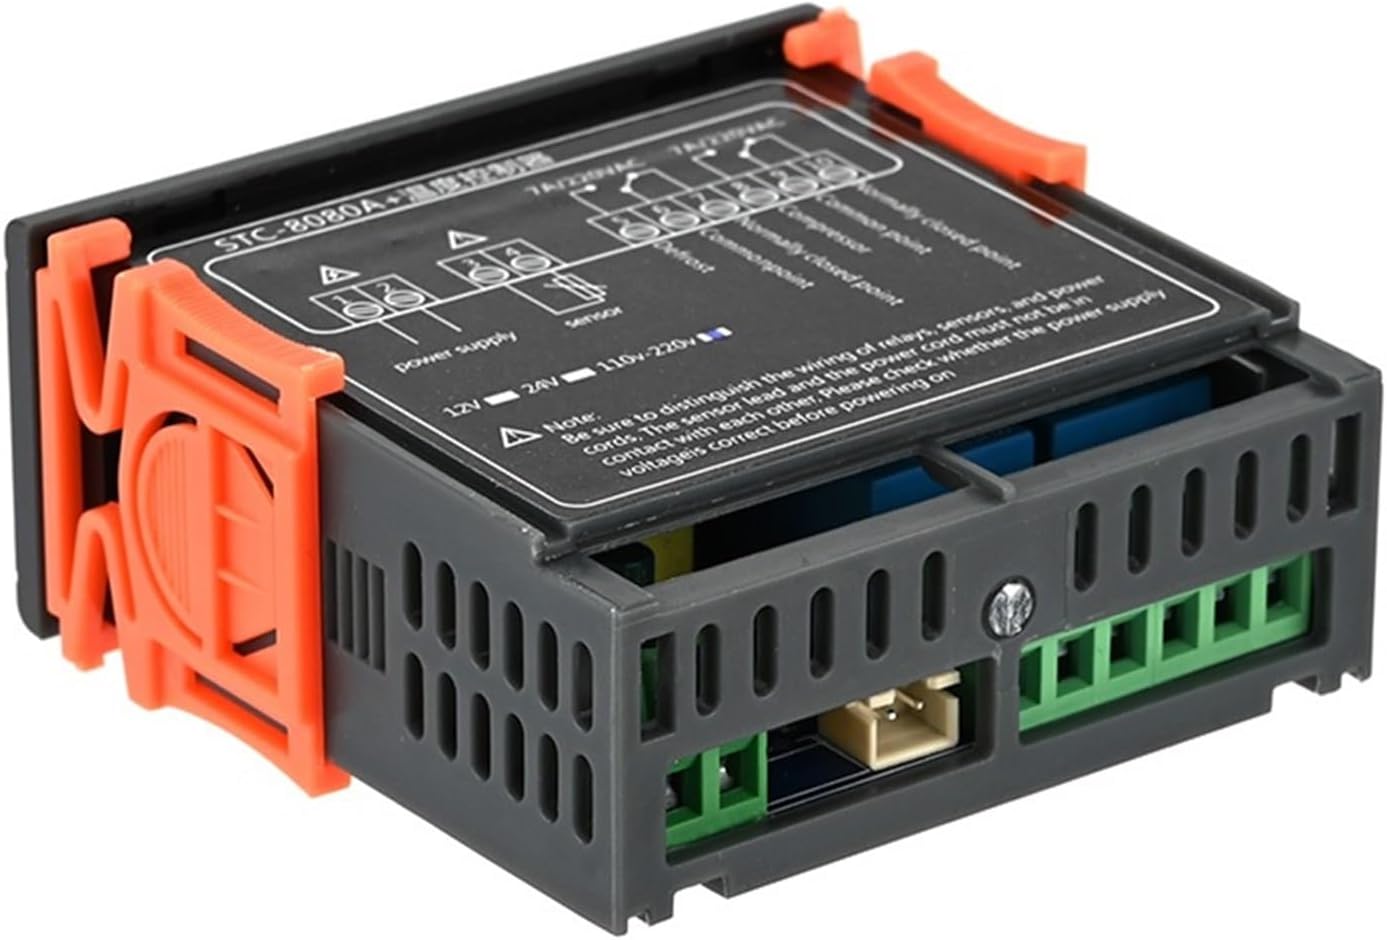
Image: Side view of the controller revealing the terminal block for electrical connections. This view helps in identifying the physical location of each wiring point.
Wiring Instructions
- Power Supply: Connect the appropriate power supply (12VDC for this model) to terminals 1 and 2 as indicated in the wiring diagram. Ensure the voltage matches your unit's specification.
- NTC Sensor: Connect the NTC temperature sensor to terminals 3 and 4. The sensor lead and power cord must be kept separate to prevent interference.
- Defrost Output: Connect the defrosting equipment to terminals 5 (Defrost) and 6 (Common Point).
- Compressor Output: Connect the compressor or cooling equipment to terminals 7 (Compressor) and 8 (Common Point).
- Important Note: Always verify the power supply voltage is correct before powering on the device. Distinguish the wiring of relays, sensors, and power cords carefully.
Operating Instructions
Setting Temperature
- Press the Set button once to view the current set temperature.
- While the set temperature is displayed, use the Up (▲) or Down (▼) buttons to adjust the desired temperature value.
- Press the Set button again to save the new setting and exit. If no button is pressed for a few seconds, the setting will automatically save and exit.
Defrosting/Cooling Dual Output Control

Image: The controller display indicating active defrosting or cooling functions, often accompanied by water droplets to symbolize defrosting. This image highlights the dual control capability.
- When the defrosting time setting is not 0, the manual defrosting function is enabled.
- To display the set defrosting time: Press the Rst key.
- To display the set defrosting cycle: Press the Set button once.
Parameter Modification Mode
To enter parameter modification mode, press and hold the Set button for several seconds until the display changes. Use the Up and Down buttons to navigate through parameters and adjust their values. Press Set again to confirm and move to the next parameter, or hold Set to exit.
Maintenance
- Cleaning: Regularly wipe the front panel with a soft, dry cloth. Do not use abrasive cleaners or solvents. Ensure no liquid enters the device.
- Sensor Care: Keep the NTC sensor clean and free from debris. Avoid bending or damaging the sensor cable.
- Connections: Periodically check all wiring connections to ensure they are secure and free from corrosion.
- Ventilation: Ensure adequate ventilation around the controller to prevent overheating.
Troubleshooting
| Problem | Possible Cause | Solution |
|---|---|---|
| Controller does not power on | No power supply; Incorrect voltage; Loose wiring | Check power connection; Verify voltage matches unit; Secure all wiring. |
| Temperature reading is inaccurate | Faulty sensor; Sensor not properly connected; Sensor exposed to extreme conditions | Check sensor wiring; Replace sensor if damaged; Ensure sensor is in appropriate environment. |
| Heating/Cooling output not working | Incorrect temperature setting; Output wiring issue; Relay failure | Adjust set temperature; Check output wiring; Consult a technician if relay is suspected. |
| Display shows error code | Sensor fault; Internal error | Check sensor connection; Power cycle the device; Refer to specific error code documentation if available. |
Warranty and Support
For warranty information and technical support, please refer to the product packaging or contact your retailer. Keep your purchase receipt as proof of purchase. For further assistance, you may also visit the CONTIA official website or contact their customer service department.