
1. Product Overview
This manual provides instructions for the ATRACYPART Carburetor, designed as a replacement component for various Yamaha ATV models. The carburetor is engineered to facilitate the proper mixing of fuel and air, which is essential for efficient engine operation.
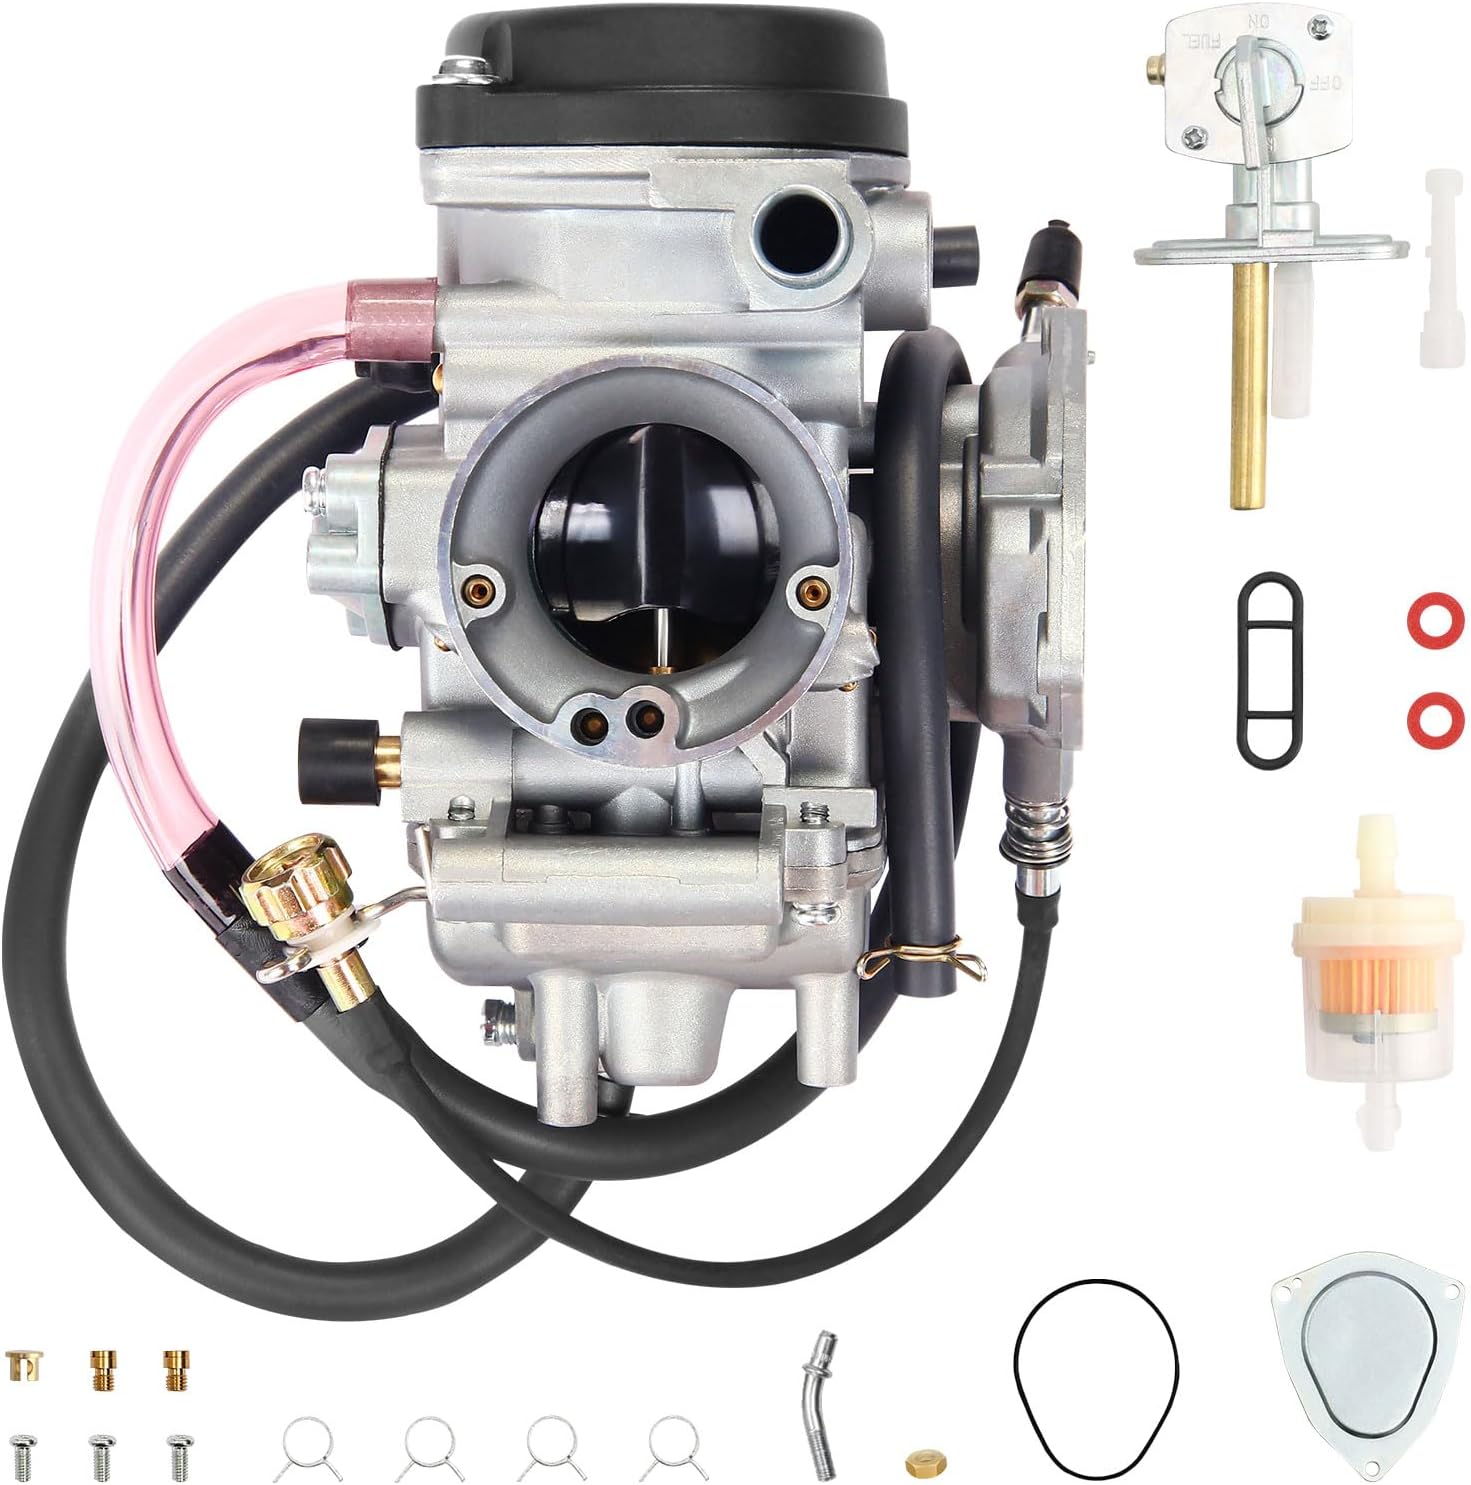
Figure 1: ATRACYPART Carburetor and accompanying components, including a fuel petcock, fuel filter, and various gaskets.
Key Features:
- Durable Construction: Manufactured to withstand operational demands.
- Optimized Performance: Designed to ensure smooth engine running and efficient fuel delivery.
- Precise Fuel-Air Mixture: Aids in preventing fuel starvation or overflow.
- OEM Standard Design: Engineered to meet original equipment manufacturer specifications for fit and function.
2. Compatibility
This carburetor is compatible with a range of Yamaha ATV models. Verify your vehicle's make, model, and year against the list below to ensure proper fitment.

Figure 2: Visual representation of the carburetor and its compatibility with various Yamaha ATV models.
Compatible Yamaha ATV Models:
- Big Bear 250 YFM250: 2007-2009
- Big Bear 400 YFM400: 2000-2010 (2WD & 4WD models, including Real Tree X-Tra variants)
- Bruin 350 YFM350: 2004-2006 (2x4 & 4x4 models)
- Grizzly 350: 2007-2011 (2x4 & 4x4 models)
- Grizzly 400: 2000
- Grizzly 450: 2007-2012 (4x4 models)
- Kodiak 400 YFM400: 2000-2006 (2WD & 4WD models, including Hunter Edition)
- Kodiak 450: 2003-2006 (4x4 models)
- Wolverine 350 YFM350: 2006-2009 (2x4 & 4x4 models)
- Wolverine 450 YFM450: 2006-2010 (4x4 models)
- Raptor 350 YFM350: 2004-2013
3. Specifications
Understanding the physical dimensions of the carburetor is crucial for proper installation and fitment. Refer to the measurements below.

Figure 3: Intake Manifold Side dimensions. Inner diameter: 34mm (1.33 inches), Outer diameter: 38mm (1.49 inches).

Figure 4: Air Filter Intake Side dimensions. Inner diameter: 48mm (1.88 inches), Outer diameter: 52mm (2.04 inches).
General Specifications:
- Model Number: A1557
- Item Weight: Approximately 1.87 pounds
- Product Dimensions: Approximately 6.3 x 4.3 x 3.9 inches
- Fuel Type: Gasoline
- Vehicle Service Type: ATV
4. Setup and Installation
Installation of a carburetor requires mechanical aptitude. If you are unsure about any steps, it is recommended to seek professional assistance. Always ensure the engine is cool and the fuel supply is turned off before beginning installation.
General Installation Steps:
- Preparation: Gather necessary tools. Ensure the ATV is on a stable, level surface. Disconnect the battery's negative terminal.
- Fuel System Disconnection: Turn off the fuel petcock. Disconnect the fuel line from the old carburetor. Drain any remaining fuel from the carburetor float bowl.
- Remove Old Carburetor: Disconnect the throttle cable, choke cable (if applicable), and any vacuum lines or electrical connectors. Loosen the clamps securing the carburetor to the intake manifold and air filter housing. Carefully remove the old carburetor.
- Inspect Components: Examine the intake manifold boots and air filter housing for cracks or damage. Replace if necessary.
- Install New Carburetor: Position the new ATRACYPART carburetor, ensuring it seats correctly in both the intake manifold and air filter housing. Tighten clamps securely.
- Reconnect Components: Reattach the throttle cable, choke cable, vacuum lines, and electrical connectors. Ensure all connections are secure and properly routed.
- Fuel Line Connection: Connect the fuel line to the new carburetor. Ensure the included fuel filter is properly installed in the fuel line if not already present.
- Initial Checks: Before starting the engine, double-check all connections, hoses, and cables. Ensure no tools or debris are left in the engine compartment.
Note: This carburetor includes a fuel petcock and tank valve switch. Ensure these components are installed correctly according to your ATV's configuration.

Figure 5: Side view of the carburetor, highlighting the fuel inlet, vacuum ports, and throttle linkage points.
5. Operating Instructions
After installation, proper operation involves starting the engine and making minor adjustments for optimal performance.
Starting the Engine:
- Fuel Supply: Turn the fuel petcock to the "ON" or "RES" position.
- Choke: If the engine is cold, engage the choke.
- Start: Start the engine according to your ATV's manufacturer instructions.
- Warm-up: Allow the engine to warm up. As it warms, gradually disengage the choke.
Idle Speed Adjustment:
The carburetor is pre-set from the factory, but minor idle speed adjustments may be necessary for your specific ATV. Locate the idle speed screw (typically a large, knurled screw on the side of the carburetor). With the engine warm and running:
- Turn the screw clockwise to increase idle speed.
- Turn the screw counter-clockwise to decrease idle speed.
Adjust until the engine idles smoothly without stalling or racing excessively. Refer to your ATV's service manual for the recommended idle RPM.
6. Maintenance
Regular maintenance ensures the longevity and optimal performance of your carburetor. Neglecting maintenance can lead to poor engine performance and potential damage.
Recommended Maintenance Practices:
- Fuel Quality: Always use fresh, clean fuel. Stale or contaminated fuel can clog carburetor passages. Consider using a fuel stabilizer if the ATV will be stored for extended periods.
- Fuel Filter: Regularly inspect and replace the fuel filter (included with this carburetor) to prevent debris from reaching the carburetor.
- Air Filter: Ensure the air filter is clean and properly oiled (if applicable) to prevent dirt and dust from entering the carburetor and engine.
- Carburetor Cleaning: Periodically, or if performance issues arise, the carburetor may need to be cleaned. This involves disassembling the carburetor and cleaning jets and passages with a specialized carburetor cleaner. This task is best performed by experienced individuals.
- Float Level Check: The float level should be checked during comprehensive maintenance to ensure correct fuel delivery to the main jet.
7. Troubleshooting
This section addresses common issues that may arise with carburetor operation. Always consult your ATV's service manual for specific diagnostic procedures.
| Symptom | Possible Cause | Solution |
|---|---|---|
| Engine will not start or starts with difficulty |
|
|
| Engine idles poorly or stalls |
|
|
| Engine lacks power or backfires |
|
|
| Fuel leaks from carburetor |
|
|
8. Warranty and Support
ATRACYPART provides a 12-month warranty for this carburetor. This warranty covers manufacturing defects and ensures product quality.
If you encounter any issues or have questions regarding the product, please contact ATRACYPART customer support. Details for contacting support are typically available through your purchase platform or the official ATRACYPART website.