Introduction
This manual provides detailed instructions for the installation, operation, and maintenance of your EVERSTEIN 23x15 inch LED Mood Lighting Shower System. This system features a ceiling-mounted rainfall and waterfall shower head with 64-color LED lighting, a thermostatic valve for consistent temperature control, and a high-pressure handheld shower.
Important Purchase Note: This system is designed for new and remodeled bathrooms. Installation requires the removal of existing tiles and fixtures, and potentially repiping. Please consult a qualified plumber before purchasing and commencing installation.
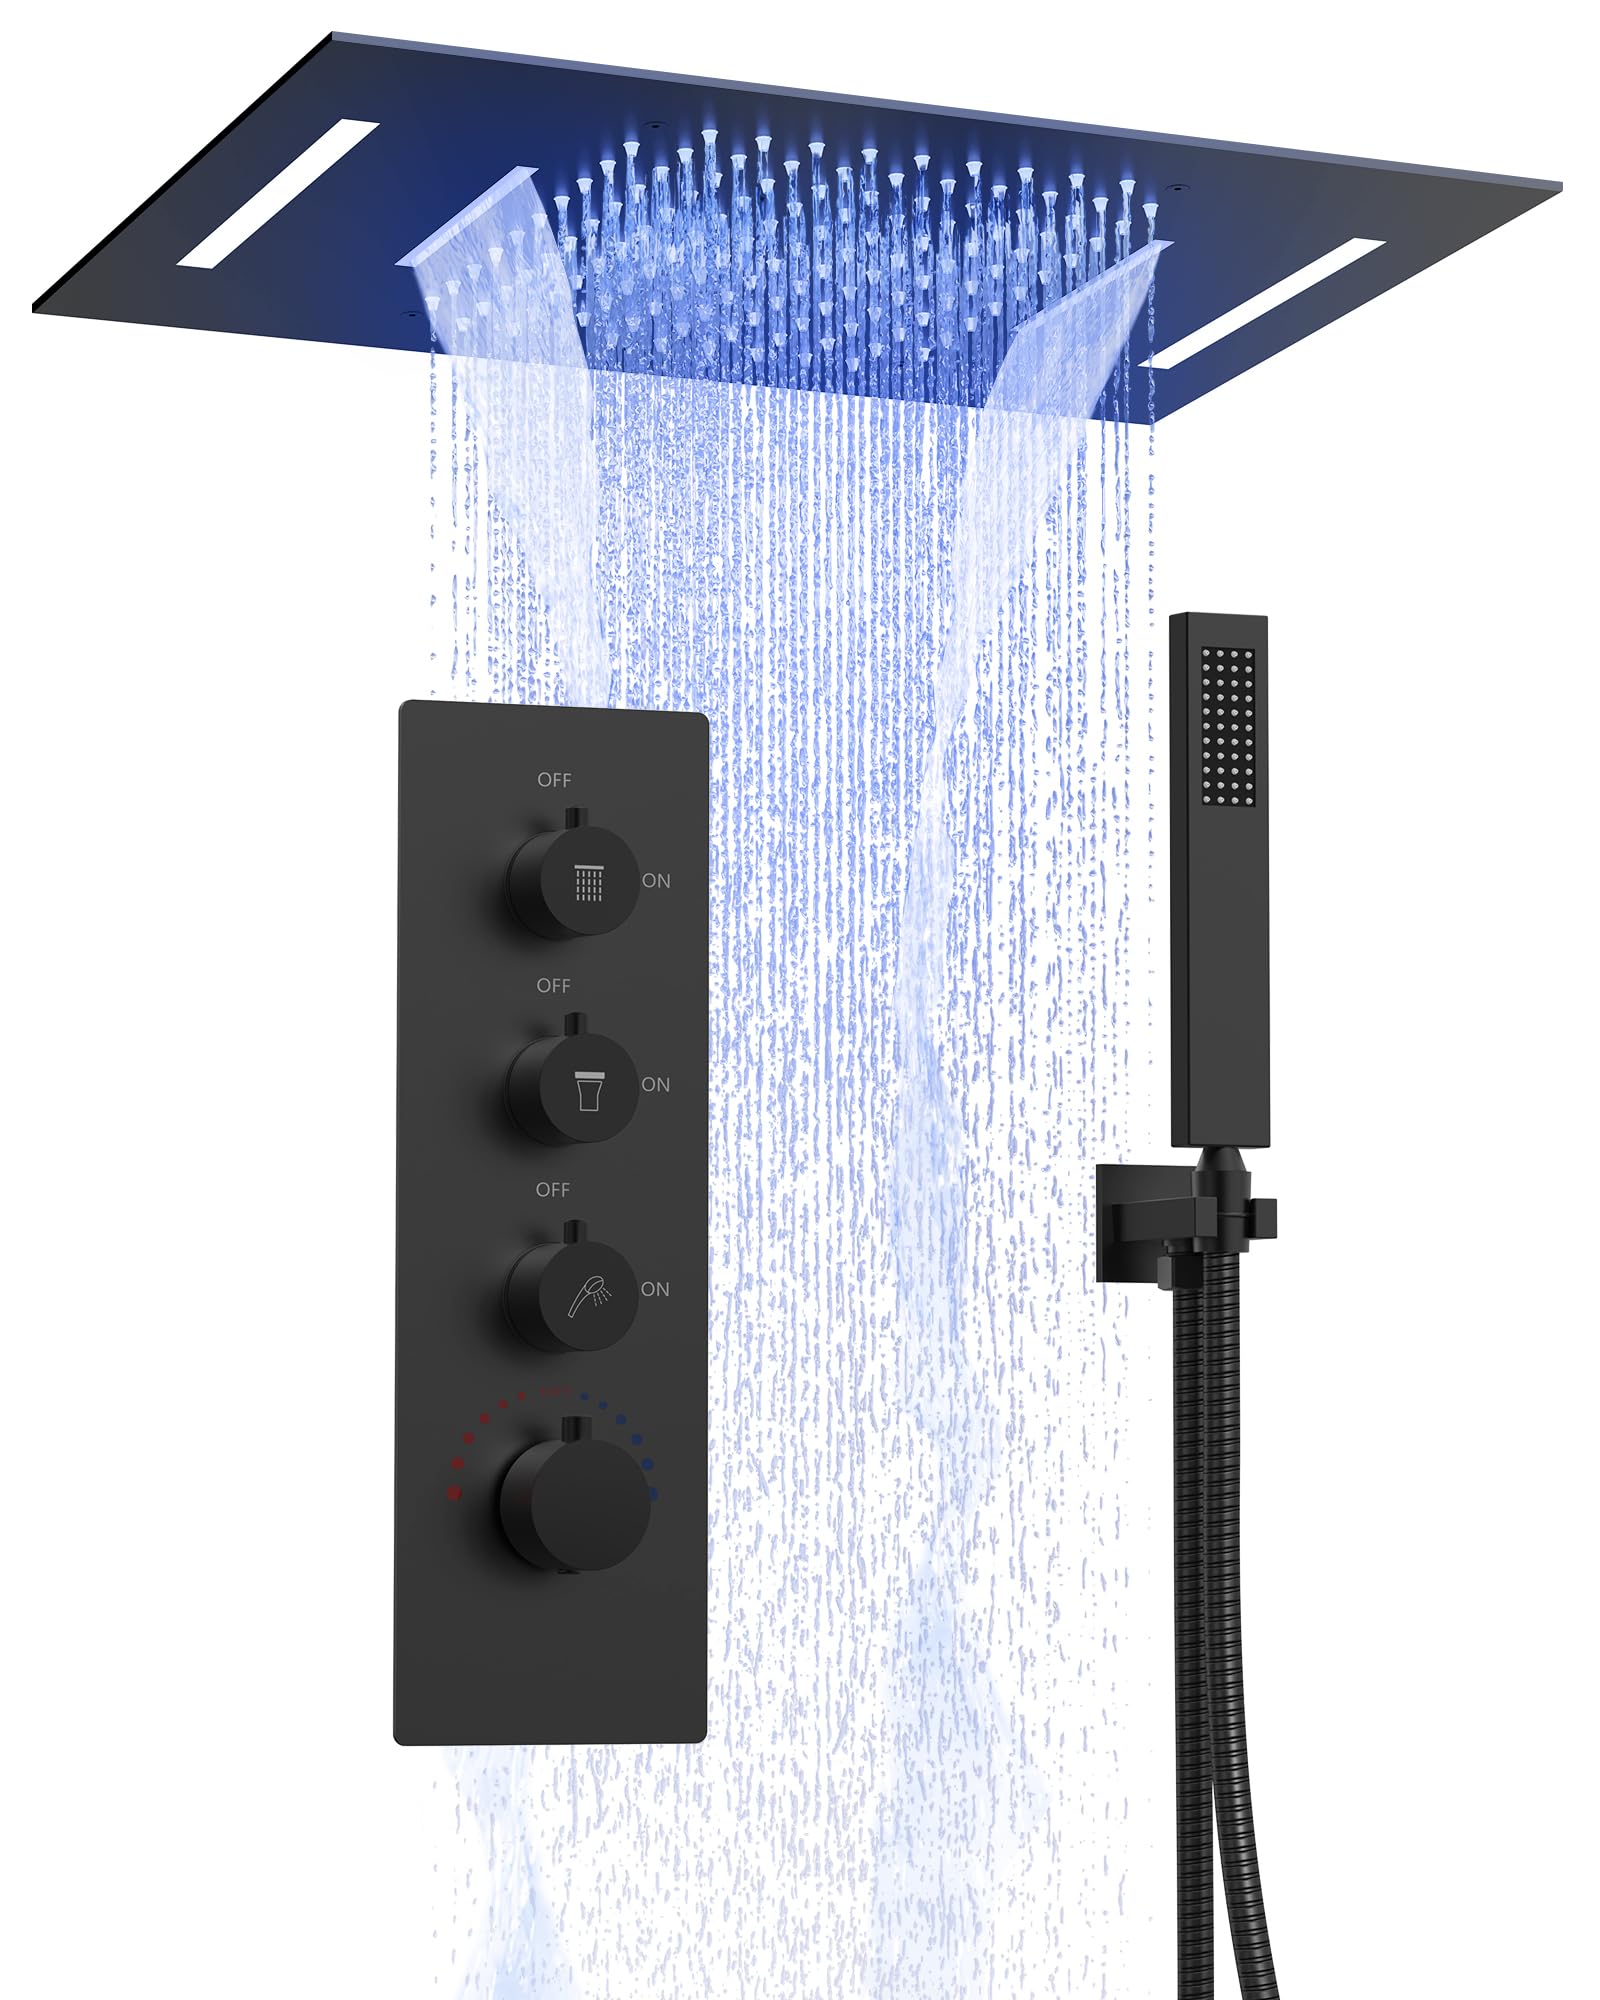
Figure 1: Overview of the EVERSTEIN 23x15 Inch LED Mood Lighting Shower System.
Setup and Installation
Professional installation is highly recommended for this shower system. Ensure all local plumbing and electrical codes are followed. The following video provides a visual guide for the installation process.
Video 1: EVERSTEIN Shower Faucet Installation Instruction. This video demonstrates the complete installation process for the shower system, including valve, shower head, and handheld components.
1. Valve and Trim Installation
The rough-in valve is the core of your shower system. Proper installation is crucial for functionality and longevity.
- Valve Placement and Depth: Ensure the valve is installed at the correct depth within the wall. The recommended depth is 3 9/32" (83 mm) minimum to 3 21/32" (93 mm) maximum. The embedded box should be cut flush with the tile surface.
- Pipe Connections: The valve features standard 1/2" NPT tapered threads for USA and Canada connections. For Europe, G1/2" connections are used.
- Teflon Tape Application: Wrap Teflon tape around all threaded connections for at least 12 turns to prevent leaks.
- Pipe Flushing: Before connecting the inlet pipes to the valve, flush both the hot and cold water inlet pipes for two minutes to remove any debris and prevent blockage.
- Cartridge Alignment: When installing the thermostatic cartridge, ensure the two alignment marks on the cartridge are aligned. This ensures correct temperature control.
- Pressure and Leakage Test: After all connections are made, perform a pressure test to ensure the water pressure is appropriate. Flush the outlet pipes for one minute. Then, insert plugs for a water test to confirm there are no leaks at any joint.

Figure 2: Rough-in valve showing hot water inlet, cold water inlet, rainfall shower outlet, and handheld shower outlet.

Figure 3: Detail of the thermostatic cartridge, highlighting the alignment marks for proper installation.
2. Rainfall Shower Head Installation
The LED rainfall shower head requires a ceiling cutout and support framing for secure installation.
- Ceiling Cutout: Create a cutout in your finished ceiling with dimensions of approximately 21 7/8" (555mm) by 14" (355mm).
- Support Framing: Ensure the support framing around the cutout is properly balanced and secure to hold the shower head bracket.
- Water Connections: Connect the water supply lines to the shower head. Wrap Teflon tape around all threaded connections for at least 12 turns to prevent leaks.
- Electrical Connection: Connect the LED power supply to a 110-220V (50/60 HZ) power source. Ensure all electrical connections are waterproof and secure.

Figure 4: The 23x15 inch LED rainfall shower head, capable of both rainfall and waterfall functions.
3. Handheld Shower Installation
Install the handheld shower holder and connect the hose.
- Holder Placement: After tiling, ensure the distance from the finished tile surface to the brass fitting for the handheld shower holder is 3/4" (20 mm).
- Teflon Tape: Wrap Teflon tape around the threaded connection of the handheld shower holder for at least 12 turns to prevent leaks.
- Hose Connection: Connect the 59" stainless steel hose to the handheld shower head and the wall outlet.

Figure 5: The high-pressure handheld shower, featuring anti-fingerprint and dirt-resistant properties, with touch-clean spray holes.
Operating Instructions
Your EVERSTEIN shower system offers a personalized and comfortable showering experience with its advanced features.
1. Thermostatic Temperature Control
The thermostatic valve maintains a consistent water temperature, preventing sudden changes. The temperature can be locked at 38°C (100°F) for safety, especially for children and the elderly. Adjust the temperature knob to your desired setting.
2. Multiple Spray Patterns
The system includes rainfall, waterfall, and handheld shower functions. These can be used individually or simultaneously for comprehensive coverage. Use the selector knobs on the control panel to activate your preferred spray patterns.

Figure 6: Multifunctional control panel showing selectors for rainfall, waterfall, handheld shower, and thermostatic temperature control.
3. LED Mood Lighting
The 23x15 inch LED rainfall shower head features 64-color LED lights that change with water temperature, providing visual enjoyment and a soothing effect. A remote control is included to customize the lighting experience.
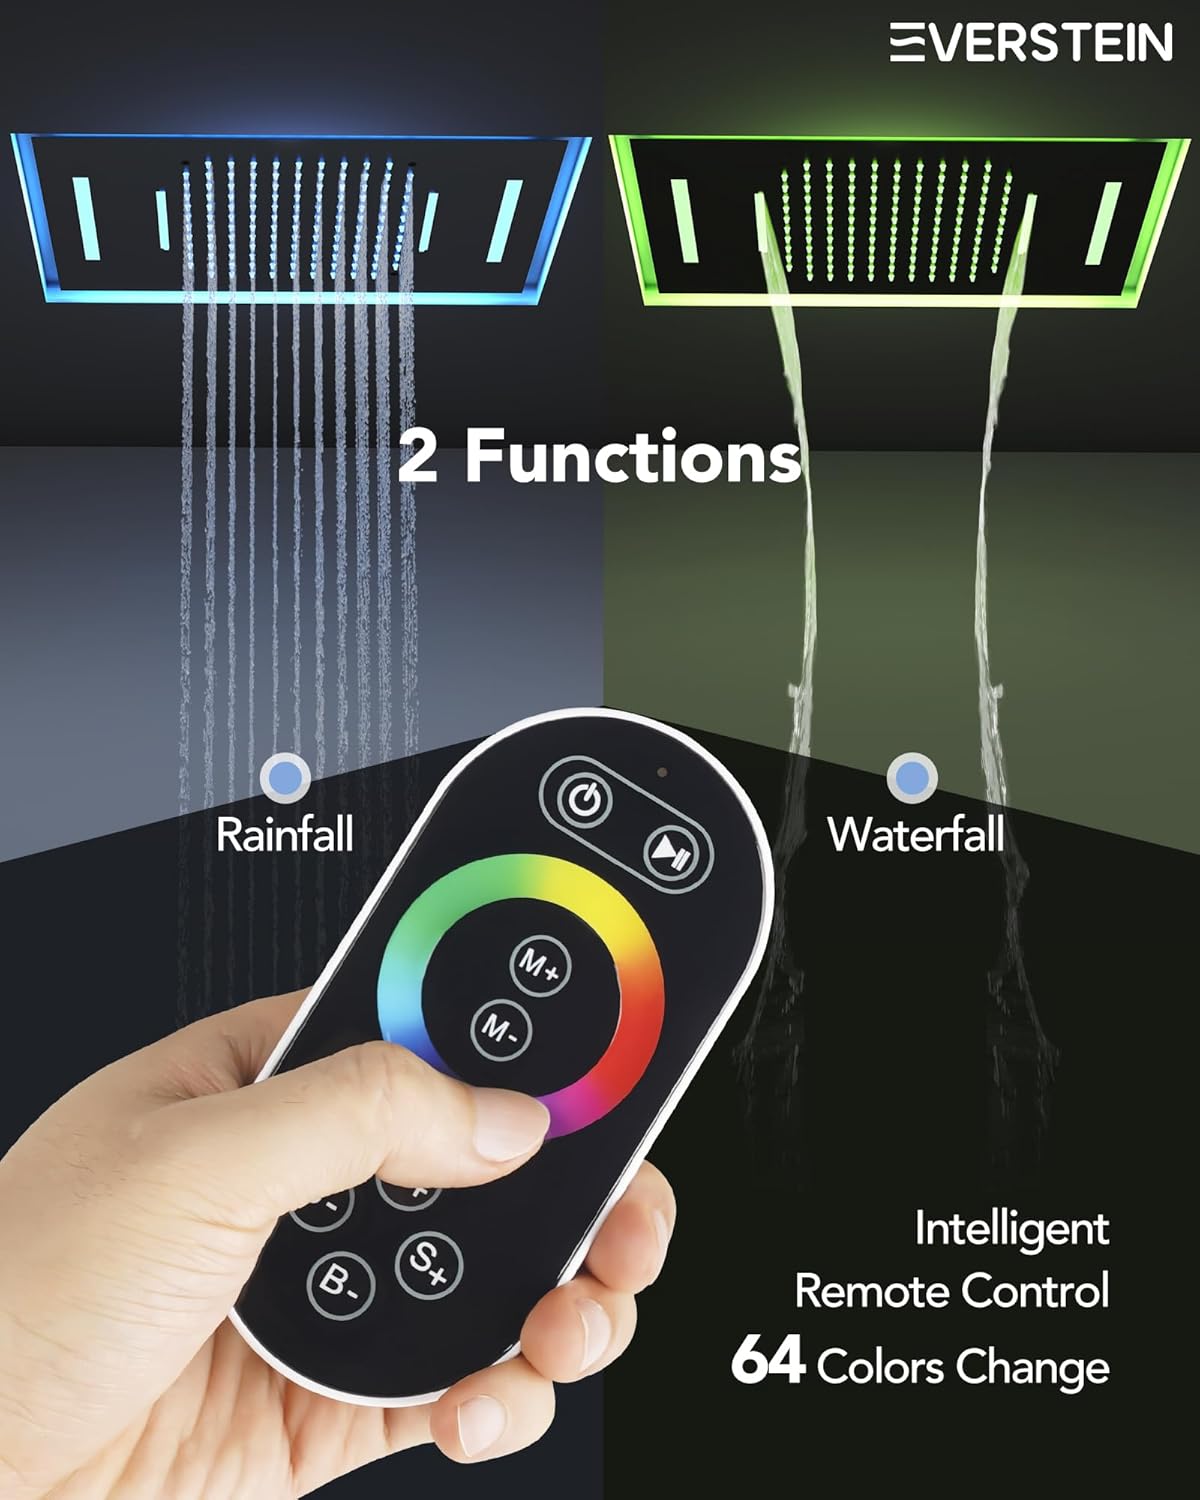
Figure 7: The LED shower head displaying various colors, controlled by an intelligent remote.
Maintenance
To maintain the appearance and functionality of your EVERSTEIN shower system, regular cleaning is recommended. Use a soft cloth and mild soap to clean the matte black finish. Avoid abrasive cleaners, solvents, or harsh chemicals, as these can damage the finish. For the handheld shower, the touch-clean spray holes can be easily cleared of mineral buildup by gently rubbing them.
Troubleshooting
If you encounter any issues with your shower system, please refer to the installation video for common setup problems. Ensure all connections are secure and free of leaks. Verify that the water supply is fully open and that the thermostatic cartridge is correctly aligned. For persistent issues, contact EVERSTEIN customer support.
Specifications
| Feature | Detail |
|---|---|
| Brand | EVERSTEIN |
| Model Number | SFS-1024-BK |
| Color | Black |
| Material | Brass |
| Finish Type | Matte Black |
| Number of Handles | 1 |
| Included Components | 23" x 15" shower head, hand shower head, shower fixtures & valve |
| Mounting Type | Ceiling Mount |
| Item Weight | 12 Pounds |
| Head Size | 23 x 15 inches |
| GTIN | 810142552387 |

Figure 8: Key dimensions of the shower head and control panel for planning installation.
Warranty and Support
EVERSTEIN provides a lifetime limited warranty for this product. This warranty covers ongoing repair and replacement support for products used properly. It does not cover repairs or replacements due to improper use or installation. For any issues or questions regarding your product, please contact EVERSTEIN customer service. Our goal is to ensure high-quality products and exceptional after-sales service, providing peace of mind with your purchase.