Introduction
Thank you for choosing the Hairich 1/4 Inch Drive Torque Wrench Set. This precision tool is designed for accurate torque application in various tasks, from bicycle and motorcycle maintenance to general equipment installation. This manual provides essential information for the safe and effective use, setup, operation, and maintenance of your torque wrench set. Please read it thoroughly before use and retain it for future reference.
Package Contents
The Hairich 1/4 Inch Drive Torque Wrench Set includes the following components:
- 1/4 Inch Drive Torque Wrench (2.3-24.9 N.M / 20-220 IN.LB)
- 8 Hex Bits: H2, H2.5, H3, H4, H5, H6, H8, H10
- 3 Torx Bits: T10, T25, T30
- 3 Socket Bits: 10mm, 11mm, 12mm
- 1 Extension Bar (10 cm / 4 inches)
- Storage Case
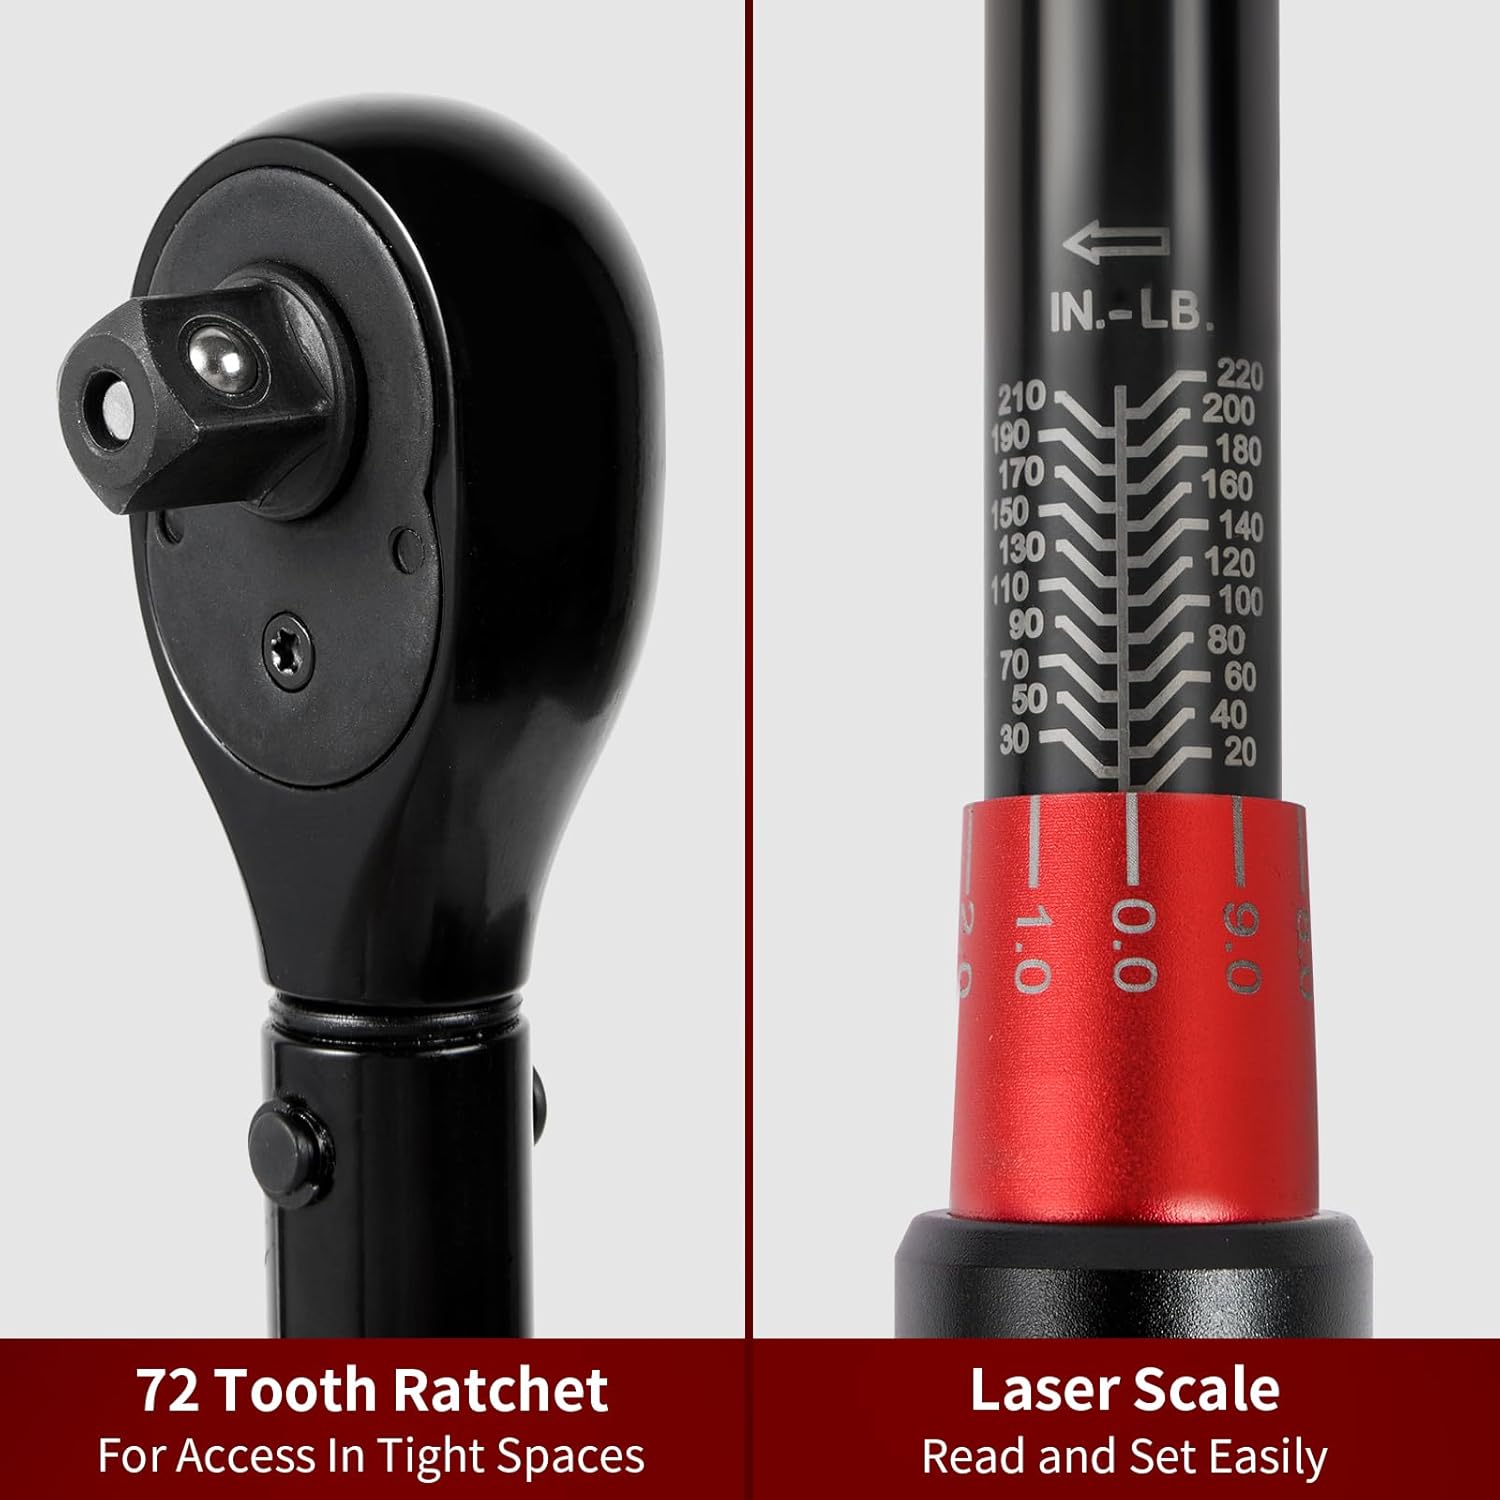
Figure 1: Overview of the 16-piece torque wrench set components.

Figure 2: The complete torque wrench set stored in its durable case.
Setup
- Unpacking: Carefully remove all components from the storage case. Inspect for any signs of damage.
- Familiarization: Identify the torque wrench, various bits (Hex, Torx, Socket), and the extension bar.
- Attaching Bits/Sockets: To attach a bit or socket, press the quick-release button on the wrench head, insert the desired bit/socket firmly, and then release the button. Ensure the bit/socket is securely locked in place.
- Using the Extension Bar: For reaching fasteners in confined spaces, attach the extension bar to the torque wrench head, then attach the desired bit/socket to the extension bar.

Figure 3: The torque wrench with an attached bit.
Operating Instructions
Setting the Torque Value
- Unlock: Locate the locking knob at the base of the handle. Pull it down and hold it to unlock the adjustment mechanism.
- Adjust: Rotate the handle to set the desired torque value. The wrench features a dual scale for both Newton-meters (N.M) and Inch-pounds (IN.LB). Align the desired value on the main scale with the zero mark on the micro-adjustment scale. Then, rotate the handle further until the exact desired value on the micro-adjustment scale aligns with the main scale line.
- Lock: Release the locking knob. It will automatically return to its locked position, securing the set torque value. Always ensure the knob is fully locked before applying torque.

Figure 4: Dual scale for precise torque setting in IN-LB and N.M.

Figure 5: Detailed view of the 72-tooth ratchet and laser scale for easy reading.
Applying Torque
- Attach the appropriate bit/socket to the wrench head.
- Place the bit/socket onto the fastener.
- Apply smooth, steady pressure to the handle in a clockwise direction.
- Continue applying pressure until you hear and feel a distinct "click." This indicates that the preset torque value has been reached.
- Immediately stop applying force once the click is detected to prevent over-tightening.
Quick Release and Reversible Switch
- The quick-release button on the wrench head allows for easy and secure attachment and removal of bits and sockets.
- A reversible switch on the wrench head enables you to change the direction of the ratchet mechanism, useful for loosening fasteners (though torque should only be applied in the tightening direction for accuracy).

Figure 6: Key features of the torque wrench, including the quick release and reversible switch.
Maintenance
- Cleaning: After each use, wipe the torque wrench and accessories with a clean, dry cloth. Do not use solvents or harsh chemicals, as these can damage the finish and internal mechanisms.
- Storage: Always store the torque wrench in its original case to protect it from dust, moisture, and impact. Set the torque wrench to its lowest setting (but not below) before storing to relieve tension on the internal spring, which helps maintain calibration accuracy over time.
- Recalibration: For optimal accuracy, it is recommended to have the torque wrench recalibrated periodically, especially after 12 months of use or if dropped. Refer to the included calibration certificate for initial accuracy details.

Figure 7: Example of a calibration certificate for the torque wrench.
Troubleshooting
- Wrench does not click: Ensure the torque value is set correctly and the locking knob is released. If the fastener is already tight, the wrench may not click. If the issue persists, the wrench may require recalibration or service.
- Inaccurate readings: Always apply smooth, steady pressure. Jerking or sudden movements can affect accuracy. Ensure the wrench is clean and properly maintained. If suspected inaccuracy continues, recalibration is recommended.
- Bits/sockets not holding: Verify that the quick-release button was fully pressed and released, and the bit/socket is correctly seated. Inspect the square drive for any damage.
Specifications
| Feature | Specification |
|---|---|
| Model Number | HRC-SU-14200-16 |
| Drive Size | 1/4 Inch Drive |
| Torque Range | 2.3-24.9 N.M / 20-220 IN.LB |
| Accuracy | ±3% |
| Material | Chrome Vanadium Steel (body), Aluminum-Titanium Alloy (handle) |
| Ratchet Teeth | 72-tooth |
| Color | Black and Red |
| Dimensions | 27.94 x 10.16 x 5.08 cm |
| Weight | 839 g |
| Power Source | Hand-powered |
Warranty Information
The Hairich 1/4 Inch Drive Torque Wrench Set comes with a 24-month warranty from the date of purchase. This warranty covers defects in materials and workmanship under normal use. Please retain your proof of purchase for warranty claims. The warranty does not cover damage resulting from misuse, abuse, unauthorized modification, or normal wear and tear.
Customer Support
Should you encounter any issues or have questions regarding your Hairich Torque Wrench Set, please contact our customer support team. Refer to your purchase documentation or the retailer's website for contact details. Our team is dedicated to assisting you with product inquiries, troubleshooting, and warranty services.