1. Introduction
This manual provides detailed instructions for the installation, setup, and operation of your JaeJaes Motorized Smart Shades, Model V0001. Please read this manual thoroughly before installation and use to ensure proper function and safety. These shades are designed for indoor use in various settings including living rooms, bedrooms, study rooms, dining rooms, and offices, offering 100% light-blocking, heat resistance, noise reduction, and privacy protection.
2. What's in the Box
Carefully unpack your JaeJaes Motorized Smart Shades and ensure all components are present. The package should contain the following items:
- Motorized Roller Shade Unit
- Remote Control
- USB-C Charging Cable (16 ft)
- Mounting Brackets (3 pieces)
- Screws and Wall Anchors
- Small Phillips Screwdriver (for remote)
- Installation Reference Slip
- User Manual
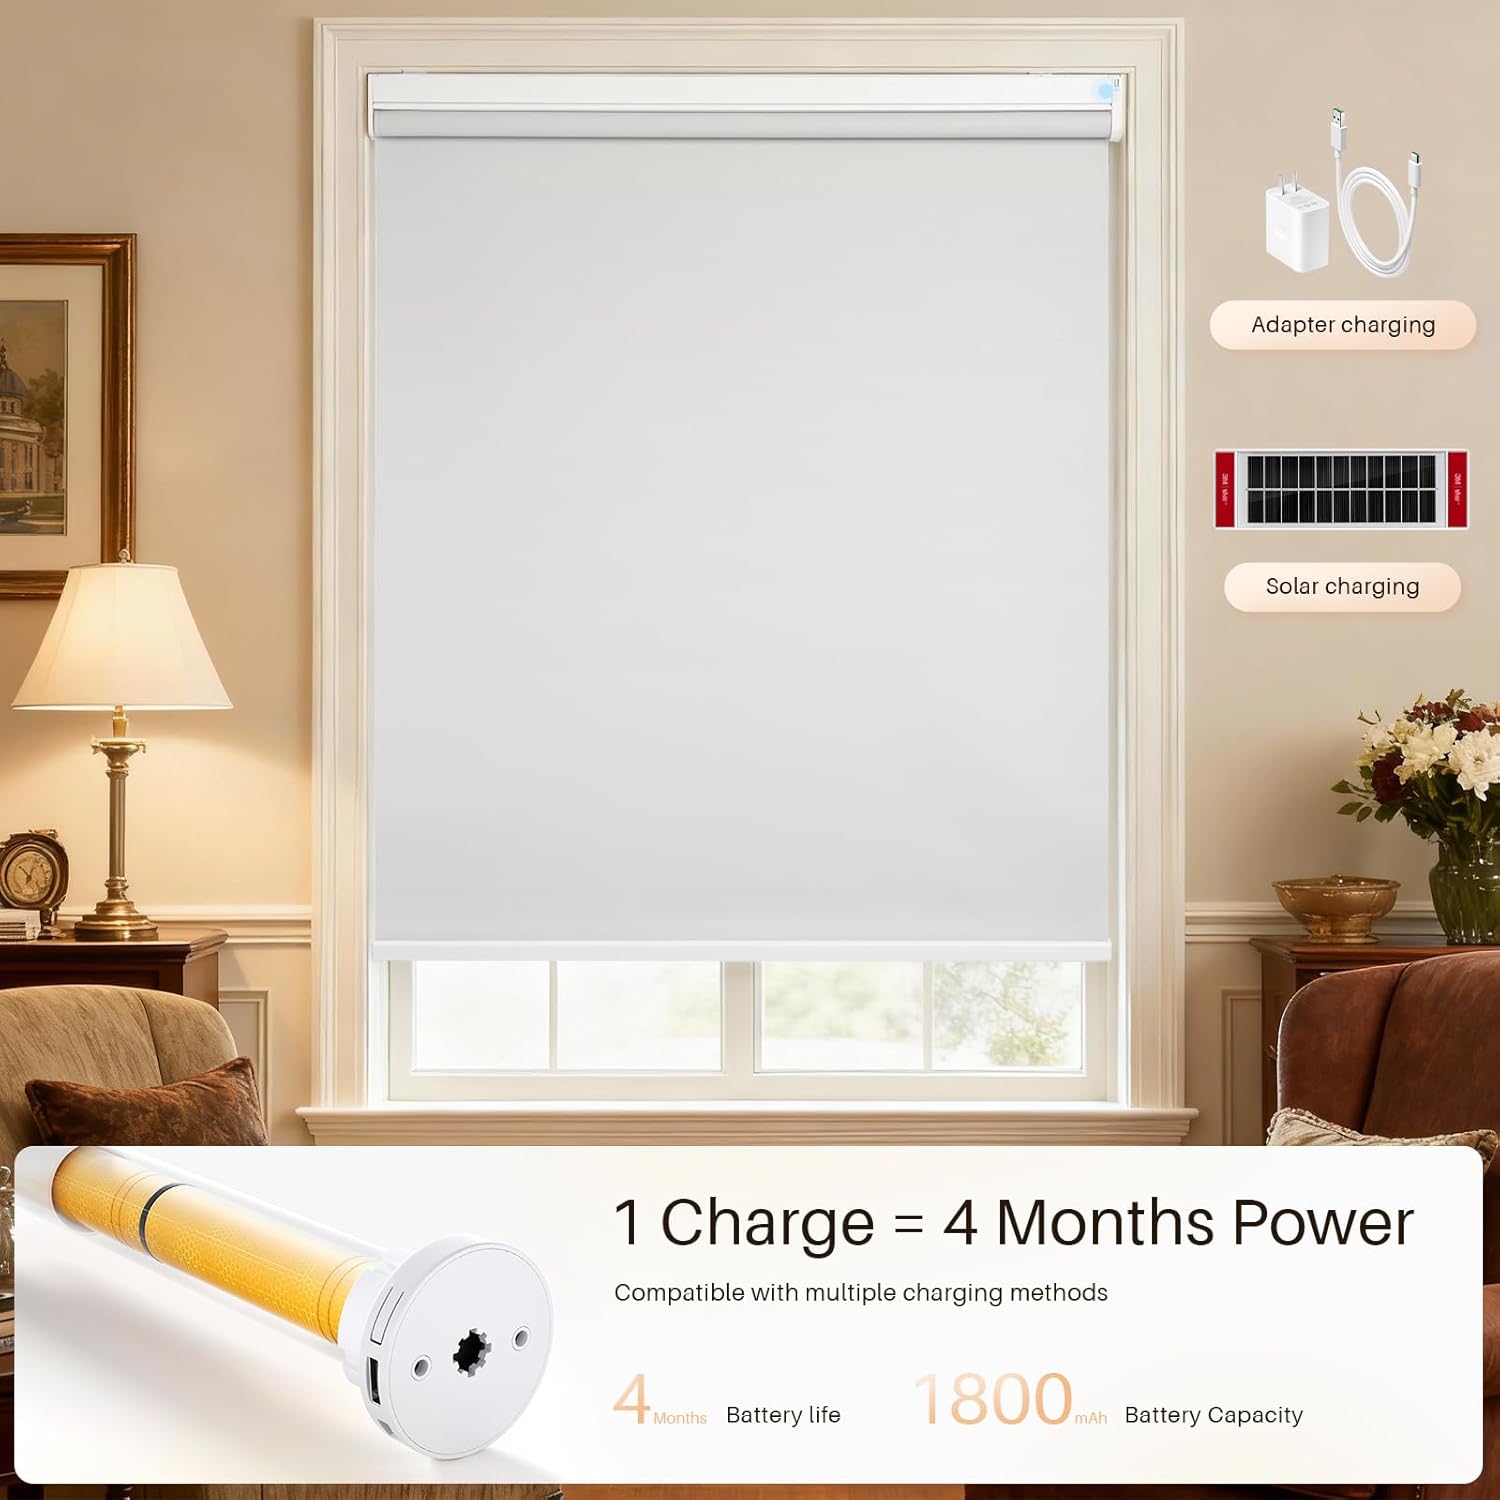
Image: All components included in the JaeJaes Motorized Smart Shades package, including the shade unit, remote, charging cable, mounting hardware, and manual.
3. Installation
Required Tools (Not Included)
- Electric Drill
- Phillips Screwdriver (larger than the one provided for remote)
- Hammer (for non-wooden surfaces)
3.1. Inside Mount Installation
For inside mount, the window frame depth should be at least 1.5 inches. The order width is typically the window width (or 0-1 inch less). The full extended height is 72 inches.
- Prepare the Reference Slip: Paste the provided Reference Slip for Installation Position onto the top inside of your window frame. Ensure it is level and centered.
- Drill Holes: Use an electric drill to create holes at the marked internal installation positions on the reference slip.
- Insert Expansion Tubes: For non-wooden surfaces, gently tap the expansion tubes into the drilled holes using a hammer until flush with the surface.
- Secure Mounting Brackets: Secure the mounting brackets to the wall using a Phillips screwdriver and the long screws provided. Ensure they are firmly attached.
- Attach the Shade: Tilt the shade unit and carefully hook it onto the mounting brackets. Push upwards and then inwards until it clicks securely into place.

Image: Inside mount diagram illustrating window width, height, and depth requirements for installation.
3.2. Outside Mount Installation
For outside mount, the order width should be 4 inches more than the window frame width. The window height should be less than or equal to 68 inches.
- Prepare the Reference Slip: Paste the provided Reference Slip for Installation Position onto the wall above your window frame. Ensure it is level and centered.
- Drill Holes: Use an electric drill to create holes at the marked external installation positions on the reference slip.
- Insert Expansion Tubes: For non-wooden surfaces, gently tap the expansion tubes into the drilled holes using a hammer until flush with the surface.
- Secure Mounting Brackets: Secure the mounting brackets to the wall using a Phillips screwdriver and the long screws provided. Ensure they are firmly attached.
- Attach the Shade: Tilt the shade unit and carefully hook it onto the mounting brackets. Push upwards and then inwards until it clicks securely into place.

Image: Outside mount diagram illustrating window width and height requirements for installation.
3.3. Installation Video Guide
For a visual guide on the installation process, please refer to the video below:
Video: JaeJaes Installation Guide. This video demonstrates the step-by-step process for installing the motorized roller shades, covering both inside and outside mount methods.
4. Remote Control Setup
Before using your remote control, you need to set the bottom stop position for your shades.
4.1. Entering Admin State
- Disassemble Remote: Use the small Phillips screwdriver provided to open the remote control.
- Remove Battery Tab: Locate the battery and remove the white paper tab if it's still present.
- Switch to Admin: On the remote's circuit board, locate the small toggle switch labeled "admin/user". Slide the switch to the "admin" position.
4.2. Setting the Bottom Stop Position
- Move Shades Down: Use the down arrow button on the remote to move the shades to your desired bottom position.
- Stop Shades: Press the pause button to stop the shades at the desired position.
- Save Position: While in Admin mode, hold the down arrow button for 2 seconds. The shades will rotate forwards and backwards once, indicating successful setting.
4.3. Exiting Admin State
- Switch to User: Slide the toggle switch on the remote's circuit board back to the "user" position. This saves the settings and completes the setup.
- Reassemble Remote: Put the back cover on the remote and tighten the screws for normal use.
Your remote control is now ready for normal operation.
Video: JaeJaes Initial Operations. This video guides you through setting up the remote control, including entering admin mode and setting the bottom stop position.
5. Smart Gateway & App Control
To enable smart features like app control, scheduling, and voice assistant integration, you will need a JaeJaes WiFi gateway (sold separately).
5.1. Gateway Preparation
- Connect Power: Connect the gateway to a power supply using the provided cable.
- Enter Matching Mode: Press and hold the power button on the gateway for 5 seconds. The red light on the gateway will flash, indicating it has entered matching mode.
5.2. App Download and Gateway Pairing
- Download App: Download the "Smart Life" app from your device's app store and register an account.
- Add Device: In the app, navigate to the 'Home' interface and click 'Add Device'.
- Select Gateway Type: Select "Others" on the left, then click "Others Wi-Fi" on the right.
- Enter Wi-Fi Details: Enter your 2.4GHz Wi-Fi network name and password. (Note: 5GHz Wi-Fi networks are not supported).
- Confirm Indicator: Choose the gateway indicator light status (e.g., "Blink Quickly") according to the actual situation.
- Connect: The app will scan for and connect to the gateway. Once connected, click "Done".
5.3. Connecting Smart Shades to the App
- Shade Pairing Mode: Press and hold the "M" button on the shade unit for 2 seconds until the shade rotates forwards and backwards once. This indicates it has entered 60-second pairing mode.
- Add Subdevice: In the app, click on the paired gateway, then click 'Add subdevice'.
- Enter Search State: Click 'LED already blink' to enter the search state.
- Search and Add: The app will search for and add the smart shade. When the shade rotates forwards and backwards once, it means the shade is added successfully.
5.4. App Control Interface
Once connected, you can control your shades through the app:
- Select the corresponding shade type (e.g., Roller Blinds).
- Modify the shade name for easy identification.
- Access the settings interface for advanced options.
- Drag the slider to control shade opening and closing percentage.
- Use dedicated buttons to open, stop, or close the shade completely.
- Run to a third travel point (if set).
- Monitor battery power.
5.5. Scheduled Opening or Closing of Shades
You can set schedules for your shades to open or close automatically:
- In the app, navigate to the shade's control interface.
- Click on the 'Timer Opera' option within the settings.
- Add a new schedule, set the desired time, days of the week, and action (open/close).
- Save the schedule.
Video: Alexa APP Pair. This video demonstrates how to connect the smart gateway, pair the shades to the app, and control them via the app interface, including setting schedules.
6. Voice Assistant Integration (Alexa/Google Home)
Your JaeJaes Smart Shades can be controlled using voice commands through Amazon Alexa or Google Assistant, provided you have a compatible smart gateway.
- Open Smart Life App: In the Smart Life app, click on "Me" (usually located at the bottom right).
- Select Voice Assistant: Under "Third-Party Services", click on "Alexa" or "Google Assistant".
- Sign In: Click "Sign In With Amazon" or follow the prompts for Google Assistant to link your Smart Life account.
- Link Account: Follow the on-screen instructions to link your Smart Life account with your chosen voice assistant.
- Discover Devices: Once linked, open your Alexa or Google Home app and discover new devices. Your JaeJaes Smart Shades should appear and be ready for voice control.
You can now use commands like "Alexa, open the living room shade" or "Hey Google, close the bedroom blinds."
7. Specifications
| Feature | Detail |
|---|---|
| Material | Polyester |
| Product Dimensions | 72"L x 23"W |
| Brand | JaeJaes |
| Color | White |
| Opacity | Blackout |
| Recommended Uses | Indoor |
| Room Type | Bedroom, Kitchen, Living Room |
| Operation Mode | Automatic |
| Special Feature | Blackout, Lightweight |
| Shape | Rectangular |
| Number of Items | 1 |
| Pattern | Solid |
| Product Care Instructions | Spot Clean Only |
| Closure Type | Cordless, Motorized |
| Compatible Devices | WiFi hub, Alexa, Google Assistant |
| Size | 23"W x 72"H |
| Mounting Type | Inside Mount, Outside Mount |
| Water Resistance Level | Not Water Resistant |
| Control Type | Motorized |
| Manufacturer | JaeJaes |
| Item Weight | 3.59 pounds |
| ASIN | B0CPM1Q5BX |
| Item Model Number | V0001 |
| Batteries | 1 Lithium Ion battery required (included) |
| Date First Available | December 6, 2023 |
8. Care and Maintenance
To maintain the appearance and functionality of your JaeJaes Motorized Smart Shades, follow these care instructions:
- Cleaning: Spot clean only. Use a soft, damp cloth with mild soap and water to gently clean any soiled areas. Avoid harsh chemicals or abrasive cleaners.
- Dusting: Regularly dust the shades with a soft cloth or a vacuum cleaner with a brush attachment to prevent dust buildup.
- Battery Charging: The shades feature a high-capacity battery that lasts 4-5 months on a full 6-hour charge. Recharge using the provided USB-C cable. A solar panel can be purchased separately for continuous charging. Ensure the charging port is accessible for recharging.
- Avoid Water: The shades are not water-resistant. Avoid exposing them to excessive moisture or direct water contact.

Image: Instructions for charging the motorized shades using the included USB-C cable or an optional solar panel.
9. Troubleshooting
If you encounter any issues with your JaeJaes Motorized Smart Shades, please refer to the following common troubleshooting tips:
- Shades Not Responding:
- Check the remote control battery.
- Ensure the remote is in "user" mode after initial setup.
- Verify the shade unit is charged.
- Shades Not Pairing with Gateway/App:
- Ensure the gateway is powered on and its indicator light is flashing (matching mode).
- Confirm your Wi-Fi network is 2.4GHz.
- Make sure the shade unit is in pairing mode (press 'M' button for 2 seconds).
- Ensure the gateway and shades are within range of your Wi-Fi router.
- Shades Not Stopping at Correct Position:
- Re-enter Admin mode on the remote and reset the bottom stop position as described in Section 4.2.
- Voice Control Issues:
- Verify that your Smart Life account is correctly linked to Alexa or Google Home.
- Ensure your voice assistant device is online and connected to the internet.
- Try rediscovering devices in your Alexa or Google Home app.
If the issue persists, please contact customer support for further assistance.
10. Warranty and Support
JaeJaes provides a standard warranty for its products. Please refer to the warranty card included in your package or visit the official JaeJaes website for detailed warranty information and terms and conditions.
For technical support, troubleshooting assistance, or any questions regarding your Motorized Smart Shades, please contact JaeJaes customer service through the following channels:
- Online Support: Visit the JaeJaes Store on Amazon for FAQs and contact options.
- Email Support: Refer to your product packaging or warranty card for the customer support email address.
When contacting support, please have your product model number (V0001) and purchase information readily available.