1. Introduction
This manual provides detailed instructions for the installation, operation, and maintenance of the ORIGPARTS Control Circuit Board Display Panel, model YX76C-DL04A. This component is designed as a replacement part for specific Bradley Digital 4 Rack and 6 Rack Electric Smokers. Please read this manual thoroughly before attempting any installation or operation to ensure proper function and safety.
2. Safety Information
- Disconnect Power: Always ensure the electric smoker is completely unplugged from the power source before beginning any installation, maintenance, or inspection. Failure to do so can result in electric shock or injury.
- Handle with Care: Electronic components are sensitive. Avoid touching the circuit board directly with bare hands to prevent electrostatic discharge. Use appropriate tools and handle the display panel carefully to prevent damage.
- Professional Installation Recommended: If you are not comfortable with electrical repairs, it is recommended to seek assistance from a qualified technician.
- Use Correct Tools: Ensure you have the appropriate tools for disassembly and reassembly to avoid stripping screws or damaging components.
3. Product Overview
The ORIGPARTS Control Circuit Board Display Panel (Model YX76C-DL04A) serves as the primary interface for controlling your Bradley Digital Electric Smoker. It features a digital display for time and temperature settings, along with nine control buttons for various functions. The unit operates with an input voltage of 5V.
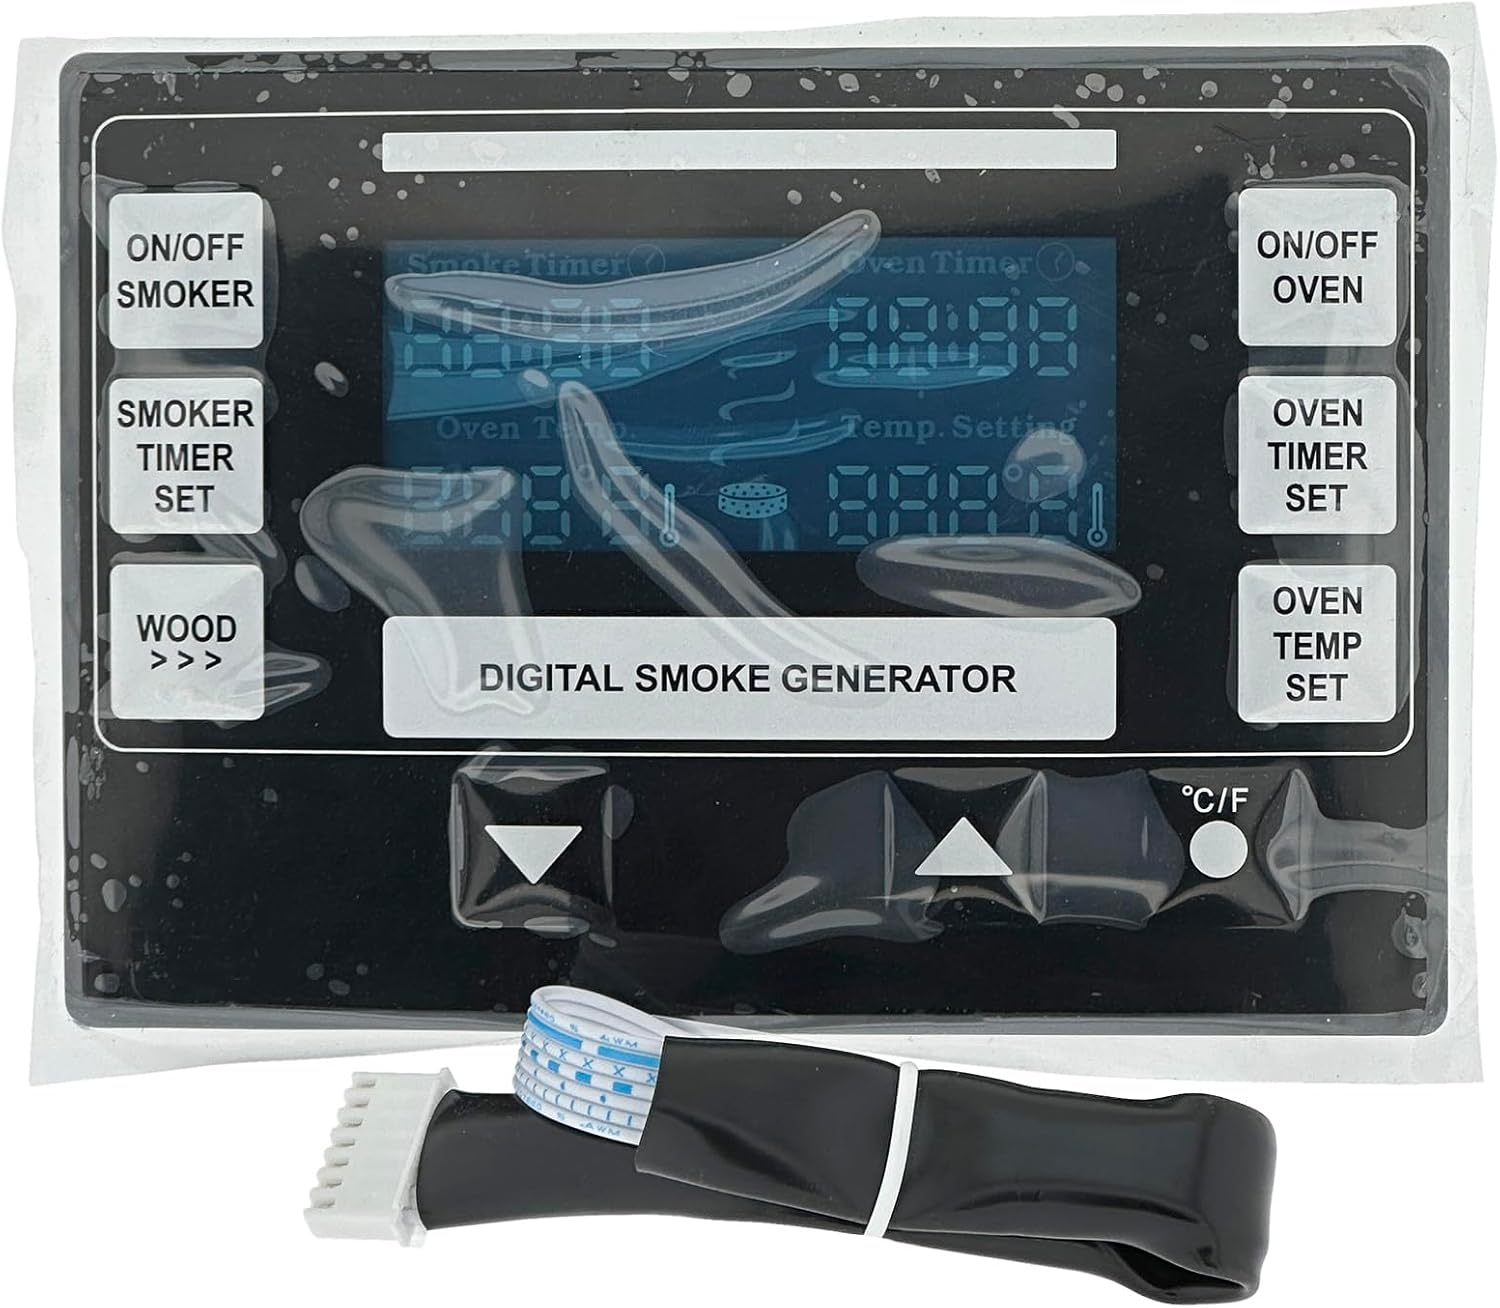
Figure 1: Front view of the ORIGPARTS Control Circuit Board Display Panel, showing the digital screen and nine control buttons.

Figure 2: Back view of the ORIGPARTS Control Circuit Board Display Panel, illustrating the circuit board and the connector cable.
4. Compatibility Verification
This replacement display panel is compatible with the following Bradley Digital Electric Smoker models:
- BTDS76P
- BTDS76CE-EU
- BTDS108P
- BTDS108CE-EU
Important Compatibility Note: It is crucial to verify the connector type of your existing display panel before purchasing and installing this replacement part. Some Bradley smoker models may use different connector configurations (e.g., 7-pin versus 11-pin). This ORIGPARTS display panel features a 7-pin connector. Please disassemble your smoker's control panel to visually confirm the connector type on your original unit matches the 7-pin connector shown in Figure 2 and the 'New Version' in Figure 3.

Figure 3: Comparison of 'New Version' (compatible) and 'Old Version' (incompatible) display panels. Ensure your existing unit matches the 'New Version' for proper fit and function.
5. Installation Instructions
Follow these steps carefully to replace the control circuit board display panel:
- Power Disconnection: Unplug the Bradley Electric Smoker from the main power outlet.
- Access Control Panel: Locate and carefully remove the screws securing the existing control panel to the smoker unit. The exact number and location of screws may vary by model.
- Disconnect Old Panel: Gently pull the old display panel away from the smoker. Carefully disconnect the ribbon cable and any other wires attached to the back of the old display panel. Note the orientation of the connectors before disconnecting.
- Remove Old Circuit Board: If the display panel and circuit board are separate, carefully remove the circuit board from its housing. The ORIGPARTS replacement is a combined display panel and circuit board.
- Connect New Panel: Connect the ribbon cable from the smoker to the new ORIGPARTS display panel. Ensure the connector is fully seated and correctly oriented. Do not force the connection.
- Secure New Panel: Carefully position the new display panel into the smoker's control panel opening. Re-insert and tighten the screws to secure the panel. Do not overtighten.
- Test Functionality: Plug the electric smoker back into the power outlet. Turn on the smoker and verify that the display lights up and all buttons are responsive.
6. Operating Instructions
The display panel features nine buttons for controlling your smoker:
- ON/OFF SMOKER: Powers the smoke generator on or off.
- SMOKER TIMER SET: Used to set the duration for smoke generation.
- WOOD >>>: Advances the wood bisquette feeder.
- ON/OFF OVEN: Powers the oven heating element on or off.
- OVEN TIMER SET: Used to set the cooking duration for the oven.
- OVEN TEMP SET: Used to set the desired oven temperature.
- Up/Down Arrows: Adjust numerical values (time, temperature) up or down.
- °C/°F: Toggles the temperature display between Celsius and Fahrenheit.
Refer to your Bradley Electric Smoker's original user manual for detailed instructions on specific smoking and cooking programs.
7. Maintenance
- Cleaning: To clean the display panel, ensure the smoker is unplugged. Use a soft, damp cloth to gently wipe the surface. Avoid abrasive cleaners or excessive moisture, which can damage the electronics.
- Storage: If the smoker is to be stored for an extended period, ensure the display panel is clean and dry. Store the smoker in a dry, protected environment.
8. Troubleshooting
- Display Not Lighting Up:
- Ensure the smoker is properly plugged into a working power outlet.
- Verify that the ribbon cable connection to the display panel is secure and correctly seated.
- Confirm that the replacement panel is compatible with your smoker's wiring (refer to Section 4: Compatibility Verification).
- Buttons Unresponsive:
- Check for any debris or moisture around the buttons.
- Ensure the display panel is securely mounted and not experiencing pressure that might affect button function.
- Incorrect Readings:
- Verify that all internal sensors (temperature probes, etc.) are correctly connected to the main smoker unit. This display panel is a control interface, not a sensor itself.
- Panel Does Not Fit/Connect:
- Re-check the connector type on your original smoker unit against the 7-pin connector of this replacement part. Incompatibility in connector type is a common issue.
If troubleshooting steps do not resolve the issue, contact ORIGPARTS customer support or a qualified technician.
9. Specifications
| Part Description | Display Panel (Contains Control Board) |
| Manufacturer Part # | YX76C-DL04A |
| Input Voltage | 5V |
| Number of Buttons | 9 |
| Product Dimensions | 6.8 x 4.8 x 1.5 inches |
| Item Weight | 7 ounces |
| Manufacturer | ORIGPARTS |
10. Warranty and Support
For warranty information or technical support regarding your ORIGPARTS Control Circuit Board Display Panel, please refer to the documentation provided with your purchase or contact ORIGPARTS directly through their official channels. Keep your purchase receipt as proof of purchase.