NEEWER S101-300W
NEEWER S101-300W Strobe Flash Light User Manual
Model: S101-300W
Brand: NEEWER
1. Introduction
Thank you for choosing the NEEWER S101-300W Strobe Flash Light. This professional studio monolight is designed to provide powerful and consistent illumination for various photography applications, including product, portrait, still life, food, commercial, and wedding photography. This manual provides detailed instructions for the safe and effective use of your new equipment. Please read it thoroughly before operation and retain it for future reference.
2. Safety Information
- Do not expose the unit to rain or moisture to avoid electric shock.
- Do not disassemble or modify the unit. Repairs should only be performed by qualified personnel.
- Ensure the power supply voltage matches the unit's requirements before plugging in.
- Avoid direct eye exposure to the flash light, as it can cause temporary vision impairment.
- Keep the unit away from flammable materials and ensure proper ventilation during use.
- Always unplug the unit from the power outlet before cleaning or when not in use.
- The flash tube and modeling lamp can become hot during operation. Allow them to cool before handling.
3. Product Overview
The NEEWER S101-300W is a robust studio flash unit designed for high-performance lighting. It features a powerful flash output, an adjustable modeling lamp, and versatile triggering options.

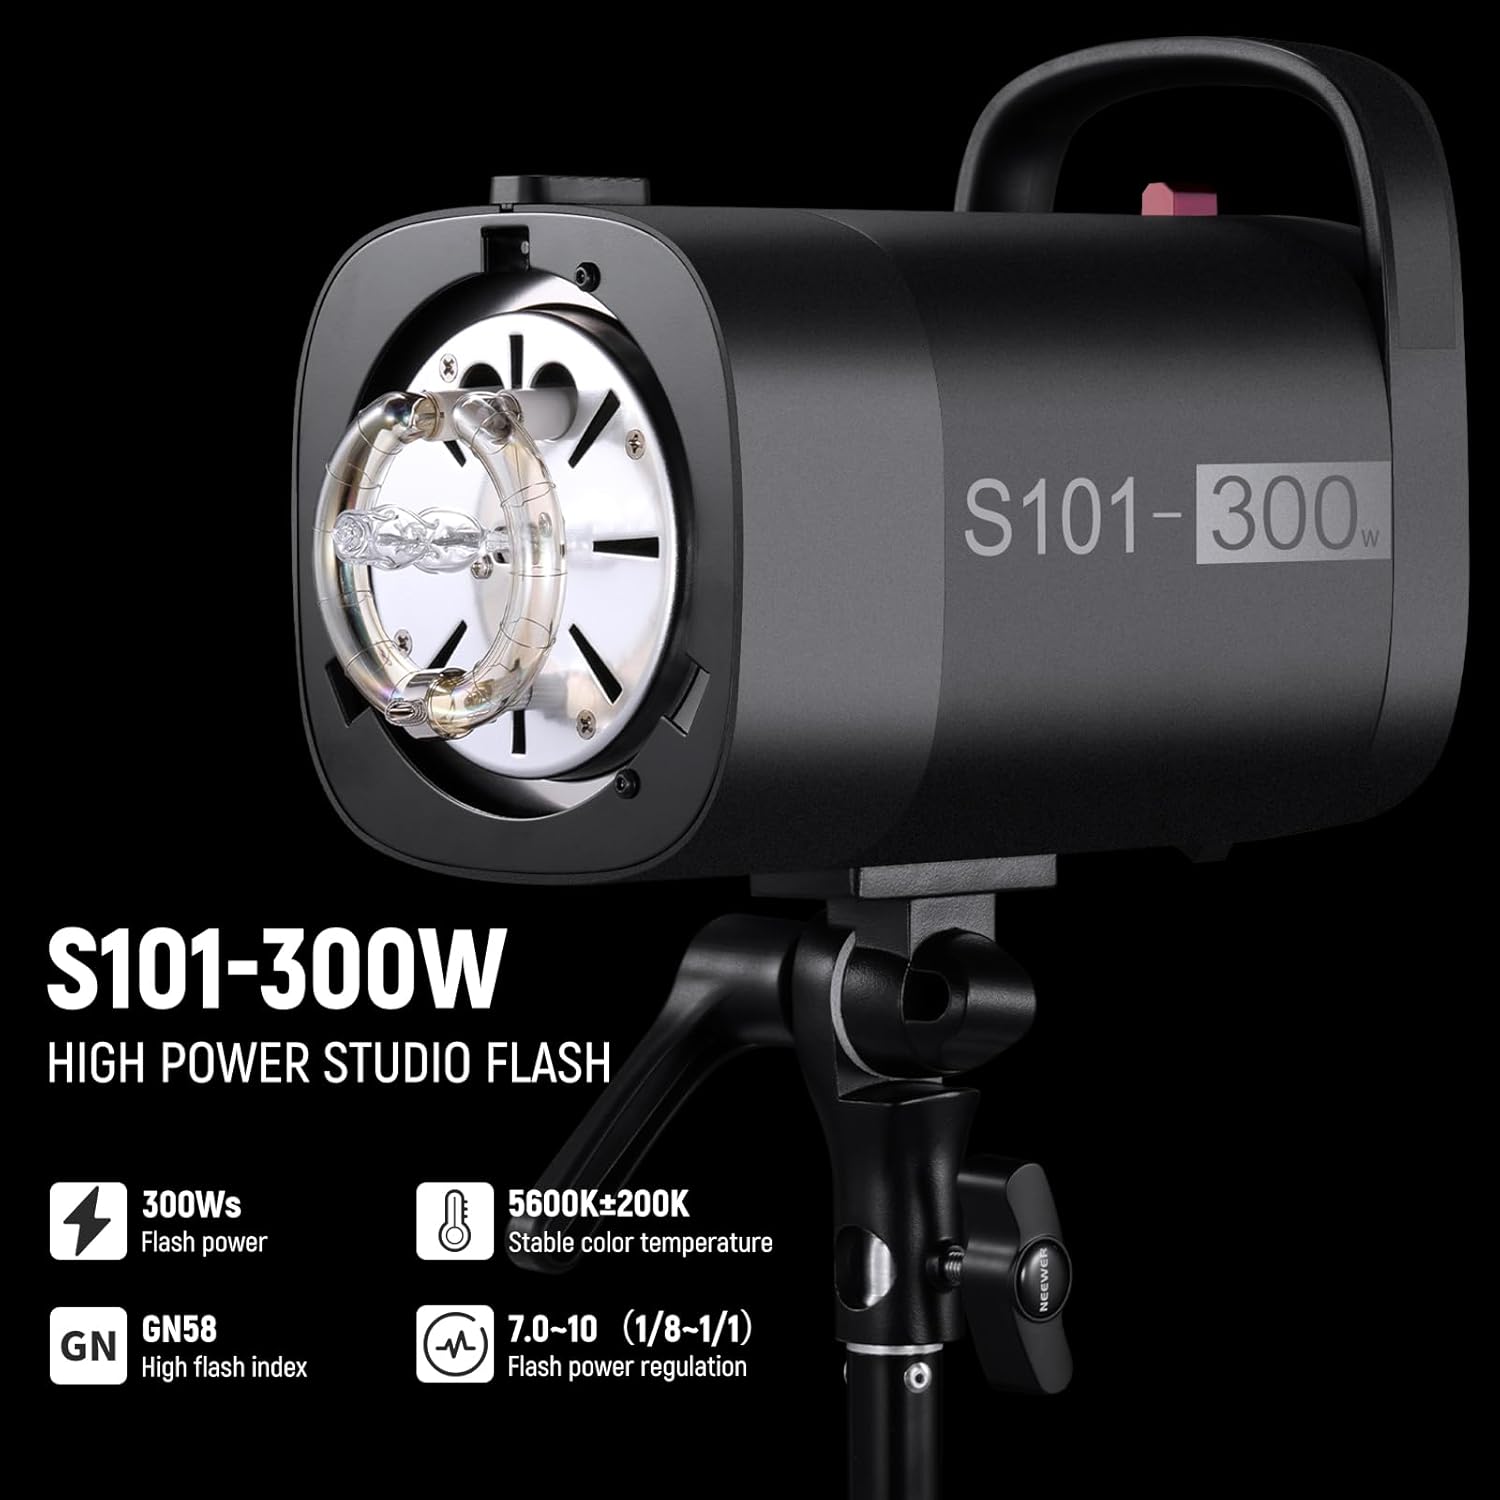
Key Features:
- 300Ws Powerful Studio Monolight: Provides 300Ws maximum power with a consistent 5600K color temperature and a high guide number of GN58 (1m, ISO100).
- 150W Modeling Lamp: Features 9 brightness levels (L1–L9) and 7.0–10 (1/8–1/1) flash power adjustment for precise lighting control.
- Fast Recycling Time: Offers a flash duration of 1/2000–1/800s and a recycling time of 0.4-2.5s for continuous shooting.
- S1/S2 Optical Slave Mode: Can be triggered by a manual master unit (S1 mode) or a TTL master unit (S2 mode).
- Efficient Heat Dissipation System: Optimized vents and cooling fans prevent overheating, even after 300 consecutive full power flashes.
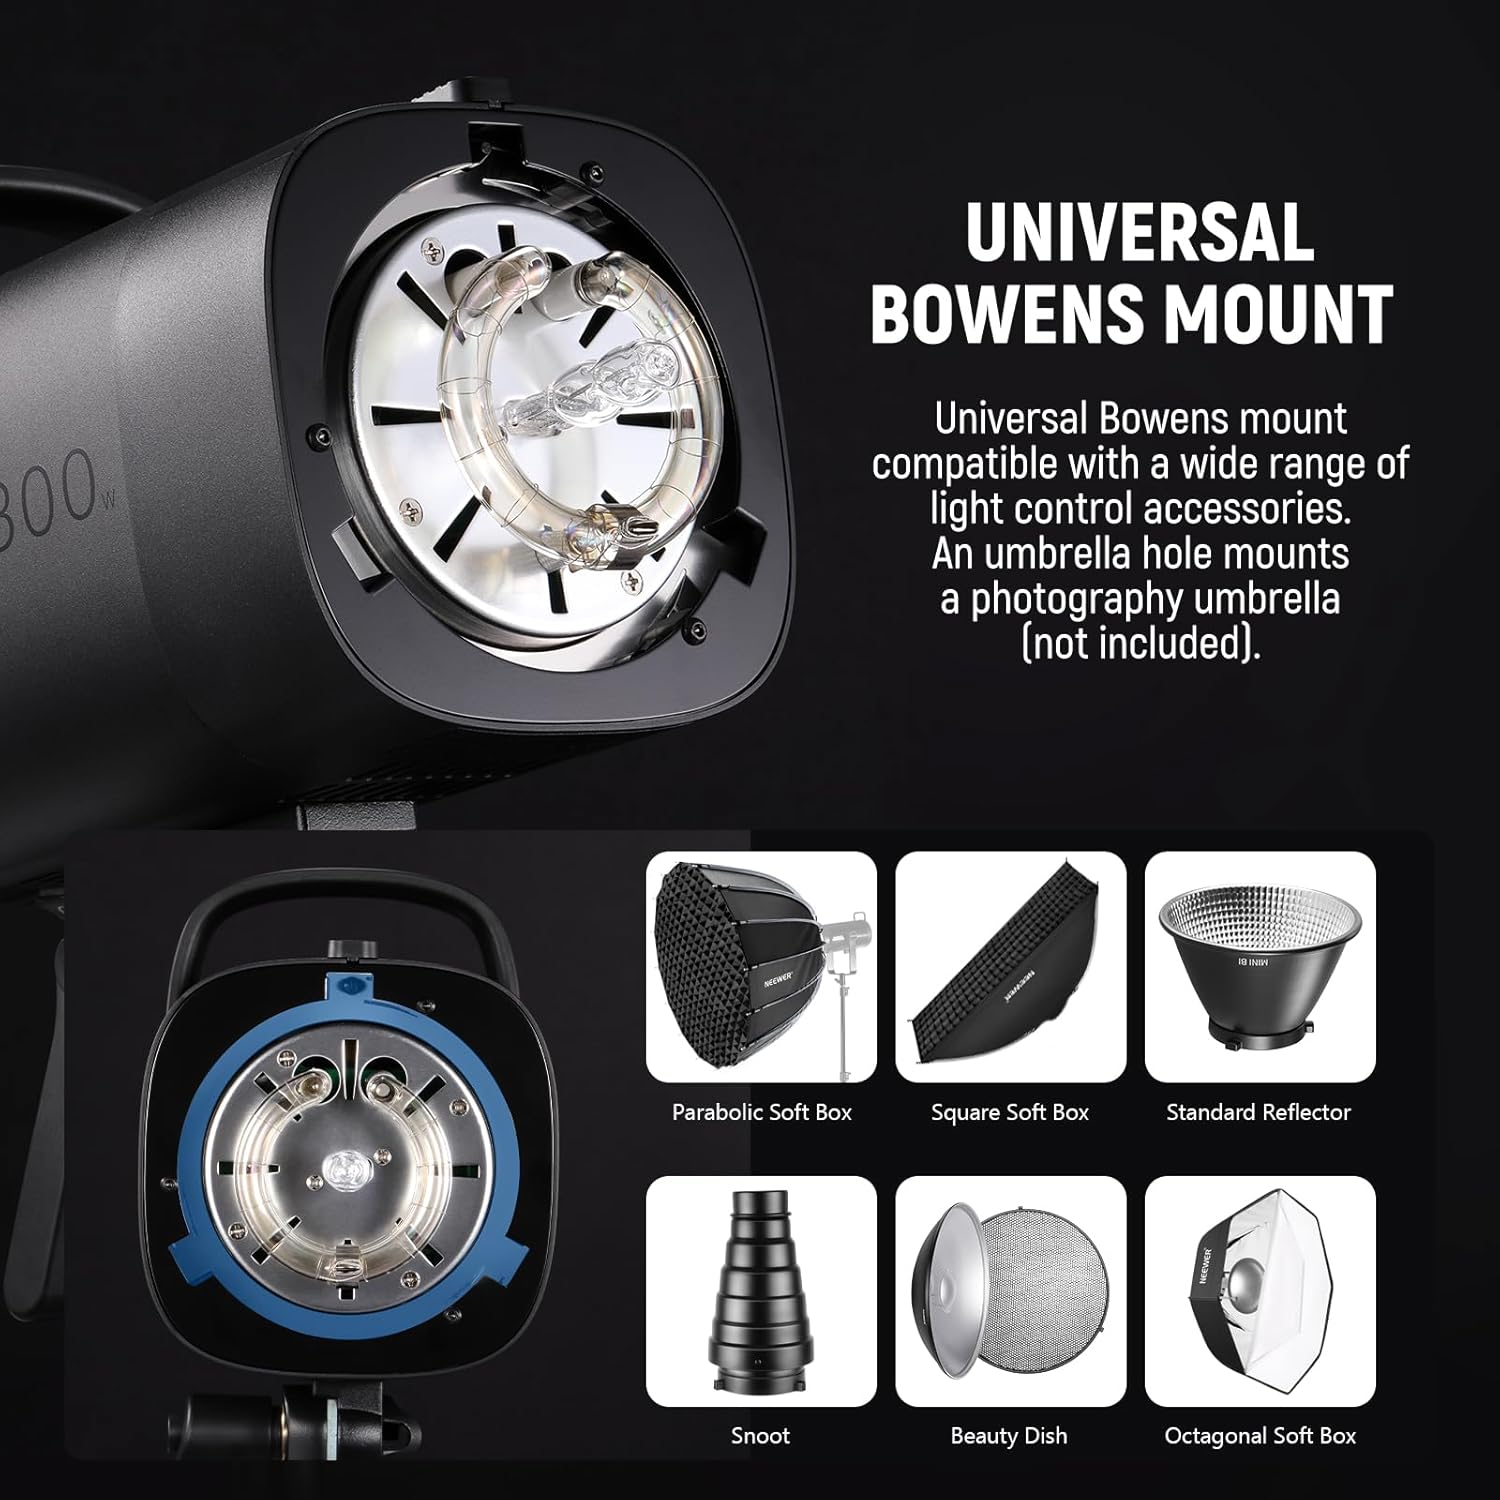
- Universal Bowens Mount: Compatible with a wide range of light modifiers such as softboxes, reflectors, and beauty dishes.
- 180° Tilt Adjustment: Allows for flexible angle positioning of the light.
4. Setup
4.1 Unpacking and Inspection
- Carefully remove all components from the packaging.
- Verify that all items listed in the 'Product List' section (see Section 8) are present and undamaged.
- If any items are missing or damaged, contact your retailer immediately.
4.2 Attaching the Reflector
- Align the three mounting tabs on the standard reflector with the corresponding slots on the flash unit's Bowens mount.
- Insert the reflector into the mount and rotate it clockwise until it clicks securely into place.
- To remove, press the release button on the flash mount and rotate the reflector counter-clockwise.
4.3 Mounting on a Light Stand
- Loosen the tilt adjustment knob on the light stand mount adapter.
- Slide the flash unit onto the top stud of a compatible light stand.
- Tighten the knob to secure the flash unit in place.
- Adjust the tilt angle as needed and tighten the knob firmly.
4.4 Power Connection
- Ensure the flash unit's power switch is in the OFF position.
- Connect the provided power cord to the power port on the back of the flash unit.
- Plug the other end of the power cord into a suitable AC power outlet.
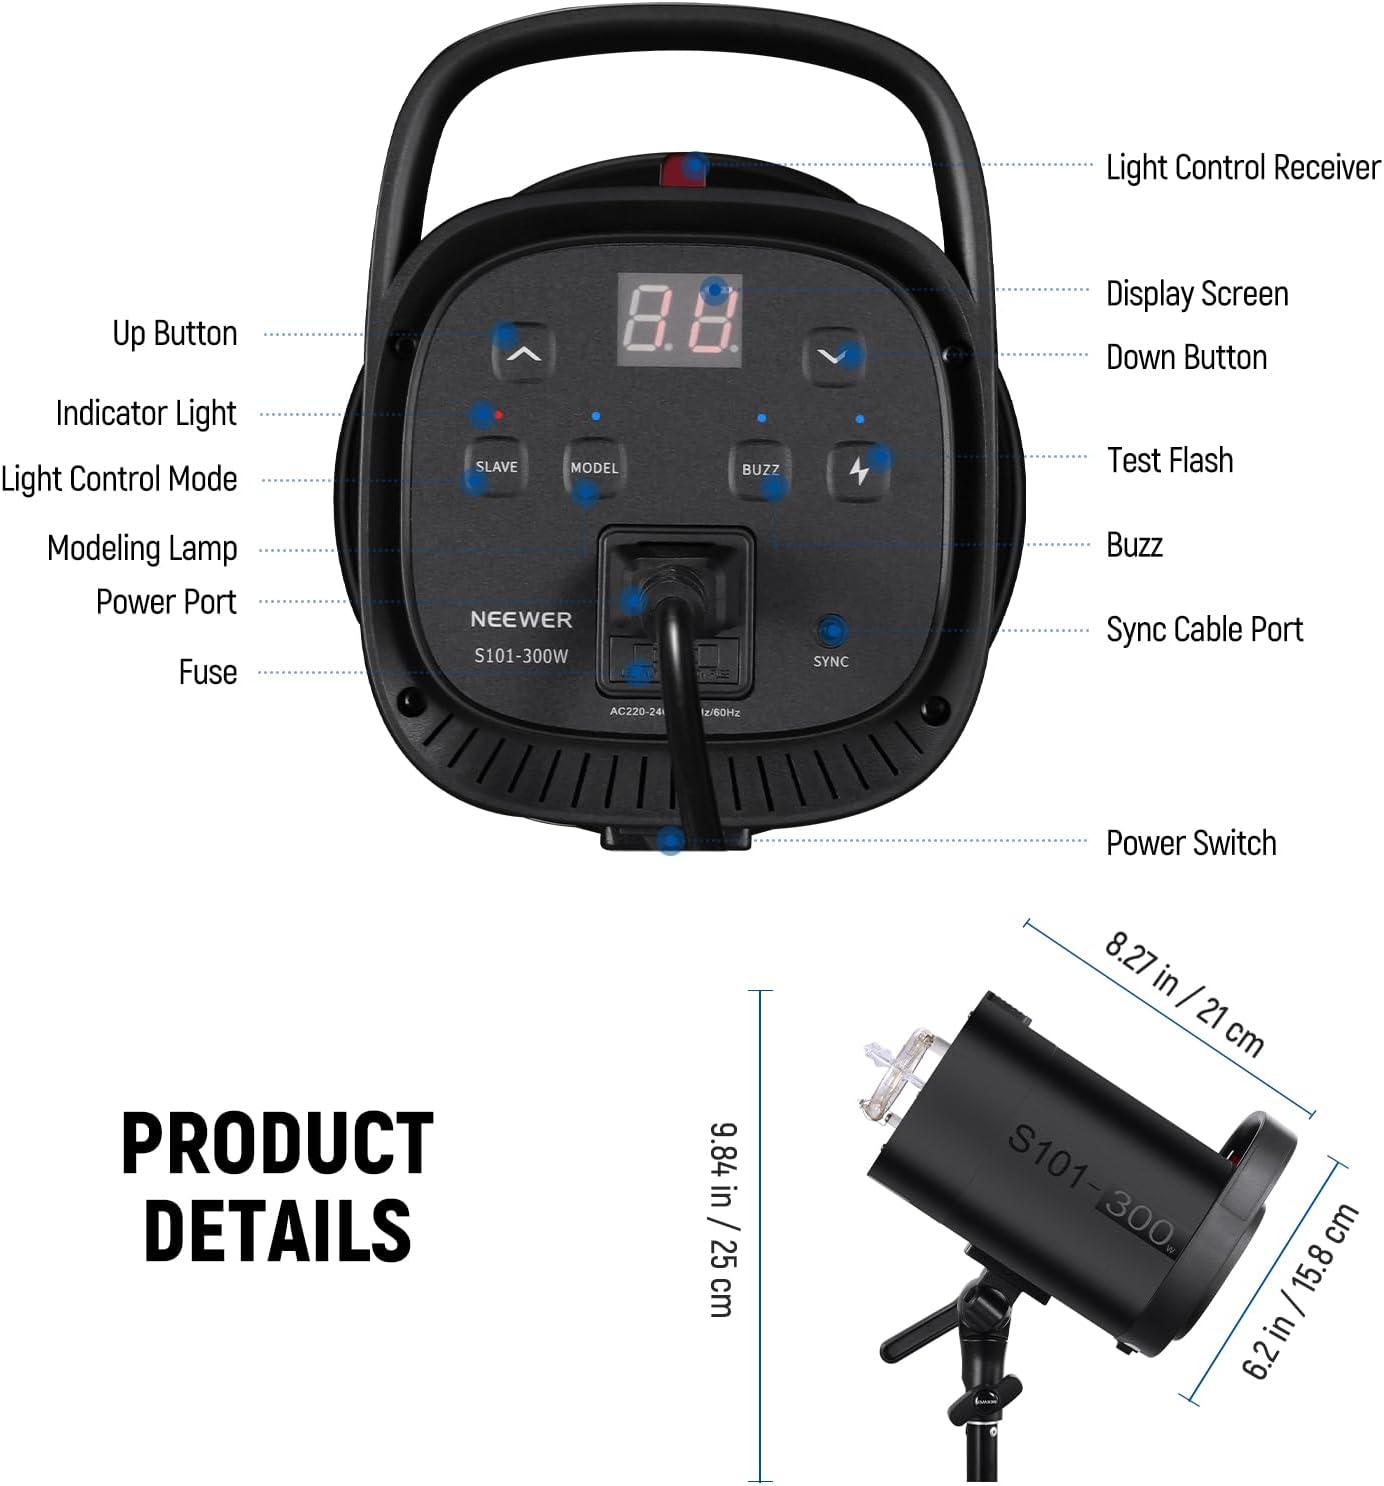
5. Operating Instructions
5.1 Powering On/Off
Press the power switch located on the back of the unit to turn the flash ON or OFF.
5.2 Adjusting Flash Power
- Use the Up (^) and Down (v) buttons on the control panel to adjust the flash power output.
- The flash power can be adjusted from 7.0 to 10 (equivalent to 1/8 to 1/1 power).
- The current power level will be displayed on the screen.
5.3 Modeling Lamp Control
- Press the MODEL button to toggle the modeling lamp ON or OFF.
- When the modeling lamp is ON, use the Up (^) and Down (v) buttons to adjust its brightness from L1 to L9.

5.4 Optical Slave Modes (S1/S2)
The S101-300W can be triggered by another flash unit using its optical slave modes:
- S1 Mode: Press the SLAVE button until 'S1' appears on the display. In this mode, the flash will fire in response to the first flash from a manual master unit.
- S2 Mode: Press the SLAVE button again until 'S2' appears. In this mode, the flash will ignore the pre-flash from a TTL master unit and fire on the second flash.

5.5 Test Flash
Press the TEST FLASH button (lightning bolt icon) to manually fire a test flash. This is useful for checking light output and positioning.
5.6 Buzz Function
Press the BUZZ button to toggle the audible ready indicator ON or OFF. When ON, the unit will emit a beep sound when it is fully recycled and ready to fire.
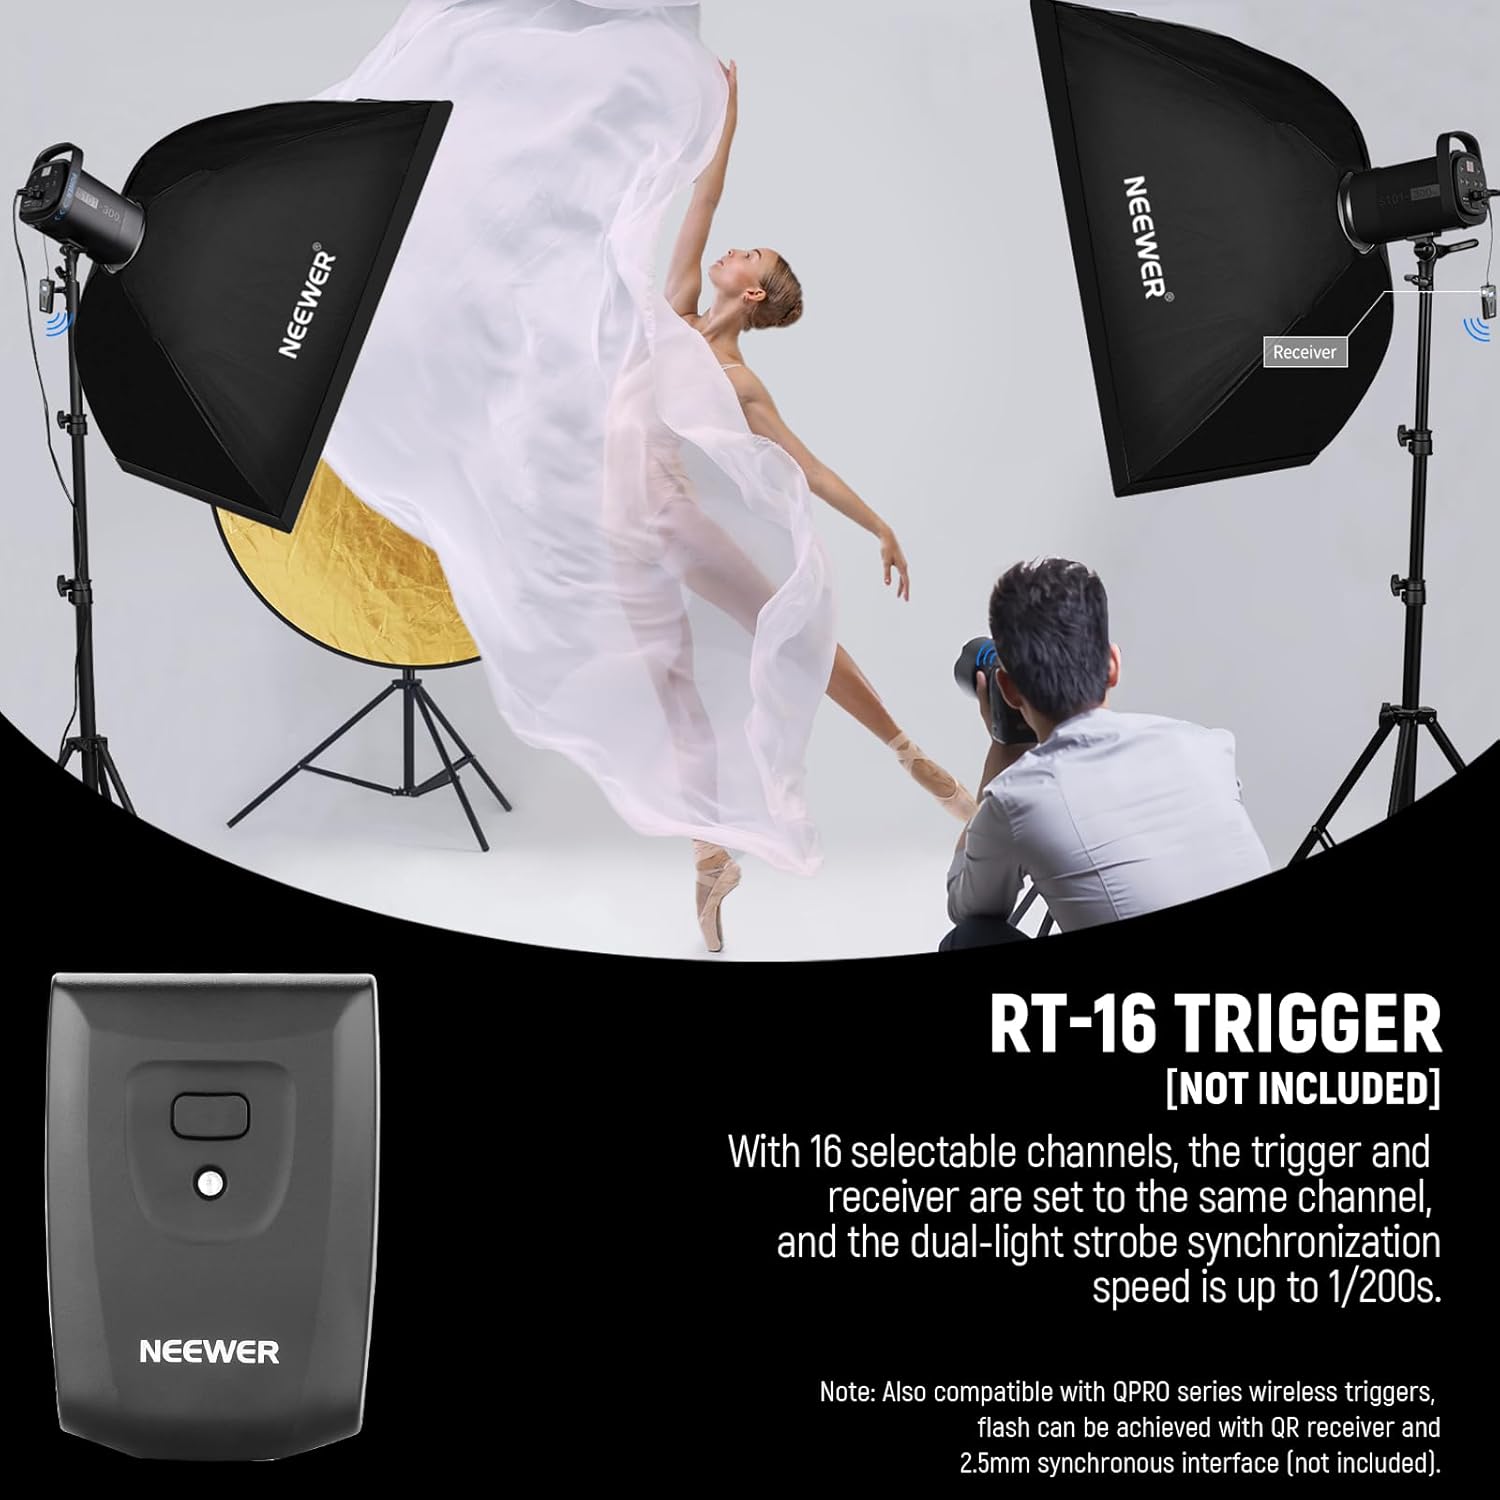
5.7 Remote Synchronization
The S101-300W can be synchronized wirelessly with a compatible NEEWER RT-16 trigger (not included) or other QPRO series wireless flash triggers. Ensure the trigger and receiver are set to the same channel for proper operation. The flash also supports 2.5mm synchronous interface for wired sync.

6. Maintenance
6.1 Cleaning
- Always unplug the unit before cleaning.
- Use a soft, dry cloth to wipe the exterior of the flash unit.
- For the flash tube and modeling lamp, use a clean, lint-free cloth. Avoid touching the glass directly with bare hands, as oils can reduce performance and lifespan.
- Do not use harsh chemicals, abrasive cleaners, or solvents.
6.2 Storage
- Store the unit in a cool, dry place, away from direct sunlight and excessive humidity.
- If storing for an extended period, remove the power cord and place the unit in its original packaging or a protective case.
6.3 Fuse Replacement
If the unit fails to power on, the fuse may need replacement. The fuse holder is located near the power port.
- Unplug the unit from the power outlet.
- Use a small flathead screwdriver to gently pry open the fuse holder.
- Remove the old fuse and insert a new fuse of the same type and rating (refer to specifications).
- Close the fuse holder securely.
6.4 Heat Dissipation System
The S101-300W features an efficient heat dissipation system with optimized vents and cooling fans. Ensure these vents are not obstructed during operation to maintain optimal performance and extend the lifespan of the flash tube.
7. Troubleshooting
| Problem | Possible Cause | Solution |
|---|---|---|
| Unit does not power on. | No power from outlet; Power cord loose; Blown fuse. | Check power outlet; Ensure power cord is securely connected; Replace fuse (see Section 6.3). |
| Flash does not fire. | Unit not ready (still recycling); Trigger issue; Optical slave mode incorrect. | Wait for recycling indicator; Check trigger battery/connection; Ensure S1/S2 mode is correctly set for your master flash. |
| Modeling lamp not working. | Lamp burnt out; Lamp not turned on. | Replace modeling lamp; Press the MODEL button to turn it on. |
| Overheating warning. | Excessive continuous firing; Obstructed vents. | Allow unit to cool down; Ensure vents are clear and unit has proper ventilation. |
8. Specifications
| Feature | Detail |
|---|---|
| Model | S101-300W |
| Flash Power | 300Ws |
| Guide Number (GN) | 58 (1m, ISO100) |
| Color Temperature | 5600K ±200K |
| Flash Duration | 1/2000s – 1/800s |
| Recycling Time | 0.4s – 2.5s |
| Modeling Lamp Power | 150W |
| Modeling Lamp Brightness | 9 Levels (L1-L9) |
| Flash Power Adjustment | 7.0 – 10 (1/8 – 1/1) |
| Sync Mode | S1/S2 Optical Slave, 2.5mm Sync Cable, Wireless Trigger (RT-16 compatible) |
| Mount Type | Bowens Mount |
| Dimensions (Product) | 6.2 x 10.6 x 10.6 inches (15.8 x 26.9 x 26.9 cm) |
| Item Weight | 4.53 pounds (2.05 kg) |
| Included Components | Strobe Flash Light, Standard Reflector, Lamp Cover, Power Cord |
9. Warranty and Support
NEEWER products are designed and manufactured to the highest quality standards. This product is covered by a limited warranty against defects in materials and workmanship from the date of purchase. Please refer to the warranty card included with your product for specific terms and conditions.
For technical support, troubleshooting assistance, or warranty claims, please contact NEEWER customer service through the official NEEWER website or your point of purchase. When contacting support, please have your product model number (S101-300W) and proof of purchase ready.
You can find more information and support resources on the official NEEWER website: www.neewer.com
Ask a question about this manual
Ask about setup, troubleshooting, compatibility, parts, safety, or missing instructions. Manuals+ will review the question and use this page’s manual context to help answer it.