1. Introduction
The OKKÖBI OBI-12 is an automatic egg incubator designed for hatching eggs from various poultry, including chickens, ducks, and other birds. This device features automatic temperature control, humidity indication, and an integrated egg candler to provide optimal conditions for successful hatching. This manual provides essential instructions for the safe and effective use of your incubator.
2. Safety Instructions
- Always place the incubator on a stable, level surface away from direct sunlight, drafts, and heat sources.
- Ensure the power supply matches the voltage requirements specified on the device.
- Do not immerse the incubator or its electrical components in water or any other liquid.
- Unplug the incubator from the power outlet before cleaning or performing any maintenance.
- Keep the device out of reach of children and pets.
- Avoid opening the lid frequently during incubation to maintain stable temperature and humidity.
- Use only clean, distilled water for humidity control to prevent mineral buildup.
3. Package Contents
Before starting, verify that all components are present in the package:

Image: Exploded view showing the incubator's main components.
- Control Panel Lid
- Rotating Tubes (Egg Turners)
- Mesh Tray
- Incubator Box (Base)
- Eggloo Insulation Box
- Humidifier Bottle
- Water Spray Bottle
- User Manual
4. Setup
4.1 Placement
Place the Eggloo insulation box on a flat, stable surface. Then, place the incubator box inside the Eggloo insulation box. This insulation helps maintain a stable internal temperature, especially in colder environments.
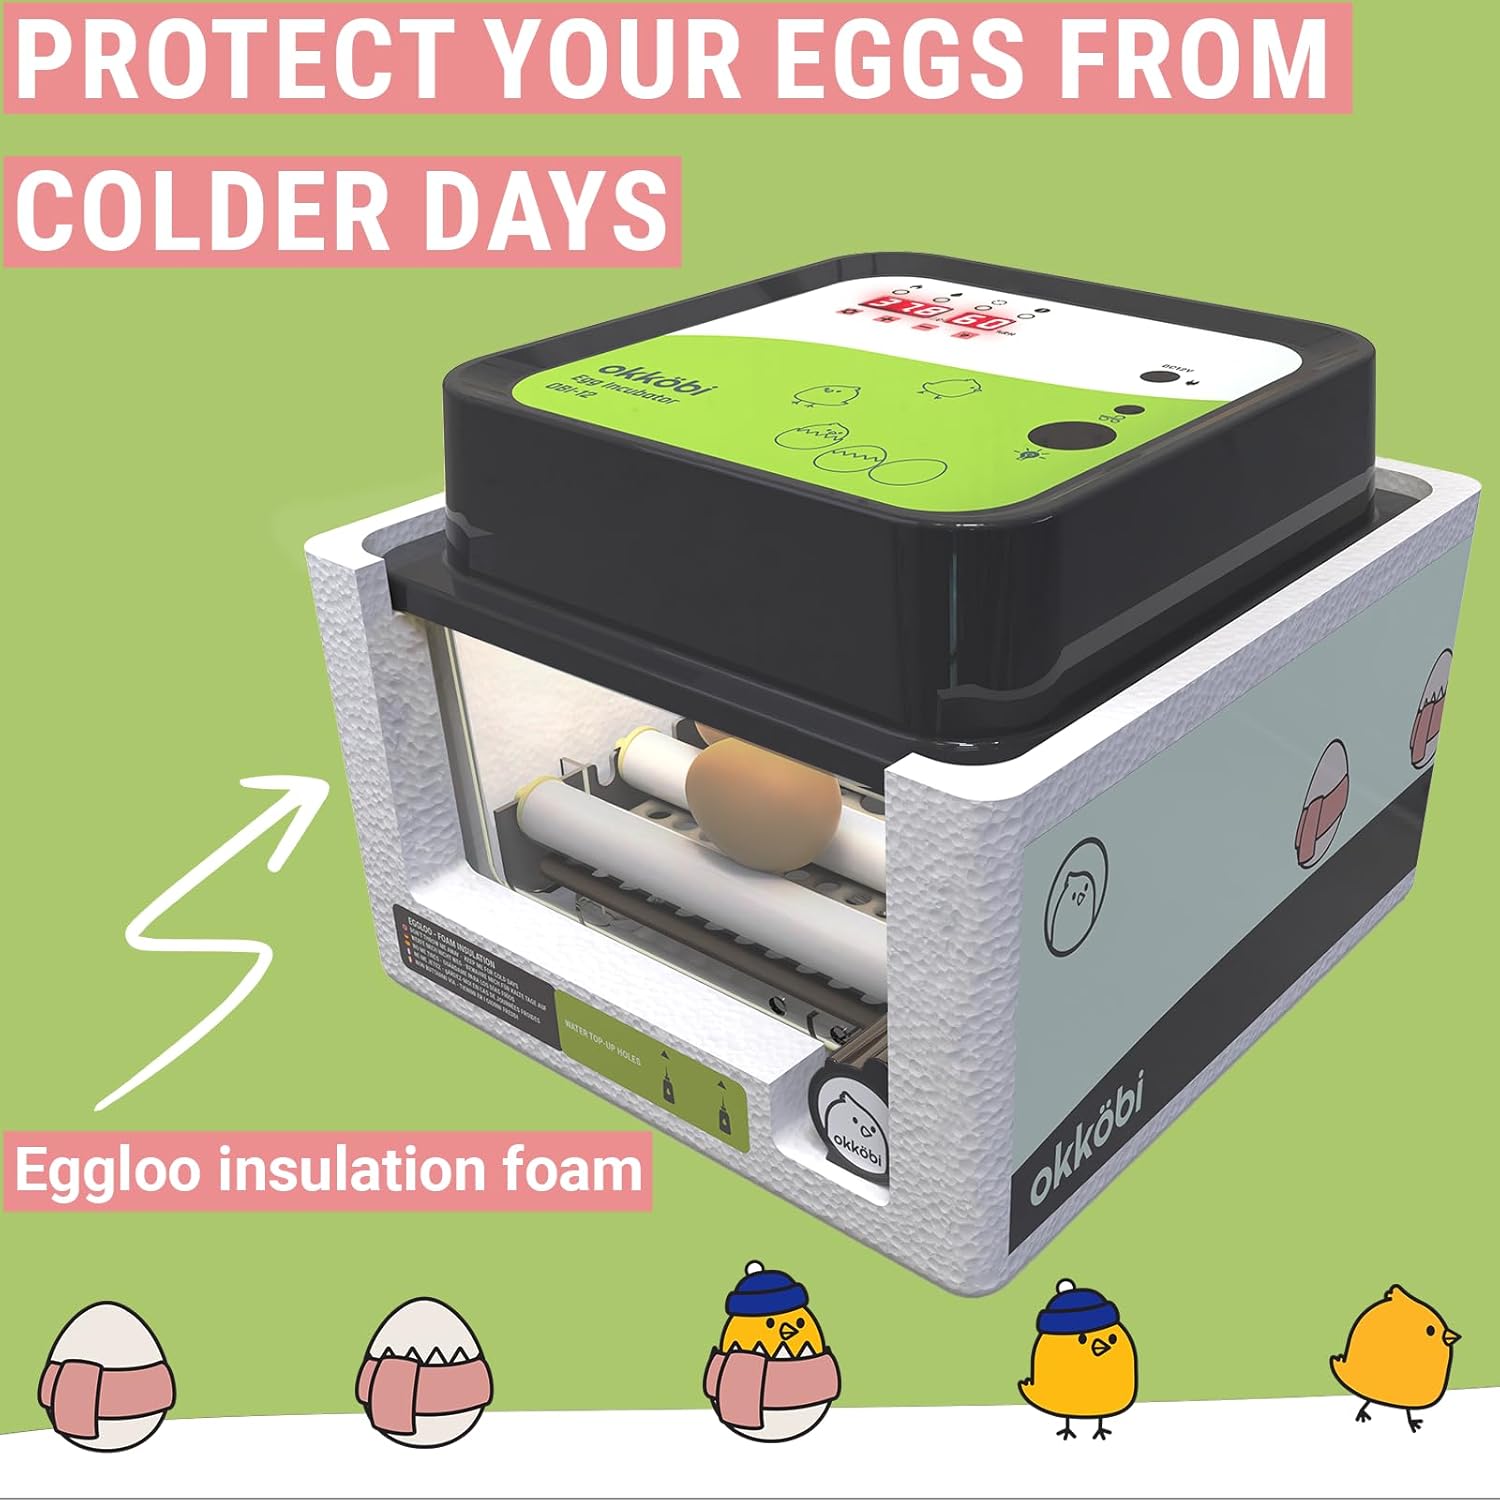
Image: The incubator placed within its Eggloo insulation foam for thermal protection.
4.2 Power Connection
Connect the power adapter to the incubator and then plug it into a suitable electrical outlet. The digital display will illuminate, showing the current temperature and humidity readings.
4.3 Water Filling for Humidity
To maintain optimal humidity, fill the humidifier bottle with clean, distilled water. Use the external water filling openings to add water to the channels at the bottom of the incubator. Avoid overfilling. This allows for humidity adjustment without opening the lid, preventing temperature fluctuations.

Image: Overview of the incubator's top panel, indicating the water filling port, temperature display, and egg candler location.
4.4 Egg Placement
Carefully place the eggs into the adjustable rotating tubes. The incubator can accommodate up to 12 standard chicken eggs. Ensure eggs are positioned correctly for the automatic turning mechanism.
5. Operation
5.1 Temperature Control
The incubator features an automatic temperature control system. The digital display shows the current internal temperature. The fan-powered airflow system ensures stable and uniform heat distribution throughout the incubator. Refer to the specific egg type's recommended incubation temperature and adjust settings if necessary using the control panel buttons (details on specific button functions are typically found in a quick start guide or on the device itself).
5.2 Humidity Control
Monitor the humidity level on the digital display. Add water through the external filling ports as needed to maintain the desired humidity range for your specific egg type. The "Eggloo" insulation also contributes to humidity stability by reducing external influences.
5.3 Automatic Egg Turning
The OBI-12 automatically turns the eggs at regular intervals (typically every 1.5 hours). This eliminates the need for manual turning and significantly improves hatching rates. Ensure the rotating tubes are clear of obstructions.
5.4 Egg Candling
The incubator includes a built-in egg candler. To use it, place an egg over the candler light source on the control panel. This allows you to observe the development of the embryo inside the egg without disturbing the incubation process.

Image: The built-in egg candler in use, illustrating how to monitor embryo growth.
6. Maintenance
6.1 Cleaning
After each hatch, or if the incubator becomes soiled, unplug the unit and allow it to cool. Wipe down all surfaces with a damp cloth and a mild disinfectant solution. Ensure all components are completely dry before reassembling or storing. Do not use abrasive cleaners or submerge electrical parts in water.
6.2 Storage
Store the incubator in a clean, dry place, away from extreme temperatures and direct sunlight. Keep all components, including the Eggloo insulation box, together to prevent loss.
7. Troubleshooting
- Temperature Fluctuations: Ensure the incubator is placed in a stable environment, away from drafts or direct heat. Verify the lid is securely closed and the Eggloo insulation is properly fitted.
- Humidity Too Low: Add more water to the external channels. Ensure the water channels are not dry.
- Humidity Too High: Reduce the amount of water in the channels. Ensure proper ventilation.
- Eggs Not Turning: Check if the rotating tubes are properly installed and free from obstructions. Ensure the power supply is stable.
- No Display/Power: Verify the power adapter is securely connected to both the incubator and the electrical outlet. Check the power source.
If issues persist, refer to the support section for assistance.
8. Specifications
| Feature | Detail |
|---|---|
| Model Number | OBI-12 |
| Manufacturer | OKKÖBI |
| Dimensions (L x W x H) | 50.8 x 50.8 x 50.8 cm |
| Weight | 1.45 kg |
| Egg Capacity | Up to 12 chicken eggs (adjustable for various sizes) |
| Automatic Egg Turning | Yes |
| Built-in Egg Candler | Yes |
| Temperature Control | Automatic, fan-powered airflow |
| Humidity Control | External water filling ports, digital indicator |
9. Warranty and Support
The OKKÖBI OBI-12 incubator comes with a 5-year protection period, reflecting our commitment to quality and durability. For any questions, technical assistance, or warranty claims, please contact OKKÖBI customer support. Our team is available to provide friendly, multilingual assistance 24/7.
For support, please visit our official website or contact us via the details provided on your purchase receipt.
Spare parts are available for 5 years from the date of purchase.


