Introduction
Welcome to your new LetCart 505A Electric Sewing Machine. This manual provides essential information for safe and effective operation, setup, maintenance, and troubleshooting. Please read it thoroughly before first use to ensure optimal performance and longevity of your machine.
Product Overview
Key Features
- 12 Built-in Stitch Types: Offers a variety of stitch patterns for different sewing needs.
- Quiet Operation: Designed with a horizontal rotary hook for reduced noise during use.
- Replaceable Presser Foot: Allows for easy interchangeability of presser feet to perform specialized sewing functions.
- Adjustable Speed Control: Features both fast and slow speed settings, with a foot pedal for variable speed control.
- Convenient Storage: Includes a pull-out drawer for storing small accessories.
- Durable Construction: Equipped with a metal hook for enhanced durability.
- Thick Fabric Capability: Capable of sewing through multiple layers, including up to 6 layers of denim.
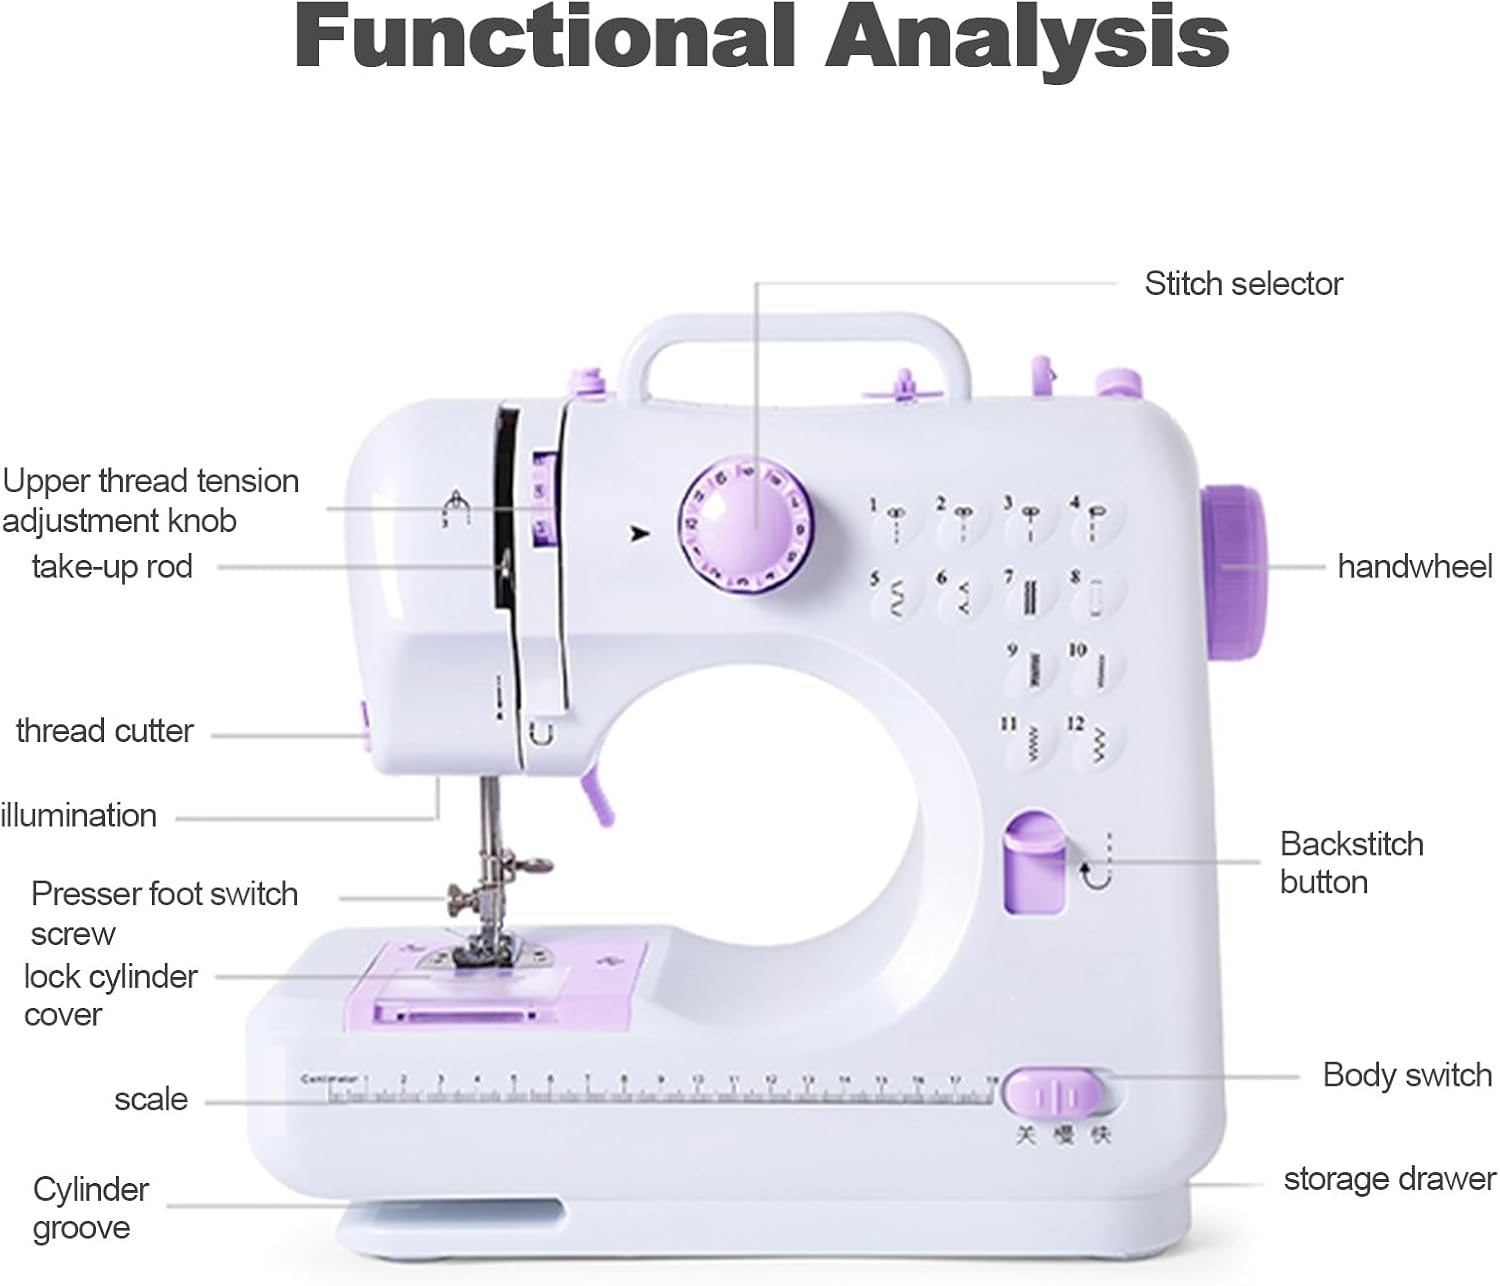
Components and Controls

Setup
Unpacking
Carefully remove the sewing machine and all included accessories from the packaging. Retain the packaging for future storage or transport.
Power Connection
Connect the power adapter to the machine's power input port, then plug it into a standard EU 220V electrical outlet. Alternatively, the machine can be powered by 4 "AA" batteries (not included) for portable use.
Extension Table Installation
If an extension table is included with your model, attach it to the sewing machine to provide a larger and more stable working surface for your projects.

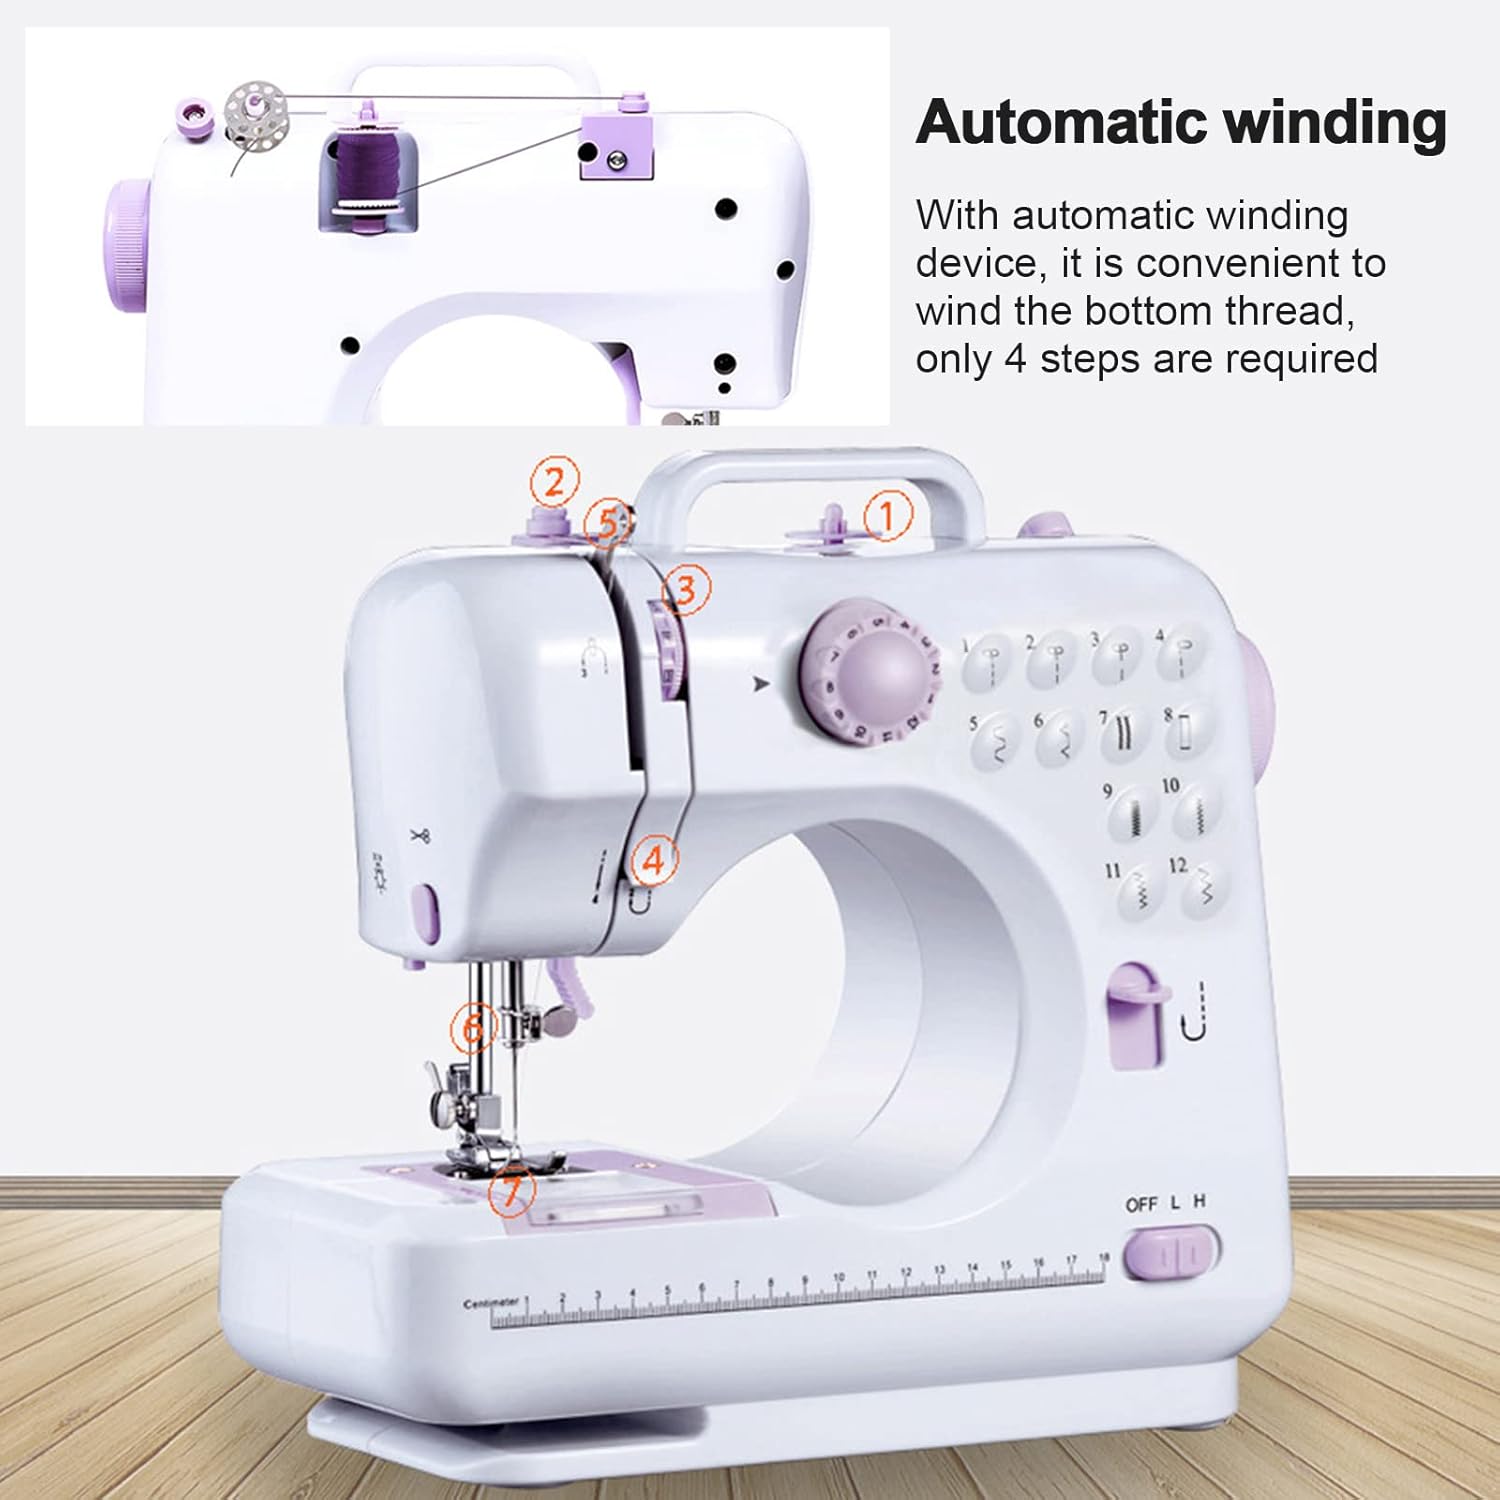
Bobbin Winding
The machine features an automatic winding device for the bottom thread. Follow the illustrated steps to wind the bobbin correctly.

Threading the Machine
Proper threading is crucial for correct stitch formation and to prevent thread breakage. Refer to the machine's threading guides and the "Functional Analysis" diagram (Figure 1) for the correct upper thread path. Ensure the thread is seated properly in all tension discs and guides.
Operating Instructions
Stitch Selection
Use the stitch selector dial on the front of the machine to choose one of the 12 built-in stitch patterns. Turn the dial until the desired stitch number aligns with the indicator mark.

Speed Control
The machine offers two speed settings (Low/High) via a switch located on the side. For more precise control, use the foot pedal; pressing harder on the pedal increases the sewing speed.

Reverse Stitching
To reinforce seams at the beginning and end of your stitching, press and hold the reverse stitch button. The machine will sew backward as long as the button is held.

Using the Presser Foot
The machine comes with a standard presser foot suitable for general sewing. Additional presser feet can be interchanged by using the presser foot switch to release the current foot and attach a new one for specialized sewing tasks like buttonholes.

Sewing Thick Fabrics
The LetCart 505A is designed to handle multiple layers of fabric, demonstrating its capability with materials such as up to 6 layers of denim.

Needle Bar and Hook System
The machine features a secure needle bar and presser foot bar for stable operation. The metal hook tip is designed for durability and consistent stitch formation.
Maintenance
Cleaning
Regularly clean lint and dust from the bobbin area, feed dogs, and tension discs using a small brush. This prevents build-up that can affect stitch quality and machine performance.
Needle Replacement
Replace needles frequently, especially when sewing different fabric types or if the needle becomes dull, bent, or damaged. A fresh, sharp needle is essential for smooth stitching and to prevent fabric damage.
Troubleshooting
Common Issues
- Skipped Stitches: Check needle installation (ensure it's fully inserted and facing correctly), ensure the needle is not bent or dull, and re-thread the machine completely.
- Thread Breakage: Verify correct threading of both upper and bobbin threads, ensure proper tension settings, and confirm that the needle size and type are suitable for the fabric and thread being used.
- Uneven Stitches: Adjust the upper thread tension knob. Ensure the bobbin is correctly wound and inserted, and that the bobbin thread tension is appropriate.
- Machine Not Starting: Check the power connection to both the machine and the electrical outlet. Ensure the foot pedal is securely connected and the main power switch (Body switch) is in the 'ON' position.
Specifications
| Feature | Specification |
|---|---|
| Brand | LetCart |
| Model | 505A |
| Product Dimensions (L x W x H) | 31 x 15 x 29 cm (approx. 12.2 x 5.9 x 11.4 inches) |
| Product Weight | 2 kg (approx. 4.4 lbs) |
| Material | Stainless steel or polypropylene |
| Power Source | Electric cable (EU 220V) or 4 "AA" batteries |
| Stitch Types | 12 built-in |
| Color | Lilac |
Warranty and Support
For detailed warranty information, please refer to the documentation provided with your original purchase. This typically includes terms, conditions, and duration of the manufacturer's warranty.
For further assistance, technical support, or to inquire about replacement parts, please visit the official LetCart website or contact their customer service department directly. Contact information can usually be found on the product packaging or the manufacturer's website.


