DENBIG JHS-A029B-05KR-D3
DENBIG 8,000 BTU Portable Air Conditioner User Manual
Model: JHS-A029B-05KR-D3
Introduction
Thank you for choosing the DENBIG 8,000 BTU Portable Air Conditioner. This 4-in-1 unit provides efficient cooling, dehumidification, fan operation, and a sleep mode to enhance your indoor comfort. Designed for spaces up to 300 sq. ft., it offers user-friendly controls and easy maintenance. Please read this manual thoroughly before operation to ensure proper use and optimal performance.
Important Safety Information
Always follow basic safety precautions when using electrical appliances to reduce the risk of fire, electric shock, and injury. Keep this manual for future reference.
- Ensure the unit is placed on a flat, stable surface.
- Do not operate the unit with a damaged cord or plug.
- Keep the air intake and exhaust vents clear of obstructions.
- Unplug the unit before cleaning or performing any maintenance.
- Do not insert objects into the air vents.
Package Contents
Verify that all components are present and in good condition upon unpacking.
- Portable Air Conditioner Unit
- Exhaust Hose
- Drain Hose
- Window Slider Kit (multiple panels)
- Hose Inlet
- Hose Outlet
- Wing Nuts and Screws
- Insect Guard
- Remote Control
- User Manual (this document)

Figure 1: Included components of the DENBIG Portable Air Conditioner.

Figure 2: Detailed view of all parts included in the package.
Setup and Installation
Follow these steps to properly set up your portable air conditioner.
1. Assemble the Window Slider Kit
- Position and insert the wing nut into the panel.
- Connect 2 or 3 panels according to your window's dimensions. The kit is adjustable for windows between 25.5 inches and 76 inches.
- Secure the panels together using the wing nuts.

Figure 3: Window slider kit assembly and hose connection steps.

Figure 4: The window slider kit is designed to fit most standard window types, adjustable from 9 to 57 inches.
2. Connect the Exhaust Hose
- Stretch the exhaust hose to its full length (up to 6 feet).
- Twist the hose outlet into one end of the exhaust hose.
- Connect the hose inlet and insect guard to the other end of the exhaust hose.
- Insert the assembled hose outlet into the opening of the window slider kit and screw it tightly to secure.
- Connect the hose inlet to the exhaust port on the back of the air conditioner unit. Ensure it clicks into place.
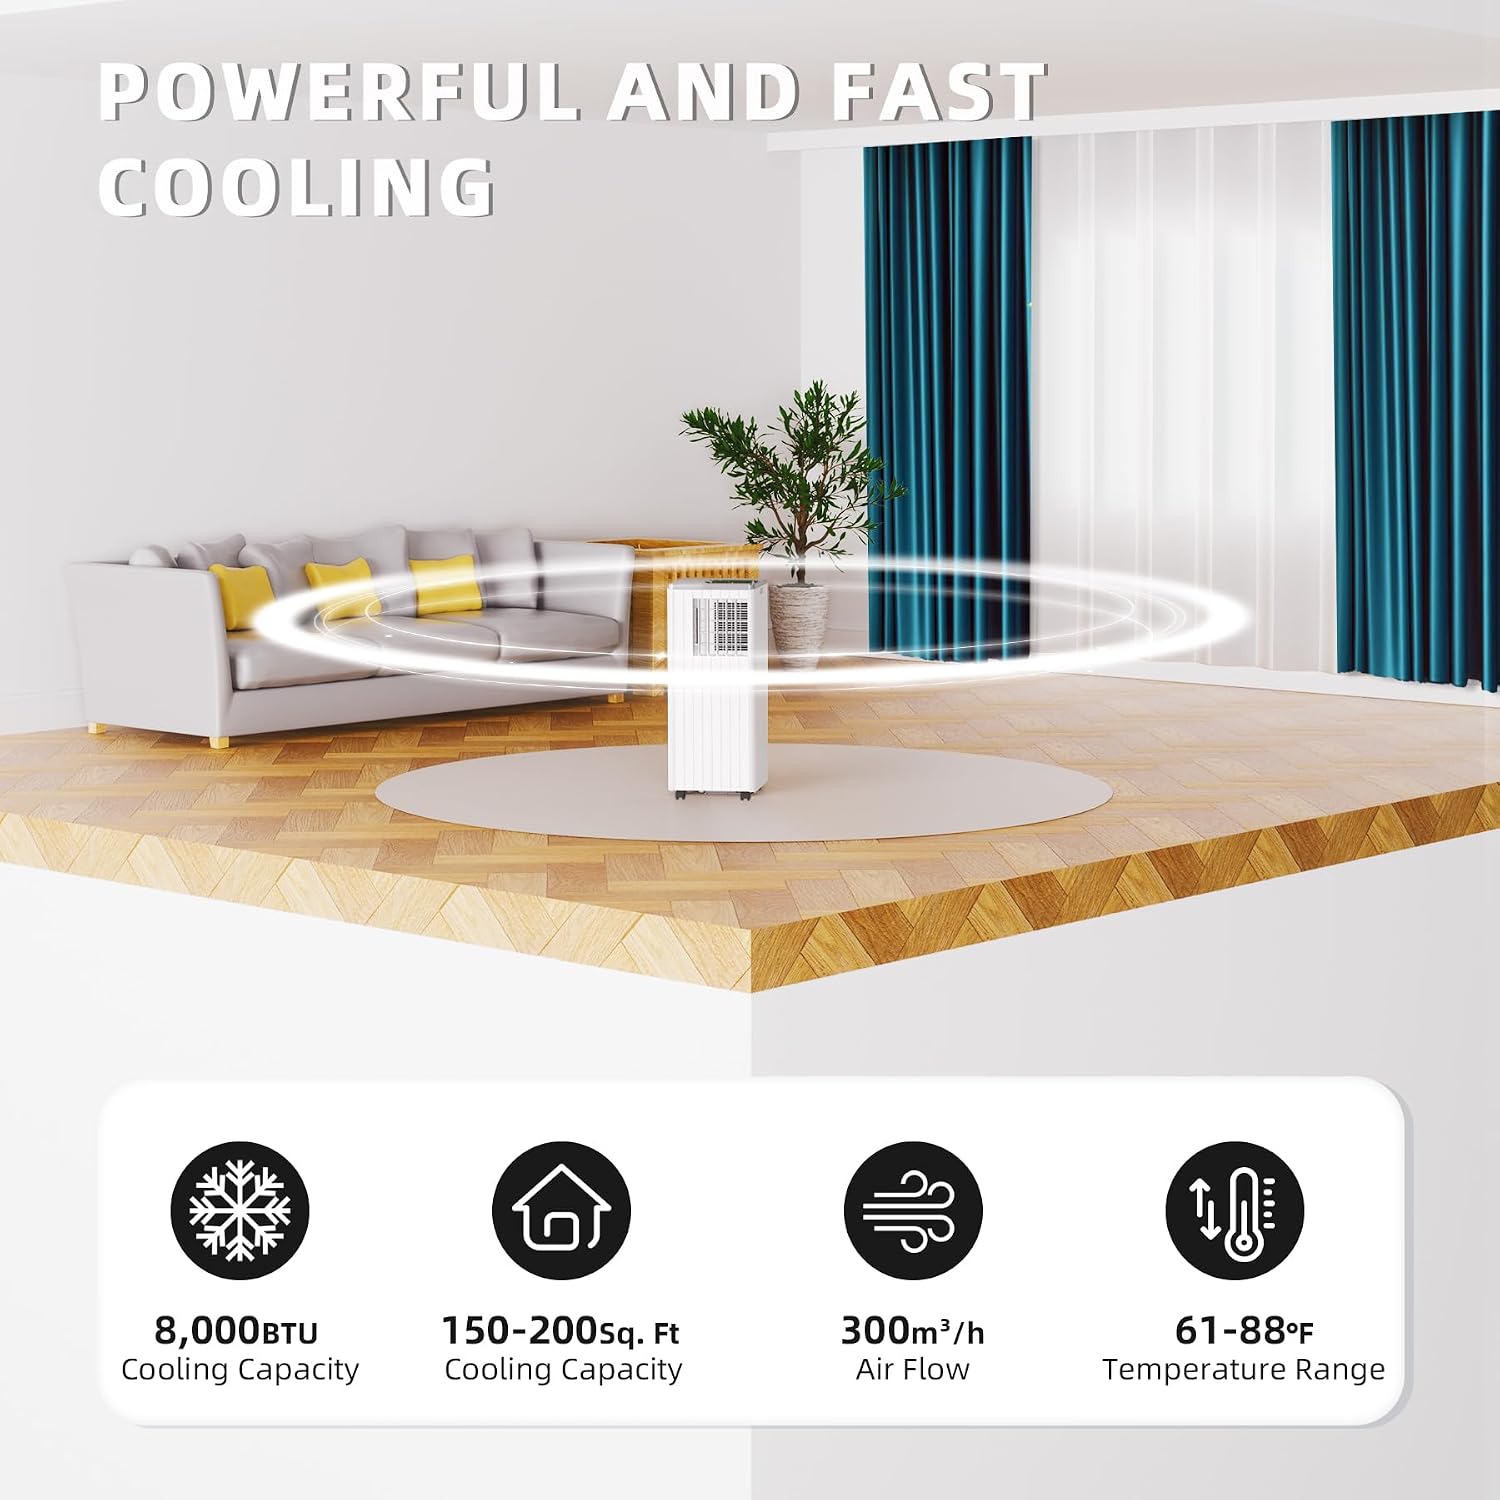
Figure 5: The portable air conditioner properly set up with the exhaust hose vented through a window.
3. Position the Unit
Place the unit on a level surface near a window. Ensure there is at least 20 inches of space around the unit for proper airflow. The unit features durable caster wheels for easy mobility.

Figure 6: The unit's 360-degree caster wheels allow for easy movement.
Video Guide: Setup and Installation
Video 1: Introduction to DENBIG 8000 BTU Portable Air Conditioner. This video demonstrates the unboxing, assembly of the window kit, connection of the exhaust hose, and basic operation modes.
- 0:01 - 0:05: Overview of all included components.
- 0:05 - 0:14: Step-by-step assembly of the adjustable window slider kit.
- 0:14 - 0:20: Attaching the hose inlet and insect guard to the exhaust hose.
- 0:20 - 0:30: Connecting the exhaust hose assembly to the window slider kit.
- 0:30 - 0:33: Connecting the exhaust hose to the back of the portable air conditioner unit.
Operating the Unit
Your DENBIG portable air conditioner offers multiple modes for customized comfort.
Control Panel and Remote Control
The unit can be operated using the intuitive control panel on top of the unit or the included remote control.

Figure 7: The unit can be controlled via its top panel or the remote control.

Figure 8: Detailed view of the control panel.
- Power Button: Turns the unit On/Off.
- Mode Button: Cycles through Cool, Dehumidify (Dry), and Fan modes.
- Temperature/Timer Adjustment Buttons (Up/Down Arrows): Adjusts desired temperature in Cool mode or sets timer duration.
- Speed Button: Adjusts fan speed (High/Low).
- Sleep Button: Activates Sleep mode for quiet operation.
- Timer Button: Sets the 24-hour on/off timer.
Operating Modes

Figure 9: The unit features Cool, Fan, and Dry (Dehumidify) modes.
Cool Mode
This mode provides powerful cooling for spaces up to 300 sq. ft. The unit efficiently lowers temperatures and circulates cool air.
- Press the Mode button until "Cool" is indicated on the display.
- Use the Up/Down Arrows to set your desired temperature (61-88°F).
- Press the Speed button to select High or Low fan speed.
Figure 10: The unit effectively cools and circulates air in your space.
Video 2: Cool Mode Operation. This segment demonstrates how to activate and adjust the temperature in Cool Mode (0:35 - 0:42).
Dry Mode (Dehumidify)
This mode helps remove excess moisture from the air, ideal for humid conditions. In this mode, the fan speed is fixed to low.
- Press the Mode button until "dh" (dehumidify) is indicated on the display.
- Connect the drain hose to the drainage port at the bottom rear of the unit for continuous drainage. If not using continuous drainage, the internal water tank will collect moisture and the unit will stop operating when full, indicating "FL" (Full) on the display.
Video 3: Dry Mode Operation. This segment shows how to activate Dry Mode and connect the drain hose for continuous drainage (0:42 - 0:50).
Fan Mode
Operates as a fan to circulate air without cooling. This is useful for general air circulation.
- Press the Mode button until "FA" (Fan) is indicated on the display.
- Press the Speed button to select High or Low fan speed.
Video 4: Fan Speed Adjustment. This segment demonstrates adjusting the fan speed between Low and High settings (0:54 - 0:57).
Sleep Mode
Activates quiet operation, ideal for nighttime use. The fan speed will automatically set to low, and the display lights will dim.
- Press the Sleep button to activate. Press again to deactivate.
24-Hour Timer
Set the unit to automatically turn on or off after a specified period (1-24 hours).
- Press the Timer button.
- Use the Up/Down Arrows to set the desired hours.
- The timer will activate after a few seconds of inactivity.
Video 5: 24-Hour Timer Setting. This segment demonstrates how to set the timer for automatic operation (0:57 - 1:01).
Maintenance
Regular maintenance ensures optimal performance and longevity of your unit.
Cleaning the Washable Air Filter
The air filter should be cleaned every two weeks or more frequently depending on usage and air quality.
- Unplug the air conditioner from the power outlet.
- Locate the air filter on the back of the unit.
- Gently pull out the filter.
- Wash the filter under running water (warm, not hot) or use a vacuum cleaner to remove dust.
- Allow the filter to air dry completely before reinserting it into the unit. Do not expose to direct sunlight.

Figure 11: Removing the washable air filter for cleaning.
Video 6: Washable Air Filter Cleaning. This segment demonstrates how to remove and clean the air filter (1:01 - 1:09).
Draining the Unit (Dry Mode)
When operating in Dry (Dehumidify) mode without continuous drainage, the internal water tank will fill up. The unit will stop operating and display "FL" when full. To drain:
- Unplug the unit.
- Place a shallow pan or tray under the drainage port at the bottom rear of the unit.
- Remove the rubber stopper from the drainage port.
- Allow all collected water to drain out.
- Replace the rubber stopper firmly.
Troubleshooting
If you encounter issues with your unit, please refer to the following common problems and solutions before contacting customer service.
| Problem | Possible Cause | Solution |
|---|---|---|
| Unit does not turn on. | No power, power cord unplugged, circuit breaker tripped. | Check power connection, plug in firmly, reset circuit breaker. |
| Unit not cooling effectively. | Dirty air filter, blocked air intake/exhaust, room too large, windows/doors open. | Clean air filter, clear obstructions, ensure proper room size, close windows/doors. |
| "FL" (Full) displayed. | Internal water tank is full (in Dry mode). | Drain the unit as per the "Draining the Unit" section. |
| Unit is noisy. | Unit not on a level surface, fan speed too high. | Ensure unit is on a flat surface, try a lower fan speed. |
Specifications
| Feature | Detail |
|---|---|
| Brand Name | DENBIG |
| Model Info | JHS-A029B-05KR-D3 |
| Item Weight | 49 pounds |
| Product Dimensions | 13.1 x 13.3 x 34.3 inches |
| Efficiency | Average |
| Capacity | 49 Pounds |
| Annual Energy Consumption | 850 Watts |
| Noise Level | 65 dB |
| Installation Type | Freestanding |
| Form Factor | Portable |
| Special Features | Easy to Install, Portable, Wheels |
| Color | White |
| Voltage | 110 Volts |
| Wattage | 850 watts |
| Material Type | Plastic |
| Floor Area | 300 Square Feet |
| Cooling Power | 8000 British Thermal Units |
| BEE Star Rating | 1 Star |
| Seasonal Energy Efficiency Ratio (SEER) | 11 |
Warranty and Customer Support
The DENBIG Portable Air Conditioner comes with a 1-year warranty. We also provide lifetime customer service to ensure your peace of mind and quick assistance whenever needed. For any questions, issues, or support, please contact our customer service team.
Contact information can typically be found on the product packaging or the brand's official website.
Ask a question about this manual
Ask about setup, troubleshooting, compatibility, parts, safety, or missing instructions. Manuals+ will review the question and use this page’s manual context to help answer it.