1. Introduction
This manual provides detailed instructions for the installation, operation, and maintenance of your Podofo Double Din Car Stereo, Model A2747. Please read this manual thoroughly before using the product to ensure proper function and safety. Keep this manual for future reference.
2. Package Contents
Verify that all items are present in the package:
- Podofo Double Din Car Stereo Unit
- Remote Control
- AHD Backup Camera
- Power Wiring Harness
- Camera Video Cable
- Mounting Frame/Trim
- User Manual (this document)
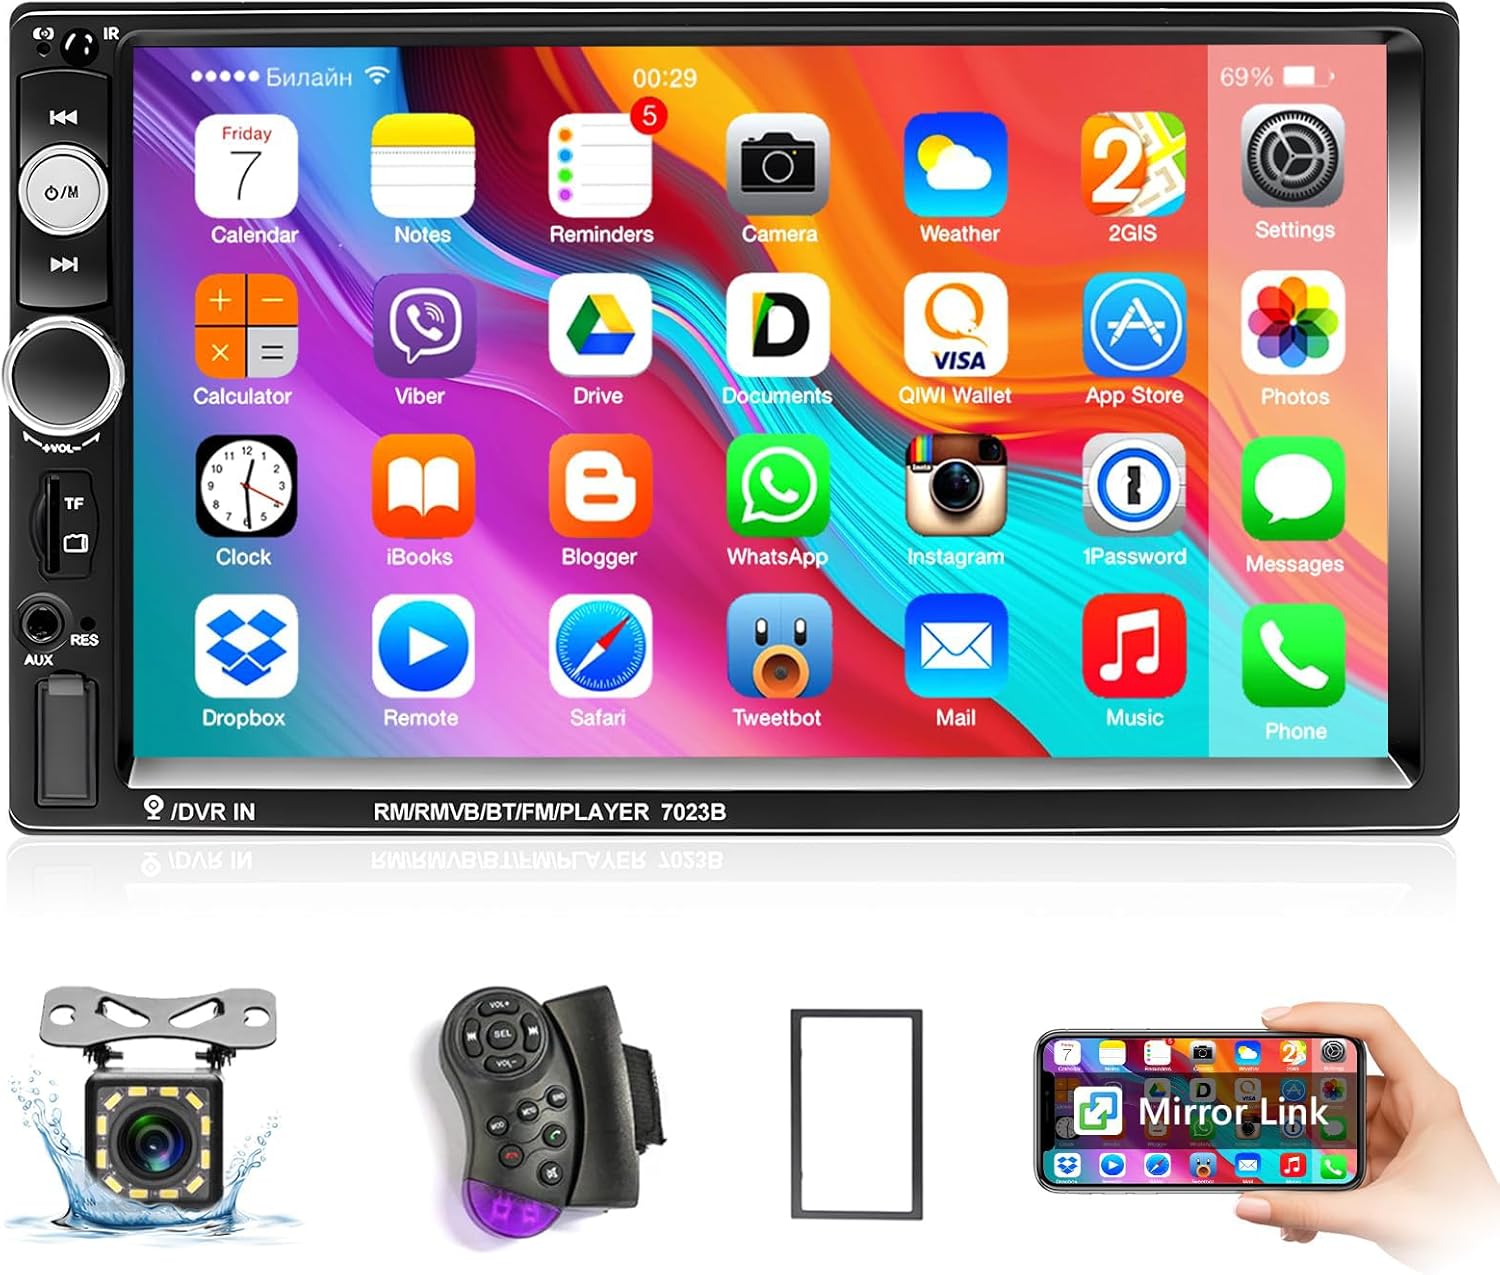
Figure 2.1: Car Stereo Unit and Accessories
This image displays the main car stereo unit, a remote control, an AHD backup camera, and a mounting frame, representing the typical contents of the product package.
3. Product Overview
3.1 Front Panel Controls and Ports
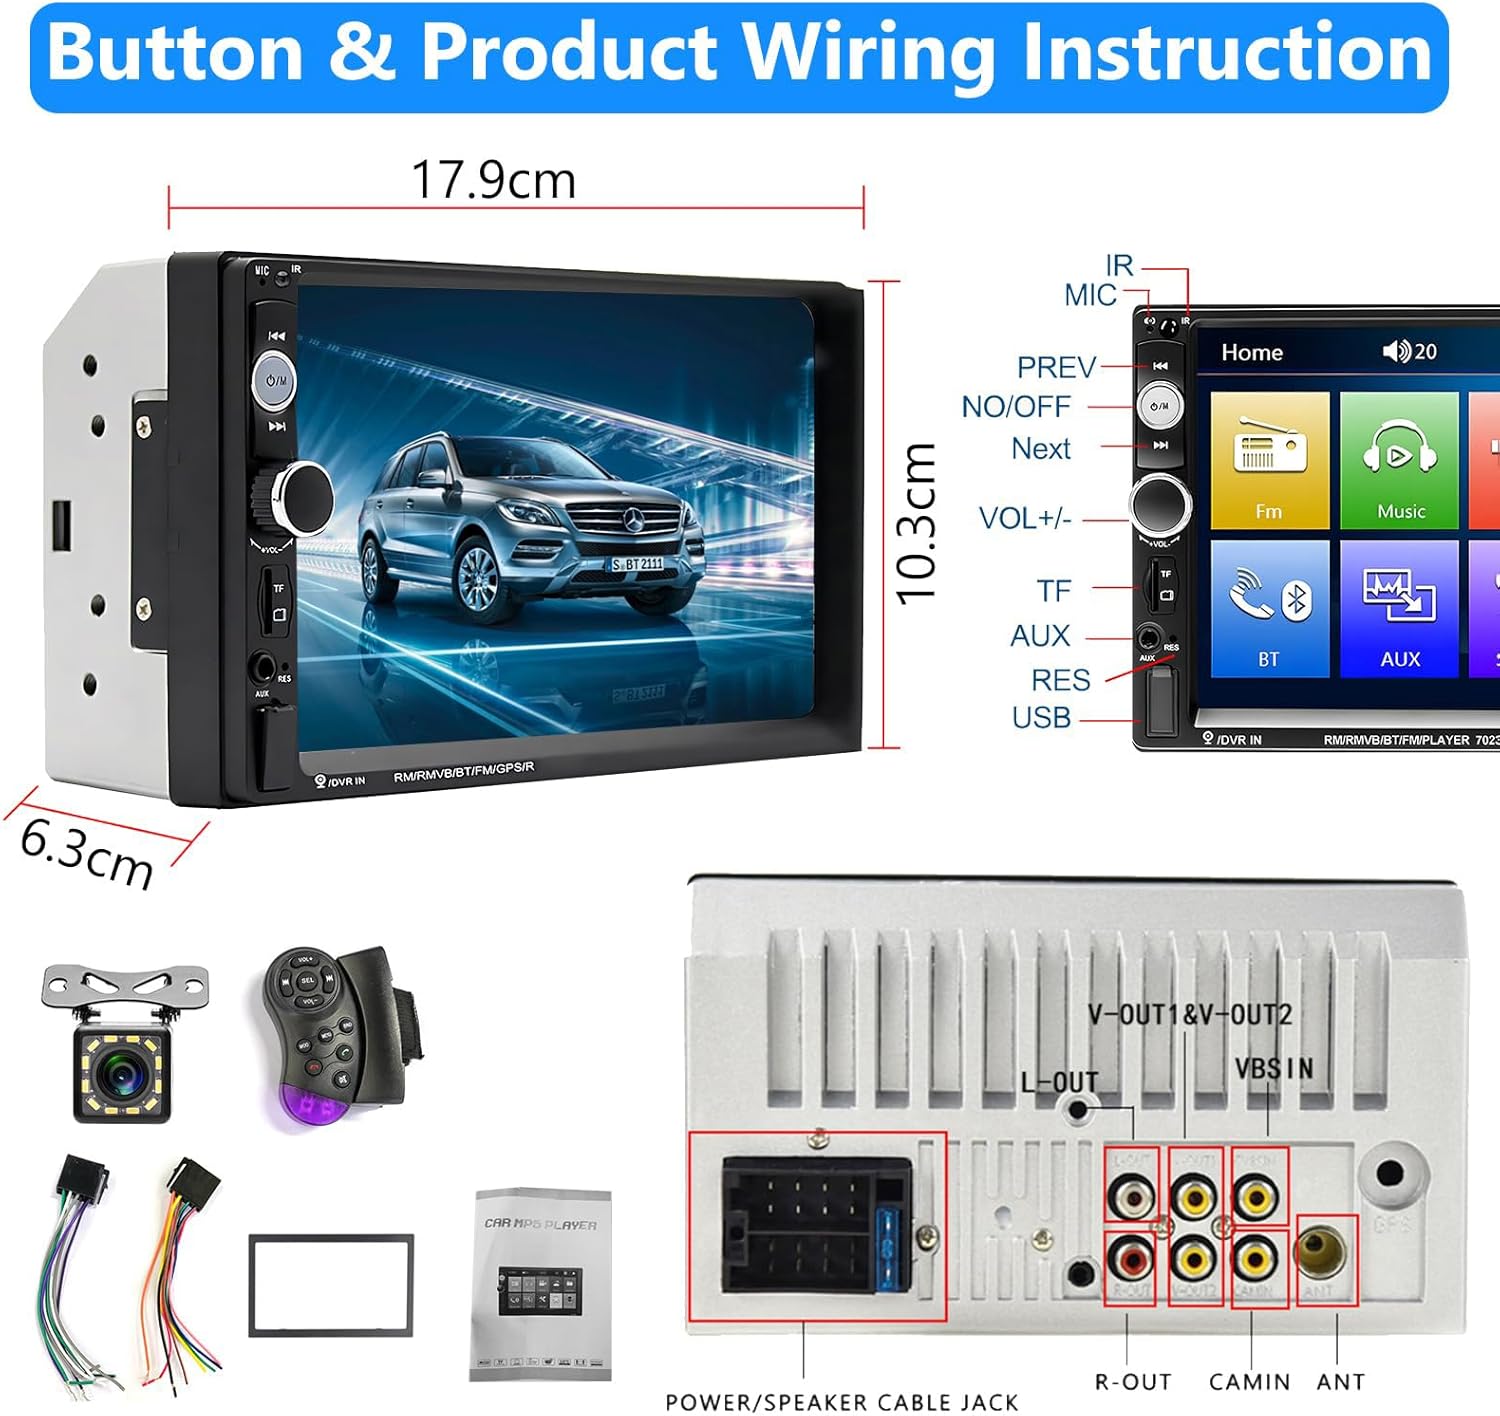
Figure 3.1: Front Panel and Dimensions
This image shows the front panel of the car stereo with its 7-inch touchscreen, physical buttons on the left side (Power/Mode, Volume knob, TF card slot, AUX input, USB port, Reset button), and microphone. Product dimensions are also indicated.
The front panel features a 7-inch touchscreen display and several physical controls for easy access:
- Power/Mode Button: Press to turn on/off, short press to switch modes.
- Volume Knob: Rotate to adjust volume.
- TF Card Slot: Insert a TF (MicroSD) card for media playback.
- AUX Input: Connect external audio devices via a 3.5mm jack.
- USB Port: Connect USB drives for media playback or charge mobile devices.
- Reset Button (RST): Use a thin object to press for factory reset.
- Microphone (MIC): For hands-free calling.
3.2 Rear Panel Connections
Figure 3.2: Rear Panel Connections
This image illustrates the rear panel of the car stereo, detailing the power/speaker cable jack, video output (V-OUT1, V-OUT2), audio output (L-OUT, R-OUT), camera input (CAMIN), and antenna port.
The rear panel provides various ports for power, audio, video, and camera connections:
- Power/Speaker Cable Jack: Main connection for power and speaker wires.
- Video Output (V-OUT1, V-OUT2): For connecting external monitors.
- Audio Output (L-OUT, R-OUT): For connecting external amplifiers.
- Camera Input (CAMIN): Dedicated input for the AHD backup camera.
- Antenna Port: For connecting the car's radio antenna.
4. Setup and Installation
Proper installation is crucial for optimal performance. If you are unsure about any steps, consult a professional installer.
4.1 Wiring Diagram

Figure 4.1: Main Wiring and Rear Camera Wiring Diagram
This diagram illustrates the connections for the main power harness (ACC, B+, Ground), speaker wires (front/rear, left/right), parking sensor control, auto antenna, and steering wheel control. It also shows the separate wiring for the backup camera, connecting to the monitor, positive power of the reverse light, and ground.
Refer to the wiring diagram above for all electrical connections. Ensure all connections are secure to prevent malfunctions.
- Yellow Wire (B+): Connect to the car's constant 12V positive battery terminal. This provides continuous power for memory retention.
- Red Wire (ACC): Connect to the car's ignition switch (ACC). This allows the stereo to turn on/off with the car's ignition.
- Black Wire (GND): Connect to the car's chassis ground.
- Speaker Wires: Connect the corresponding speaker wires (e.g., White/White-Black for Front Left, Gray/Gray-Black for Front Right, Green/Green-Black for Rear Left, Purple/Purple-Black for Rear Right). Ensure correct polarity.
- Parking Sensor Control Wire (Pink): Connect to the parking brake signal for video playback safety.
- Reverse Input Wire (Orange): Connect to the positive lead of the car's reverse light for automatic camera activation.
- Auto Antenna Wire (Blue): Connect to the car's power antenna or amplifier turn-on lead.
- Steering Wheel Control (Brown): Connect to the car's steering wheel control wires (if applicable).
4.2 Backup Camera Installation
The included AHD backup camera provides a clear view when reversing.
- Connect the yellow RCA video cable from the camera to the "CAMIN" input on the car stereo's rear panel.
- Connect the red power wire of the camera to the positive lead of your car's reverse light.
- Connect the black ground wire of the camera to a suitable chassis ground point.
- Ensure the orange reverse input wire from the stereo's main harness is also connected to the positive lead of the reverse light.
Video 4.1: Mobile Phone Interconnection and Reversing Camera Connection
This video demonstrates how to connect a mobile phone for mirror link functionality and provides a visual guide for connecting the reversing camera to the car stereo system, including power and video signal connections.
5. Operating Instructions
5.1 Basic Operation
- Power On/Off: Press the Power/Mode button on the front panel.
- Mode Selection: Short press the Power/Mode button to cycle through available modes (FM, Music, Movie, Photo, Explorer, BT, AUX, Setting, P-Link).
- Volume Adjustment: Rotate the volume knob.
- Touchscreen: Navigate menus and control functions by touching the 7-inch display.
5.2 FM Radio
Access the FM Radio mode to listen to radio stations.
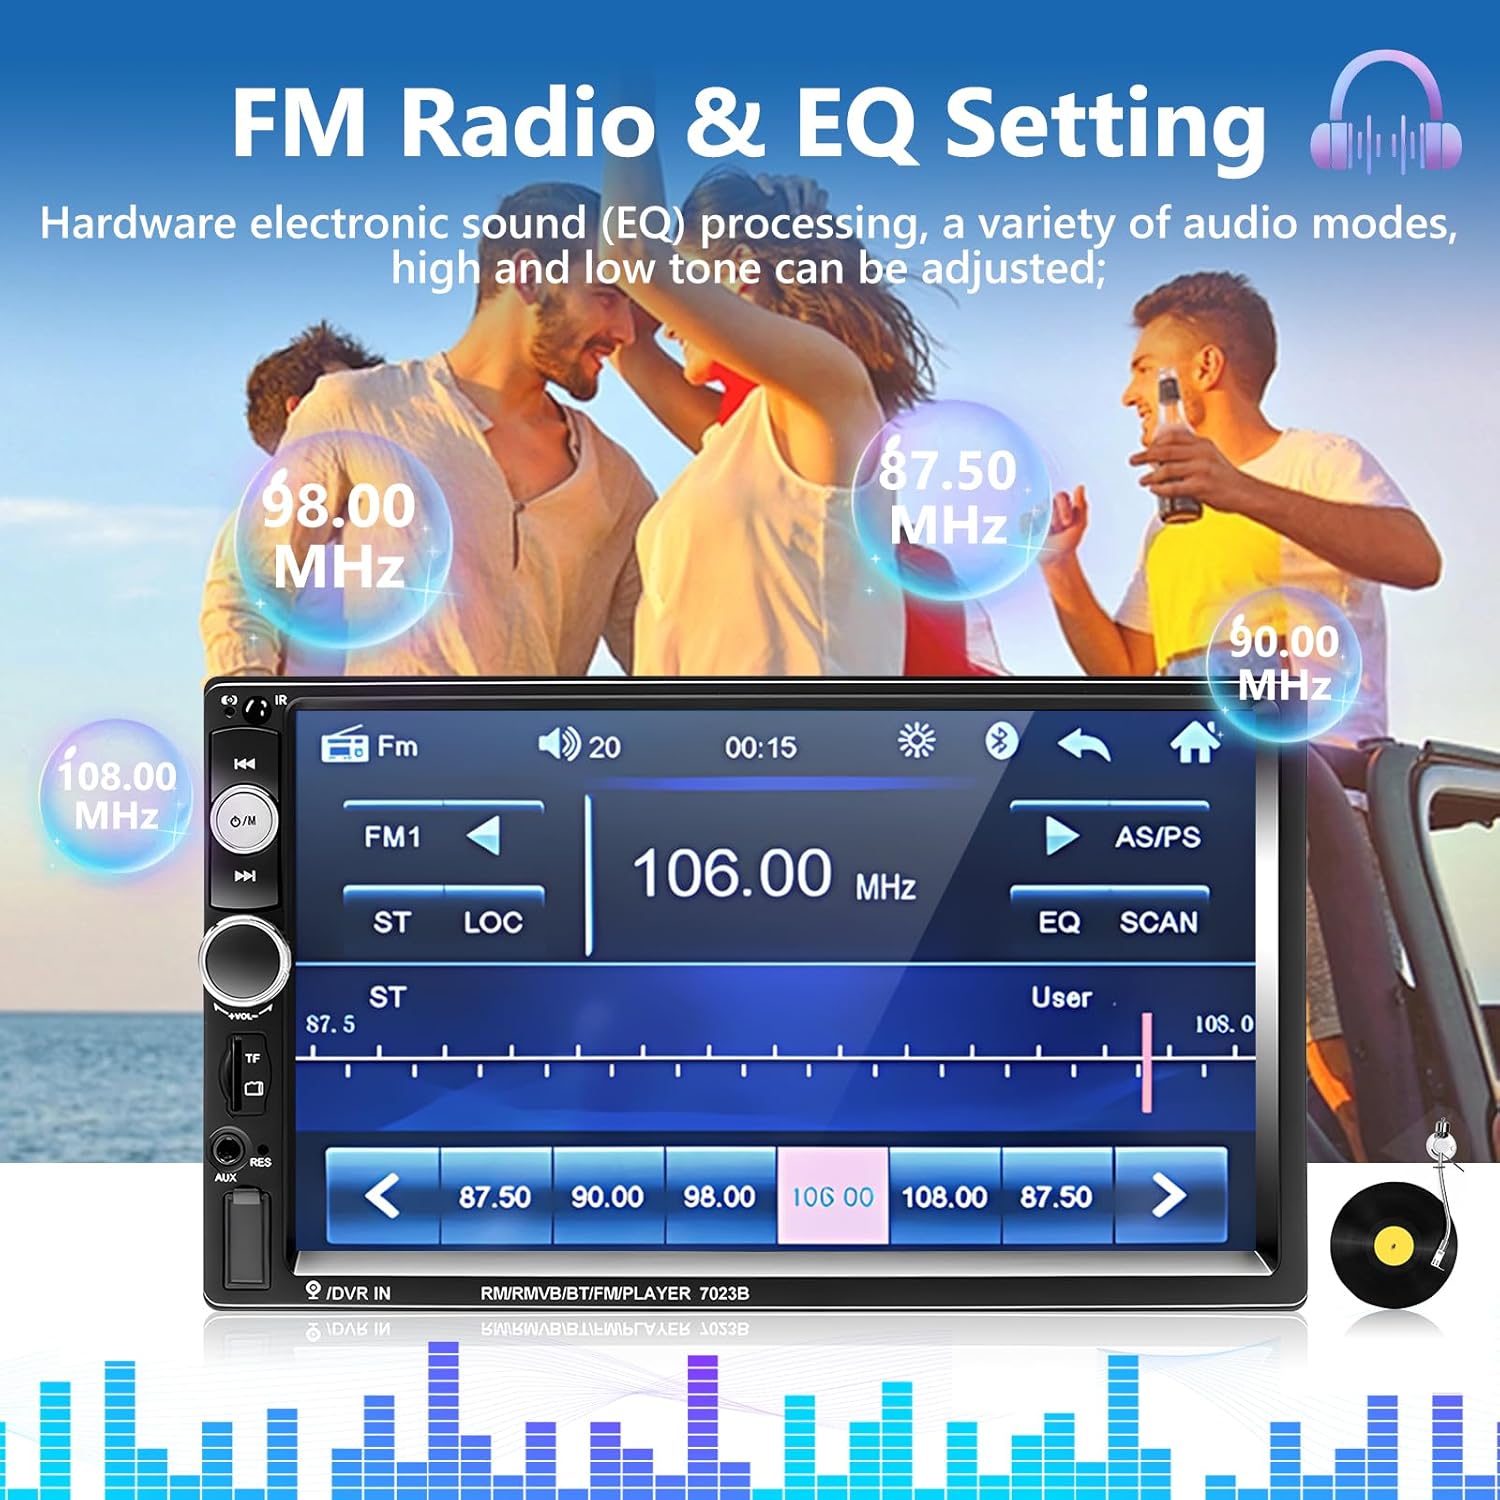
Figure 5.1: FM Radio and EQ Settings Interface
This image displays the car stereo's FM radio interface, showing frequency selection, station presets, and access to equalizer (EQ) settings for sound adjustment.
- Automatic Scanning: The unit supports automatic scanning and storage of up to 18 radio stations.
- Manual Tuning: Use the on-screen controls to manually tune to desired frequencies.
- EQ Settings: Adjust sound parameters like treble, bass, balance, and fader through the equalizer settings.
5.3 Bluetooth Connectivity
Connect your smartphone via Bluetooth for hands-free calling and audio streaming.

Figure 5.2: Bluetooth Hands-free Calling
This image shows the car stereo screen displaying a Bluetooth hands-free calling interface, with a smartphone next to it indicating an incoming call from "John."
- Enable Bluetooth on your smartphone.
- On the car stereo, select the "BT" mode.
- Search for available devices on your phone and select the car stereo (usually named "Car BT" or similar).
- Confirm pairing. Once connected, you can make/receive calls and play music wirelessly.
5.4 Mirror Link (Phone Interconnection)
Mirror Link allows you to display your smartphone screen on the car stereo display.
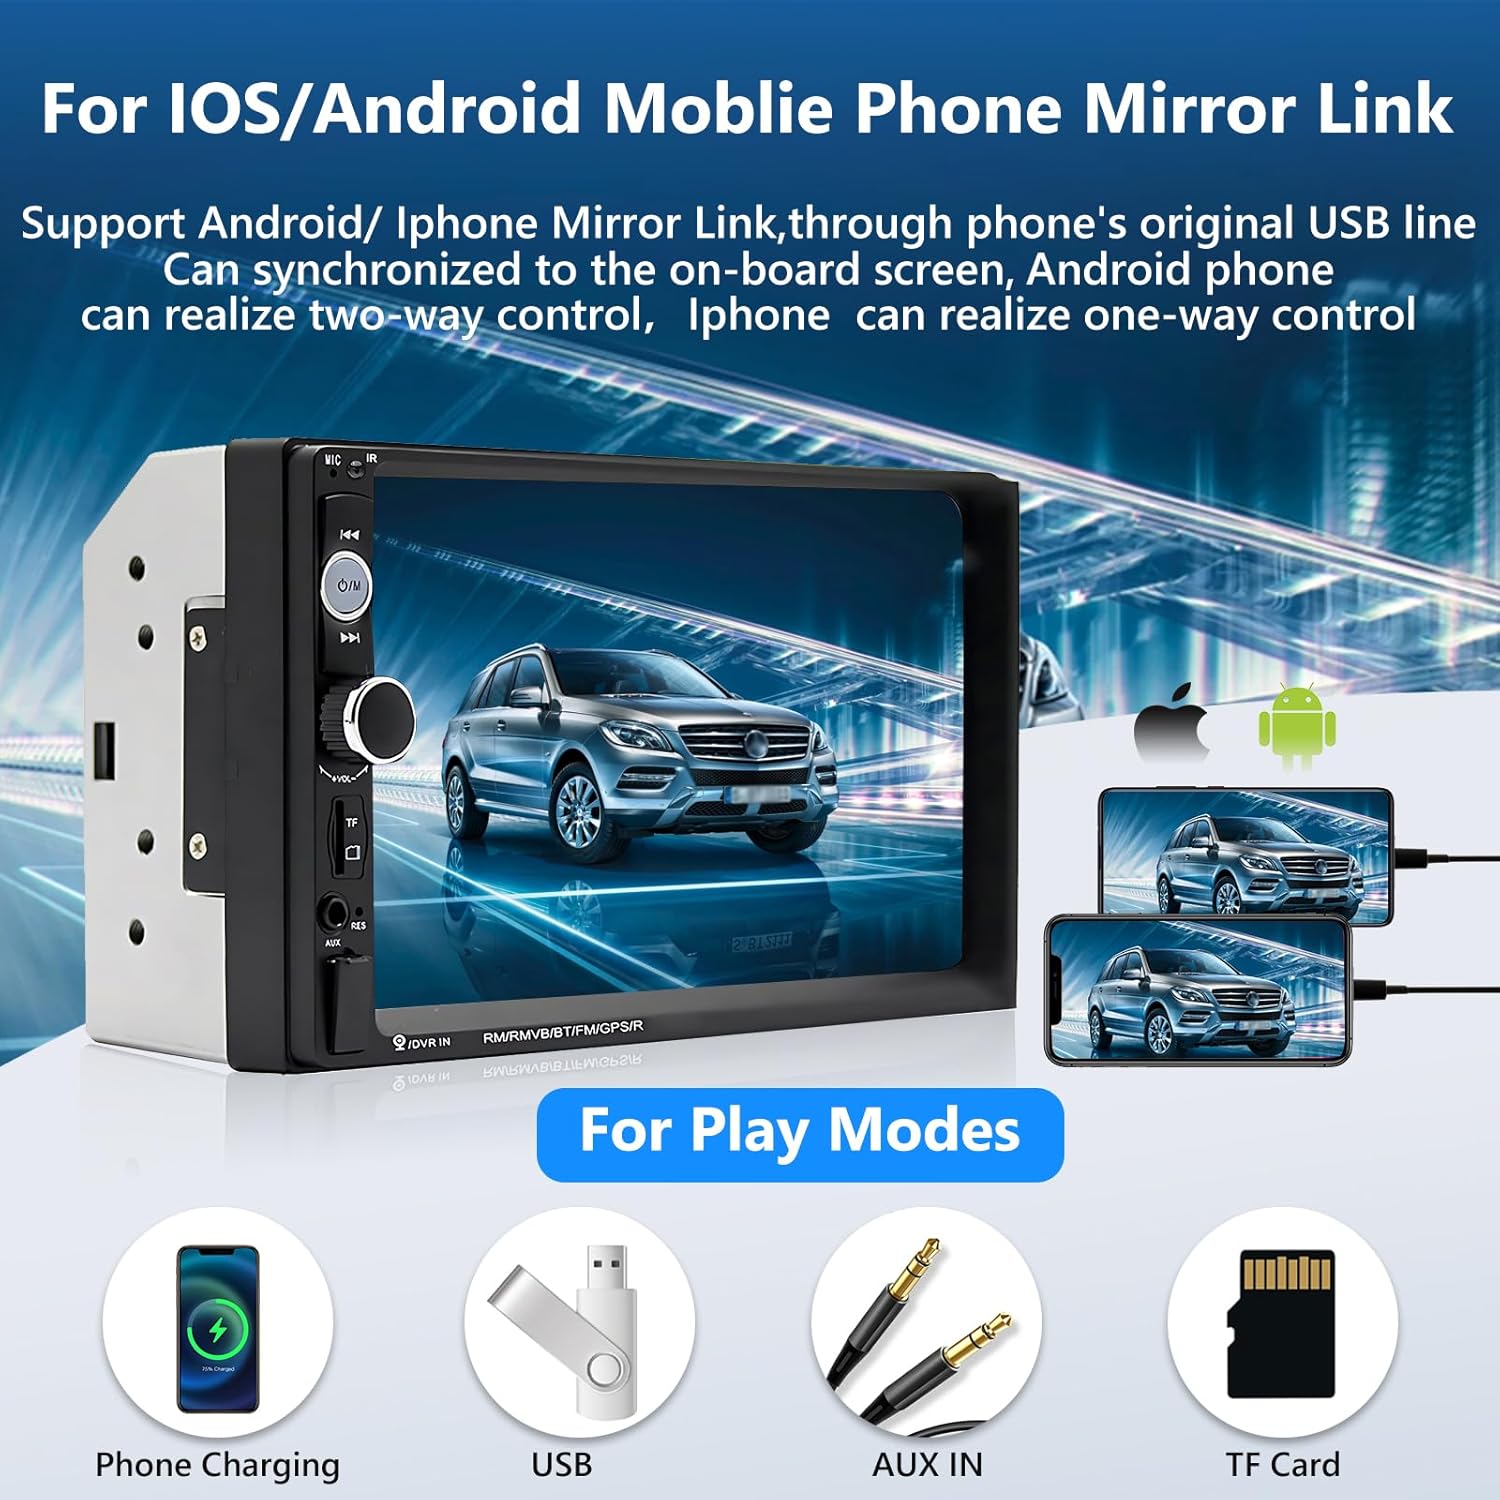
Figure 5.3: iOS/Android Mobile Phone Mirror Link
This image shows a smartphone connected to the car stereo, with the phone's screen content (app icons) mirrored onto the larger stereo display. It also highlights various play modes including phone charging, USB, AUX IN, and TF Card.
- Connect your smartphone to the car stereo using its original USB data cable.
- Select the "P-Link" mode on the car stereo.
- Follow the on-screen prompts to establish the mirror link connection.
- For Android phones, two-way control is supported. For iPhones, one-way control (display only) is supported.
- Note: The car stereo is not a GPS device. GPS navigation functionality is obtained by mirroring your mobile phone's navigation app.
5.5 USB/TF Card Playback & AUX Input
The unit supports various media playback options:
- USB: Insert a USB flash drive (up to 32GB) into the front USB port for music and video playback. The USB port also supports mobile phone charging.
- TF Card: Insert a TF (MicroSD) card (up to 32GB) into the front TF card slot for music and video playback.
- AUX Input: Connect external audio devices (MP3 players, smartphones) to the 3.5mm AUX input jack on the front panel. Select "AUX" mode to listen to audio from the connected device.
5.6 AHD Backup Camera Display
When properly installed, the backup camera automatically displays the rear view when the vehicle is shifted into reverse gear.

Figure 5.4: AHD Backup Camera View
This image shows the car stereo screen displaying the real-time feed from the AHD backup camera, complete with dynamic parking guidelines, providing a clear view of the area behind the vehicle.
- The camera features wide-angle viewing, night vision, and is waterproof.
- Parking guidelines are displayed on the screen to assist with reversing.
5.7 Steering Wheel Control (SWC)
If your vehicle supports steering wheel controls and the unit is correctly wired, you can operate basic functions directly from your steering wheel.

Figure 5.5: Steering Wheel Control Interface
This image shows the car stereo's settings menu for configuring steering wheel controls, alongside an illustration of common steering wheel buttons for audio and call management.
- Access the "Setting" menu on the stereo to configure SWC functions.
- Assign functions like volume up/down, track skip, mode change, and answer/end call to your steering wheel buttons.
6. Troubleshooting
If you encounter issues, refer to the following common problems and solutions:
| Problem | Possible Cause / Solution |
|---|---|
| Unit does not power on. |
|
| Unit turns off with car ignition, but does not retain settings (memory function). |
|
| Cannot connect to Bluetooth. |
|
| Unit is stuck or unresponsive. |
|
| Backup camera not displaying. |
|
7. Specifications
| Feature | Detail |
|---|---|
| Model Number | A2747 |
| Product Dimensions | 2.48 x 4.06 x 2.48 inches (Unit only) |
| Item Weight | 1.81 pounds |
| Display Size | 7 Inch |
| Display Resolution | 1024*600 Full HD |
| Connectivity Technology | Bluetooth, USB, TF Card, AUX |
| Special Features | FM Tuner, Mirror Link (Android/iPhone), AHD Backup Camera Support, Steering Wheel Control |
| Audio Output Mode | Stereo |
| Surround Sound Channel Configuration | 4.1 |
| Video Encoding Support | RM, RMVB, AVI, MP4, MKV, 3GP |
| Max USB/TF Card Capacity | 32 GB |
| Manufacturer | podofo |
8. Warranty and Support
Podofo is committed to providing excellent customer service and support for your product.
- Customer Service: For any operational or other issues, please contact customer support. You can typically find a "Contact Seller" option on your order page.
- Technical Support: Lifetime technical support is provided.
- Returns/Exchanges: The product includes a 30-day return or exchange policy.
- Replacement: Replacements are available within 24 months of purchase.
We aim to respond to inquiries within 24 hours.