KATSU Tools 100772
KATSU 1850W Thicknesser 330mm Electric Woodworking Planer
User Manual
Model: 100772 | Brand: KATSU Tools
Important Safety Instructions
Always observe basic safety precautions when operating electrical tools to reduce the risk of fire, electric shock, and personal injury. Read all instructions carefully before operating this machine.
- Work Area Safety: Keep the work area clean and well-lit. Cluttered or dark areas invite accidents. Do not operate power tools in explosive atmospheres, such as in the presence of flammable liquids, gases, or dust.
- Electrical Safety: Power tool plugs must match the outlet. Never modify the plug in any way. Do not expose power tools to rain or wet conditions. Water entering a power tool will increase the risk of electric shock.
- Personal Safety: Always wear appropriate personal protective equipment, including safety glasses, hearing protection, and dust masks. Do not overreach. Keep proper footing and balance at all times.
- Tool Use and Care: Do not force the power tool. Use the correct power tool for your application. Disconnect the plug from the power source before making any adjustments, changing accessories, or storing power tools.
Failure to follow these safety guidelines may result in serious injury or damage to the machine.
Product Overview and Components
The KATSU 1850W Thicknesser is designed for precise wood planing, offering efficient and consistent results. Familiarize yourself with the main components of the machine before operation.
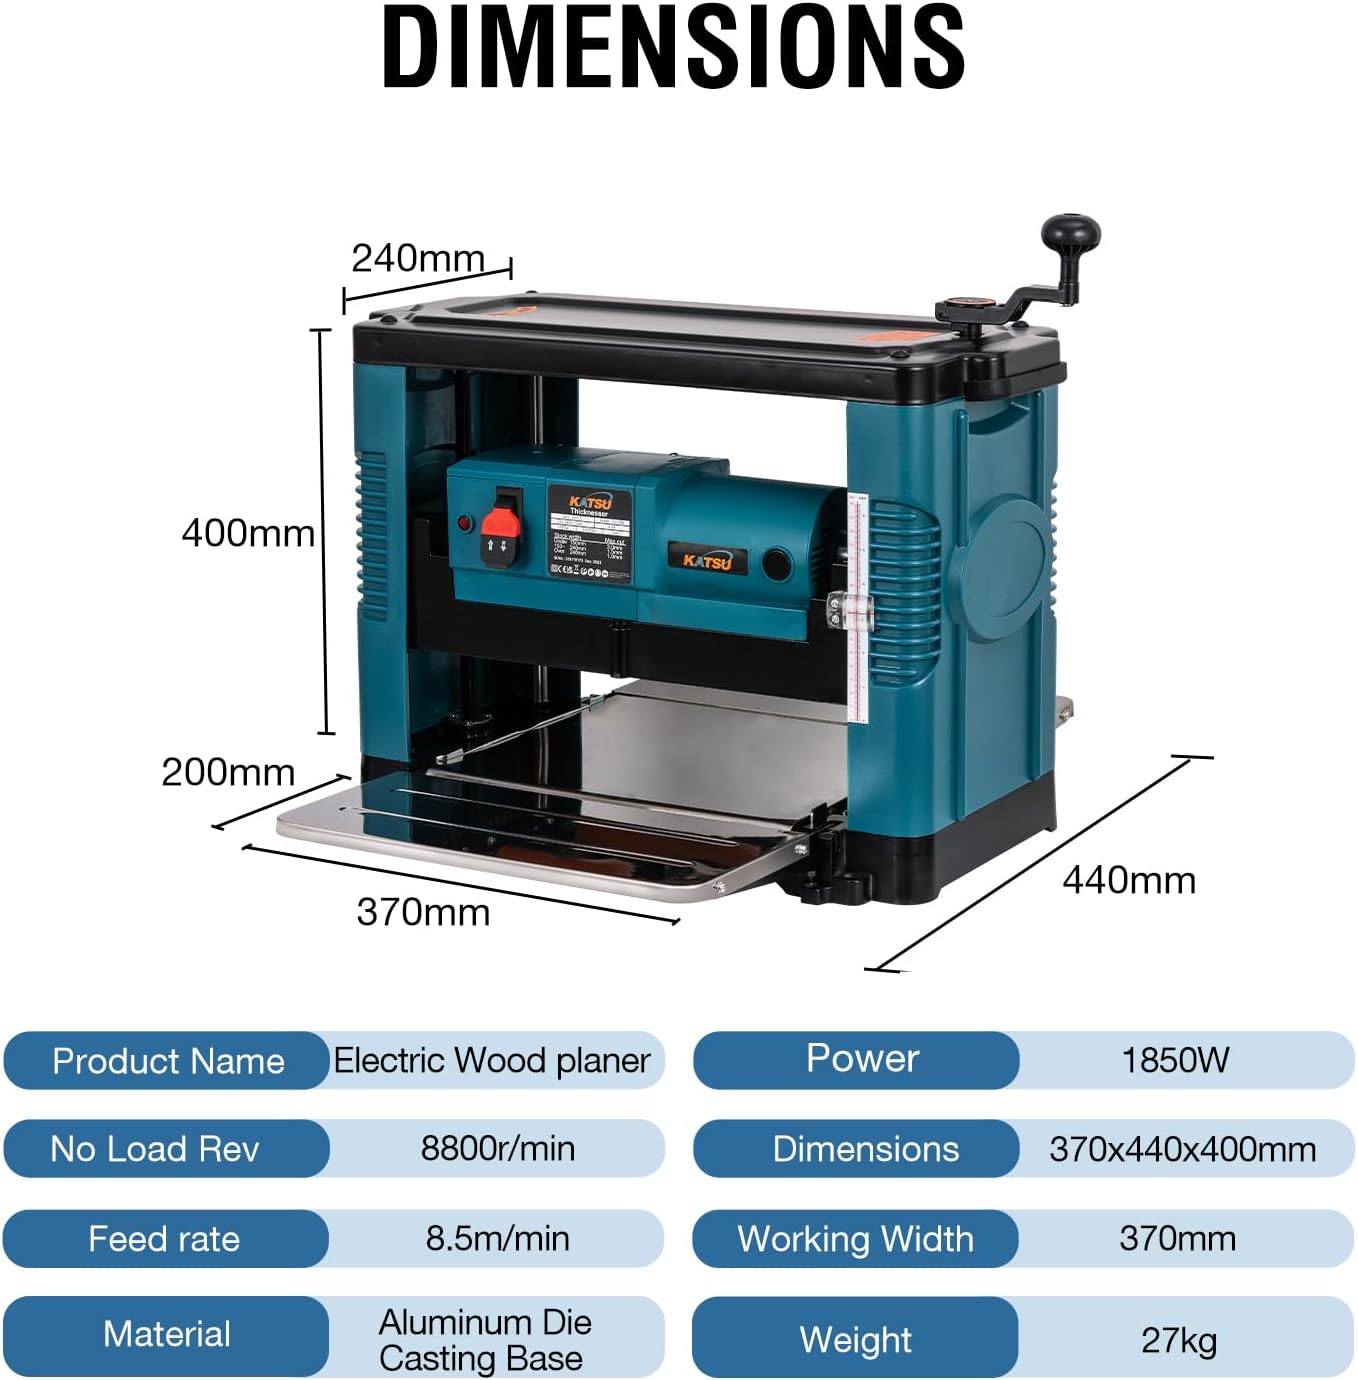
Figure 1: Main components of the KATSU Bench Top Planer.
- 1. Handle: Used for carrying the machine.
- 2. Power Switch: Controls the machine's power (On/Off).
- 3. Carbon Brush Socket: Access point for carbon brush maintenance.
- 4. Copper Core Motor: Provides the driving power for planing.
- 5. Lift Handle: Adjusts the planing height.
- 6. Gauge: Indicates the current planing thickness.
- 7. Foldable Stainless Steel Flap: Front material support.
- 8. Stainless Steel Rear Flap: Rear material support.
- 9. Pilot Light: Indicates power status.
The machine features a robust design with an electromagnetic switch for overload protection and safety, and a quick lift handle for precise height adjustments (approximately 2mm per rotation).

Figure 2: Robust design features including the electromagnetic switch and quick lift handle.
Specifications
| Feature | Specification |
|---|---|
| Voltage/Frequency | 220V/50Hz |
| No-load Power | 1850W |
| No-load Speed | 8500r/min |
| Feed Speed | 8m/min |
| Maximum Planing Width | 330mm |
| Maximum Cutting Height | ≤160mm |
| Milling Depth | 0-3mm |
| Number of Blades | 2 |
| Platform Size | 374 x 655mm |
| Dimensions (L x W x H) | 578 x 320 x 410mm |
| Net Weight | 27.3kg |
| Material | Aluminum Die Casting + Sheet Metal Parts |

Figure 3: The KATSU Thicknesser is suitable for a variety of woodworking tasks, including design, construction, craft, and DIY projects.
Setup
1. Unpacking and Inspection
- Carefully remove the thicknesser from its packaging.
- Inspect the machine for any signs of damage that may have occurred during transit. Report any damage to the supplier immediately.
- Ensure all components listed in the packing list are present.
2. Placement and Stability
- Place the thicknesser on a stable, level workbench or stand capable of supporting its weight (approx. 27.3kg).
- Ensure there is sufficient clear space around the machine for safe operation and material feeding/output.
3. Preparing the Flaps
The machine features foldable front and rear flaps for compact storage and uniform planing support.

Figure 4: Foldable front and rear flaps for easy storage and material support.
- Before operation, unfold both the front and rear stainless steel flaps to provide adequate support for the workpiece.
- Ensure they are securely locked in the unfolded position.
Operating Instructions
1. Power Connection
- Ensure the power switch is in the "OFF" position.
- Connect the power cable to a suitable 220V/50Hz power outlet.
- The pilot light should illuminate when power is supplied.
2. Adjusting Planing Depth
The planing depth can be adjusted using the lift handle and the built-in gauge.

Figure 5: Built-in switch scale for accurate depth measurement.
- Turn the lift handle clockwise to decrease the planing depth (raise the cutter head) or counter-clockwise to increase the planing depth (lower the cutter head).
- Refer to the built-in gauge to set the desired thickness. Each full rotation of the handle adjusts the height by approximately 2mm.
- The maximum milling depth per pass is 3mm. For best results and to avoid overloading the motor, take multiple shallow passes rather than one deep pass, especially with hard wood.
3. Feeding Material
- Ensure the workpiece is free of nails, screws, or other foreign objects that could damage the blades.
- Turn on the machine using the power switch. Allow the motor to reach full speed before feeding material.
- Carefully feed the workpiece into the front opening, ensuring it is flat against the bed. The machine's feed mechanism will pull the wood through.
- Support the workpiece as it exits the machine to prevent it from dropping and causing snipe.
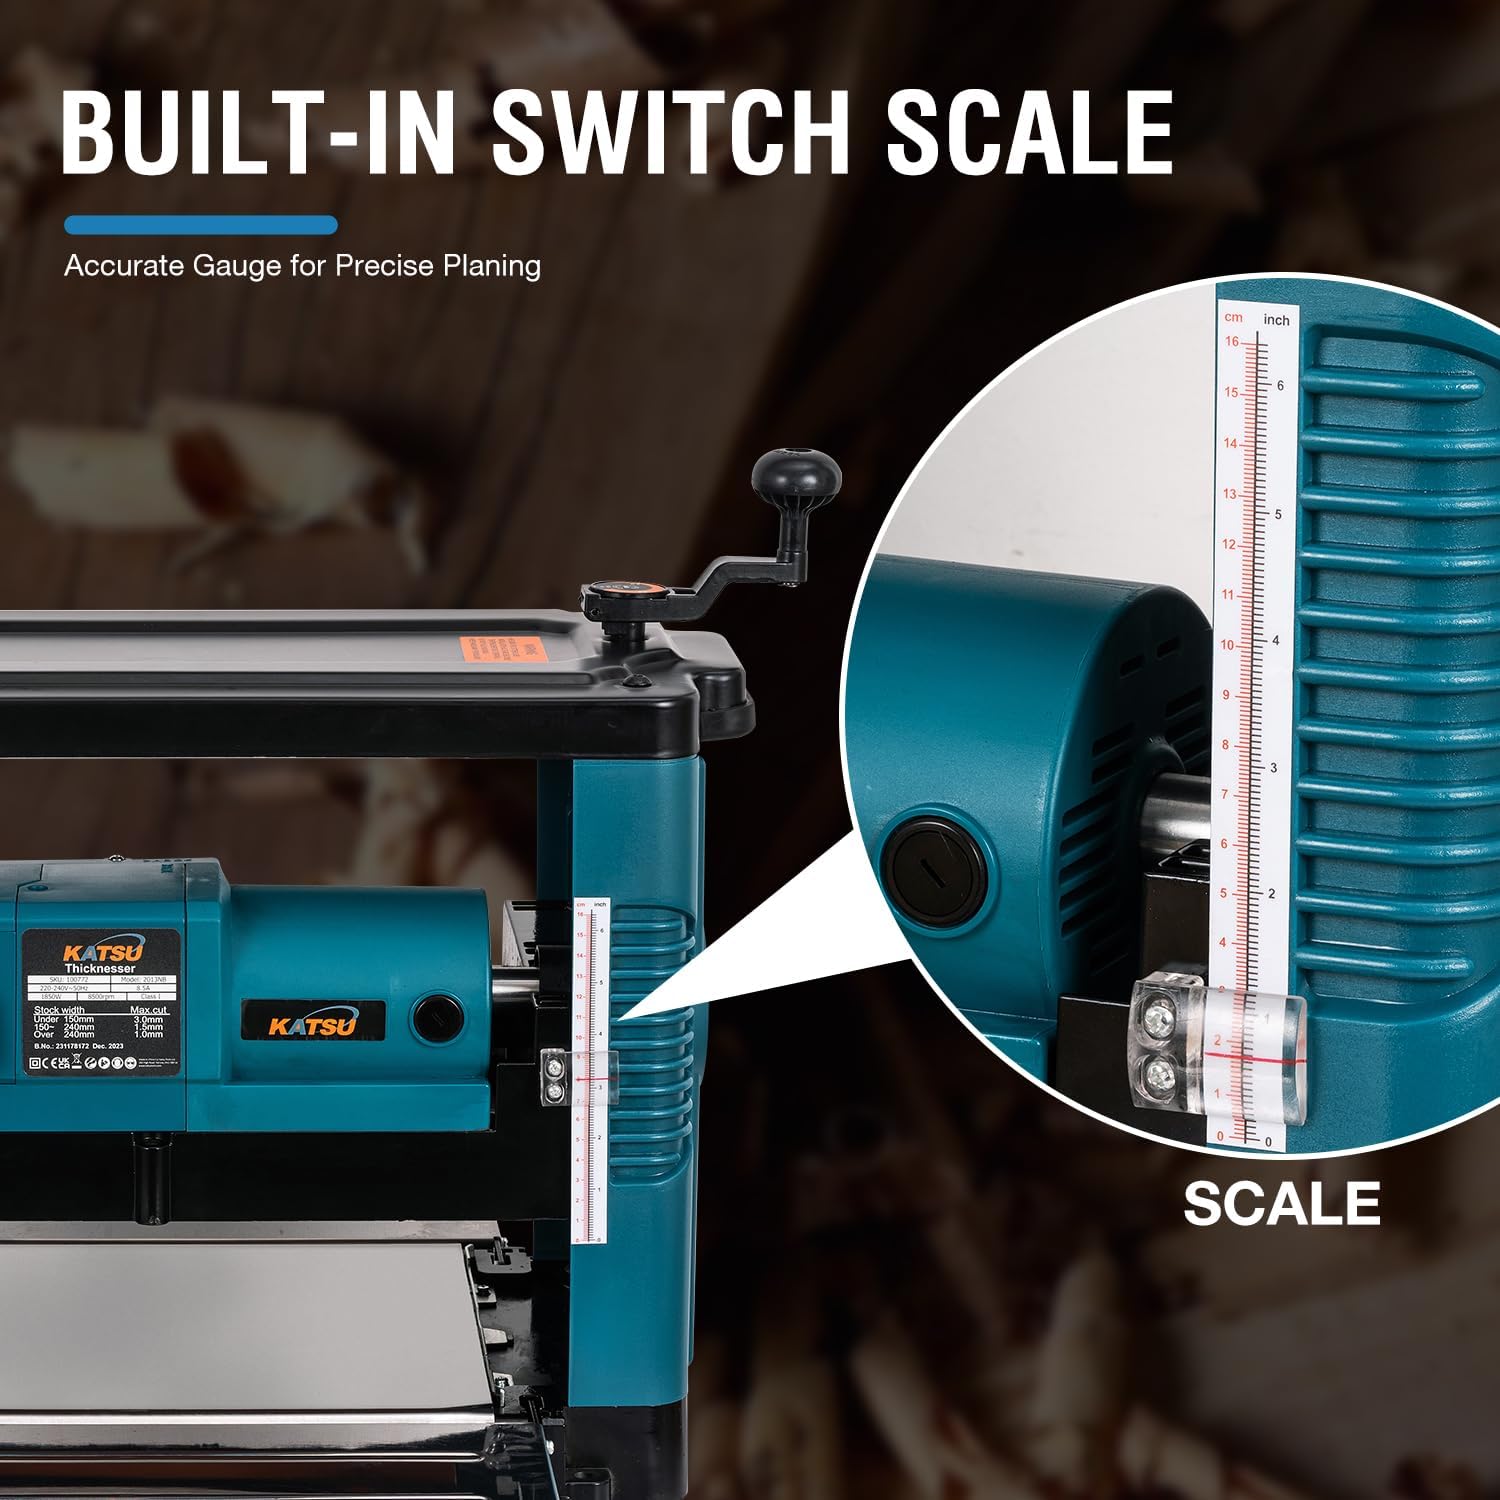
Figure 6: The thicknesser provides precise and efficient wood planing.
Maintenance
Regular maintenance ensures the longevity and optimal performance of your KATSU Thicknesser.
1. Cleaning
- Always disconnect the machine from the power supply before cleaning.
- Remove sawdust and wood chips from the machine, especially around the cutter head and feed rollers, using a brush or vacuum cleaner.
- Wipe down external surfaces with a clean, dry cloth. Do not use solvents or abrasive cleaners.
2. Blade Inspection and Replacement
- Regularly inspect the blades for sharpness and damage. Dull or chipped blades can lead to poor planing quality and increased motor strain.
- Refer to the manufacturer's instructions for safe blade replacement procedures. Always use genuine replacement blades.
3. Lubrication
- Periodically apply a light coat of machine oil to moving parts, such as the height adjustment mechanism, to ensure smooth operation.
4. Storage
- Store the thicknesser in a dry, clean environment, away from direct sunlight and extreme temperatures.
- If storing for an extended period, apply a rust preventative to exposed metal surfaces.
Troubleshooting
| Problem | Possible Cause | Solution |
|---|---|---|
| Machine does not start. | No power supply; Power switch off; Overload protection tripped. | Check power connection; Turn power switch on; Reset overload protection (if applicable) and reduce load. |
| Poor planing quality (rough surface, snipe). | Dull or damaged blades; Incorrect feed rate; Insufficient support for workpiece. | Replace or sharpen blades; Adjust feed rate; Ensure flaps are fully extended and support workpiece. |
| Machine stalls during operation. | Overload (too deep a cut); Motor overheating. | Reduce planing depth; Allow motor to cool down before resuming. |
| Excessive vibration or noise. | Loose components; Damaged bearings; Unbalanced blades. | Check and tighten all fasteners; Contact service for bearing or blade issues. |
If the problem persists after attempting these solutions, contact KATSU Tools customer support.
Warranty and Support
KATSU Tools stands behind the quality of its products. For warranty information, technical support, or to order replacement parts, please contact KATSU Tools directly.
Please have your model number (100772) and purchase date available when contacting support.
For further assistance, visit the official KATSU Tools store or contact their customer service department.
Online Store: KATSU Tools Store on Amazon.co.uk