1. Introduction
Thank you for choosing the PSIDE Parkside PHP 500 E3 Cordless Hot Glue Gun. This manual provides essential information for the safe and efficient operation, setup, and maintenance of your new hot glue gun. Please read these instructions carefully before first use and keep them for future reference.
This kit includes the Parkside PHP 500 E3 hot glue gun with its charging station, and a PSIDE bottle opener keychain.
2. Safety Instructions
Always observe the following safety precautions to prevent injury or damage to the device:
- Hot Surfaces: The nozzle and melted glue become very hot (up to 200°C). Avoid direct contact with skin to prevent burns.
- Ventilation: Use the glue gun in a well-ventilated area.
- Flammable Materials: Do not use near flammable liquids, gases, or materials.
- Children and Pets: Keep the device out of reach of children and pets.
- Power Supply: Ensure the power supply voltage matches the specifications of the charging station.
- Storage: Allow the glue gun to cool completely before storing.
- Maintenance: Disconnect from power before cleaning or performing maintenance.
- Intended Use: Use only with standard 11mm glue sticks. Do not attempt to use other materials.
3. Package Contents
Please check that all items are present and undamaged:
- 1 x PSIDE Parkside PHP 500 E3 Cordless Hot Glue Gun
- 1 x Charging Station (with removable drip cup)
- 3 x Transparent Glue Sticks (180 mm length, 11 mm diameter)
- 1 x PSIDE Bottle Opener Keychain
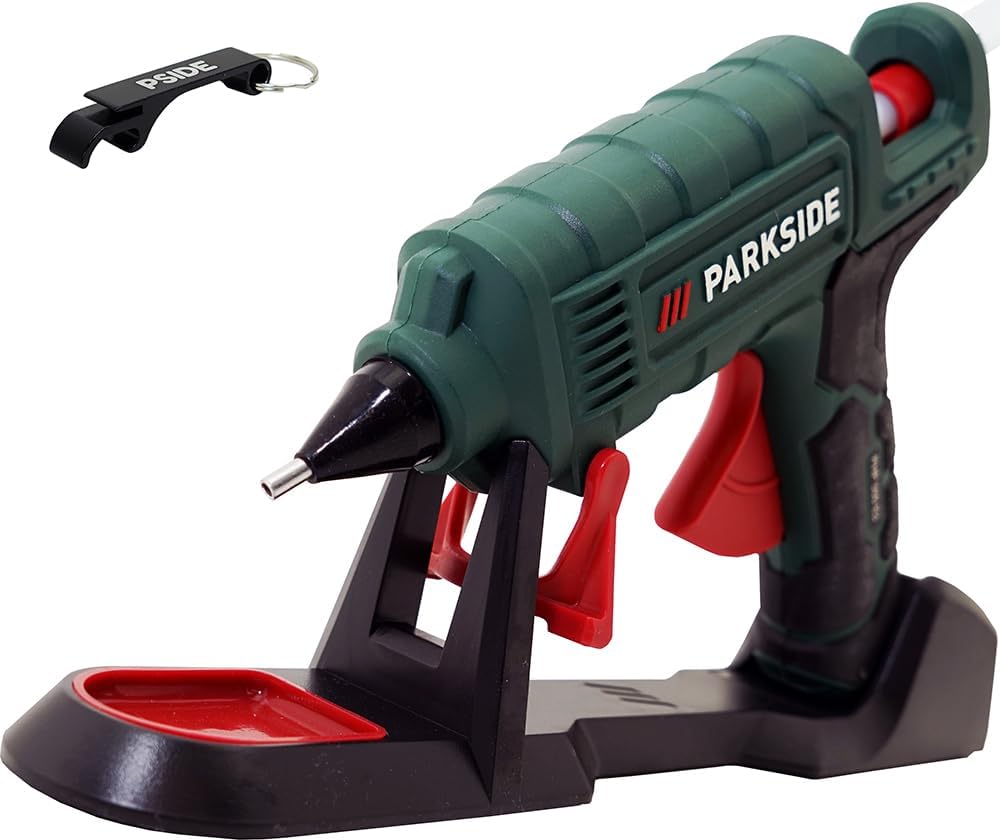
Image 1: The PSIDE Parkside PHP 500 E3 hot glue gun with its charging station and included glue sticks. The gun is green and black, resting on a black charging base with a red drip tray. A PSIDE bottle opener keychain is also visible in the upper left corner.
Image 2: A close-up of the black PSIDE bottle opener keychain, made of aluminum, designed to open bottles and cans with tabs.
4. Setup
Before using the hot glue gun, follow these steps for initial setup:
- Insert Glue Stick: Insert an 11mm diameter glue stick into the opening at the rear of the glue gun until it stops.
- Connect Charging Station: Place the charging station on a stable, heat-resistant surface. Plug the power cable of the charging station into a suitable electrical outlet (230V).
- Heat Up: Place the glue gun onto the charging station. The gun will begin to heat up. The approximate heating time is 2 minutes to reach 150°C, with an operating temperature of 200°C.
- Cordless Use: Once heated, the glue gun can be removed from the charging station for cordless operation for short, punctual gluing tasks.
- Continuous Use: For continuous gluing tasks, keep the glue gun connected directly to the power cable (bypassing the charging station) or return it to the charging station periodically to maintain temperature.
- Drip Cup: The charging station includes a removable drip cup to collect any excess glue. Ensure it is in place during heating and use.
5. Operation
The PHP 500 E3 offers two operating modes for maximum flexibility:
- Cordless Mode: After heating in the charging station, the glue gun can be used wirelessly for approximately 5-10 minutes for quick, small tasks.
- Corded Mode: For longer, continuous gluing, connect the glue gun directly to the power cable. This ensures a constant operating temperature without interruption.
Gluing Procedure:
- Prepare Surfaces: Ensure surfaces to be glued are clean, dry, and free of dust or grease.
- Heat Gun: Place the glue gun on the charging station and allow it to heat up (approx. 2 minutes).
- Apply Glue: Once heated, gently press the trigger to dispense melted glue. Apply a small amount of glue to one of the surfaces.
- Join Surfaces: Immediately press the two surfaces together firmly for a few seconds. Hot glue sets quickly.
- Refill Glue Stick: When a glue stick is nearly depleted, insert a new one into the rear opening. The new stick will push the old one through.
- Cool Down: After use, place the glue gun back on its charging station or on a heat-resistant surface and allow it to cool completely before storing. The foldable stand on the gun can be used for safe temporary placement.
6. Maintenance
Proper maintenance ensures the longevity and optimal performance of your glue gun:
- Cleaning the Nozzle: Never attempt to clean the nozzle while the gun is hot. Allow it to cool completely. Gently wipe any dried glue from the nozzle with a soft cloth. Do not use abrasive cleaners or sharp objects.
- Cleaning the Body: Wipe the exterior of the glue gun and charging station with a damp cloth. Do not immerse in water.
- Drip Cup: Regularly empty and clean the removable drip cup on the charging station.
- Storage: Store the cooled glue gun and charging station in a dry, dust-free environment.
7. Troubleshooting
Refer to the table below for common issues and their solutions:
| Problem | Possible Cause | Solution |
|---|---|---|
| Glue not dispensing or dispensing slowly. | Gun not hot enough; glue stick jammed or too short. | Allow more time to heat. Ensure a new glue stick is fully inserted. Do not force the trigger. |
| Glue gun not heating. | Not properly seated in charging station; power cable not connected; power outlet issue. | Ensure gun is correctly placed on the charging station. Check power cable connection and try a different outlet. |
| Excessive glue dripping from nozzle. | Normal during heating or when idle; gun is too hot. | Use the drip cup. This is common for hot glue guns. Ensure the gun is not left heating for excessively long periods without use. |
8. Specifications
| Model: | PHP 500 E3 |
| Operating Modes: | Corded (direct power) / Cordless (after pre-heating) |
| Starting Power: | 500 W (reduces to under 25 W during operation) |
| Heating Time: | Approx. 2 minutes (to approx. 150°C) |
| Operating Temperature: | 200°C |
| Glue Stick Diameter: | 11 mm |
| Adhesive Flow Rate: | 20 g/min |
| Power Source: | Electric Cable (230 Volts) |
| Material (Housing): | Plastic |
| Dimensions (Glue Gun): | 212 x 167 x 53 mm |
| Dimensions (Charging Station): | 299 x 65 x 54 mm |
| Weight (Glue Gun without cable): | 298 g |
9. Warranty and Support
For warranty information and customer support, please refer to the documentation provided with your purchase or contact the retailer. Keep your proof of purchase for any warranty claims.