Hanicks EP2
Potterton EP2 Twin Channel Programmer User Manual
Model: EP2
1. Product Overview
The Potterton EP2 Twin Channel Programmer is designed to provide precise control over your central heating and domestic hot water systems. This configurable programmer offers flexible time settings, including 24-hour, 5/2 day, or 7-day options, allowing users to tailor their heating schedule to their specific weekly or daily requirements. It is engineered for straightforward installation, being compatible with existing EP range backplates, and serves as a direct replacement for older models such as EP2000, EP2001, EP2002, EP3002, and EP6002.
Key features include independent control for heating and hot water, a digital clock display, LED circuit indicators, and convenient advance and extend functions for temporary schedule adjustments.
2. Product Features
- Digital Clock Display: Clear and easy-to-read time display.
- Independent 7-Day Programming: Separate programming capabilities for Central Heating (CH) and Domestic Hot Water (DHW).
- Flexible Time Settings: Choose between 24-hour, 5/2 day (weekdays/weekends), or full 7-day programming options.
- Multiple Timed Periods: Up to 3 timed periods can be set per day for both heating and hot water.
- LED Circuit Indicators: Visual confirmation of heating and hot water operation.
- Manual Override Function: Allows for temporary adjustments to the programmed schedule.
- Advance Function: Brings on or turns off heating/hot water ahead of schedule.
- Extend Function: Extends the current ON period for a set duration (e.g., 1 hour).
- Easy Installation: Designed for compatibility with existing EP range backplates, requiring no additional wiring.
- Direct Replacement: Fully compatible as a replacement for EP2000, EP2001, EP2002, EP3002, and EP6002 models.
- Double Insulated Case: Ensures electrical safety.
3. Setup and Installation
The Potterton EP2 Programmer is designed for straightforward installation, particularly when replacing an existing EP series programmer. It utilizes the same backplate, eliminating the need for complex rewiring.
3.1 Compatibility
This programmer is a direct replacement for the following models: EP2000, EP2001, EP2002, EP3002, and EP6002. It is compatible with their existing backplates.
3.2 Installation Steps (General Guidance)
- Safety First: Before commencing any electrical work, ensure the mains electricity supply to the heating system is completely switched off at the consumer unit/fuse box.
- Remove Old Programmer: Carefully detach the old programmer from its backplate. Note the wiring connections if you are not replacing an identical model, though for direct replacements, this step is simplified.
- Mount New Programmer: The EP2 programmer attaches to the existing backplate using a single screw. Align the new programmer with the backplate and secure it firmly.
- Restore Power: Once securely mounted, restore the mains electricity supply.
- Initial Setup: The programmer will typically power on and display the current time. You may need to set the correct time and date if it's not automatically maintained.
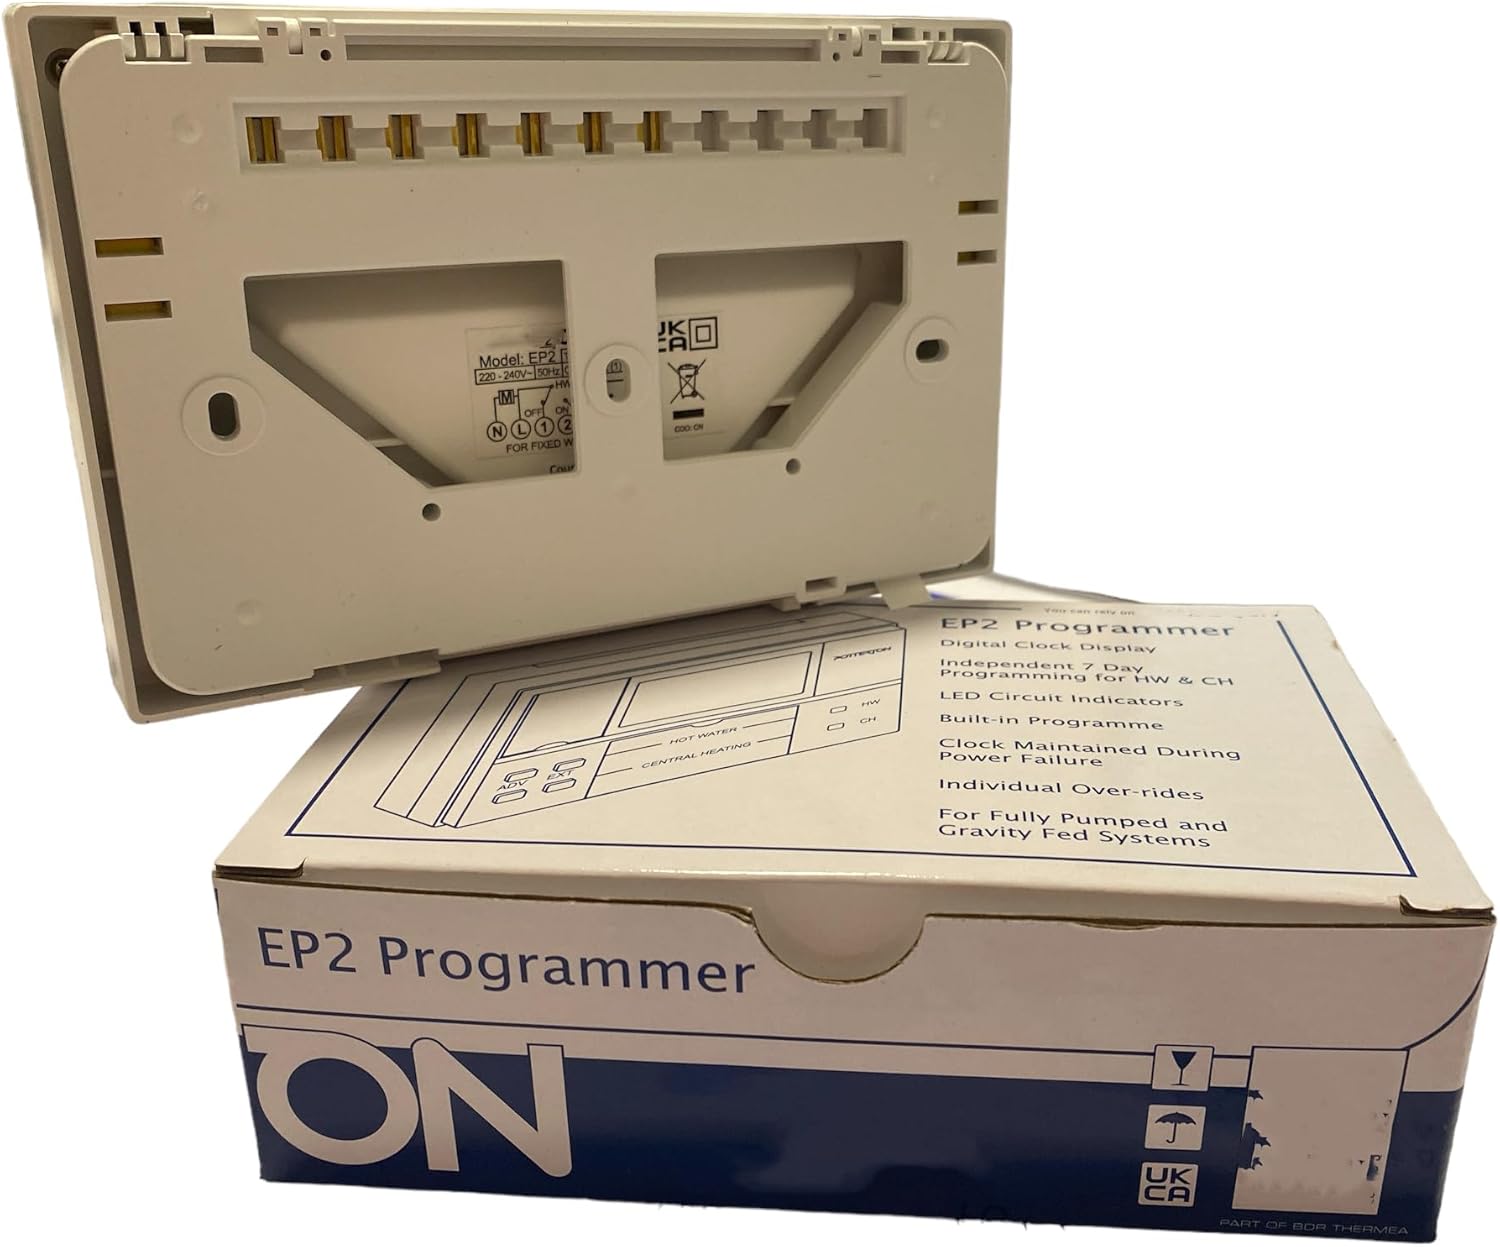
Figure 1: Rear view of the EP2 Programmer, illustrating the backplate connection points. This view is crucial for understanding how the unit connects to existing wiring.
For detailed wiring diagrams and specific installation instructions, always refer to the full installation guide provided with the product or consult a qualified electrician.
4. Operating Instructions
The EP2 programmer allows for precise control of your heating and hot water. Familiarize yourself with the display and buttons for optimal use.

Figure 2: Front view of the EP2 Programmer, showing the digital display and control buttons for Hot Water (HW), Central Heating (CH), Advance (ADV), and Extend (EXT).
4.1 Setting the Time and Date
Upon initial power-up or after a prolonged power cut, you may need to set the current time and day. Refer to the specific instructions in your product's detailed manual for the exact button sequence, as this can vary slightly between models.
4.2 Programming Heating and Hot Water Schedules
The EP2 allows for independent programming of Central Heating (CH) and Domestic Hot Water (DHW). You can choose from three programming modes:
- 24 Hour: The same schedule repeats every day.
- 5/2 Day: One schedule for weekdays (Monday-Friday) and another for weekends (Saturday-Sunday).
- 7 Day: A unique schedule can be set for each day of the week.
For each channel (CH and DHW) and each day/period, you can typically set up to three ON/OFF times. Consult your full manual for detailed steps on entering programming mode and adjusting times.
4.3 Manual Override Functions
The programmer includes buttons for temporary manual control:
- ADV (Advance): Pressing this button will either bring on the heating/hot water if it's currently off, or turn it off if it's currently on, until the next programmed event.
- EXT (Extend): This function allows you to extend the current ON period for a set duration (e.g., 1 hour), useful if you need heating or hot water for longer than programmed.
The specific operation of these buttons and any associated indicators will be detailed in your product's comprehensive user guide.
5. Maintenance
The Potterton EP2 Twin Channel Programmer requires minimal maintenance to ensure its longevity and optimal performance.
- Cleaning: Wipe the unit periodically with a soft, dry cloth. Do not use abrasive cleaners, solvents, or excessive moisture, as these can damage the display or internal components.
- No User-Serviceable Parts: The programmer contains no user-serviceable parts. Do not attempt to open the casing or perform any repairs yourself. Refer any issues to a qualified technician.
- Power Supply: Ensure a stable 230V AC power supply. Fluctuations or interruptions can affect performance. The unit is designed to maintain clock settings during power failure.
6. Troubleshooting
If you encounter issues with your Potterton EP2 Programmer, consider the following common troubleshooting steps before seeking professional assistance.
| Problem | Possible Cause | Solution |
|---|---|---|
| Display is blank / No power | No mains power supply; unit not properly seated on backplate. | Check circuit breaker/fuse for heating system. Ensure programmer is securely attached to its backplate. |
| Heating/Hot Water not coming on | Incorrect programming; manual override active; boiler fault. | Verify programmed ON times. Check if 'ADV' or 'EXT' function is active. Ensure boiler is operational and not showing a fault code. |
| Time/Date incorrect | Power interruption; battery low (if applicable). | Reset the time and date according to the operating instructions. The unit is designed to maintain clock during power failure, but prolonged outages might require reset. |
| LED indicators not lighting up | No demand for heating/hot water; LED fault. | Ensure a programmed ON period is active. If the system is working but LEDs are off, contact support. |
If the problem persists after attempting these steps, it is recommended to contact a qualified heating engineer or the Hanicks customer support for further assistance.
7. Specifications
- Brand: Hanicks
- Model Number: EP2
- Colour: White
- Product Dimensions: 4 x 16 x 11 cm (Depth x Width x Height)
- Item Weight: 300 g
- Voltage: 230 Volts AC
- Material: Plastic
- Special Features: Independent 7-day programming, manual override, LED circuit indicator, Digital clock display.
- Control Type: Touch (referring to button interface)
- Included Components: Backplate
8. Warranty and Support
For information regarding the warranty period and terms for your Potterton EP2 Twin Channel Programmer, please refer to the documentation provided at the time of purchase or contact Hanicks directly.
Hanicks Customer Support:
- For technical assistance, troubleshooting, or warranty claims, please visit the official Hanicks website or contact their customer service department.
- You can find more information and contact details on the Hanicks Brand Store on Amazon.
Always ensure that any installation or repair work is carried out by a qualified and competent person.
Ask a question about this manual
Ask about setup, troubleshooting, compatibility, parts, safety, or missing instructions. Manuals+ will review the question and use this page’s manual context to help answer it.