1. Introduction
This user manual provides comprehensive instructions for the safe and efficient operation, maintenance, and troubleshooting of your EFAN Dayplus Cordless Vacuum Cleaner. Please read this manual thoroughly before first use and retain it for future reference.
2. Important Safety Instructions
To reduce the risk of fire, electric shock, or injury, always follow basic safety precautions when using an electrical appliance, including the following:
- Read all instructions before using the appliance.
- Do not use outdoors or on wet surfaces.
- Do not allow to be used as a toy. Close attention is necessary when used by or near children.
- Use only as described in this manual. Use only manufacturer's recommended attachments.
- Do not use with damaged cord or plug. If appliance is not working as it should, has been dropped, damaged, left outdoors, or dropped into water, return it to a service center.
- Do not pull or carry by cord, use cord as a handle, close a door on cord, or pull cord around sharp edges or corners. Do not run appliance over cord. Keep cord away from heated surfaces.
- Do not unplug by pulling on cord. To unplug, grasp the plug, not the cord.
- Do not handle plug or appliance with wet hands.
- Do not put any object into openings. Do not use with any opening blocked; keep free of dust, lint, hair, and anything that may reduce airflow.
- Keep hair, loose clothing, fingers, and all parts of body away from openings and moving parts.
- Do not pick up anything that is burning or smoking, such as cigarettes, matches, or hot ashes.
- Do not use to pick up flammable or combustible liquids, such as gasoline, or use in areas where they may be present.
- Do not use without dust cup and/or filters in place.
- Turn off all controls before unplugging.
- Use extra care when cleaning on stairs.
- Store the appliance indoors. Put away after use to prevent tripping accidents.
- Prevent unintentional starting. Ensure the switch is in the off-position before connecting to battery pack, picking up or carrying the appliance.
- Recharge only with the charger specified by the manufacturer.
3. Package Contents
Please check the package contents upon opening to ensure all items are present and undamaged:
- Cordless Vacuum Cleaner Host (Main Unit) x 1
- Built-in 2000mAh Battery (6 cells, non-removable)
- Conductive Straight Tube x 1
- Long Crevice Nozzle x 1
- 2-in-1 Combination Brush x 1
- Electric Floor Brush with LED Front Searchlight x 1
- Charger x 1
- Wall Mount Bracket x 1
- HEPA Filter x 2 (one pre-loaded in the body)
- Instruction Manual x 1
- Screws for Wall Mount

Figure 3.1: Included components of the EFAN Dayplus Cordless Vacuum Cleaner.
4. Product Overview
The EFAN Dayplus Cordless Vacuum Cleaner is a versatile 6-in-1 cleaning tool designed for various surfaces and cleaning tasks. It features a powerful motor, multi-stage filtration, and a bendable wand for enhanced maneuverability.
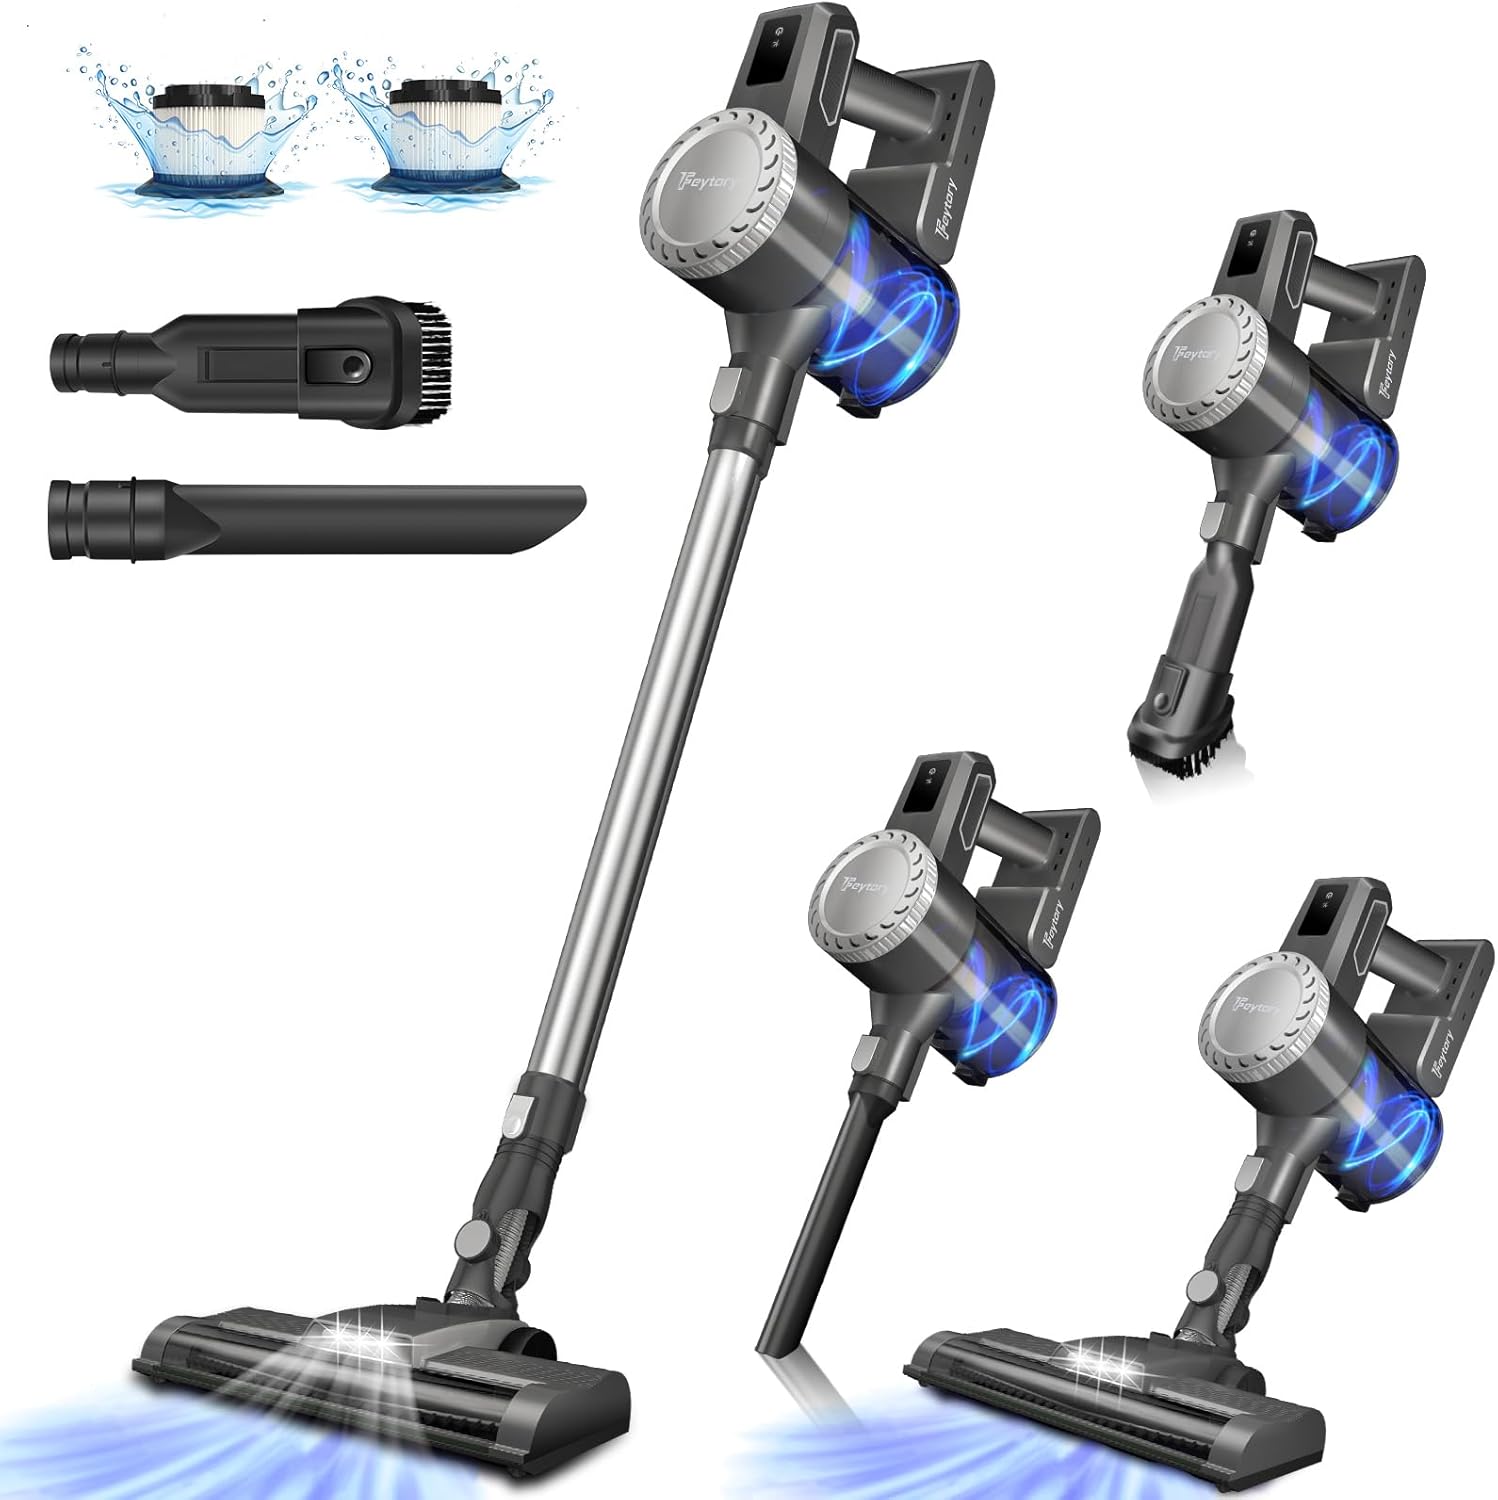
Figure 4.1: The EFAN Dayplus Cordless Vacuum Cleaner in different assembly modes.

Figure 4.2: Versatile 6-in-1 configurations for various cleaning needs.
Key Components:
- Main Unit: Contains the motor, dust cup, and battery.
- Conductive Straight Tube: Extends the reach for floor cleaning.
- Electric Floor Brush: Equipped with an independent motor, LED headlights, and a flexible joint for maneuverability.
- Long Crevice Nozzle: Ideal for narrow gaps and corners.
- 2-in-1 Combination Brush: Suitable for upholstery, keyboards, and delicate surfaces.

Figure 4.3: Main unit of the vacuum cleaner.
5. Setup
5.1 Assembly
Follow these steps to assemble your cordless vacuum cleaner:
- Insert the conductive straight tube into the main unit until it clicks securely into place.
- Attach the electric floor brush to the other end of the conductive straight tube, ensuring it clicks into place.
- For handheld use, attach the desired accessory (long crevice nozzle or 2-in-1 combination brush) directly to the main unit.

Figure 5.1: Assembly of the vacuum cleaner components.
5.2 Charging the Battery
Before first use, fully charge the vacuum cleaner. The built-in 2000mAh battery provides approximately 25-45 minutes of runtime depending on the suction mode.
- Connect the charger to the charging port on the main unit.
- Plug the charger into a power outlet.
- The indicator lights on the main unit will show the charging status. Ensure the vacuum is fully charged before use.

Figure 5.2: Battery indicator on the main unit.
6. Operating Instructions
6.1 Power On/Off and Suction Modes
To operate the vacuum cleaner:
- Press the power button on the main unit to turn the vacuum cleaner on. It will typically start in the low suction mode.
- Press the power button again to switch to high suction mode.
- Press the power button a third time to turn the vacuum cleaner off.

Figure 6.1: Suction modes and approximate runtimes.
- Low Gear: Approximately 35-45 minutes runtime, suitable for daily cleaning and lighter debris.
- High Gear: Approximately 25-35 minutes runtime, suitable for stubborn dirt and deeper cleaning.
6.2 Using Attachments and Features
The vacuum cleaner comes with various attachments to suit different cleaning needs:
- Electric Floor Brush: Use for cleaning hard floors and carpets. The LED headlights illuminate dark areas, and its flexible joint allows for easy maneuverability (180° horizontal, 90° vertical).
- Long Crevice Nozzle: Attach directly to the main unit for cleaning tight spaces, corners, and edges.
- 2-in-1 Combination Brush: Use for dusting surfaces, cleaning upholstery, or car interiors.

Figure 6.2: Flexible floor brush for enhanced maneuverability.

Figure 6.3: Examples of various cleaning scenarios with different attachments.
6.3 Emptying the Dust Cup
Empty the dust cup regularly to maintain optimal suction performance. The dust cup has a capacity of 400 ml.
- Ensure the vacuum cleaner is turned off.
- Position the main unit over a trash bin.
- Press the dust cup release button (usually located near the dust cup) to open the bottom flap and empty the contents.
- Close the dust cup flap securely until it clicks.
Note: The dust cup itself is not removable from the main unit for cleaning, only its bottom flap opens for emptying.

Figure 6.4: One-click dust cup emptying.
7. Maintenance
Regular maintenance ensures the longevity and optimal performance of your vacuum cleaner.
7.1 Cleaning the Dust Cup and Filters
The vacuum cleaner features a 5-stage advanced filter system, including HEPA filters, which efficiently captures 99.99% of dust particles. Clean the filters regularly to prevent clogging and maintain suction power.
- Ensure the vacuum cleaner is turned off and unplugged from the charger.
- Twist and pull to remove the filter assembly from the main unit.
- Separate the HEPA filter and the metal mesh filter.
- Tap off loose dirt from both filters.
- Rinse the filters under cold running water until the water runs clear. Do not use detergent.
- Allow the filters to air dry completely for at least 24 hours before reassembling and placing them back into the vacuum cleaner. Ensure they are completely dry to prevent damage to the motor.

Figure 7.1: Multi-stage filtration system and washable HEPA filters.

Figure 7.2: Cleaning the washable HEPA filters.
7.2 Cleaning the Brush Roll
Periodically check the brush roll in the electric floor brush for tangled hair or debris. Remove any obstructions to ensure effective cleaning.
- Ensure the vacuum cleaner is turned off.
- Detach the electric floor brush from the extension tube.
- Locate the brush roll access cover (usually on the bottom of the floor brush) and open it.
- Remove the brush roll and carefully cut away any tangled hair or fibers using scissors.
- Clean any debris from the brush roll housing.
- Reinsert the brush roll and close the access cover securely.
7.3 Battery Care
- Always use the original charger provided with the vacuum cleaner.
- Do not expose the battery to extreme temperatures.
- If storing the vacuum for an extended period, charge it to about 50% and store in a cool, dry place. Recharge every 3-6 months to prevent deep discharge.
8. Troubleshooting
Refer to the table below for common issues and their solutions.
| Problem | Possible Cause | Solution |
|---|---|---|
| Vacuum does not turn on. | Battery is depleted. Power button not pressed correctly. | Charge the battery fully. Ensure the power button is pressed firmly. |
| Low suction power. | Dust cup is full. Filters are clogged. Obstruction in the nozzle or tube. Brush roll is tangled. | Empty the dust cup. Clean or replace the filters. Remove any obstructions. Clean the brush roll. |
| Battery not charging. | Charger not properly connected. Charger or battery fault. | Ensure charger is securely plugged into the vacuum and outlet. Contact customer support if the issue persists. |
| Floor brush not rotating. | Brush roll is jammed. Connection issue. | Clean the brush roll of any obstructions. Ensure the floor brush is securely attached to the tube. |
9. Specifications
| Feature | Specification |
|---|---|
| Brand | EFAN |
| Model | B0CP9C1Z1B |
| Color | Dark Gray |
| Power/Wattage | 210 Watt-hours |
| Voltage | 22.2 Volts (DC) |
| Battery | 7*2000mAh A+ premium battery (built-in) |
| Runtime | High suction: 25-35 minutes; Low suction: 35-45 minutes |
| Suction Power | Up to 23 Kpa |
| Number of Speeds | 2 |
| Dust Cup Capacity | 400 ml |
| Filter Type | HEPA Filter (5-stage system) |
| Noise Level | 80 Decibels |
| Item Weight | 1.95 kg |
| Special Features | HEPA filtration, Lightweight, 180° bendable wand, LED headlight |
| Surface Recommendation | Carpet, Hard Floor |
10. Warranty and Support
For warranty information or technical support, please refer to the purchase documentation or contact the retailer/manufacturer directly. Keep your proof of purchase for any warranty claims.
For further assistance, please visit the EFAN official website or contact their customer service department.