1. Product Overview
The KCO Lighting Green Glass Pendant Light is a modern lighting fixture designed for indoor use. It features a green glass lampshade and brushed gold metal components, offering an elegant and contemporary aesthetic. The fixture includes an adjustable cord for versatile hanging positions and is compatible with various ceiling types.
This pendant light is designed to accommodate an E26 base bulb (included) and operates on 110-240V. While the fixture itself is not dimmable, it can be used with a dimmable E26 bulb and a compatible dimmable switch for adjustable light intensity.
2. Safety Information
WARNING: To reduce the risk of fire, electric shock, or personal injury, always follow these safety precautions:
- Always turn off the power at the main circuit breaker or fuse box before beginning installation or performing any maintenance.
- Consult a qualified electrician if you are unsure about the installation process.
- Ensure all electrical connections are made in accordance with local codes, ordinances, and the National Electric Code (NEC).
- Do not install this fixture in wet or damp locations. It is designed for indoor use only.
- Use only E26 base bulbs with a maximum wattage of 40W (or as specified on the fixture label).
- Do not exceed the recommended wattage to prevent overheating and potential fire hazards.
- Handle glass components with care to avoid breakage.
- Keep flammable materials away from the light fixture when in operation.
3. Package Contents
Verify that all components are present and undamaged before beginning installation. If any parts are missing or damaged, contact KCO Lighting customer service.
- Green Glass Lampshade
- Brushed Gold Metal Lamp Body / Socket Assembly
- Adjustable Cord
- Gold Metal Canopy with Sloped Ceiling Adapter
- Mounting Hardware (screws, wire nuts, etc.)
- E26 Bulb
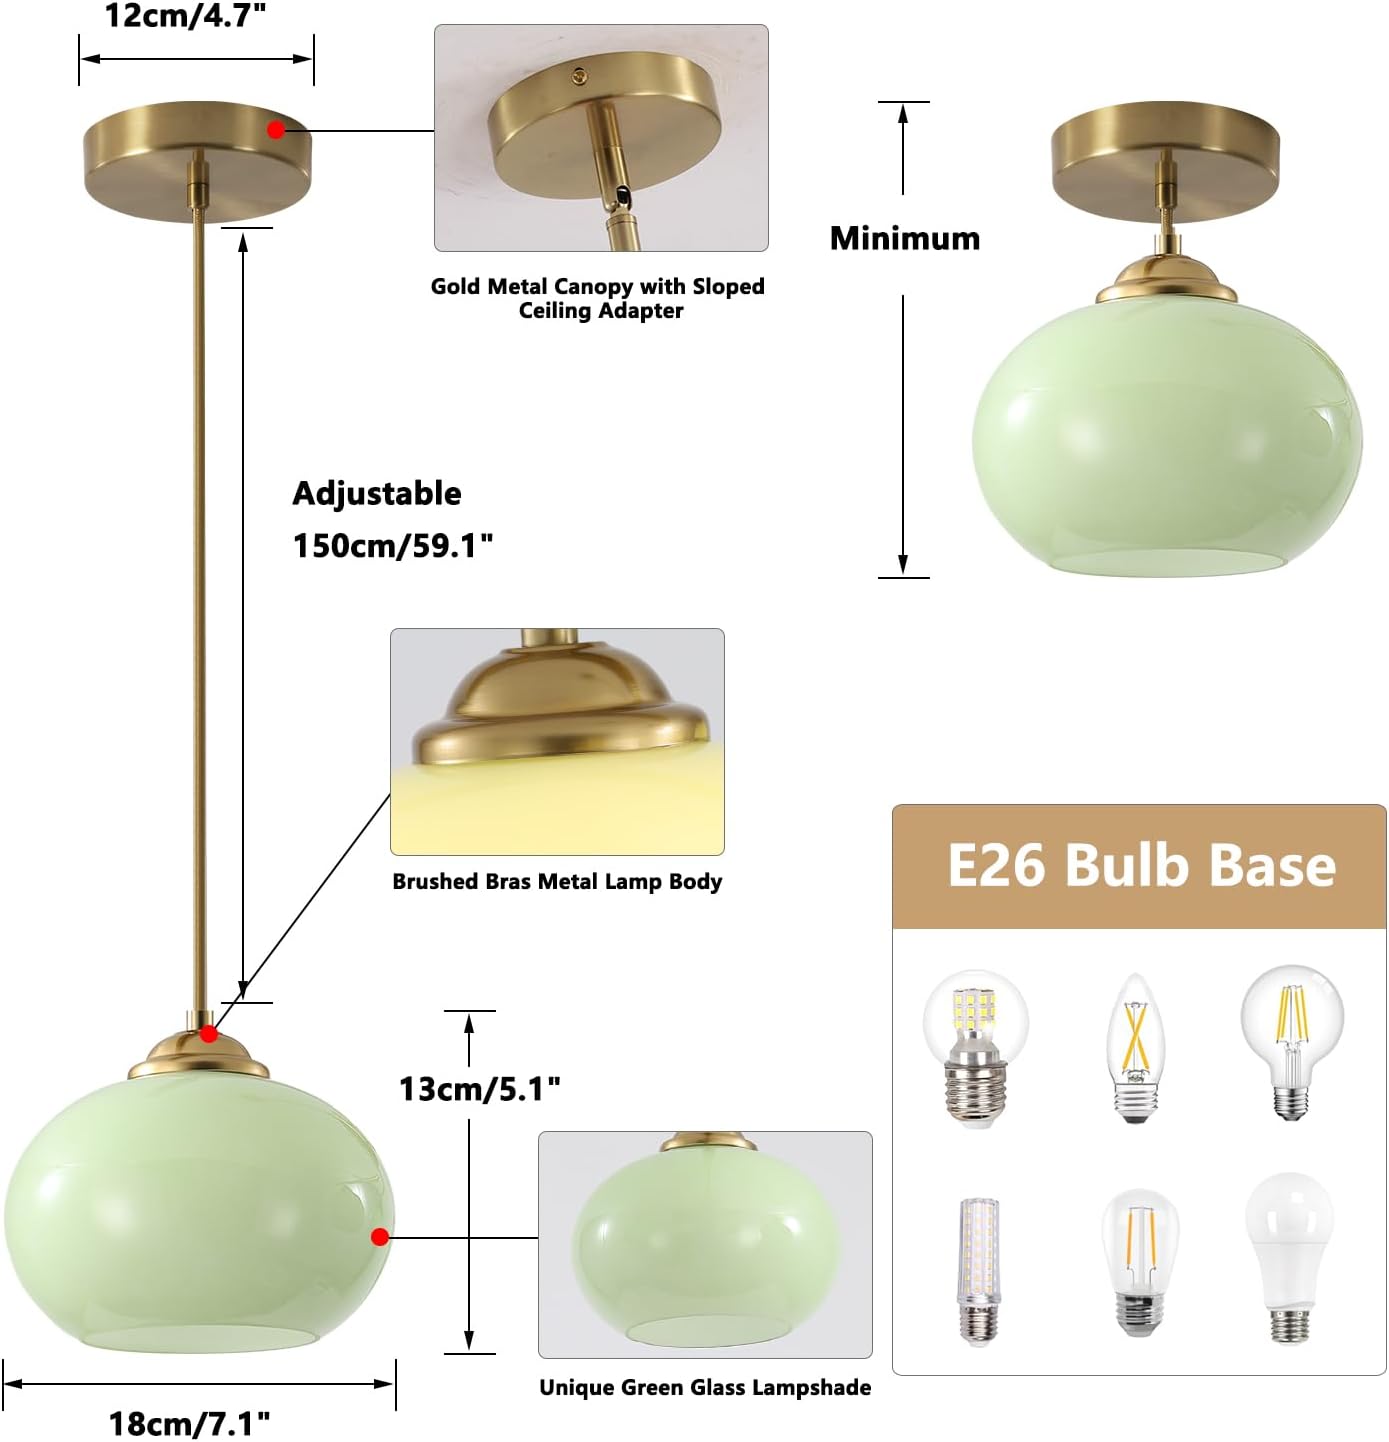
Figure 1: Exploded view of the pendant light components and dimensions.
4. Specifications
| Feature | Specification |
|---|---|
| Brand | KCO |
| Model Number | L1145-G |
| Color | Green (Shade) |
| Material | Glass, Metal |
| Light Fixture Form | Pendant |
| Indoor/Outdoor Usage | Indoor |
| Power Source | Corded Electric |
| Voltage | 110-240 Volts |
| Light Source | LED (Bulb Included) |
| Number of Light Sources | 1 |
| Wattage | Max 40 watts |
| Bulb Base | E26 |
| Adjustable Cord Length | Up to 59.1 inches (150cm) |
| Shade Dimensions (L x W x H) | 7.1"L x 7.1"W x 5.1"H (18cm x 18cm x 13cm) |
| Canopy Diameter | 4.7" (12cm) |
| Mounting Type | Ceiling Mount (Semi Flush Mount) |
| Water Resistance Level | Not Water Resistant |
5. Setup and Installation
Before you begin: Ensure the power is turned off at the circuit breaker. It is recommended to have two people for installation.
Step 1: Prepare the Mounting Location
Locate the existing electrical box in your ceiling. Ensure it is securely mounted and capable of supporting the weight of the fixture. If replacing an old fixture, carefully remove it and disconnect the wiring.
Step 2: Install the Mounting Bracket
Attach the mounting bracket (usually pre-attached to the canopy) to the electrical box using the provided screws. Ensure it is flush and stable.
Step 3: Adjust Cord Length
Determine the desired hanging height for your pendant light. The cord is adjustable up to 59.1 inches (150cm). To adjust, push the cord up into the canopy or pull it down from the canopy until the desired length is achieved. Secure the cord in place within the canopy's strain relief mechanism.
Figure 2: Adjustable cord and overall dimensions.
Step 4: Wire the Fixture
Connect the fixture's wires to the corresponding wires from the electrical box using the provided wire nuts:
- Connect the black wire (hot) from the fixture to the black wire (hot) from the electrical box.
- Connect the white wire (neutral) from the fixture to the white wire (neutral) from the electrical box.
- Connect the ground wire (bare copper or green) from the fixture to the ground wire from the electrical box.
Ensure all connections are secure and no bare wire is exposed. Carefully tuck the wires into the electrical box.
Step 5: Mount the Canopy
Align the canopy with the mounting bracket and secure it to the ceiling using the canopy screws or nuts. Ensure the canopy is flush against the ceiling.
Step 6: Install the Bulb and Glass Shade
Screw the provided E26 bulb into the lamp socket. Carefully attach the green glass lampshade to the lamp body, ensuring it is securely fastened according to the fixture's design (typically by screwing it onto the socket assembly or using retaining rings).

Figure 3: Example of the pendant light installed as a ceiling light.
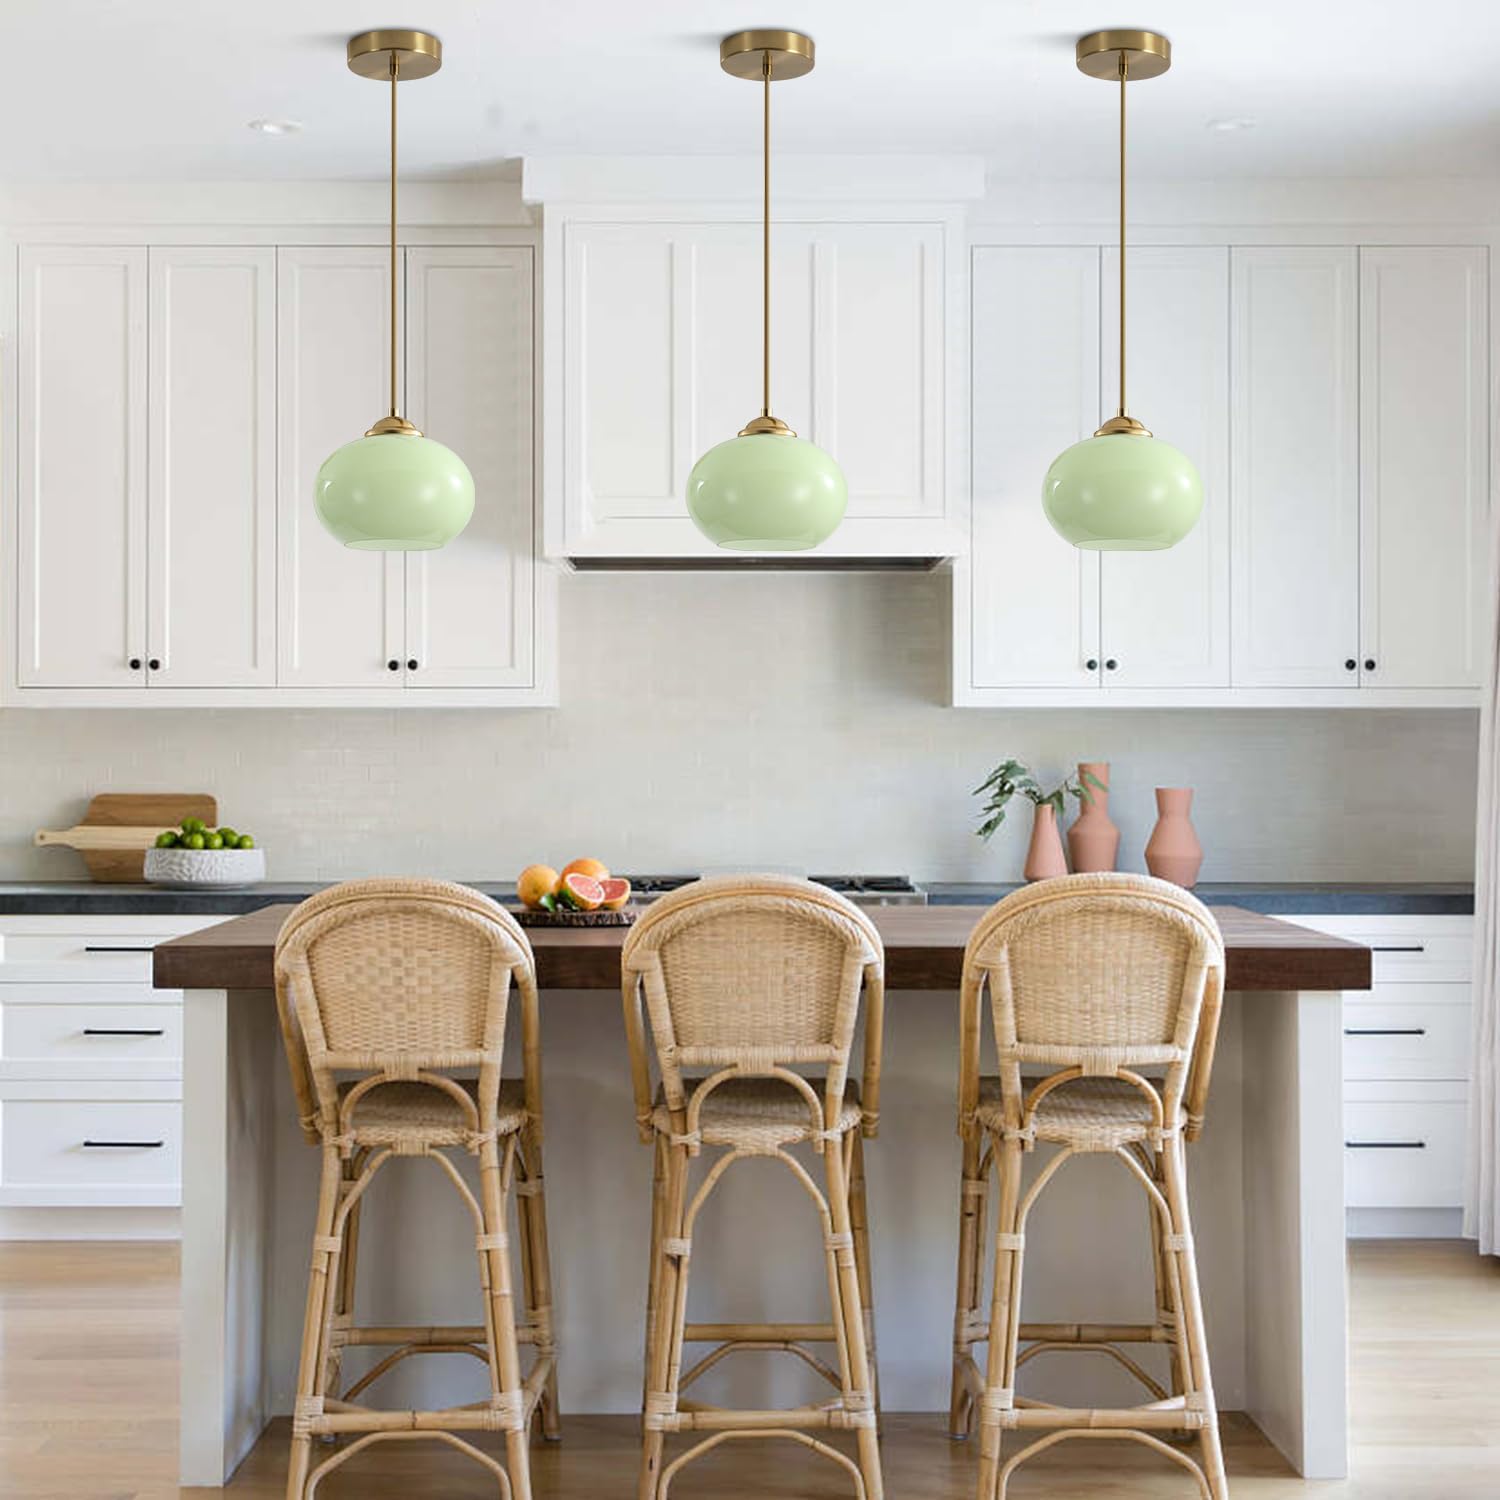
Figure 4: Example of multiple pendant lights installed above a kitchen island.
6. Operating Instructions
Once installation is complete and verified, restore power at the circuit breaker. The light can be operated using a standard wall switch. If you are using a dimmable E26 bulb and a compatible dimmable wall switch, you can adjust the light intensity as desired.

Figure 5: The pendant light demonstrating various light temperatures (bulb dependent).
Note: The fixture itself is not dimmable. Dimmable functionality depends on the bulb and switch used.
7. Maintenance
Cleaning
To clean the fixture, ensure the power is turned off and the light has cooled down. Wipe the metal parts with a soft, dry cloth. For the glass shade, use a soft cloth dampened with a mild glass cleaner. Avoid abrasive cleaners or solvents that could damage the finish.
Bulb Replacement
Before replacing the bulb, turn off the power at the circuit breaker and allow the bulb to cool. Carefully unscrew the old E26 bulb and replace it with a new E26 base bulb, ensuring it does not exceed the maximum wattage of 40W. Hand-tighten the bulb gently.
8. Troubleshooting
| Problem | Possible Cause | Solution |
|---|---|---|
| Light does not turn on |
|
|
| Light flickers |
|
|
| Glass shade is cracked or damaged |
|
|
9. Warranty and Support
KCO Lighting offers a 3-year warranty on this product. This warranty covers manufacturing defects and ensures free replacement for broken, damaged, or cracked glass lampshades, or missing parts.
For any issues, questions, or to request replacement parts, please contact KCO Lighting customer service. You can typically reach them via the order number on the platform where you purchased the product. They aim to provide a solution within 24 hours.
Contact Information: Refer to your purchase platform or the KCO Lighting official website for specific contact details.
10. Product Video
Watch this official product video for a visual guide on the KCO Lighting Green Glass Pendant Light.
Video: KCO Lighting Small Vintage Green Glass Pendant Light. This video showcases the product details, including the brushed brass metal lamp body and green glass lampshade, and provides examples of its application in kitchen and dining areas.