1. Introduction
This manual provides detailed instructions for the installation, operation, and maintenance of your Tennoz 5MP PoE IP Bullet Camera. Please read this manual thoroughly before using the product to ensure correct setup and optimal performance. This camera is designed for outdoor surveillance, offering high-resolution video and advanced detection features.

Figure 1: Tennoz 5MP PoE IP Bullet Camera
2. Product Features
The Tennoz 5MP PoE IP Bullet Camera offers a range of features for effective surveillance:
- 5MP Super HD Resolution: Captures video at 2592 x 1944 pixels, providing clearer images than 1080P, 3MP, or 4MP cameras.
- Power over Ethernet (PoE): Simplifies installation by transmitting both power and data through a single Ethernet cable. A PoE switch or injector is required (not included).
- 2.8mm Fixed Lens: Provides a wide 105-degree viewing angle for broader coverage.
- Advanced Detection: Features 3D Noise Reduction (3D NR), motion detection, human body detection, and vehicle detection to reduce false alerts.
- H.265/H.264 Compression: Supports dual compression standards (default H.265) to optimize storage and bandwidth usage.
- Wide Compatibility: Compatible with various 4K H.265/H.264 PoE NVRs, QNAP, NAS, FTP, Blue Iris, and iSpy. Supports plug-and-play with Hikvision, LTS, EZVIZ, Dahua, Uniview, TVT, and Raysharp NVRs after DHCP is enabled.
- 80ft Night Vision: Equipped with 6 Matrix IR LEDs for clear night vision up to 80 feet (approximately 24 meters).
- IP66 Weatherproof Rating: Durable metal housing ensures protection against dust and water, suitable for outdoor installation.
- Web Browser Support: Accessible via multiple web browsers including IE, Microsoft Edge, Firefox, Google Chrome, and Safari.
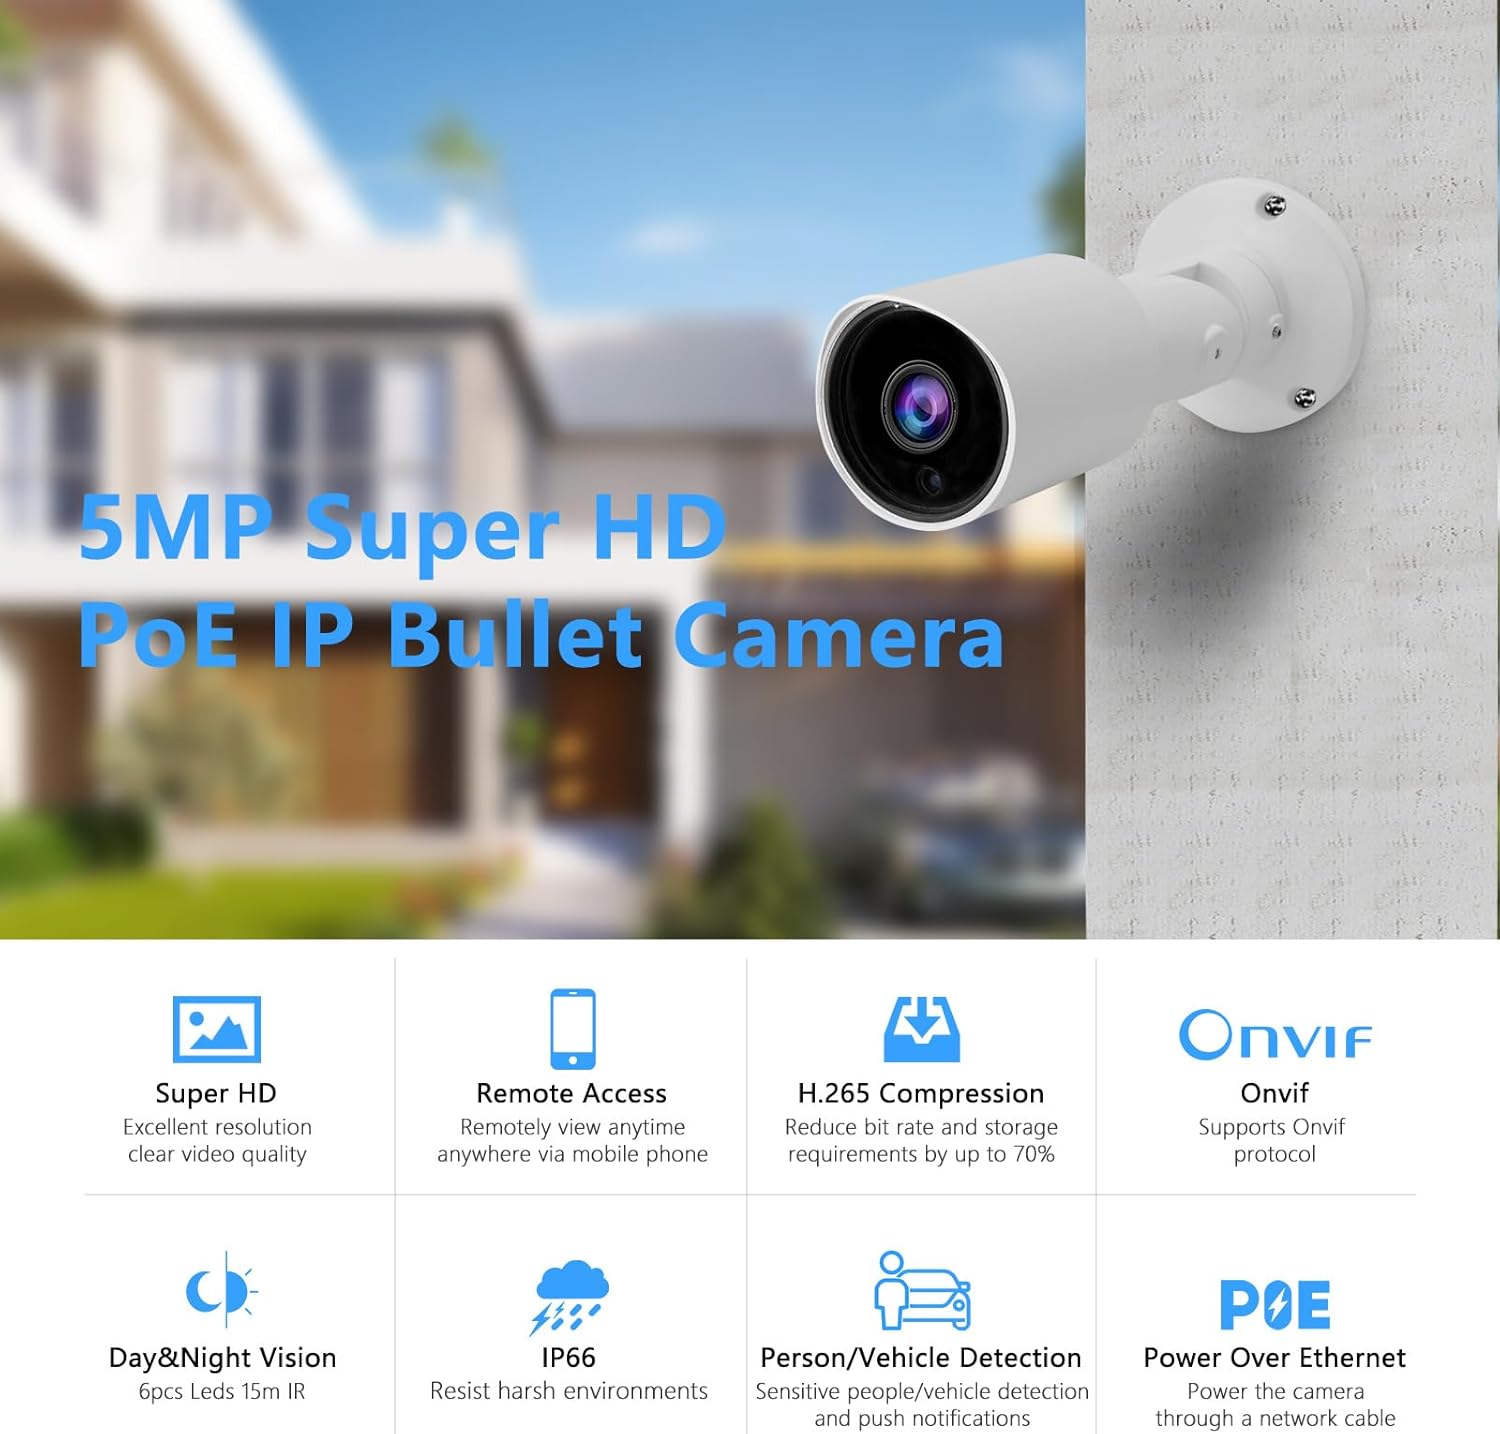
Figure 2: Key Features Overview
3. Setup
3.1 Package Contents
Please verify that all components are present:
- Tennoz 5MP PoE IP Bullet Camera
- Mounting Screws and Wall Plugs
- Waterproof Connector for Ethernet Cable
- Quick Start Guide (this document)
3.2 Physical Installation
- Choose a Location: Select an outdoor location that provides the desired viewing angle and is within reach of your Ethernet cable run. Ensure the camera is mounted securely.
- Mount the Camera: Use the provided screws and wall plugs to securely attach the camera to a wall or ceiling. Adjust the camera's angle for optimal coverage.
- Connect Ethernet Cable: Connect a standard Ethernet cable (Cat5e or Cat6 recommended) to the camera's LAN port. If using PoE, this cable will also supply power. Use the waterproof connector to protect the Ethernet connection from environmental elements.
- Optional DC 12V Power: If not using PoE, connect a 12V DC power adapter (not included) to the DC 12V power port.

Figure 3: Camera Components and Ports
3.3 Network Connection
The camera can be connected to your network in two primary ways:
- Via PoE Switch/Injector: Connect the Ethernet cable from the camera to a PoE port on a PoE switch or PoE injector. Then, connect the PoE switch/injector to your router.
- Via NVR: Connect the Ethernet cable from the camera directly to a PoE port on your compatible NVR. The NVR will provide both power and data connection.

Figure 4: Connecting Camera to PC or NVR

Figure 5: NVR System Connection Diagram
3.4 Initial Access and Configuration
After connecting the camera to your network, you can access it via a web browser or compatible software:
- Find Camera IP: Use a network scanner tool or check your router's DHCP client list to find the camera's assigned IP address. The camera's default DHCP setting is enabled.
- Web Browser Access: Open a web browser (IE, Edge, Firefox, Chrome, Safari) and enter the camera's IP address in the address bar. You will be prompted for login credentials. Refer to the camera's packaging or contact support for default credentials. It is highly recommended to change the default password immediately for security.
- NVR Integration: If using an NVR, follow your NVR's instructions to add the IP camera. The camera supports ONVIF protocol for broad compatibility.
- Mobile App Access: Download the recommended mobile application (if available) from the App Store or Google Play and follow the in-app instructions to add your camera for remote viewing.
4. Operating Instructions
4.1 Live View and Recording
Once configured, you can view live footage and manage recordings through your NVR, dedicated software, or web browser interface. Consult your NVR or software manual for specific recording schedules and playback options.
4.2 Motion and Human/Vehicle Detection
The camera features intelligent detection capabilities:
- Configuration: Access the camera's web interface or NVR settings to configure detection zones, sensitivity levels, and alert actions (e.g., push notifications, email alerts, FTP upload).
- Event Recording: Set up the system to record only when motion, human, or vehicle activity is detected, saving storage space.

Figure 6: Human/Vehicle Detection in action

Figure 7: Person Detection

Figure 8: Motion Detection Alert
4.3 Night Vision
The camera automatically switches to infrared night vision in low-light conditions, providing clear black and white images up to 80 feet.

Figure 9: Day and Night Vision Comparison

Figure 10: Night Vision Range Illustration
4.4 Remote Access
Access your camera feed remotely via the mobile application or web browser. Ensure your network is configured for remote access (e.g., port forwarding if not using cloud services or an NVR with remote access features).
5. Maintenance
- Lens Cleaning: Regularly clean the camera lens with a soft, damp cloth to remove dust and smudges that may affect image clarity. Avoid abrasive cleaners.
- Housing Inspection: Periodically check the camera housing for any signs of damage or loose mounting. Ensure all screws are tight.
- Cable Connections: Verify that all cable connections are secure and free from corrosion or damage, especially the waterproof Ethernet connector.
- Firmware Updates: Check the manufacturer's website for available firmware updates. Keeping your camera's firmware updated can improve performance and security.
6. Troubleshooting
6.1 No Image/Video Feed
- Power Check: Ensure the camera is receiving power. If using PoE, verify the PoE switch/injector is powered on and functioning. If using a DC adapter, check the power supply.
- Network Connection: Confirm the Ethernet cable is securely connected at both ends and that your network is operational. Check network cables for damage.
- IP Address: Verify the camera's IP address is correct and not conflicting with other devices on your network. Use a network scanner to confirm the camera is online.
- NVR/Software Configuration: Ensure the camera is correctly added and configured in your NVR or viewing software.
6.2 Poor Image Quality
- Lens Cleanliness: Clean the camera lens as described in the Maintenance section.
- Resolution Settings: Check the camera's resolution settings in the web interface or NVR. Ensure it is set to 5MP for optimal clarity.
- Lighting Conditions: Ensure adequate lighting during the day. At night, verify IR LEDs are functioning and not obstructed.
- Network Bandwidth: Insufficient network bandwidth can cause choppy or low-quality video. Check your network load.

Figure 11: 5MP vs 2MP Resolution Comparison
6.3 Detection Not Working or False Alarms
- Sensitivity Settings: Adjust the detection sensitivity in the camera's settings. High sensitivity can lead to false alarms from environmental factors (e.g., moving branches, shadows).
- Detection Zones: Configure specific detection zones to monitor only relevant areas and exclude areas with constant movement.
- Firmware: Ensure the camera's firmware is up to date, as updates often include improvements to detection algorithms.
6.4 Login Issues / Default Credentials
- Default Password: If you cannot log in, refer to the product packaging or contact Tennoz support for the default username and password. It is crucial to change these immediately after initial setup.
- Password Reset: If you have forgotten your password, consult the manufacturer's website or contact support for password reset procedures.
7. Specifications
| Feature | Specification |
|---|---|
| Effective Still Resolution | 5 MP (2592 x 1944) |
| Lens | 2.8mm Fixed Lens |
| Wide Angle | 105° |
| Night Vision Range | 80 Feet (approx. 24 meters) with 6 Matrix IR LEDs |
| Video Compression | H.265/H.264 |
| Connectivity Technology | Ethernet (PoE) |
| International Protection Rating | IP66 (Weatherproof) |
| Detection Features | 3D NR, Motion Detection, Human Body Detection, Vehicle Detection |
| Compatible Devices | Smartphone, NVRs (Hikvision, LTS, EZVIZ, Dahua, Uniview, TVT, Raysharp), QNAP, NAS, FTP, Blue Iris, iSpy |
| Mounting Type | Wall Mount |
| Power Source | Corded Electric (PoE or DC 12V) |
| Product Dimensions | 3.07 x 3.07 x 7.17 inches (78 x 78 x 182 mm) |
| Item Weight | 1.01 pounds (0.46 kg) |
| Color | White |

Figure 12: Detailed Product Dimensions
8. Warranty and Support
Tennoz provides a 1-year warranty for this PoE bullet IP camera. If you encounter any issues or have questions regarding your camera, please contact our customer service team. You can also leave your question on the product page, and we will assist you.
For technical support or warranty claims, please refer to the contact information provided with your purchase or visit the official Tennoz website.