

1. Safety Instructions
Read all instructions thoroughly before operating the appliance. Failure to follow these instructions may result in property damage, personal injury, or death.
- This appliance is for commercial use only.
- Ensure proper ventilation. Do not operate in an enclosed space.
- Only qualified personnel should install and service this gas appliance.
- Keep flammable materials away from the appliance.
- Surfaces will be hot during and after operation. Use caution and appropriate protective gear.
- Disconnect from power and gas supply before cleaning or maintenance.
- Do not spray water directly onto the control panel or electrical components.
2. Product Overview
The Cooler Depot KJ-2R is a commercial gas rotisserie oven designed for cooking poultry and other meats. It features a durable stainless steel structure, gas-fired burners, and internal illumination for monitoring the cooking process.
Key Features:
- Stainless steel construction for durability and hygiene.
- Gas-fired burners for efficient cooking.
- Transparent front and back toughened glass for product visibility.
- Internal illuminated light for better view of grilled chicken.
- Electronic ignition for instant and safe lighting of burners.
- Stainless steel crumb tray to collect grease.
- Equipped with rotisserie skewers; optional baskets are available.

Image: Front-right view of the rotisserie oven, showing the protective glass shield and overall design.

Image: Close-up of the control panel, featuring a temperature knob, power indicator, and switches for heating and ignition.

Image: Interior view of the oven, showing the rotisserie skewers and the gas burner element at the bottom.
3. Setup
3.1 Unpacking
Carefully remove the rotisserie oven from its packaging. Inspect for any shipping damage. Retain packaging for future transport if necessary.
3.2 Placement
- Place the oven on a stable, level, non-combustible surface.
- Ensure adequate clearance from walls and other equipment for proper ventilation and heat dissipation.
- The appliance must be installed under an appropriate ventilation hood in accordance with local codes.
3.3 Gas Connection
This appliance is designed for use with Natural Gas or Propane, as specified on the product label. Gas connection must be performed by a licensed professional in accordance with all local and national gas codes.
- Ensure the gas supply pressure matches the appliance requirements.
- Connect the gas line to the inlet at the rear of the unit.
- Check all connections for leaks using a soap solution. Never use an open flame.

Image: Close-up of the threaded gas inlet connection point located on the side of the rotisserie oven.
3.4 Electrical Connection
Connect the appliance to a grounded 120VAC, 60Hz electrical outlet. Ensure the circuit can handle the appliance's power requirements.
3.5 Initial Cleaning
Before first use, clean the interior and exterior surfaces with a mild detergent and warm water. Rinse thoroughly and dry. Operate the unit empty for 15-20 minutes at maximum temperature to burn off any manufacturing residues. Ensure adequate ventilation during this process.
4. Operating Instructions
4.1 Pre-heating
- Ensure the gas supply is open and the unit is plugged in.
- Turn the main power switch ON. The power indicator light will illuminate.
- Set the desired cooking temperature using the temperature control knob.
- Press the ignition switch. The igniting light will come on, and the burners will ignite.
- Allow the oven to pre-heat to the set temperature, typically 15-20 minutes.
4.2 Loading Product
- Carefully load seasoned poultry or other meats onto the rotisserie skewers. Ensure even distribution for balanced rotation.
- Insert the loaded skewers into the rotisserie mechanism inside the oven.
- Close the glass door securely.
4.3 Cooking Process
- Monitor the cooking process through the transparent glass door. The internal light can be turned on for better visibility.
- Adjust the temperature as needed using the control knob.
- Cooking times will vary based on product type, size, and desired doneness. Refer to standard cooking guidelines for specific products.
4.4 Shut Down
- Once cooking is complete, turn the temperature control knob to the OFF position.
- Turn off the ignition switch and the main power switch.
- Close the gas supply valve.
- Allow the unit to cool down before unloading product or cleaning.
5. Maintenance
5.1 Daily Cleaning
- Ensure the unit is cool and disconnected from power and gas.
- Remove the crumb tray and empty it. Wash with warm, soapy water.
- Remove rotisserie skewers and wash them thoroughly.
- Wipe down the interior surfaces with a damp cloth and mild detergent. Avoid abrasive cleaners.
- Clean the exterior stainless steel surfaces with a stainless steel cleaner.
- Clean the glass doors with a non-abrasive glass cleaner.
5.2 Regular Inspection
- Periodically inspect gas lines and connections for wear or leaks.
- Check electrical cords for damage.
- Ensure all moving parts of the rotisserie mechanism operate smoothly.
6. Troubleshooting
- Unit Not Heating: Check gas supply, ensure gas valve is open. Verify electrical connection and power switch. Check if ignition light is on.
- Rotisserie Not Turning: Ensure the rotisserie motor is powered on (if separate switch). Check for obstructions or overloaded skewers.
- Burners Not Igniting: Ensure gas supply is open. Check electrical connection for the igniter. If electronic ignition fails, consult a professional.
- Excessive Smoke: Ensure crumb tray is clean. Reduce fat content of product or adjust cooking temperature.
For issues not resolved by these steps, contact a qualified service technician or Cooler Depot customer support.
7. Specifications
The following table outlines the technical specifications for the Cooler Depot KJ-2R Commercial Gas Rotisserie Oven.
| Feature | Specification |
|---|---|
| Model | KJ-2R |
| Product Dimensions (WxDxH) | 1010 x 834 x 810 mm (39.8 x 32.8 x 32 inch) |
| Voltage / Frequency | 120V / 60Hz |
| Total BTU/HR | 32,000 BTU |
| Packing Dimensions (WxDxH) | 1140 x 970 x 890 mm (45 x 38 x 35 inch) |
| Net Weight (NW) | 90 kgs (198 lbs) |
| Gross Weight (GW) | 114 kgs (250 lbs) |
| Gas Type | Natural Gas / Propane (field convertible by professional) |
| Manifold Pressure | 4" W/C |
| Orifice Size | #48 |
| Max Pressure | 7" W/C |
| Certifications | ETL US (Conforms to ANSI STD Z83.11, CSA STD 1.8), ETL Sanitation (Conforms to NSF/ANSI Std. 4) |
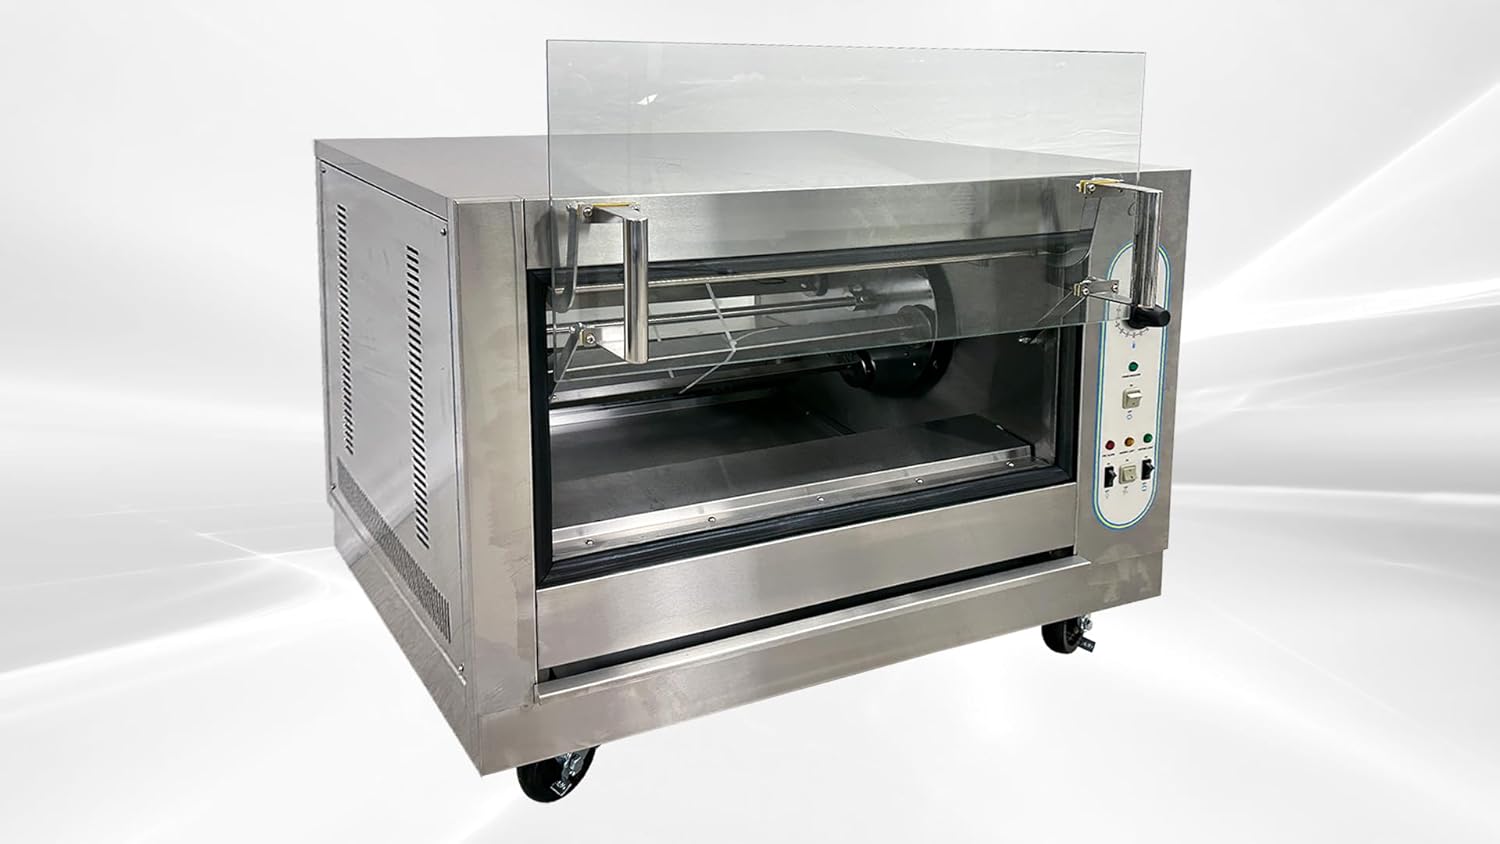
Image: Diagram and specification sheet for the Cooler Depot KJ-2R, detailing dimensions, power, and BTU ratings.

Image: Close-up of the product label, showing model KJ-2R, gas type, electrical rating (120VAC, 60Hz), and ETL certifications.
8. Warranty and Support
This Cooler Depot product is covered by a manufacturer's warranty. Please refer to the warranty card included with your purchase for specific terms and conditions. For technical assistance, parts, or service inquiries, please contact Cooler Depot USA customer support.
Cooler Depot USA
14923 Proctor Ave, City of Industry CA 91746
Email: products@coolerdepotusa.com
Phone: (626) 336-0400, (626) 827-6793, (626) 800-8109, (626) 506-1381, (626) 800-7215, (626) 665-1926
Note: Contact information is provided for support purposes and is based on available product details.


