1. Introduction
This manual provides detailed instructions for the safe and effective operation, maintenance, and troubleshooting of your LLAVETOR Digital Torque Wrench. Please read this manual thoroughly before using the tool to ensure proper function and to prevent damage or injury.
The LLAVETOR Digital Torque Wrench is designed for precise torque applications, offering high accuracy and multiple features for various maintenance tasks, including bicycle, motorcycle, and car repairs.
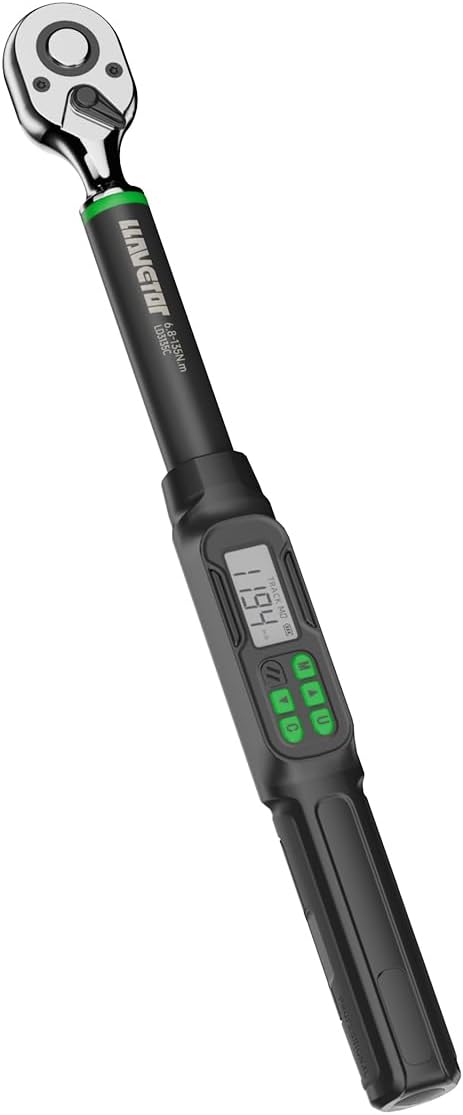
Figure 1: LLAVETOR Digital Torque Wrench (Model LLAVETOR-LD)

Figure 2: Overview of key features including high accuracy, 72-tooth ratchet, bi-directional operation, backlight, 4 units, alert function, 2 modes, and auto shut-off.

Figure 3: The digital torque wrench is suitable for versatile use in various maintenance tasks.
2. Safety Information
Always observe the following safety precautions to prevent injury or damage to the tool and the item being worked on:
- Wear appropriate personal protective equipment (PPE), such as safety glasses.
- Do not exceed the maximum torque capacity of the wrench (99.5 ft-lbs for this model).
- Ensure the socket is correctly seated on the drive and the fastener.
- Avoid dropping the wrench. While durable, impacts can affect calibration.
- Keep the wrench clean and dry. Do not expose it to excessive moisture or extreme temperatures.
- Store the wrench in its protective case when not in use.
3. Product Overview
3.1 Components and Display
Familiarize yourself with the various parts of your digital torque wrench:

Figure 4: Key components including socket release, clockwise/counter-clockwise switch, ratchet drive, up/down key, unit switch, model button, power on/clear button, anti-slip handle, and battery compartment.
- Ratchet Drive: 1/2-inch square drive for attaching sockets.
- Socket Release Button: For quick and easy socket changes.
- Direction Switch: Toggles between clockwise and counter-clockwise operation.
- Digital Display: Shows torque values, unit modes, and battery status.
- Control Buttons:
- M (Model/Preset): Selects preset torque values (M0-M9).
- U (Unit/Mode): Switches between torque units (N-m, in-lb, ft-lb, kg-cm) and Track/Peak modes.
- Up/Down Arrows: Adjusts torque values.
- C (Power On/Clear): Powers the wrench on/off and clears settings.
- LED Indicators: Provide visual alerts as target torque is approached.
- Buzzer: Provides audible alerts.
- Anti-slip Handle: Ensures a secure grip during use.
4. Setup
4.1 Battery Installation
The wrench requires two (2) AAA batteries (included). Follow these steps to install them:
- Locate the battery compartment cap at the end of the handle.
- Unscrew or open the cap.
- Insert two AAA batteries, ensuring correct polarity (+/-).
- Replace the battery compartment cap securely.

Figure 5: Step-by-step guide for opening the end case, inserting two AA batteries, and pressing the C button to power on.
5. Operating Instructions
5.1 Power On/Off
- To power on, press the C button.
- To power off, press and hold the C button for a few seconds. The wrench also features an automatic sleep mode to conserve battery life after a period of inactivity.
5.2 Selecting Measurement Units
The wrench supports four unit modes: N-m, in-lb, ft-lb, and kg-cm.
- Press the U button repeatedly to cycle through the available units. The selected unit will be displayed on the screen.

Figure 6: Display showing different torque measurement units.
5.3 Track Mode and Peak Hold Mode
The wrench operates in two primary modes:
- Track Mode: Displays the torque value in real-time as force is applied. This is useful for monitoring torque during application.
- Peak Hold Mode: Captures and displays the maximum torque value applied during an operation.
To switch between Track Mode and Peak Hold Mode, press the U button (after selecting the desired unit, if necessary).

Figure 7: Comparison of Track Mode (real-time display) and Peak Mode (maximum value display).

Figure 8: Visual representation of Preset, Track, and Peak operating modes.
5.4 Setting Target Torque and Presets
You can set a specific target torque value and save up to 10 preset values (M0-M9) for repetitive tasks.
- To set a target torque:
- Ensure the wrench is in the desired unit mode.
- Use the Up/Down Arrows to adjust the displayed torque value to your target.
- The wrench will automatically save this as the current target.
- To save/recall a preset (M0-M9):
- Press the M button to cycle through preset memory locations (M0-M9).
- Once a memory location is selected, use the Up/Down Arrows to set the desired torque value for that preset.
- The wrench will automatically save the value to the selected memory location.
- To recall a preset, simply press the M button until the desired preset (e.g., M3) is displayed.

Figure 9: Illustration of the 10 preset torque value groups (M0-M9) for quick selection.
5.5 Target Torque Multi-Alert System
As you approach the preset target torque, the wrench provides both audible and visual warnings:
- Audible Alert: The buzzer will emit a regular beep sound. The frequency of beeps increases as you get closer to the target torque.
- Visual Alert: LED indicator lights will illuminate and change color, signaling proximity to the target torque.
- Stop applying force once the target torque is reached and the alerts indicate completion.
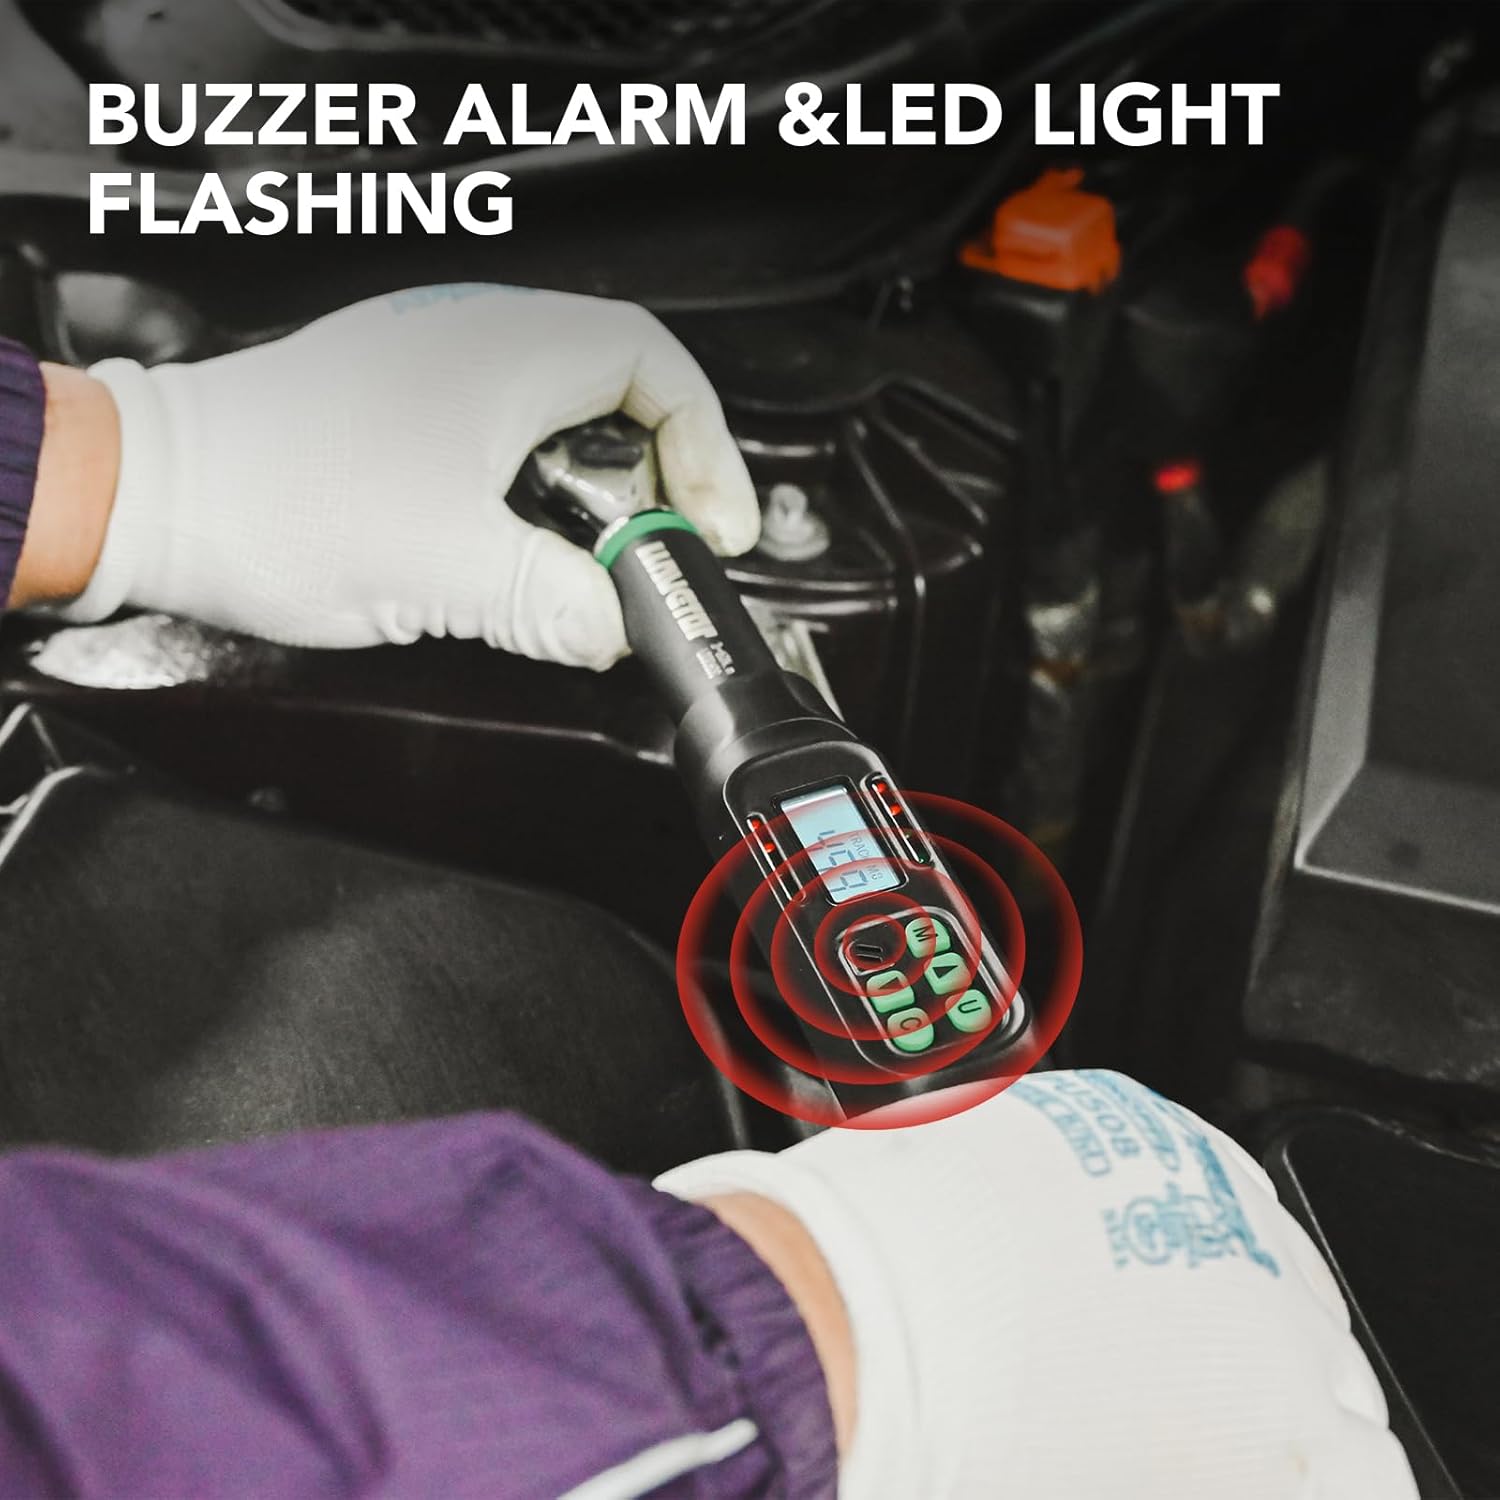
Figure 10: Visual representation of the buzzer alarm and LED light indicators during torque application.
5.6 Lock Mode
To prevent accidental changes to your set torque values, the wrench features a lock mode. Consult the on-screen prompts or specific button combinations (often involving holding down a button like 'M' or 'U' for a few seconds) to activate and deactivate this feature. Refer to the display for lock indicator.

Figure 11: The digital torque wrench in use for automotive maintenance, demonstrating practical application.
5.7 Rapid Socket Replacement
The wrench is designed for quick and easy socket changes. Simply press the socket release button on the ratchet head to detach a socket, and firmly press a new socket onto the square drive until it clicks into place.

Figure 12: Demonstrating the rapid socket replacement feature for efficient workflow.
6. Maintenance
- Cleaning: Wipe the wrench with a clean, dry cloth after each use. Do not use abrasive cleaners or solvents.
- Storage: Store the wrench in its original protective case in a dry, temperature-controlled environment. Remove batteries if storing for extended periods to prevent leakage.
- Calibration: Digital torque wrenches are factory calibrated. For professional use or after significant impact, periodic recalibration by a certified service center is recommended to maintain accuracy.
- Battery Replacement: Replace batteries when the low battery indicator appears on the display.
7. Troubleshooting
| Problem | Possible Cause | Solution |
|---|---|---|
| Wrench does not power on. | Dead or incorrectly installed batteries. | Check battery polarity. Replace with new AAA batteries. |
| Inaccurate torque readings. | Wrench needs recalibration; improper use. | Ensure proper technique. If issues persist, contact customer support for recalibration options. |
| Buzzer/LED alerts not working. | Alerts may be disabled or unit malfunction. | Check settings for alert activation. If still not working, contact customer support. |
| Display is dim or flickering. | Low battery power. | Replace batteries. |
8. Specifications
| Feature | Detail |
|---|---|
| Model | LLAVETOR-LD |
| Drive Size | 1/2-Inch Square Drive |
| Torque Range | 5-99.5 ft-lbs (6.8-135 N-m) |
| Accuracy | ±2% Clockwise, ±3% Counter-clockwise |
| Measurement Units | N-m, in-lb, ft-lb, kg-cm |
| Operating Modes | Track Mode, Peak Hold Mode |
| Preset Memory | 10 groups (M0-M9) |
| Alerts | Audible (Buzzer), Visual (LED) |
| Power Source | 2 x AAA Batteries |
| Material | Chrome Vanadium Steel |
| Length | Approximately 17.5 inches (44.4 cm) |
| Weight | Approximately 3.49 pounds (1.59 kg) |

Figure 13: The wrench's high accuracy of ±2% is crucial for preventing fastener damage.
9. Warranty and Support
For warranty information, technical support, or service inquiries, please refer to the contact information provided with your purchase or visit the official LLAVETOR website. Keep your purchase receipt as proof of purchase.