Introduction
This manual provides instructions for the safe operation, maintenance, and adjustment of your YESWELDER True Color Auto-Darkening Welding Helmet, model LYG-9600A-A. Please read this manual thoroughly before use to ensure proper function and safety.
Safety Information
Welding and cutting processes can be hazardous. Always follow safety precautions to prevent injury. This helmet provides protection for eyes and face from sparks, spatter, and harmful radiation under normal welding conditions. It is not suitable for laser welding or overhead welding applications.
- Always wear appropriate safety glasses under the welding helmet.
- Ensure the helmet is correctly adjusted for your head size and viewing angle.
- Do not use the helmet if the lens is cracked or damaged. Replace immediately.
- The helmet's auto-darkening function relies on battery power. Ensure batteries are charged and functioning.
- Clean the helmet and lens regularly as per maintenance instructions.
- This helmet protects against UV/IR radiation even in the light state (Shade 4).
Product Features
The YESWELDER LYG-9600A-A welding helmet incorporates advanced technology for enhanced safety and visibility.
- True Color View: Provides better clarity and a real color view of the weld puddle.
- Fast Darkening: Rapid response time of 1/30,000 seconds for eye protection.
- Wide Viewing Area: 92.5mm x 42.5mm viewing size.
- Adjustable Shade: Wide shade range from DIN 4/9-13.
- Solar Powered with Replaceable Battery: Utilizes solar energy and a replaceable CR2450 lithium battery.
- Durable Material: Constructed from high-quality PP material.
- Compliance: Meets ANSI Z87.1, EN 379, CSA Z94.3, and EN ISO 16321 standards.
- Comfortable Headgear: Features a rotatable headgear for superior comfort and a lightweight design (500g total weight).

Image: The YESWELDER LYG-9600A-A auto-darkening welding helmet, showcasing its design and key features like True Color, Fast Darkening, PP-Strong Material, Anti-Strong Arc Light, and Battery replacement.

Image: A close-up of the YESWELDER LYG-9600A-A auto-darkening welding helmet, highlighting its distinctive blue lightning graphic design.
Setup
1. Headgear Adjustment
Adjust the headgear for a comfortable and secure fit. The helmet should sit firmly on your head without being too tight. Use the rotatable headgear and four adjustment points (tightness, headgear top, angle, distance) to customize the fit.

Image: Detailed view of the welding helmet's adjustable headgear, showing the oversized comfort cushion and the four adjustment points for tightness, headgear top, angle, and distance.
2. Battery Installation/Check
The helmet is solar-powered and also uses a replaceable CR2450 lithium battery. Before first use, ensure the battery is correctly installed. The low battery indicator will light up when approximately 2-3 days of battery life remain.
- Locate the battery compartment on the auto-darkening lens unit.
- Remove the cover to access the CR2450 battery.
- Insert or replace the battery, ensuring correct polarity.
- Replace the cover securely.

Image: Close-up of the auto-darkening lens unit, showing the test button, low battery indicator, sensitivity control, delay control, and the battery compartment cover. A hand is pressing the test button.
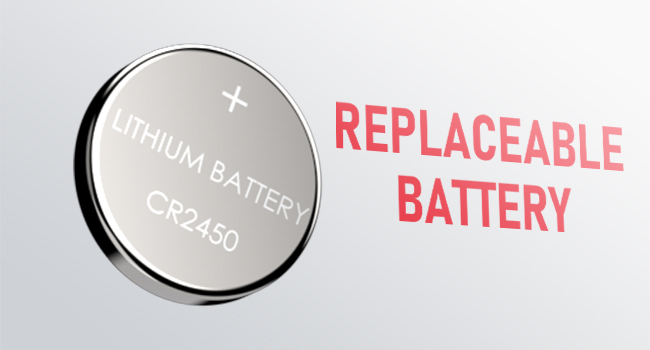
Image: A CR2450 lithium battery, indicating it is replaceable.

Image: The solar panel integrated into the welding helmet lens, illustrating its solar-powered feature for extended battery life.
3. Function Test
Before each use, press the "TEST" button on the lens unit to verify the auto-darkening function. The lens should momentarily darken and then return to its light state.
Operating Instructions
The helmet features controls for sensitivity, delay, and shade to optimize performance for various welding applications.
1. Sensitivity Control
Adjust the sensitivity knob to control how responsive the lens is to welding arc light. Higher sensitivity is suitable for low amperage TIG welding or when the arc is partially obstructed. Lower sensitivity is for high amperage welding or when there is excessive ambient light.
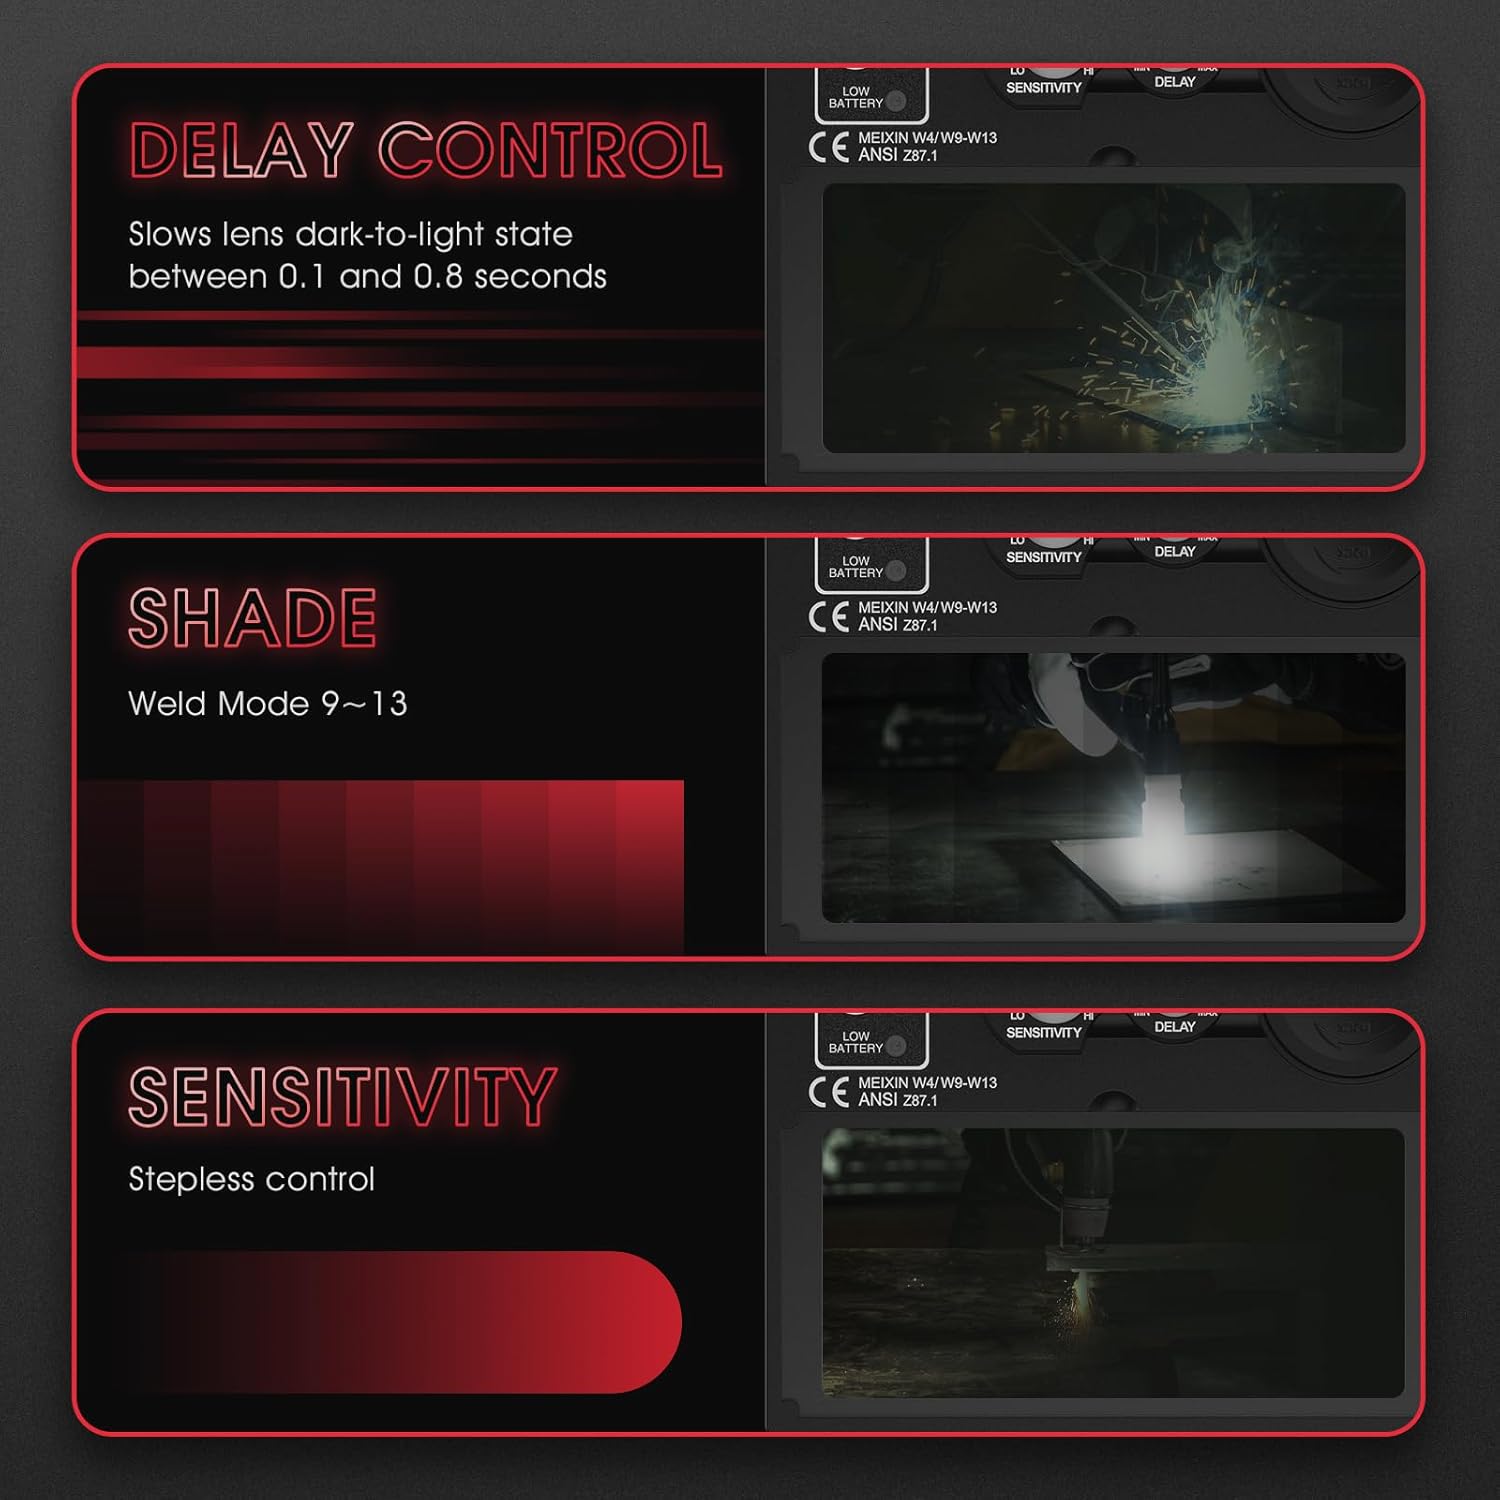
Image: A diagram illustrating the stepless sensitivity control knob on the welding helmet lens, showing its function in adjusting the lens's responsiveness to light.
2. Delay Control
The delay control adjusts the time it takes for the lens to return from the dark state to the light state after the welding arc stops. This can be set between 0.1 and 0.8 seconds. A longer delay helps prevent eye fatigue from afterglow or brief interruptions in the arc.
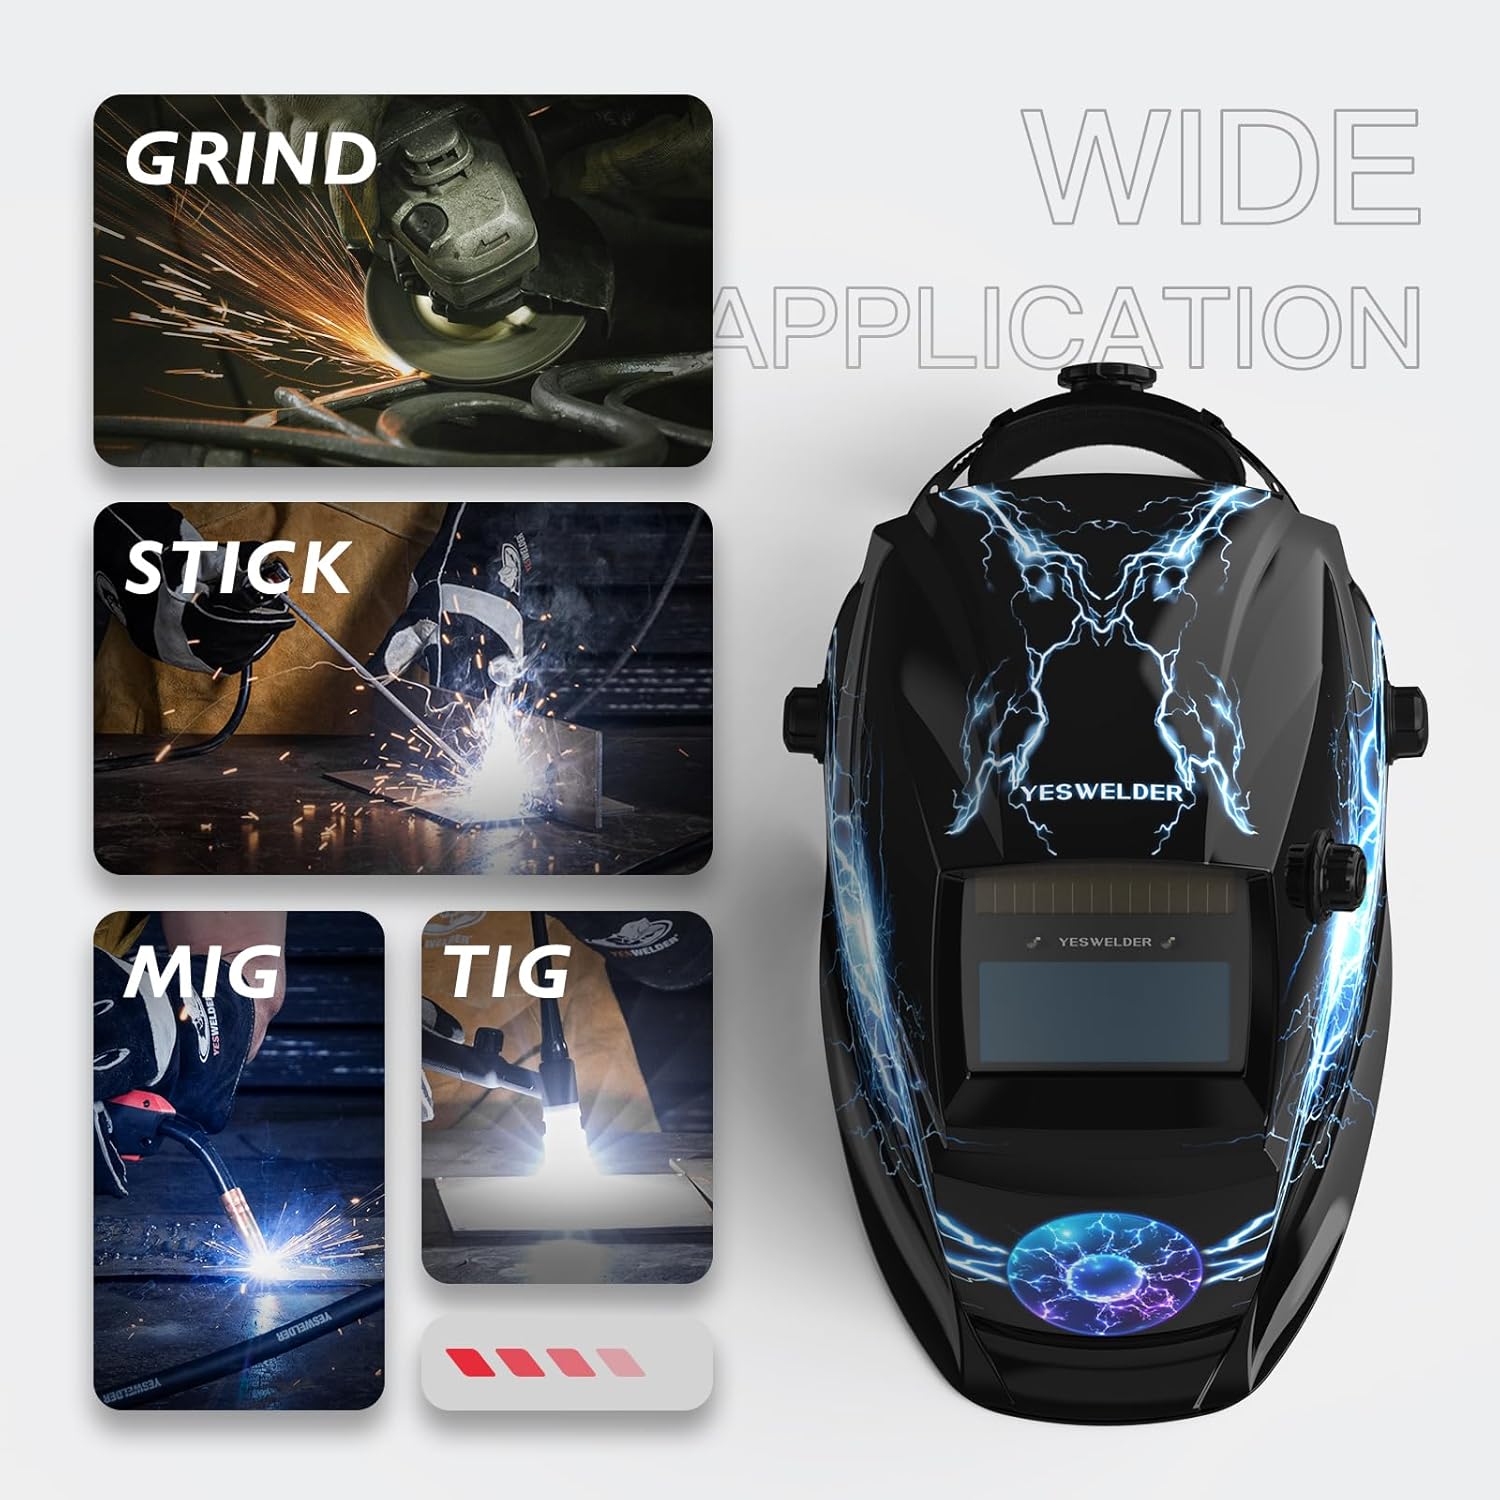
Image: A diagram illustrating the delay control knob on the welding helmet lens, explaining how it slows the lens's dark-to-light transition between 0.1 and 0.8 seconds.
3. Shade Control
The shade control knob allows you to select the appropriate dark shade level for your welding process, ranging from DIN 9 to DIN 13. Refer to welding standards for recommended shade levels based on amperage and welding type (TIG, MIG, ARC, GRIND).

Image: A diagram illustrating the shade control knob on the welding helmet lens, showing the adjustable weld mode from 9 to 13.
4. Welding Modes
This helmet is suitable for various welding and grinding applications:
- GRIND Mode: For grinding operations. The auto-darkening function is deactivated, and the lens remains in its light state (Shade 4).
- STICK (MMA) Mode: For Shielded Metal Arc Welding.
- MIG Mode: For Gas Metal Arc Welding.
- TIG Mode: For Gas Tungsten Arc Welding.

Image: The YESWELDER welding helmet shown alongside illustrations of its wide application suitability for GRIND, STICK, MIG, and TIG welding processes.

Image: A series of four panels depicting the welding helmet lens settings for GRIND, STICK, MIG, and TIG modes, showing the corresponding visual effects through the lens.
Maintenance
1. Cleaning
- Clean the helmet shell with mild soap and water. Avoid harsh solvents.
- Wipe the auto-darkening filter (ADF) lens and cover lenses with a soft, clean cloth. Do not use abrasive materials or cleaning solutions that could damage the lens coatings.
- Regularly inspect the helmet for any damage, cracks, or loose parts.
2. Battery Replacement
When the low battery indicator illuminates, replace the CR2450 lithium battery as described in the "Setup" section. Ensure the helmet is turned off or not exposed to light during replacement to prevent accidental darkening.
3. Storage
Store the helmet in a dry, clean environment away from direct sunlight and extreme temperatures.
Troubleshooting
| Problem | Possible Cause | Solution |
|---|---|---|
| Lens does not darken when arc is struck. |
|
|
| Lens remains dark after arc stops. |
|
|
| Inconsistent darkening. |
|
|
Specifications
| Feature | Detail |
|---|---|
| Model Name | LYG-9600A-A |
| Brand | YESWELDER |
| Viewing Size | 92.5mm x 42.5mm |
| Optical Clarity | 1/1/1/2 (True Color View) |
| Light State Shade | DIN 4 |
| Dark State Shade Range | DIN 9-13 (Adjustable) |
| UV/IR Protection | DIN 16 (Permanent) |
| Switching Time | 1/30,000 seconds |
| Delay Time | 0.1 - 0.8 seconds (Adjustable) |
| Power Supply | Solar Cell & Replaceable CR2450 Lithium Battery |
| Material | Polypropylene (PP) |
| Total Weight | Approximately 500g |
| Standards Compliance | ANSI Z87.1, EN 379, CSA Z94.3, EN ISO 16321 |
| Country of Origin | China |

Image: Illustration of the helmet's passive UV/IR filter, rated at DIN 16, which provides continuous protection regardless of power status.
Support
For further assistance or inquiries regarding your YESWELDER welding helmet, please contact YESWELDER customer support. Refer to the product packaging or the official YESWELDER website for contact details.