1. Introduction
Thank you for purchasing the MUSE M-15 Alarm Clock Radio. This manual provides essential information for the safe and efficient operation of your device. Please read it thoroughly before use and retain it for future reference.
2. Safety Information
- Power Source: Use only the specified battery type (1 AA battery). Ensure correct polarity when inserting batteries.
- Water and Moisture: Do not expose the device to water, rain, or excessive moisture. Avoid placing it near liquids.
- Heat: Keep the device away from heat sources such as radiators, heat registers, stoves, or other apparatus (including amplifiers) that produce heat.
- Cleaning: Clean only with a dry cloth. Do not use liquid cleaners or aerosol cleaners.
- Servicing: Do not attempt to service this product yourself. Refer all servicing to qualified service personnel.
- Disposal: Dispose of batteries and the device according to local regulations. Do not dispose of batteries in fire.
3. Product Overview
Familiarize yourself with the components of your MUSE M-15 Alarm Clock Radio.
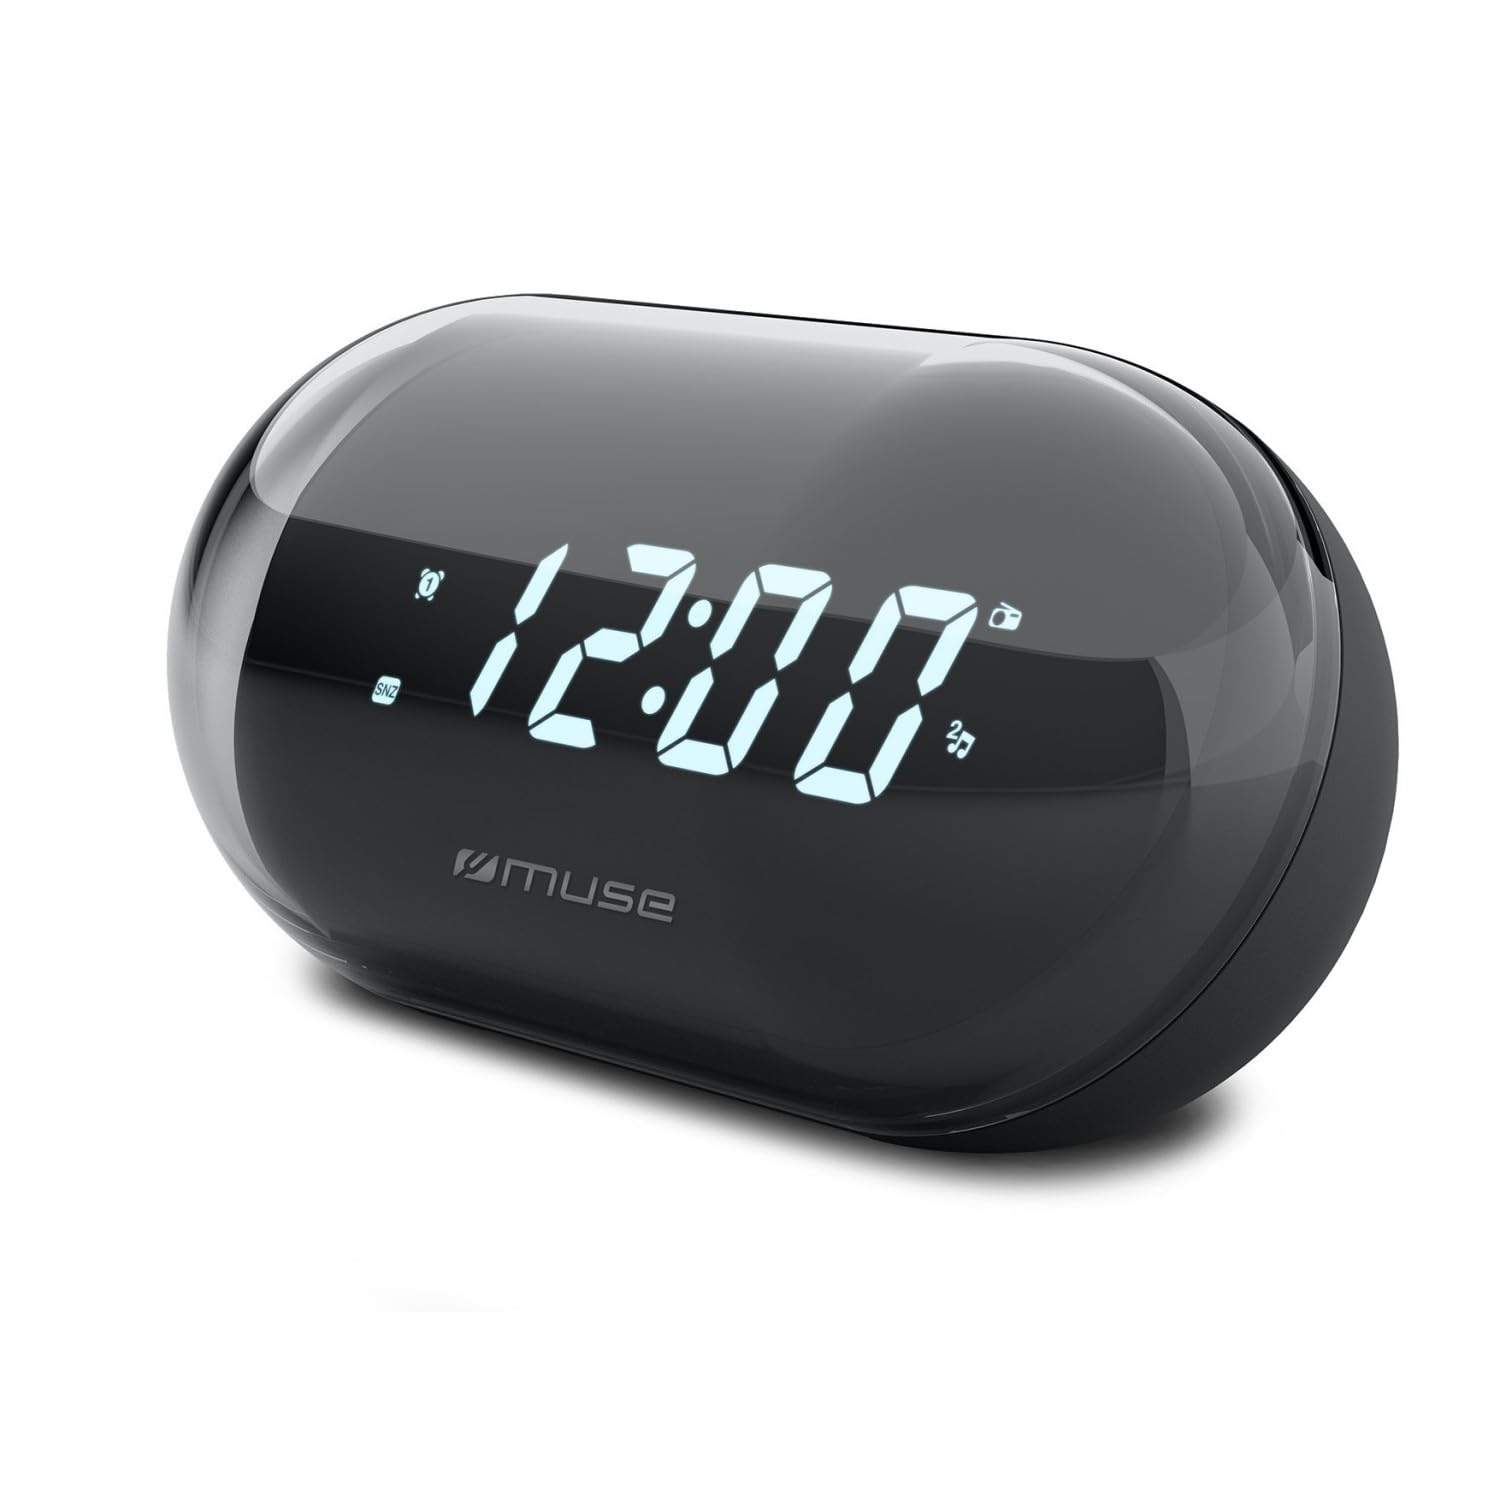
Image: Front view of the MUSE M-15 Alarm Clock Radio, showing the digital display and control buttons.
Controls and Features:
- Digital Display: Shows time, alarm status, and radio frequency.
- Time Set Button: Used to adjust the current time.
- Alarm Set Button: Used to set and activate/deactivate the alarm.
- Tuning Buttons (+/-): Used to adjust radio frequency.
- Volume Control: Adjusts the audio output level.
- Power/Mode Button: Turns the device on/off and switches between radio and clock modes.
- Snooze Button: Temporarily silences the alarm.
- Battery Compartment: Located on the back, for 1 AA battery.
4. Setup
4.1 Battery Installation
- Locate the battery compartment cover on the back of the unit.
- Slide or lift the cover to open the compartment.
- Insert one (1) AA battery, ensuring the correct polarity (+ and -) matches the diagram inside the compartment.
- Replace the battery compartment cover securely.
Note: The MUSE M-15 is battery-powered and does not require an external power adapter.
5. Operating Instructions
5.1 Setting the Time
- In clock mode, press and hold the Time Set Button until the hour digits begin to flash.
- Use the Tuning Buttons (+/-) to adjust the hour. Press the Time Set Button again to confirm the hour and move to minutes.
- Use the Tuning Buttons (+/-) to adjust the minutes. Press the Time Set Button one more time to save the time and exit time setting mode.
5.2 Setting the Alarm
- Press and hold the Alarm Set Button until the alarm hour digits begin to flash.
- Use the Tuning Buttons (+/-) to adjust the alarm hour. Press the Alarm Set Button again to confirm and move to minutes.
- Use the Tuning Buttons (+/-) to adjust the alarm minutes. Press the Alarm Set Button one more time to save the alarm time.
- To activate or deactivate the alarm, briefly press the Alarm Set Button. An alarm icon will appear on the display when activated.
5.3 Using the Radio
- Press the Power/Mode Button to switch to radio mode. The display will show the radio frequency.
- Use the Tuning Buttons (+/-) to manually tune to your desired radio station.
- Adjust the volume using the Volume Control.
- To turn off the radio, press the Power/Mode Button again to return to clock mode or turn off the device.
5.4 Snooze Function
When the alarm sounds, press the Snooze Button to temporarily silence the alarm for a few minutes. The alarm will sound again after the snooze period ends.
6. Maintenance
6.1 Cleaning
Wipe the exterior of the device with a soft, dry cloth. Do not use abrasive cleaners, waxes, or solvents as they may damage the finish.
6.2 Battery Replacement
When the display dims or the device functions become erratic, it is time to replace the battery. Follow the battery installation steps in Section 4.1.
7. Troubleshooting
| Problem | Possible Cause | Solution |
|---|---|---|
| Device does not turn on. | Battery is dead or incorrectly inserted. | Replace the AA battery or check its polarity. |
| Alarm does not sound. | Alarm is not activated or volume is too low. | Ensure the alarm icon is visible on the display. Increase the volume. |
| Poor radio reception. | Weak signal or interference. | Reposition the device or extend the antenna (if applicable). Try tuning to a stronger station. |
| Time/Alarm settings reset. | Battery power is too low. | Replace the AA battery. |
8. Specifications
- Model: MUSE M-15
- Product Dimensions (L x W x H): 15 x 3.81 x 10 cm (5.9 x 1.5 x 3.9 inches)
- Weight: 300 grams (0.66 lbs)
- Power Source: 1 x AA Battery (not included)
- Display Type: Digital
- Features: Alarm, Radio, Digital Time Display
- Mounting Type: Table Mount
9. Warranty and Support
This product is covered by a standard manufacturer's warranty. For detailed warranty information, please refer to the warranty card included with your purchase or visit the official MUSE website.
For technical support, troubleshooting assistance, or spare parts inquiries, please contact MUSE customer service through their official website or the contact information provided in your product packaging.
Please have your model number (M-15) and purchase date available when contacting support.