1. Introduction
The LINGDU AM100 is a 5GHz WiFi 3-channel dash camera designed to provide comprehensive video surveillance for your vehicle. It features 4K resolution recording, advanced parking modes, voice control, and built-in GPS for reliable incident recording and route tracking. This manual provides detailed instructions for setup, operation, and maintenance to ensure optimal performance of your dash cam.
2. Product Overview
The LINGDU AM100 dash cam offers a robust set of features for enhanced driving safety and security:
- Built-in 5GHz WiFi: Connects to your smartphone via the LINGDU App for live view, video playback, sharing, and downloading.
- 4K Resolution Recording:
- Front Camera: 4K (3840x2160P)
- Front and Rear: 4K+1080P
- Front and Inside: 4K+1080P
- Front, Rear, and Inside: 4K+1080P+1080P
- Storage: Includes a 64GB SD card. Supports up to 256GB SD card. Please format the SD card before first use.
- Voice Control: Features 6 English voice commands for easy operation.
- G-Sensor: Automatically detects sudden movements or collisions and locks emergency video files as evidence.
- 24H Parking Mode: Offers Time-lapse parking mode for continuous recording and Collision detection parking mode to record when impacts are detected.
- Super Night Vision: Equipped with an F1.75 aperture for clear recording in low-light conditions.
- Built-in GPS: Accurately records route and driving speed information, viewable via the LINGDU App Player.
- Loop Recording: Automatically overwrites the oldest footage to ensure continuous recording.

Image: Overview of LINGDU AM100 3-Channel Dash Cam features.
3. Package Contents
Verify that all items are present in your package:
- Front Camera
- Cabin Camera
- Rear Camera (6M/20ft cable)
- Car Charger
- 64GB Storage Card
- Mini USB Power Cable (3.5M/12ft)
- Cable Clips/Pry Tool
- 3M Adhesive Bracket
- Electrostatic Films
- User Manual

Image: LINGDU AM100 Package List.
4. Setup and Installation
Follow these steps to properly install your LINGDU AM100 dash cam system:
4.1 Prepare for Installation
- Clean the windshield area where the dash cam will be mounted with isopropyl alcohol to ensure proper adhesion.
- Insert the provided 64GB SD card into the dash cam.
- Format the SD card through the dash cam settings or the LINGDU app before first use.
4.2 Front Camera Installation
- Attach the 3M adhesive bracket to the front camera.
- Mount the front camera on the windshield, ideally behind the rearview mirror, ensuring it does not obstruct your view. Press firmly to secure.
- Connect the Mini USB Power Cable to the front camera.
4.3 Rear Camera Installation (Optional)
- Attach the rear camera to the rear windshield using its adhesive mount. Ensure the lens has a clear view of the road behind.
- Route the rear camera cable along the headliner and A-pillar, down to the main dash cam unit. Use the provided cable clips and pry tool to neatly tuck away the cable.
- Connect the rear camera cable to the designated port on the front camera.
4.4 Cabin Camera Installation (Optional)
- Attach the cabin camera to the front camera unit or a suitable location inside the cabin, ensuring it captures the interior of the vehicle.
- Connect the cabin camera cable to the designated port on the front camera.
4.5 Power Connection
- Route the Mini USB Power Cable from the front camera along the windshield edge, down the A-pillar, and under the dashboard to your car's cigarette lighter socket or a hardwire kit (sold separately for 24H parking mode).
- Plug the car charger into the vehicle's power outlet.

Image: Easy Installation Guide.

Image: Adjustable Lenses for Triple Channels.
4.6 Installation Video Guide
For a visual guide on the installation process, please watch the video below:
Video: LINGDU AM100 Dash Cam Installation and App Usage Guide.
This video demonstrates the physical installation of the dash cam, including mounting the main unit, routing cables for the rear and cabin cameras, and connecting to power. It also shows how to connect the dash cam to the LINGDU app, view live video, and download recorded footage. The video highlights the clear 4K resolution and the ease of accessing recordings.
5. Operating Instructions
5.1 Power On/Off
- The dash cam will automatically power on and begin recording when your vehicle's ignition is turned on.
- It will power off automatically when the ignition is turned off.
5.2 Recording Modes
- Loop Recording: The camera continuously records, overwriting the oldest files when the SD card is full. Video clips are typically 1, 3, or 5 minutes long (configurable in settings).
- G-Sensor (Emergency Recording): In the event of a sudden impact or collision, the G-Sensor will automatically trigger and lock the current video segment, preventing it from being overwritten.
- 24H Parking Mode:
- Time-lapse Parking Mode: Records continuously at a low frame rate (e.g., 1fps) to save storage space while covering extended periods. Requires a hardwire kit.
- Collision Detection Parking Mode: The camera remains in standby and starts recording only when an impact is detected.

Image: Loop Recording Functionality.

Image: 24 Hours Parking Mode.
5.3 Voice Control
The AM100 supports 6 English voice commands for hands-free operation. Refer to the on-screen prompts or the LINGDU App for specific commands.
5.4 LINGDU App Connection
- Download the "LINGDU" app from your smartphone's app store.
- Enable 5GHz WiFi on your smartphone.
- Open the LINGDU app and connect to the dash cam's WiFi network (e.g., "AM100-3CH_XXXX").
- Once connected, you can view live video, access recorded files, download videos to your phone, and adjust settings.

Image: Built-in 5.8GHz WiFi Connectivity.
5.5 Built-in GPS
The integrated GPS module records your vehicle's route and speed. This data can be reviewed within the LINGDU App Player, providing valuable information for incident reconstruction.

Image: Built-in GPS Tracking.
6. Maintenance
- SD Card Maintenance: Regularly format the SD card (at least once a month) to prevent data corruption and ensure optimal recording performance. Replace the SD card every 6-12 months, depending on usage, as they have a limited lifespan.
- Lens Cleaning: Keep the camera lenses clean from dust and smudges using a soft, lint-free cloth.
- Firmware Updates: Check the LINGDU website or app periodically for firmware updates to ensure your dash cam has the latest features and bug fixes.
- Operating Temperature: Avoid exposing the dash cam to extreme temperatures for prolonged periods.
7. Troubleshooting
- Dash Cam Not Powering On: Check the power connection to the car charger and ensure the vehicle's ignition is on. Test the car charger in another port or with another device.
- Recording Issues: Ensure the SD card is properly inserted and formatted. If issues persist, try a new, high-quality SD card (U3 or higher).
- WiFi Connection Problems: Ensure 5GHz WiFi is enabled on your phone. Restart both the dash cam and your phone. Verify you are connecting to the correct dash cam WiFi network.
- Poor Video Quality: Clean the camera lenses. Ensure the protective film has been removed from the lenses. Check the video resolution settings in the app.
- Voice Control Not Responding: Ensure you are using the correct English commands clearly. Check the microphone settings in the app.
8. Specifications
| Feature | Specification |
|---|---|
| Brand | LINGDU |
| Model Name | AM100-3CH |
| Connectivity Technology | Wi-Fi (5GHz) |
| Video Capture Resolution | 4K+1K+1K (Front: 4K, Front+Rear: 4K+1080P, Front+Inside: 4K+1080P, Front+Rear+Inside: 4K+1080P+1080P) |
| Special Feature | Built-in 5GHz WiFi, GPS, G-Sensor, Super Night Vision, 24H Parking Mode, Voice Control |
| Included Components | GPS, 64GB SD Card (Max 256GB Support) |
| Mounting Type | Windshield Mount |
| Control Method | Voice |
| Frame Rate | 30 FPS |
| Item Dimensions (D x W x H) | 7.08"D x 8.07"W x 2.52"H |
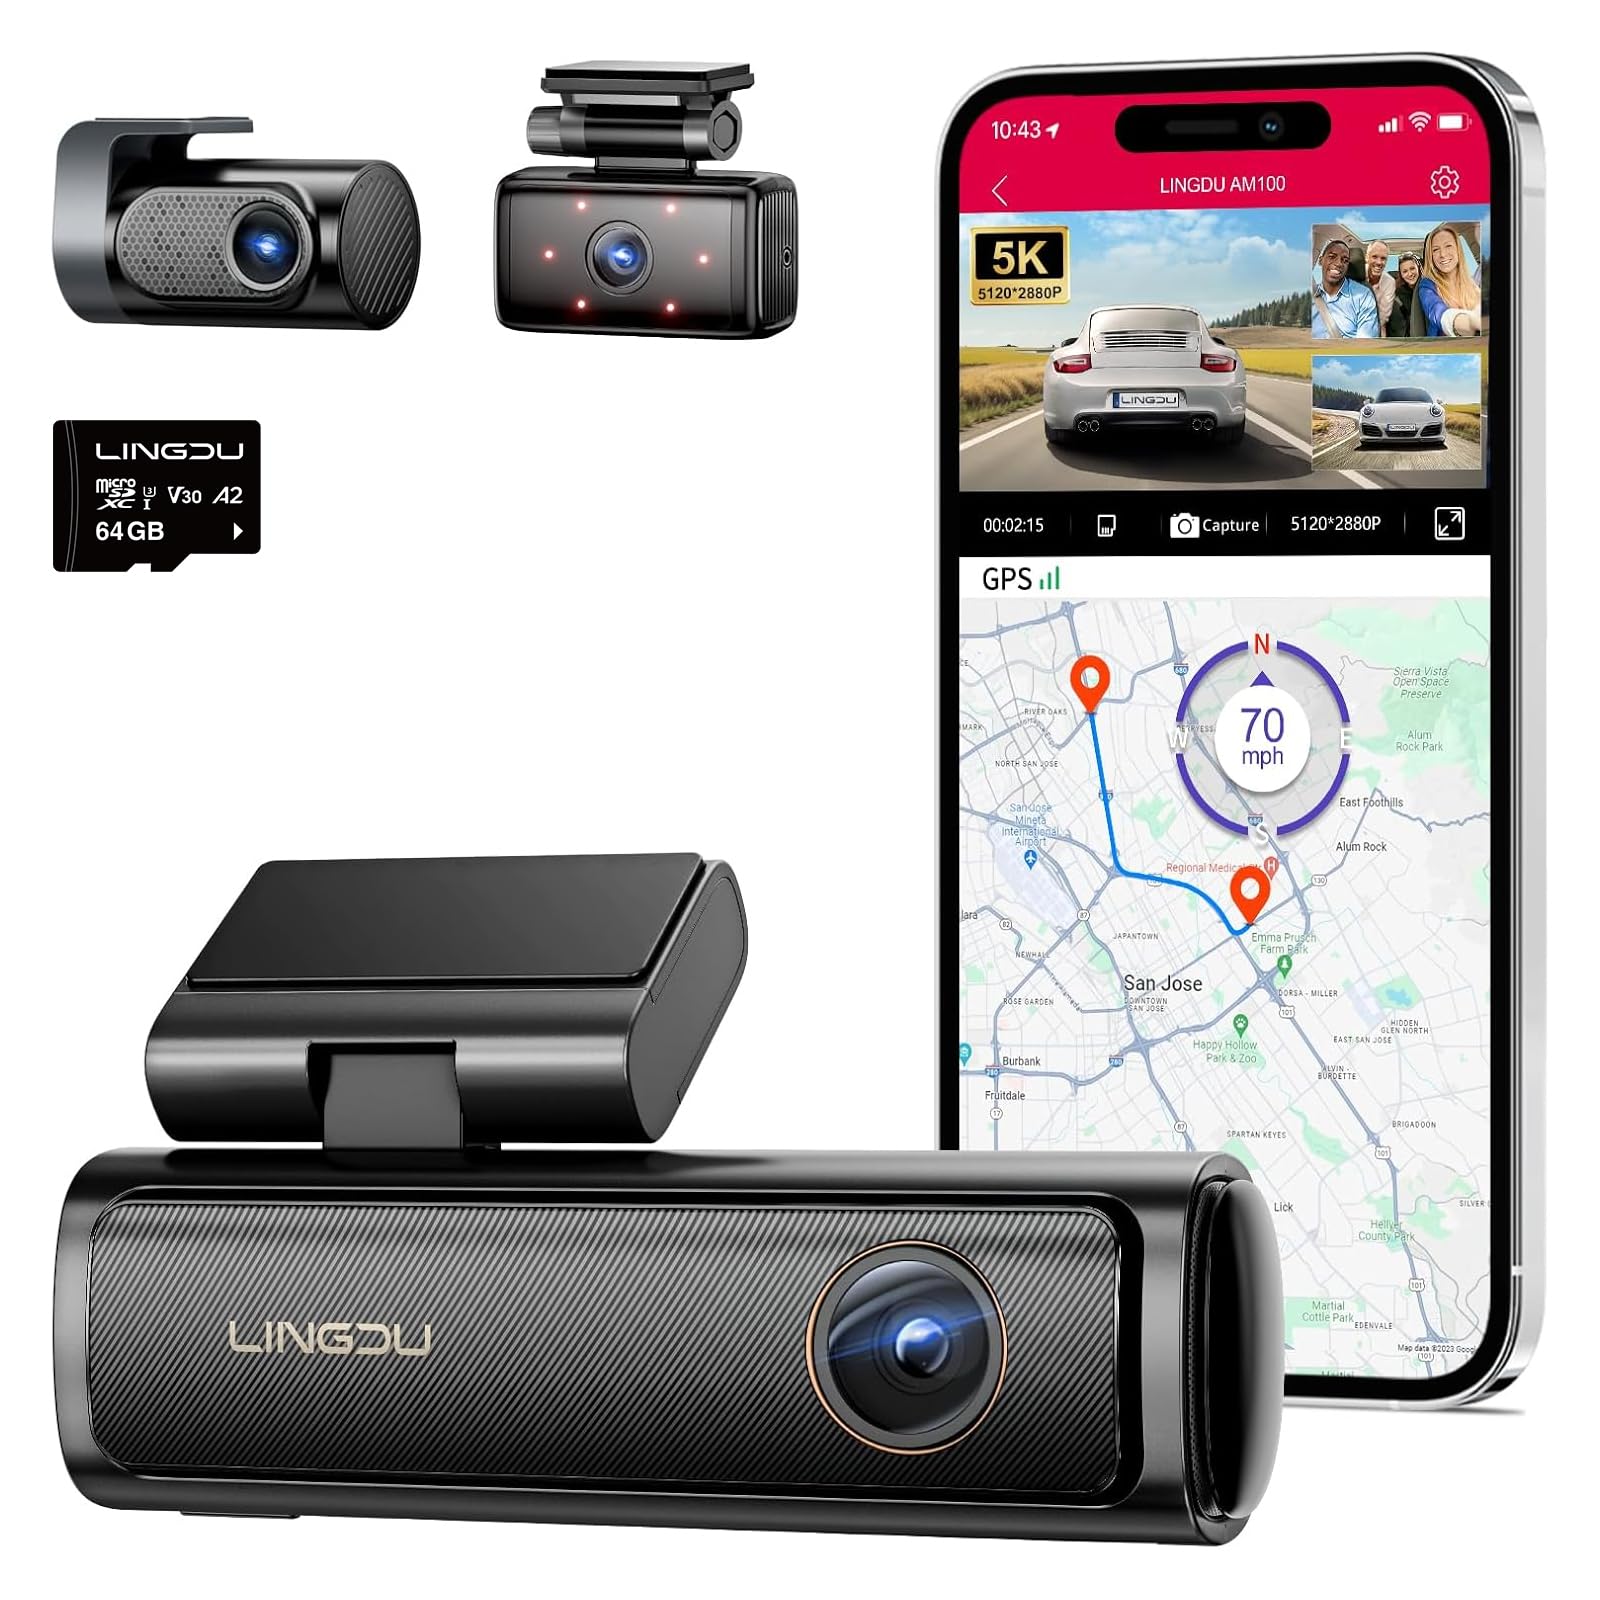
Image: LINGDU AM100 Dash Cam.
9. Warranty and Support
The LINGDU AM100 Dash Cam comes with a 1-Year Manufacturer Warranty. For warranty claims, technical support, or any inquiries, please contact LINGDU customer service through their official website or the contact information provided in your product packaging.


