1. Introduction
Welcome to your new LIKIMIO Queen Size Bed Frame with integrated LED lighting and a USB charging station. This manual provides essential information for the safe assembly, proper operation, routine maintenance, and effective troubleshooting of your bed frame. Please read all instructions carefully before beginning assembly or use to ensure optimal performance and safety.
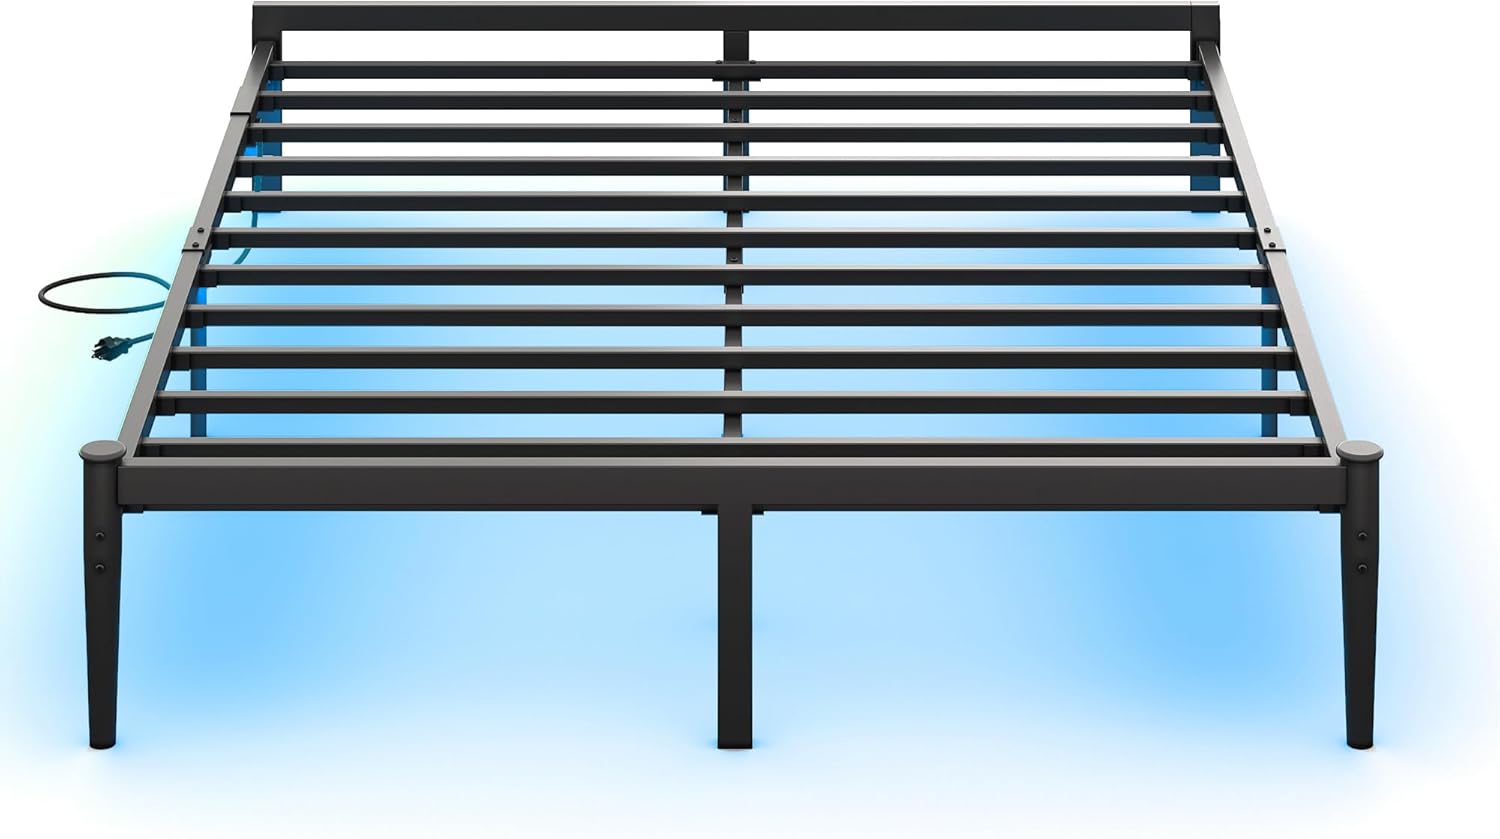
Image: The LIKIMIO Queen Size Bed Frame, showcasing its sleek black metal design and the subtle glow of the integrated LED lighting underneath.
2. Safety Information
Your safety is paramount. Adhere to the following guidelines:
- This bed frame contains metal components that may have sharp edges. Handle all parts with care during unpacking and assembly to prevent cuts or injuries.
- Ensure your mattress is properly secured within the frame's anti-slip perimeter to prevent any unwanted shifting or slipping during use.
- Do not exceed the maximum weight recommendation of 500 pounds for the bed frame. Overloading can compromise structural integrity and safety.
- Keep all small parts and packaging materials away from children and pets during assembly to avoid choking hazards.
- Assemble the bed frame on a soft, clean surface (e.g., a carpet or blanket) to prevent scratching the product or your flooring.
- Periodically check all connections and hardware to ensure they remain tight and secure.
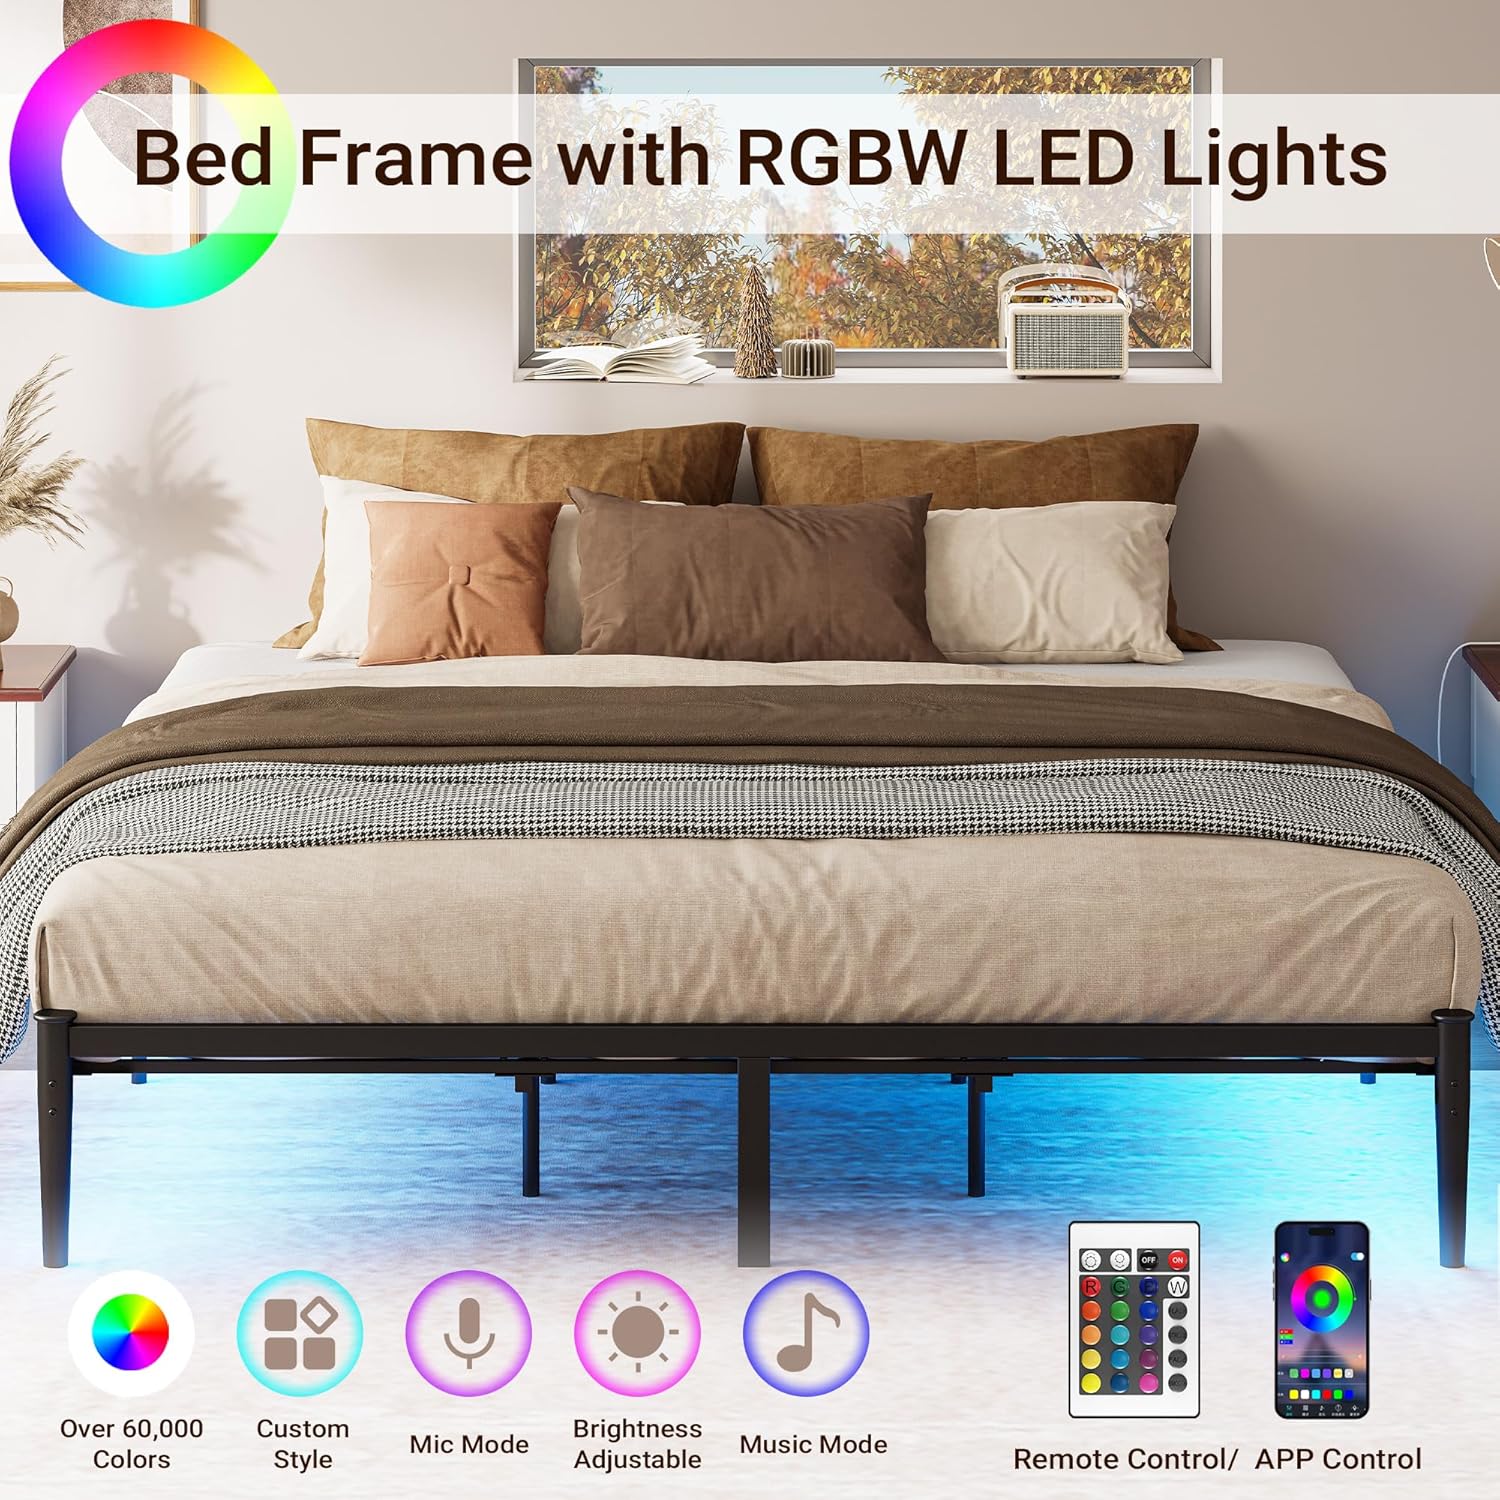
Image: A detailed view highlighting the rounded corner design of the bed frame, a feature intended to minimize the risk of accidental bumps and injuries.
3. Package Contents
Before beginning assembly, please verify that all the following components are present in your package:
- Bed Frame Components (Headboard, Footboard, Side Rails, Support Legs, Metal Slats)
- LED Light Strip with Power Adapter
- USB Charging Station (Power Strip with AC outlets and USB ports)
- Remote Control for LED Lights
- Assembly Hardware (Screws, Bolts, Washers, Allen Wrench)

Image: An illustration showing the various components of the LIKIMIO bed frame laid out, including the frame sections, slats, and hardware.
4. Assembly Instructions
Follow these steps carefully for proper assembly. It is recommended to have two people for assembly.
- Unpack all components from the box and lay them out on a clean, soft surface to prevent damage.
- Identify all parts and hardware by comparing them with the included parts list (refer to the separate parts diagram if provided in your package).
- Attach the side rails to the headboard and footboard sections using the provided bolts and the Allen wrench. Ensure all connections are finger-tight initially.
- Install the central support beam and its corresponding support legs. Ensure these are securely fastened to the frame.
- Place the metal slats onto the frame. Ensure each slat is properly seated and secured into its designated slot or attachment point.
- Mount the USB charging station to the designated area on the bed frame, typically on a side rail or headboard leg. Connect its power cord.
- Carefully attach the LED light strip underneath the frame, ensuring it adheres securely along the designated path. Connect the LED strip to its power adapter.
- Once all components are in place, systematically tighten all bolts and screws using the Allen wrench. Do not overtighten, as this can strip threads or damage components.

Image: A visual guide illustrating key connection points and structural elements during the assembly process of the bed frame.
5. Operating Instructions
5.1. LED Light Strip
The integrated LED light strip provides customizable ambient lighting for your bedroom.
- Ensure the LED light strip's power adapter is securely plugged into a functional wall outlet.
- Use the provided remote control to power the lights on or off, change between 20 different vibrant colors, adjust brightness levels, and select various dynamic modes (e.g., Mic Mode, Music Mode, Custom Style).
- For detailed instructions on specific remote control functions or app connectivity (if applicable), refer to the separate guide included with the LED light strip.
5.2. USB Charging Station
The integrated charging station offers convenient power access for your electronic devices.
- Ensure the charging station's power cord is securely plugged into a functional wall outlet.
- Utilize the two 110V/12A AC outlets to power standard electronic devices.
- Use the two 5V/2A USB ports to charge compatible USB-powered devices such as smartphones and tablets.

Image: A close-up view of the bed frame's integrated charging station, showing two AC power outlets and two USB charging ports.
6. Maintenance
Regular maintenance will help preserve the appearance and functionality of your bed frame.
- Cleaning: Wipe the metal frame surfaces with a soft, damp cloth. Avoid using abrasive cleaners, harsh chemicals, or solvents, as these can damage the powder-coated finish.
- LED Lights: If the LED strip begins to peel or detach, re-secure it using a suitable adhesive designed for electronics or light strips. Ensure the power is disconnected before handling.
- Hardware Check: Periodically (e.g., every 3-6 months) inspect all bolts, screws, and connections. Retighten any loose hardware to maintain stability and prevent squeaking.
- Mattress Positioning: Ensure your mattress remains properly seated within the frame's anti-slip design to prevent movement and maintain comfort.

Image: A detailed view of the bed frame's anti-slip design, illustrating how the frame encloses the mattress to prevent it from shifting.
7. Troubleshooting
Refer to the table below for common issues and their solutions.
| Problem | Possible Cause | Solution |
|---|---|---|
| Bed frame is wobbly or noisy. | Loose hardware. | Check and tighten all bolts and screws. Ensure all connections are secure. |
| LED lights are not working. | Power connection issue, remote control battery, or damaged strip. | Ensure the LED strip's power adapter is plugged in. Check remote control batteries. Inspect the strip for visible damage. |
| Charging station is not working. | Power connection issue or overloaded circuit. | Ensure the charging station is plugged into a live wall outlet. Avoid plugging in high-power devices simultaneously to prevent tripping a circuit. |
| Mattress slides on the frame. | Mattress not properly seated or anti-slip feature not fully engaged. | Ensure the mattress is fully positioned within the frame's perimeter. The frame's design helps prevent slipping. |

Image: The LIKIMIO bed frame with a mattress in place, demonstrating the overall setup and the under-bed LED lighting.
8. Specifications
Detailed specifications for the LIKIMIO Queen Size Bed Frame:
| Feature | Detail |
|---|---|
| Model Number | HK-QBF-37 |
| Size | Queen |
| Product Dimensions (L x W x H) | 80.3" x 62.4" x 14" |
| Material | Heavy Duty Steel |
| Color | Black |
| Finish Type | Powder Coated |
| Weight Capacity | Up to 500 pounds |
| Special Features | Integrated LED Lighting, USB Charging Station, No Box Spring Needed, Squeak Resistant, Anti-Slip Design, Rounded Corners |
| Included Components | Bed frame, LED light strip, USB charging station |
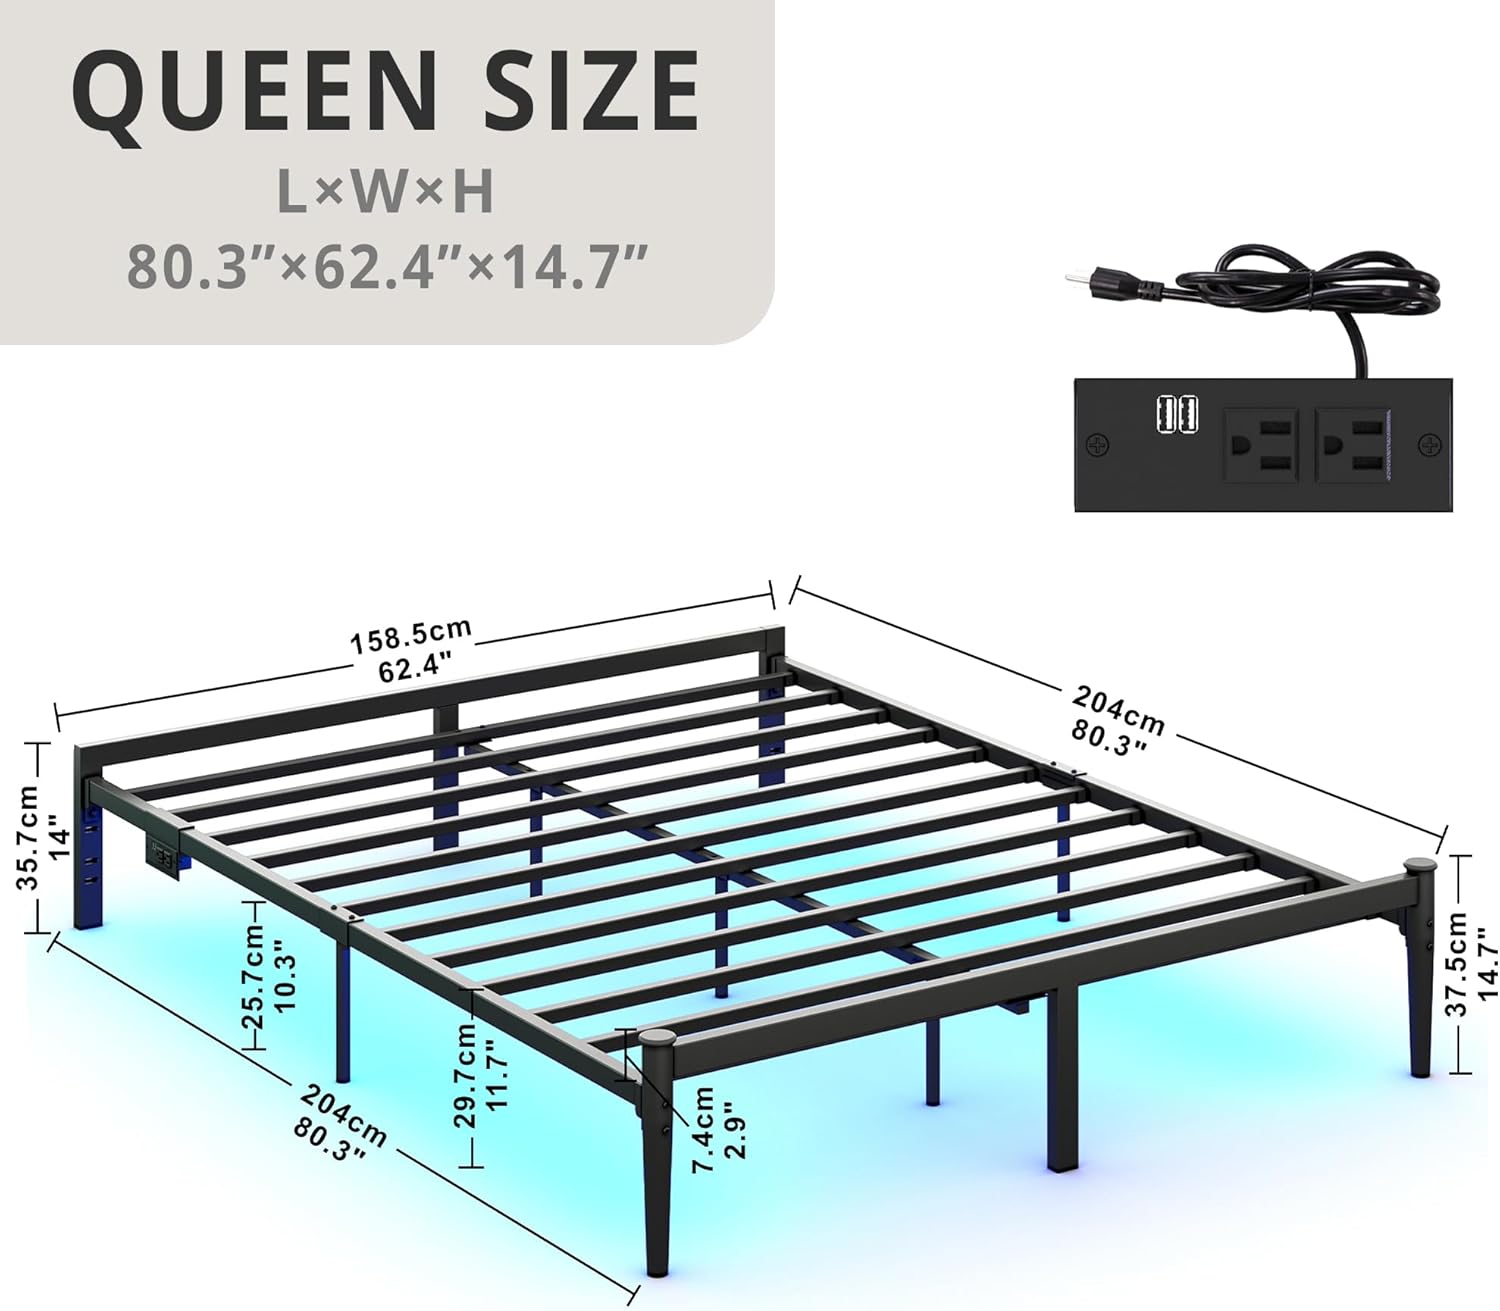
Image: A technical diagram illustrating the length, width, and height dimensions of the Queen Size LIKIMIO bed frame.
9. Warranty and Support
For warranty information, technical assistance, or to inquire about replacement parts, please contact LIKIMIO customer service. Refer to your purchase documentation or the product packaging for specific warranty terms and contact details.
You may also visit the official LIKIMIO store for additional product information and support: