1. Introduction
This manual provides detailed instructions for the installation and proper use of the SUNPIE Tow Hitch Wiring Harness (Model: SP-JW-Wires). This kit is designed to provide a reliable 4-way flat vehicle-side connector for trailer lighting functions, ensuring safe towing.
Please read all instructions carefully before beginning installation to ensure proper function and safety.
2. Compatibility and Application
This wiring harness is compatible with the following Jeep models and years:
- Jeep Wrangler JL/JLU (2-door and 4-door models): 2018, 2019, 2020, 2021, 2022, 2023, 2024 (including Sports, Sport, Rubicon, Sahara, Unlimited Moab, Unlimited Rubicon, Unlimited Sahara, Unlimited Sport, Unlimited Sport S, 4xe, Rubicon 392 variants).
- Jeep Gladiator JT: 2019, 2020, 2021, 2022, 2023, 2024 (including Altitude, Mojave, Overland, Rubicon, Sport, Sport S variants).
The 4-pin flat connector provides essential lighting functions for trailers, including brake lights, turn signals, and running lights.

Image 1: Examples of compatible Jeep Wrangler JL/JLU and Gladiator JT models. The harness is designed for a wide range of these vehicles from 2018 to 2024.
3. Product Features

Image 2: Overview of the SUNPIE Tow Hitch Wiring Harness kit components, including the main module, wiring, and connectors, shown with a Jeep towing a boat.
- 4-Pin Flat Vehicle Side Connector: Integrates brake lights, turn signals, and running lights for trailer safety.
- Vehicle-Specific Design: Engineered for direct fit and compatibility with specified Jeep Wrangler JL/JLU and Gladiator JT models.
- Durable Wiring: Features flexible and rugged insulation for protection against heat, abrasion, moisture, and chemicals, ensuring reliable performance.
- Enhanced Conductivity: Wires are engineered for superior conductivity, durability, and overall performance.
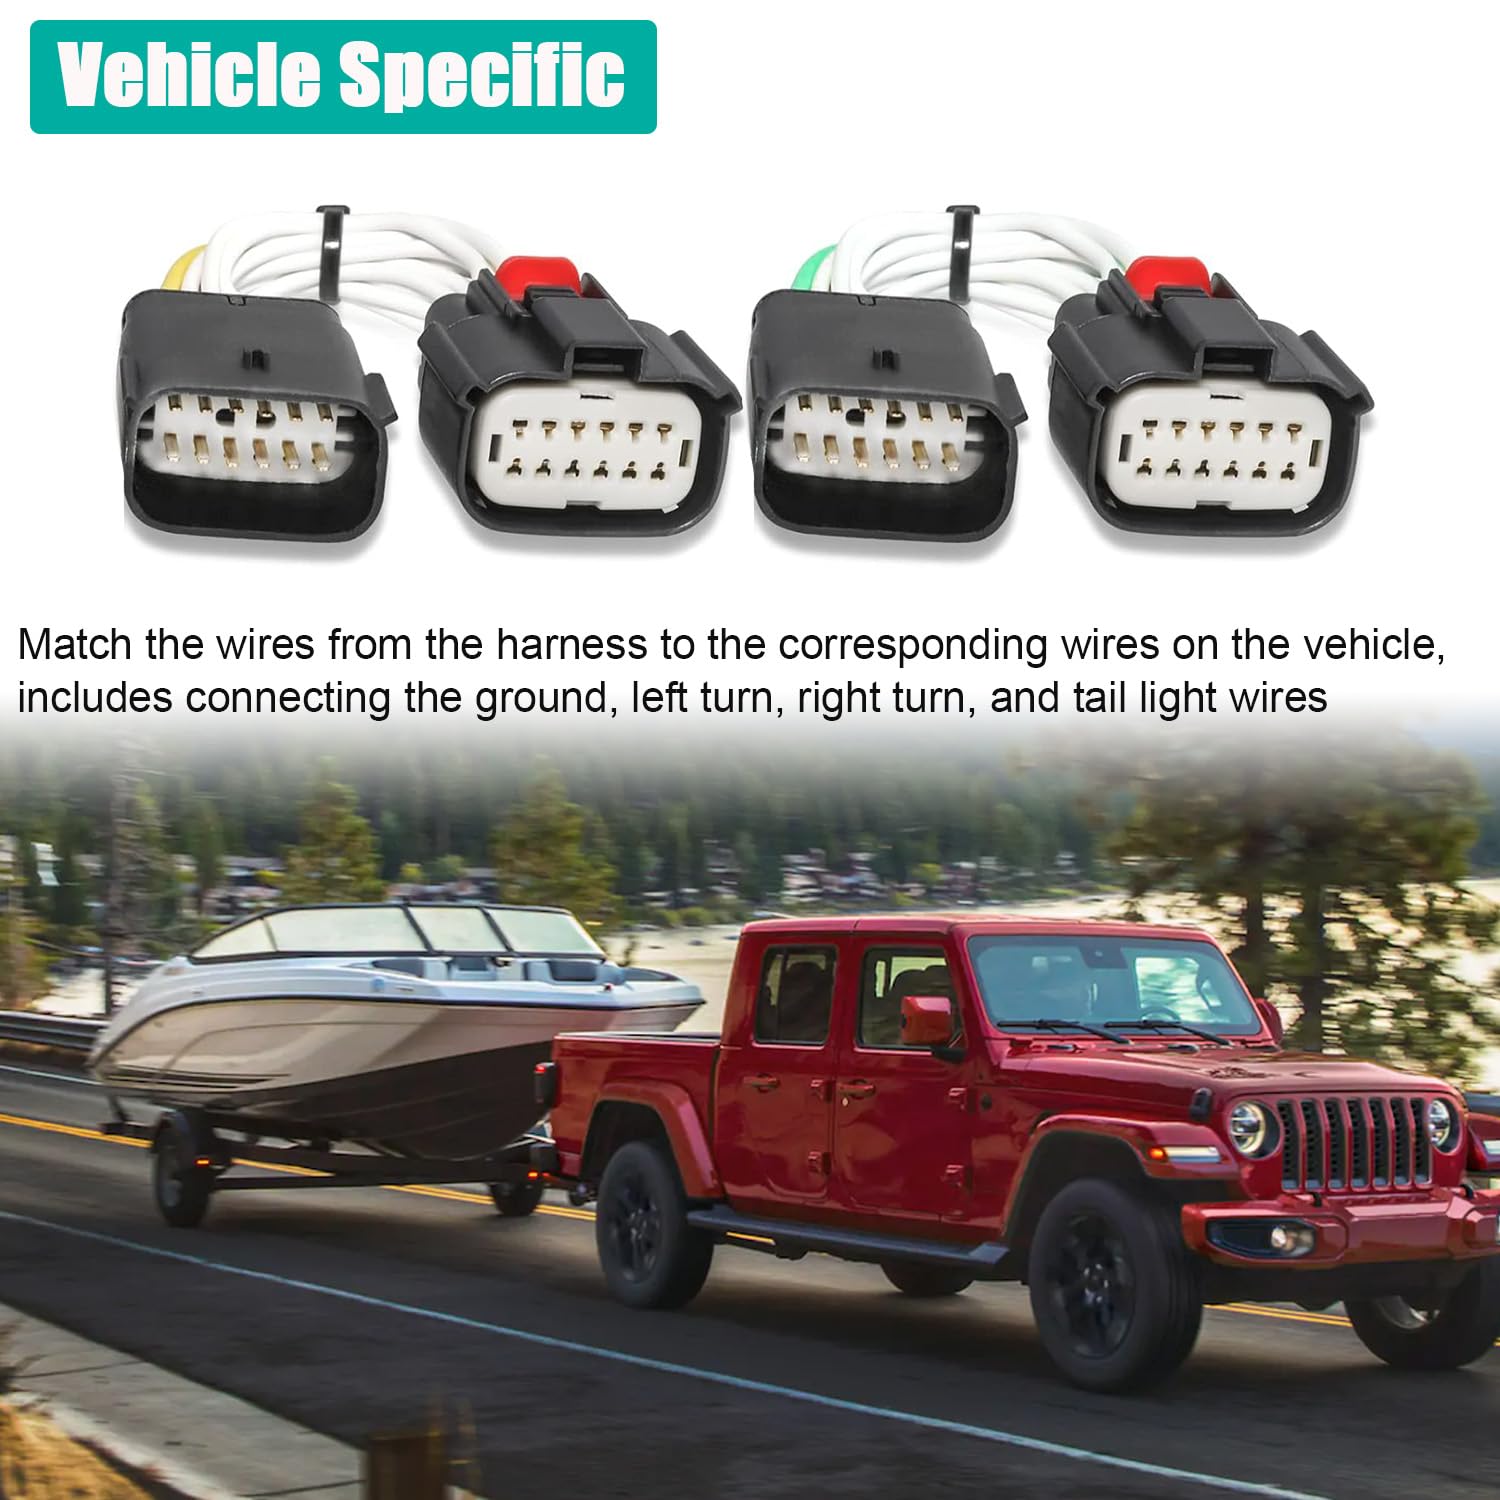
Image 3: Vehicle-specific connectors for the wiring harness. These connectors are designed to match the corresponding wiring on the vehicle for a secure and consistent connection.

Image 4: The 4-pin flat connector with a protective duct cover. This cover helps protect the connector from environmental elements, enhancing its longevity.

Image 5: Components of the premium wire kit, highlighting the ground wire (white) and the quality of the wiring. The wires are designed for durability and optimal electrical performance.
4. Setup and Installation
Tools Required: Basic hand tools, wire strippers/crimpers (if not using pre-attached connectors), drill (if needed for ground wire), double-sided tape.
Safety Precaution: Always disconnect the negative battery cable before wiring the power line to prevent electrical shorts or damage.
- Prepare Vehicle: Ensure the vehicle is turned off and the parking brake is engaged. Disconnect the negative terminal of the vehicle's battery.
- Locate Wiring Access: Identify the tail light wiring access points on your Jeep. This typically involves removing tail light assemblies or accessing wiring behind interior panels.
- Connect Harness: Match the connectors from the wiring harness to the corresponding wires on the vehicle. The harness includes connections for ground, left turn, right turn, and tail light wires. Ensure all connections are secure.
- Mount Converter: Use double-sided tape to securely mount the converter box in a dry, protected location within the vehicle.
- Route Power Wire: Route the black power wire from the converter to the positive terminal of the vehicle battery. Use a 12GA wire or larger for this connection.
- Install Fuse Holder: Install the provided fuse holder with a 15amp fuse (max) into the power line, close to the battery. Do not install the fuse until all other steps are complete.
- Connect Ground Wire: Attach the ring terminal of the white ground wire to the vehicle body using a screw. If necessary, drill a 3/32" hole for the screw. Ensure a clean, metal-to-metal contact for a good ground.
- Final Connections: Once all wiring is connected and secured, install the 15amp fuse into the fuse holder. Reconnect the negative battery cable.
- Test System: Connect a trailer or a trailer light tester to the 4-pin flat connector and verify that all lighting functions (running lights, brake lights, left turn, right turn) operate correctly.

Image 6: An illustration detailing the wiring connections for the tow hitch harness. This diagram shows how to connect to the vehicle battery, route the power wire, install the fuse holder, and connect the ground, left turn, right turn, and tail light wires.
5. Operating Instructions
Once installed, the SUNPIE Tow Hitch Wiring Harness operates automatically when a trailer is connected. Ensure the 4-pin flat connector is securely plugged into the trailer's corresponding receptacle.
- Running Lights: Turn on your vehicle's headlights to activate the trailer's running lights.
- Brake Lights: Press the brake pedal to activate the trailer's brake lights.
- Turn Signals: Activate the left or right turn signal lever to engage the corresponding trailer turn signal.
Always perform a quick check of all trailer lights before each towing trip to ensure they are functioning correctly.
6. Maintenance
- Regular Inspection: Periodically inspect the wiring harness and connectors for any signs of wear, corrosion, or damage.
- Clean Connections: Keep the 4-pin flat connector clean and free of dirt or debris. Use a dielectric grease on the pins to prevent corrosion, especially in harsh weather conditions.
- Secure Mounting: Ensure the converter box and all wiring are securely mounted and not exposed to excessive vibration or abrasion.
- Fuse Check: If trailer lights fail, check the 15amp fuse in the fuse holder near the battery. Replace with a fuse of the same rating if blown.
7. Troubleshooting
| Problem | Possible Cause | Solution |
|---|---|---|
| No trailer lights working. | Blown fuse, disconnected power wire, poor ground connection, faulty vehicle battery connection. | Check the 15amp fuse. Ensure power wire is securely connected to the battery. Verify ground wire connection. Recheck all harness connections. |
| Only some trailer lights working (e.g., no turn signals). | Loose or corroded connection for specific function, faulty trailer bulb, incorrect wiring. | Inspect the specific wire connection for the non-functioning light. Check trailer bulbs. Verify wiring matches the diagram. |
| Lights are dim or flickering. | Poor ground connection, corroded terminals, insufficient power. | Ensure a solid ground connection. Clean all terminals and apply dielectric grease. Check battery voltage. |
| Trailer lights stay on. | Faulty converter, short circuit in wiring. | Disconnect the harness and test vehicle lights. If vehicle lights are normal, the issue may be with the converter or harness wiring. Consult a professional if unable to diagnose. |
8. Specifications
- Model Number: SP-JW-Wires
- Connector Type: 4-Pin Flat Vehicle Side Connector
- Material: Polyvinyl Chloride (PVC)
- Recommended Use: Towing Trailer, Trailer Wiring
- Package Dimensions: 18.9 x 15.19 x 9.6 cm
- Item Weight: 649 g
- Manufacturer: SUNPIE
9. Warranty and Support
SUNPIE provides a 3-year warranty for this tow hitch wiring harness. Additionally, we offer a 45-day money-back guarantee and 30-day return service.
For technical support or warranty claims, please contact SUNPIE customer service through your purchase platform or the official SUNPIE website.


