1. Introduction
The Apdoe 12 Egg Incubator (Model APDOE-M16) is designed for efficient and precise hatching of various poultry eggs, including chicken, quail, duck, and parrot. This incubator features automatic temperature and humidity control, an automatic egg turner, a built-in egg candler, and a 360-degree transparent observation window. This manual provides detailed instructions for setup, operation, maintenance, and troubleshooting to ensure optimal hatching conditions.
2. Product Components
Verify that all components are present in the package:
- Egg Incubator Unit
- Egg Candler
- Foam Box (for insulation)
- User Manual & Hatching Calendar
- Water Bottle and Hose
- Spray Bottle
3. Safety Instructions
Please read and follow these safety guidelines to prevent injury or damage to the incubator:
- Always place the incubator on a stable, level surface away from direct sunlight, drafts, or extreme temperature fluctuations.
- Ensure the power cord is not damaged and is properly connected to a grounded electrical outlet.
- Do not immerse the main unit (top cover with electronics) in water.
- Unplug the incubator from the power source before cleaning or performing any maintenance.
- Keep the incubator out of reach of children and pets.
- Do not block the air vents on the incubator.
4. Setup Guide
4.1 Unpacking and Assembly
- Carefully remove all components from the packaging.
- Place the base of the incubator on a flat, stable surface.
- Insert the egg turning mechanism and egg tray into the base.
- Place the transparent dome cover securely over the base.
4.2 Initial Power Connection
- Connect the power adapter to the incubator and then plug it into a suitable electrical outlet.
- The digital display will illuminate, showing the current temperature and humidity.
4.3 Water Replenishment System Setup
The incubator features AB humidity trays with dual external bottles for easy water replenishment.
- Locate the external water bottle adaptor and connect it to the designated ports (A and B) on the incubator base.
- Fill the provided water bottle(s) with clean, distilled water.
- Invert the filled water bottle(s) and place them into the adaptor ports. Water will automatically flow into the humidity trays as needed.
- For the first 18 days of incubation, use Port A. For the last 3 days, use both Port A and Port B to increase humidity.

5. Operation
5.1 Digital Temperature Control
The incubator is equipped with an advanced digital temperature control system for precise monitoring and adjustment.
- The display shows real-time temperature and humidity levels.
- Use the control buttons (refer to the specific button labels on your unit) to set the desired incubation temperature. A common temperature for chicken eggs is 37.5°C (99.5°F).
- The system maintains the set temperature automatically.

5.2 Humidity Control
The 2-in-1 humidity control system and adjustable air vent allow for flexible and precise humidity management.
- Monitor the humidity level on the digital display.
- Adjust humidity by adding water to the external bottles (Port A for initial stages, Port A+B for lockdown) or by adjusting the air vent.
- Optimal humidity levels vary by species and stage of incubation. Consult the included Hatching Calendar for guidance.
5.3 Automatic Egg Turning
The incubator automatically rotates eggs every 2 hours to promote healthy embryo development and prevent adhesion to the shell.
- Ensure the egg turning mechanism is properly installed before placing eggs.
- Important: Remove the egg turning mechanism and place eggs directly on the mesh tray for the last 3 days of incubation (lockdown period) to prevent further turning and prepare for hatching.

5.4 Built-in Egg Candler
Use the integrated egg candler to effortlessly check the development of embryos at any time.
- To use the candler, gently place an egg over the candling light on the incubator's top cover.
- Observe the internal contents of the egg in a darkened room to see embryo growth and blood vessel development.

5.5 360-degree Clear View
The transparent observation window allows for continuous monitoring of the incubation process without disturbing the internal environment.
- Observe the eggs and chicks as they hatch, providing an educational and fascinating experience.

5.6 Advanced 360° Airflow Circulation
The innovative airflow system ensures consistent and uniform distribution of temperature and humidity throughout the incubation process, creating an ideal environment for your eggs.
- This system eliminates potential hotspots or cold spots that could harm the embryos, promoting higher hatch rates.
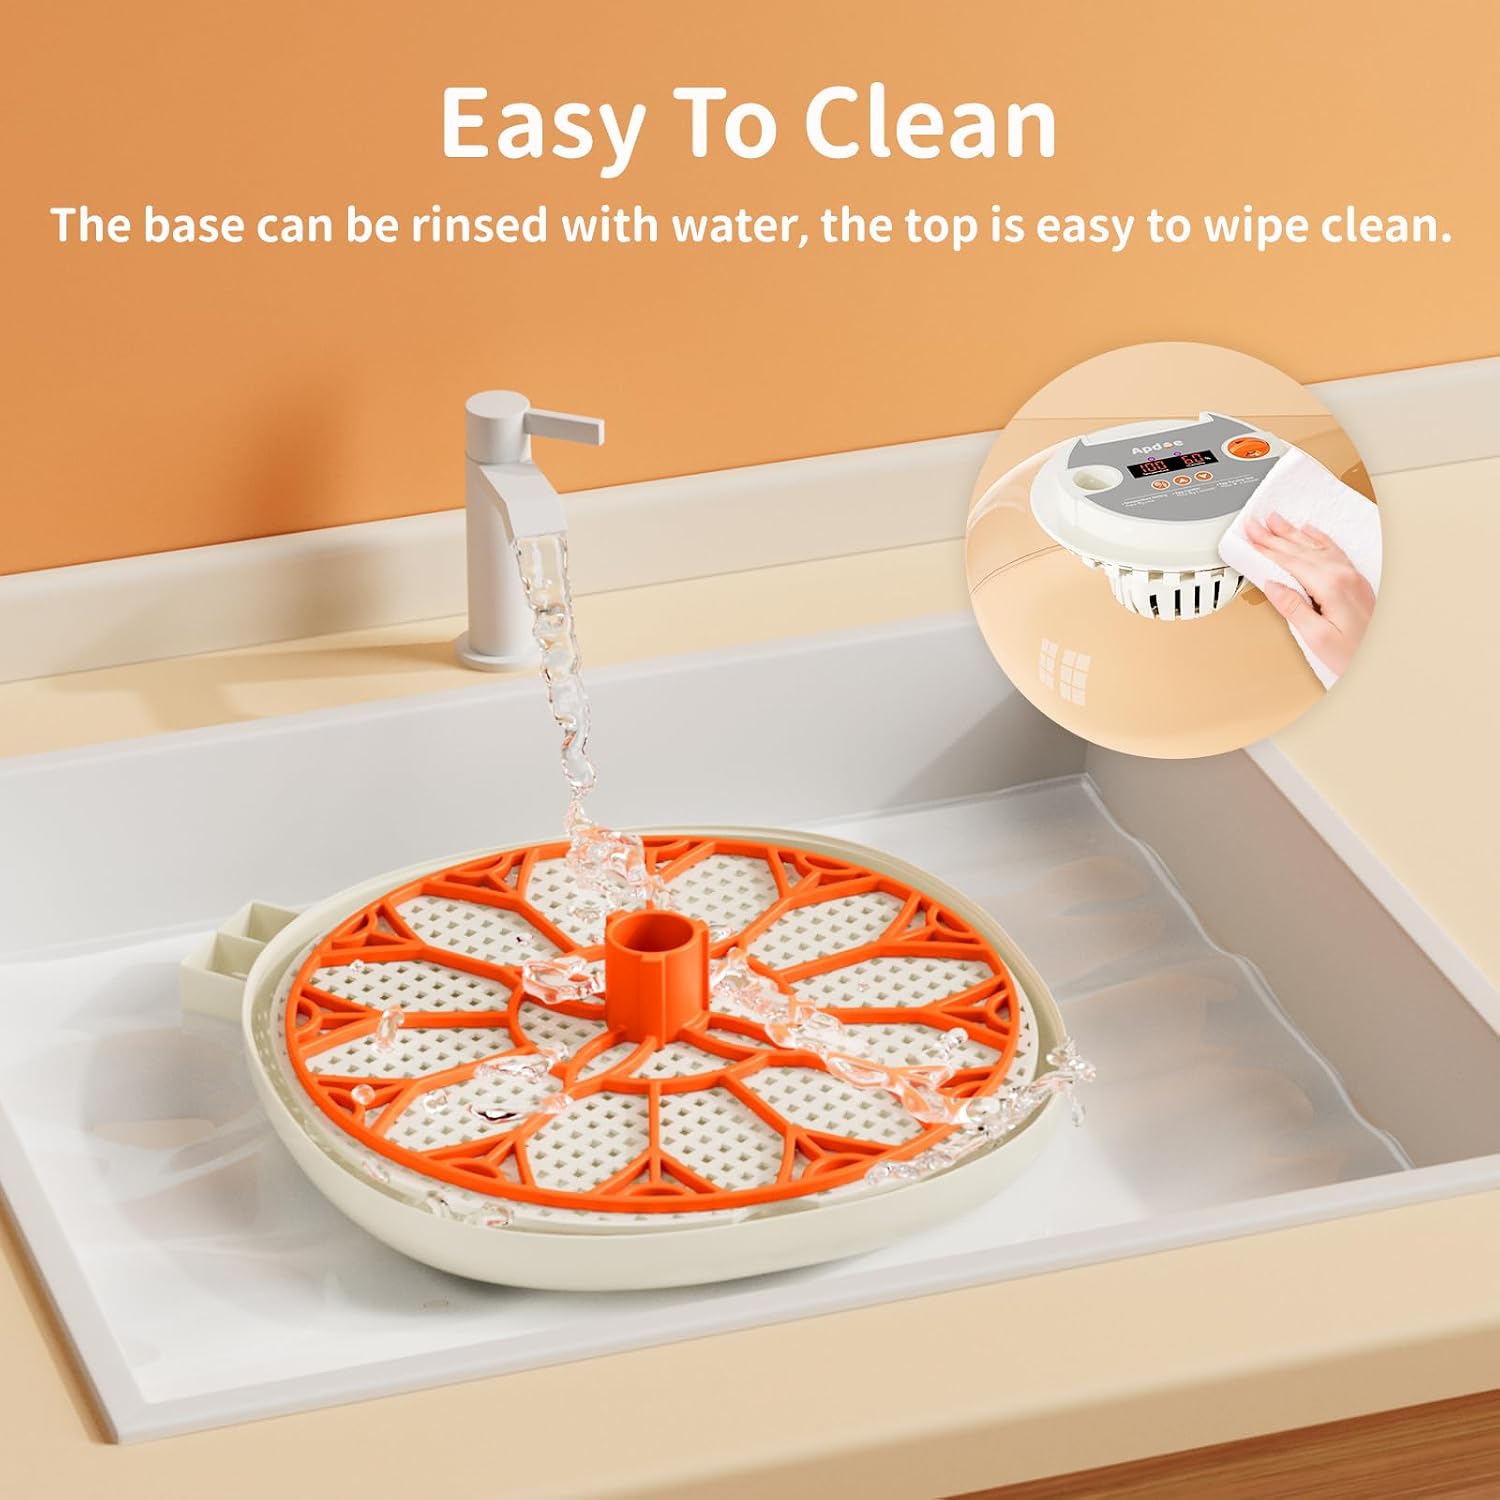
6. Maintenance and Cleaning
The incubator's detachable design makes cleaning simple and efficient.
- Always unplug the incubator before cleaning.
- Remove the transparent dome cover, egg turning mechanism, and egg trays from the base.
- The base and removable trays can be rinsed with water. Use a mild detergent if necessary.
- Do not put the egg tray in the dishwasher, as it may deform.
- Wipe the machine cover and circuit components with a damp cloth. Ensure no water enters the electronic parts.
- Allow all parts to dry completely before reassembling the incubator.
7. Troubleshooting
While specific troubleshooting steps are not detailed, common issues can often be resolved by checking the following:
- No Power/Display: Ensure the power adapter is securely plugged into both the incubator and the wall outlet. Check the power source.
- Incorrect Temperature/Humidity: Verify that the set temperature is correct. Check water levels in the external bottles and ensure the air vent is adjusted appropriately. Ensure the incubator is not in a drafty or overly warm/cold environment.
- Egg Turner Not Working: Confirm the egg turning mechanism is properly installed and connected. Check for any obstructions.
- Poor Hatch Rate: Review your incubation practices, including egg quality, temperature/humidity settings, and turning schedule. Ensure the incubator is clean and functioning correctly.
If problems persist, please contact customer support as detailed in the Warranty and Support section.
8. Product Specifications
| Feature | Specification |
|---|---|
| Manufacturer | Apdoe |
| Model Number | APDOE-M16 |
| Capacity | 12 Eggs (standard chicken egg size) |
| Material | Plastic |
| Product Dimensions (L x W x H) | 25.4 x 25.4 x 13.97 cm (10 x 10 x 5.5 inches) |
| Item Weight | 1.5 kg |
| Special Features | 360-degree transparent window, Automatic water supply, Automatic egg turning, Humidity control, Built-in Egg Candler, User-Friendly |
| Included Components | Egg Candler, Egg Incubator, Foam box, User Manual & Hatching Calendar, Water Bottle and Hose, Spray bottle |
| Batteries Required | No |
9. Warranty and Support
Apdoe stands behind the quality of its products. Your Apdoe 12 Egg Incubator comes with:
- 30-Day Money-Back Guarantee: If you are not satisfied with your purchase, you may return it within 30 days for a full refund.
- 3-Year Limited Warranty: The incubator is covered by a 3-year limited warranty against manufacturing defects.
- Lifetime Technical Support: Access to lifetime technical support for any questions or issues you may encounter.
For warranty claims or technical assistance, please refer to the contact information provided on the product packaging or the official Apdoe website.