1. Introduction
This manual provides detailed instructions for the installation, operation, and maintenance of your METEESER Android Car Stereo. Designed specifically for the Honda Accord 8th Generation (2008-2013), this unit integrates advanced features such as Wireless CarPlay, Android Auto, GPS navigation, and a 10.1-inch touchscreen display to enhance your driving experience. Please read this manual thoroughly before installation and use to ensure proper functionality and safety.
2. Product Overview
The METEESER Android Car Stereo is a comprehensive infotainment system featuring a 10.1-inch display and an Android 13.0 operating system. It offers a range of functionalities to modernize your vehicle's audio and navigation capabilities.
Key Features:
- Operating System: Android 13.0 with 2GB RAM and 64GB internal storage.
- Display: 10.1-inch ultra-high resolution (1024x600) touchscreen.
- Smartphone Integration: Built-in Wireless/Wired CarPlay and Android Auto.
- Navigation: Integrated GPS with support for offline and online maps.
- Connectivity: WiFi, Bluetooth 5.0, Dual USB ports.
- Audio: 10-band Digital Signal Processor (DSP) for sound adjustment, FM/RDS Radio.
- Vehicle Integration: Supports original steering wheel controls, mirror link for iOS/Android.
- Additional Features: Split screen functionality, HD rear view camera support, external microphone support.
Package Contents:
Please verify that all items listed below are included in your package:
- METEESER Android Car Stereo Unit
- Power Cable
- RCA Cable
- USB Cable (x2)
- GPS Antenna
- Rear Camera Input Cable
- Backup Camera
- External Microphone
- User Manual
- Installation Tool
- AUX Adapter (if applicable)

Image 2.1: The METEESER Android Car Stereo installed in a Honda Accord dashboard, displaying various application icons.
3. Installation Guide
Proper installation is crucial for the optimal performance of your car stereo. It is recommended that installation be performed by a qualified professional. Ensure the vehicle's battery is disconnected before beginning installation.
3.1 Compatibility Check
This unit is designed for Honda Accord 8th Generation models from 2008 to 2013. Verify your car's central control panel matches the compatible configurations shown below. Models with a large screen or built-in navigation may not be compatible without additional modifications.

Image 3.1: Visual guide for checking compatibility with various Honda Accord 8th Gen dashboard configurations.
3.2 Wiring Diagram and Package Contents
Refer to the following diagram for the included components and their connections. The wiring harness is designed for plug-and-play installation for most compatible models.

Image 3.2: Detailed diagram illustrating the components included in the package and their respective wiring connections.
3.3 AUX Connection Note
If your original car armrest box position has an AUX interface, connect the provided AUX adapter cable to ensure audio functionality. This connection is necessary for the audio to be transmitted correctly.

Image 3.3: Illustration of the AUX adapter cable connection for vehicles equipped with an AUX interface in the armrest.
3.4 General Installation Steps:
- Disconnect Battery: Before starting, disconnect the negative terminal of your vehicle's battery.
- Remove Original Unit: Carefully remove the original car stereo and dashboard trim.
- Connect Wiring Harness: Connect the provided plug-and-play wiring harness to the vehicle's existing connectors and to the new METEESER unit.
- Connect Accessories: Attach the GPS antenna, external microphone, USB cables, and backup camera input cable as per the wiring diagram.
- Test Connections: Before fully reassembling, temporarily reconnect the battery and power on the unit to ensure all functions (audio, display, touch, etc.) are working correctly.
- Secure Unit: Mount the new stereo unit securely into the dashboard.
- Reassemble: Reinstall all dashboard trim panels.
- Final Check: Reconnect the battery and perform a full system check.
4. Operating Instructions
Your METEESER Android Car Stereo operates similarly to a tablet, offering intuitive touch controls and a customizable interface.
4.1 Basic Operation:
- Power On/Off: Press and hold the power button on the unit or use the vehicle's ignition.
- Touchscreen: Navigate through menus and applications by tapping, swiping, and pinching on the 10.1-inch display.
- Home Screen: Customize your home screen with widgets and frequently used app shortcuts. Multiple UI options are available in settings.
- Volume Control: Adjust volume using the physical buttons on the unit, steering wheel controls, or the on-screen interface.
5. Connectivity Features
5.1 Wireless CarPlay and Android Auto:
Connect your smartphone wirelessly or via USB to access CarPlay or Android Auto. This allows for seamless integration of your phone's navigation, music, messaging, and voice assistant features directly on the stereo display.
- Ensure Bluetooth and Wi-Fi are enabled on your smartphone.
- On the car stereo, open the CarPlay or Android Auto application.
- Follow the on-screen prompts to pair your device. For wired connection, simply connect your phone via a USB cable.

Image 5.1: Visual representation of Wireless CarPlay, Android Auto, and Mirror Link interfaces on the car stereo.
5.2 GPS Navigation and WiFi:
The unit features a built-in GPS module for navigation. You can use pre-installed offline maps or connect to WiFi for online navigation and access to other internet-dependent applications.
- Offline Maps: Access navigation without an internet connection. Ensure maps are downloaded and updated periodically.
- Online Maps & WiFi: Connect the stereo to a mobile hotspot or a local WiFi network to use online navigation services and download additional apps from the Play Store (e.g., WhatsApp, YouTube, TikTok).
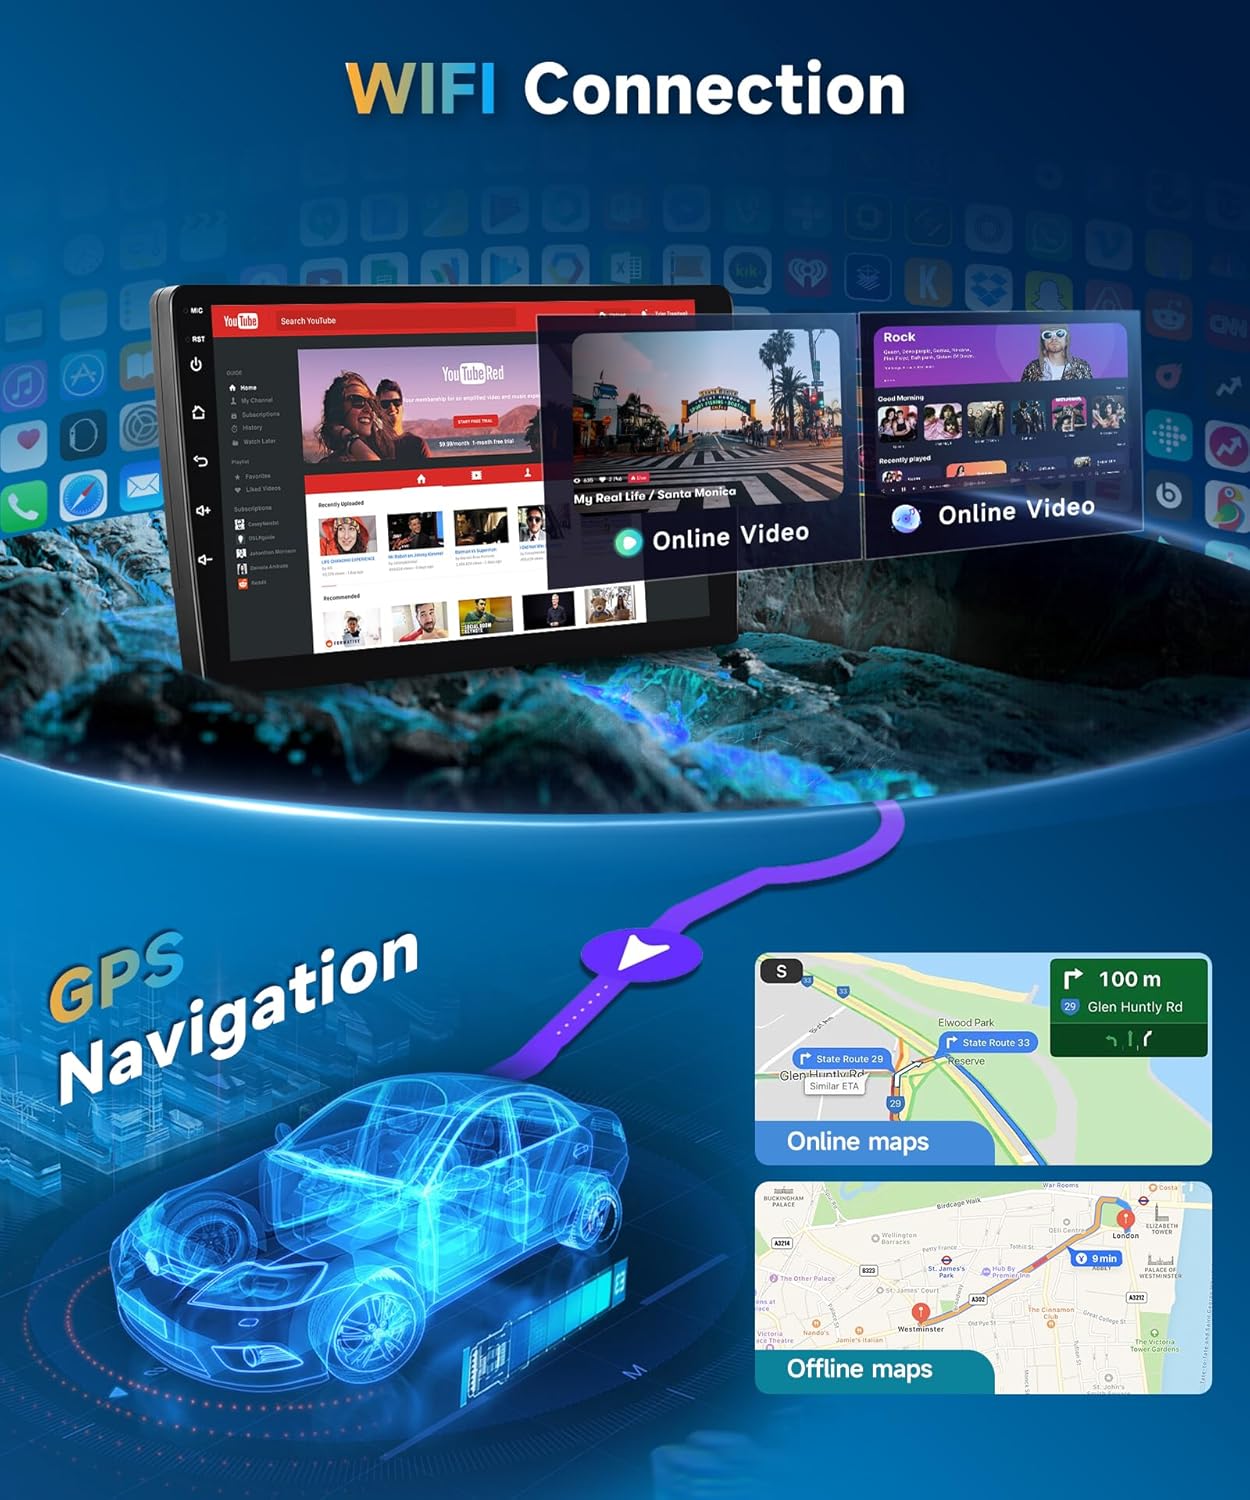
Image 5.2: Depiction of GPS navigation with online/offline map options and WiFi connectivity for streaming content.
5.3 Bluetooth 5.0:
The upgraded Bluetooth 5.0 module provides stable and fast connections for hands-free calling and audio streaming.
- Enable Bluetooth on your phone and the car stereo.
- Search for available devices on the stereo and select your phone.
- Confirm the pairing code on both devices.
- Once paired, you can make/receive calls and stream music wirelessly.
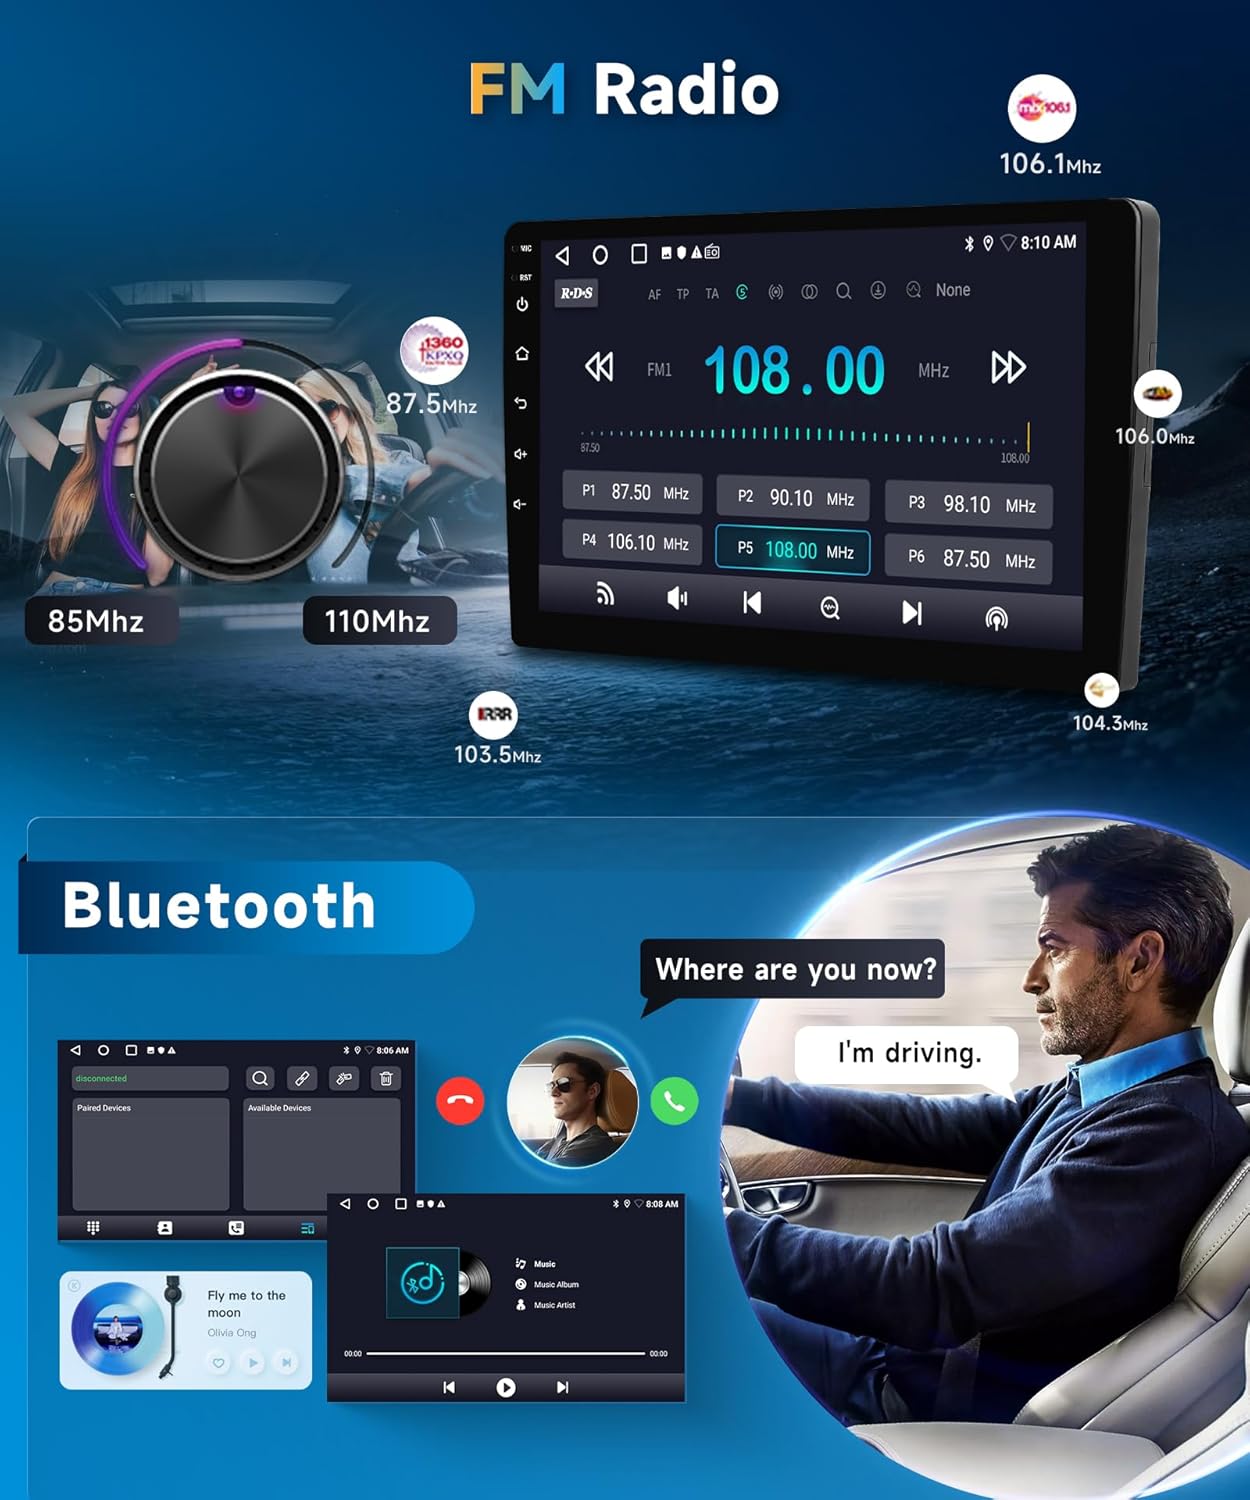
Image 5.3: User interface for Bluetooth hands-free calling and music playback, alongside the FM radio tuner.
6. Audio Features
6.1 Digital Signal Processor (DSP):
The integrated 10-band DSP allows for precise audio customization. Adjust equalizer settings, enhance bass, and reduce noise to optimize your listening experience.

Image 6.1: The 10-band equalizer (EQ DSP) interface for fine-tuning audio output.
6.2 FM/RDS Radio:
Tune into your favorite radio stations with the built-in FM/RDS tuner. RDS (Radio Data System) provides additional information such as station name and song title where available.
- Access the 'Radio' application from the home screen.
- Use the on-screen controls to scan for stations or manually tune to a specific frequency.
- Save your preferred stations as presets for quick access.
7. Additional Features
7.1 Backup Camera Support:
The unit supports an HD rear view camera, providing a clear image on the display when the vehicle is in reverse. This enhances safety during parking and maneuvering.
- Ensure the backup camera is correctly installed and connected to the 'Rear Camera Input' on the stereo.
- The display will automatically switch to the camera view when the vehicle is shifted into reverse.

Image 7.1: Display of the backup camera feed on the car stereo screen, indicating HD image quality and night vision capabilities.
7.2 Steering Wheel Control (SWC):
Maintain control over your audio and calls without taking your hands off the steering wheel. The unit supports the original car's steering wheel controls.
- Access the 'Steering Wheel Control' settings in the unit's menu.
- Follow the on-screen instructions to map the functions of your steering wheel buttons to the stereo's commands.
7.3 Split Screen Functionality:
Utilize the split screen feature to run two applications simultaneously, such as navigation on one side and music playback on the other.
- Open the first application you wish to use.
- Long-press the recent apps button or drag from the side (depending on UI) to activate split screen mode.
- Select the second application to fill the other half of the screen.
8. Maintenance
To ensure the longevity and optimal performance of your METEESER Android Car Stereo, follow these maintenance guidelines:
- Cleaning the Screen: Use a soft, lint-free cloth to gently wipe the touchscreen. For stubborn smudges, slightly dampen the cloth with water or a screen-safe cleaner. Avoid harsh chemicals or abrasive materials.
- Software Updates: Periodically check for software updates through the system settings. Updates can improve performance, add new features, and fix bugs. Ensure a stable internet connection during updates.
- Environmental Conditions: Avoid exposing the unit to extreme temperatures, direct sunlight for prolonged periods, or excessive moisture.
- Cable Connections: Occasionally check all cable connections to ensure they are secure and free from damage.
9. Troubleshooting
If you encounter issues with your car stereo, refer to the following common problems and solutions. If the problem persists, contact customer support.
| Problem | Possible Cause | Solution |
|---|---|---|
| No Power | Loose power connection, blown fuse, incorrect wiring. | Check all power cables and connections. Inspect vehicle fuses and the unit's fuse. Verify wiring against the diagram. |
| No Sound | Volume too low, mute activated, incorrect speaker wiring, AUX cable not connected. | Increase volume. Check if mute is active. Verify speaker connections. Ensure AUX adapter is connected if required (refer to Section 3.3). |
| GPS Signal Loss | GPS antenna not properly connected or obstructed, poor satellite reception. | Ensure GPS antenna is securely connected and placed in an unobstructed location (e.g., dashboard). Move to an open area for better reception. |
| Bluetooth Connection Issues | Phone not discoverable, incorrect pairing, interference. | Ensure phone's Bluetooth is on and discoverable. Delete previous pairings and re-pair. Restart both devices. |
| CarPlay/Android Auto Not Connecting | Incorrect USB cable, phone settings, app issues. | Use a high-quality USB data cable. Check phone settings for CarPlay/Android Auto permissions. Restart phone and stereo. |
| Steering Wheel Controls Not Working | Incorrect wiring, not configured. | Verify SWC wiring. Go to SWC settings in the unit and reconfigure the buttons. |
10. Specifications
Detailed technical specifications for the METEESER Android Car Stereo (Model: 2G+64G).
| Feature | Specification |
|---|---|
| Product Dimensions | 11 x 6.89 x 4.21 inches |
| Item Weight | 4.66 pounds |
| Operating System | Android 13.0, iOS (for CarPlay/Android Auto) |
| RAM | 2 GB |
| Internal Storage | 64 GB |
| Screen Size | 10.1 Inches |
| Scanner Resolution | 1024 x 600 (Display) |
| Wireless Communication | Bluetooth 5.0, WiFi |
| Connectivity Technologies | Bluetooth, WiFi, USB, FM/RDS |
| GPS | GPS Enabled, Worldwide Map Type |
| Special Features | 10-band EQ DSP, Wireless CarPlay, Android Auto, Mirror Link, Steering Wheel Control, Backup Camera Support |
| Human Interface Input | Touchscreen |
| Audio Output Mode | APE/FLAC/WAV/MP3/WMA etc. |
| Mounting Type | Dashboard Mount |
11. Warranty and Support
11.1 Product Warranty:
The METEESER Android Car Stereo comes with a 2-Year Warranty from the date of purchase, covering manufacturing defects and malfunctions under normal use. Please retain your proof of purchase for warranty claims.
11.2 Technical Support:
For any technical assistance, troubleshooting, or inquiries regarding your product, please contact METEESER customer service. Lifetime technical support is provided.
- Email: asd85hk@163.com
You can also reach out to the seller directly through the platform where you purchased the product:
- Click on the seller's name (e.g., "METEESER Tech") on the product page.
- Select the "Ask a question" option to send a message.

Image 11.1: Guide on how to contact the seller for support through the online marketplace.


